Back
|
Forward
|
Close Window
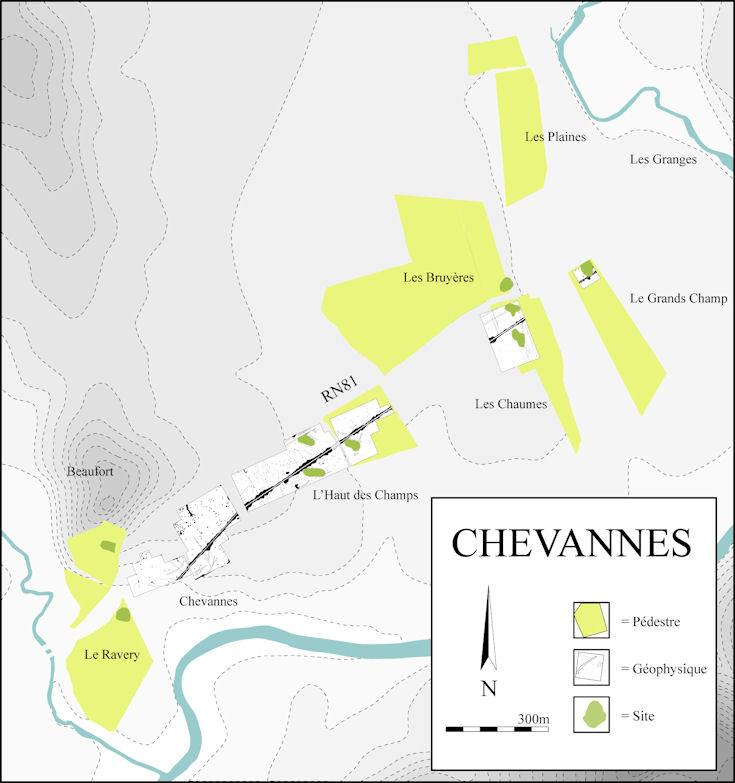
Figure 29: Area 2: Interpretation