Back
|
Forward
|
Close Window
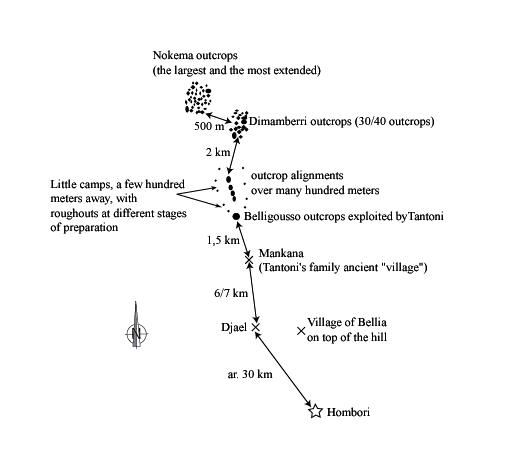
Figure 3: Location of quarries (drawing by Y. Pailler)