Figure 1: Location of excavation (Google map)
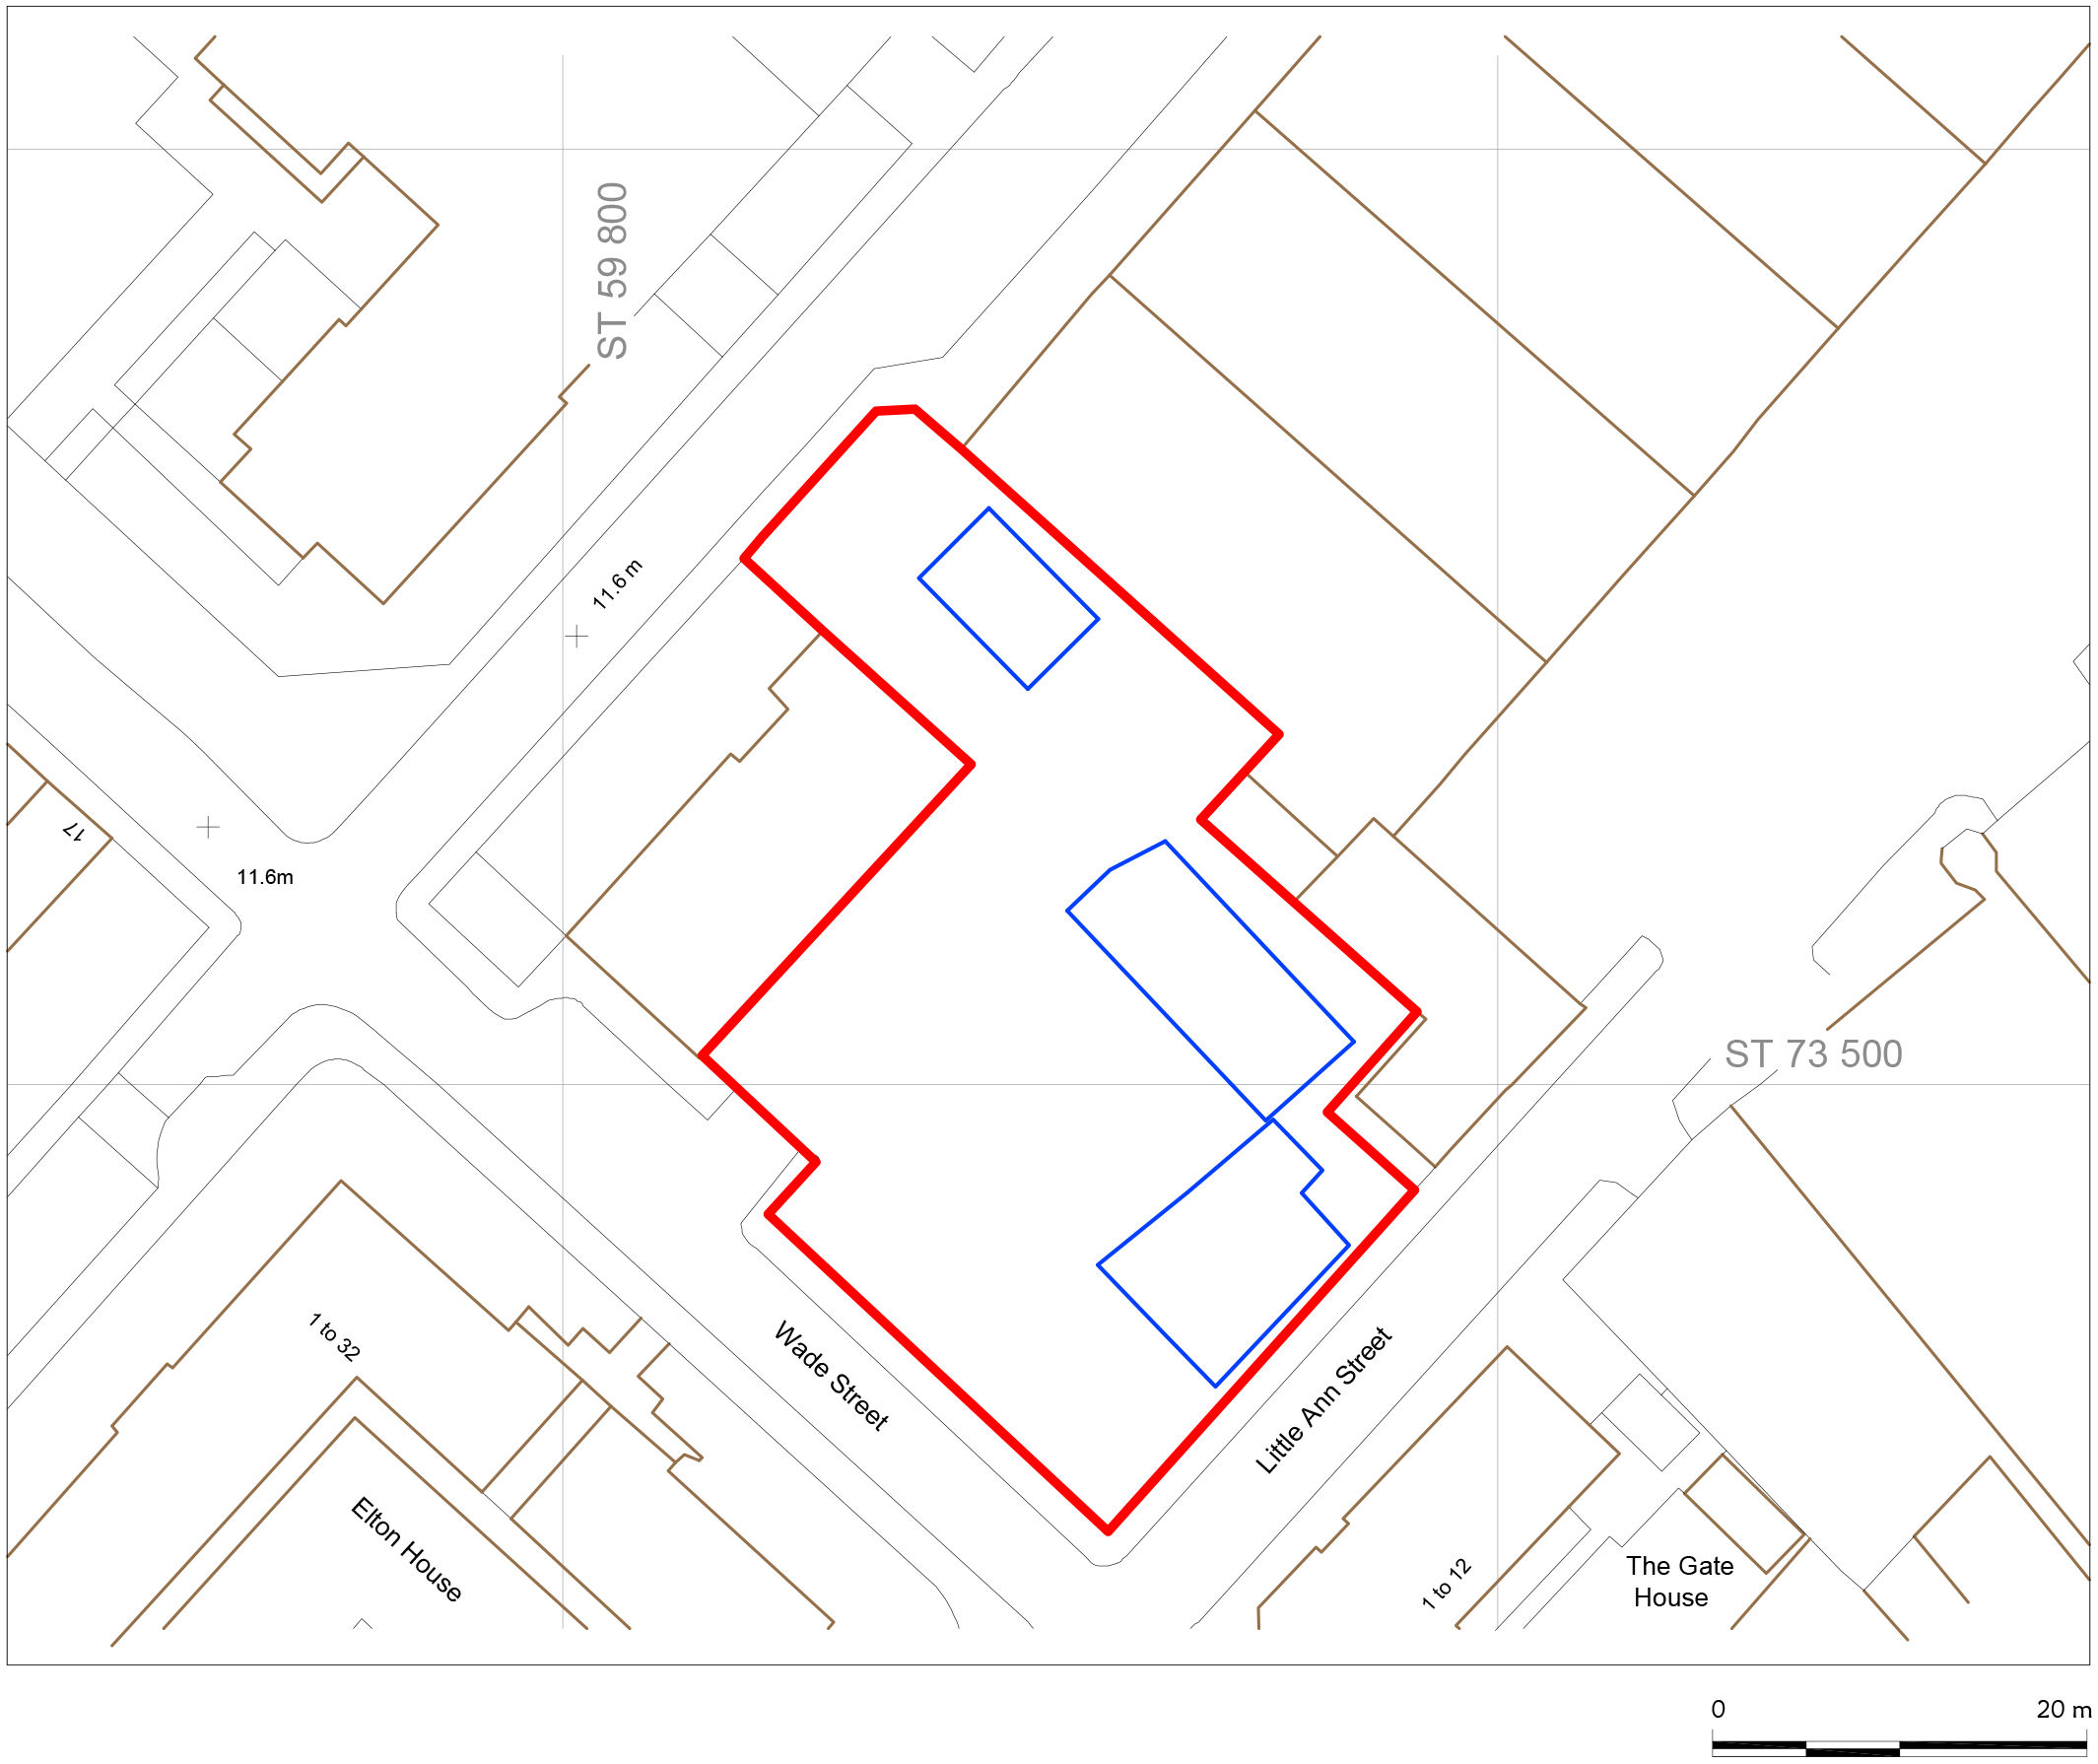
Figure 2: Location of the excavation area. Trench positions in blue
Figure 3: Plan of site showing main excavation areas (blue) and features identified from watching brief (with context numbers)
Figure 4: Extract from map of Bristol by Plumley and Ashmead 1828, showing excavation site outlined in red. Indicative only, best fit to this survey. Source: Bristol City Council
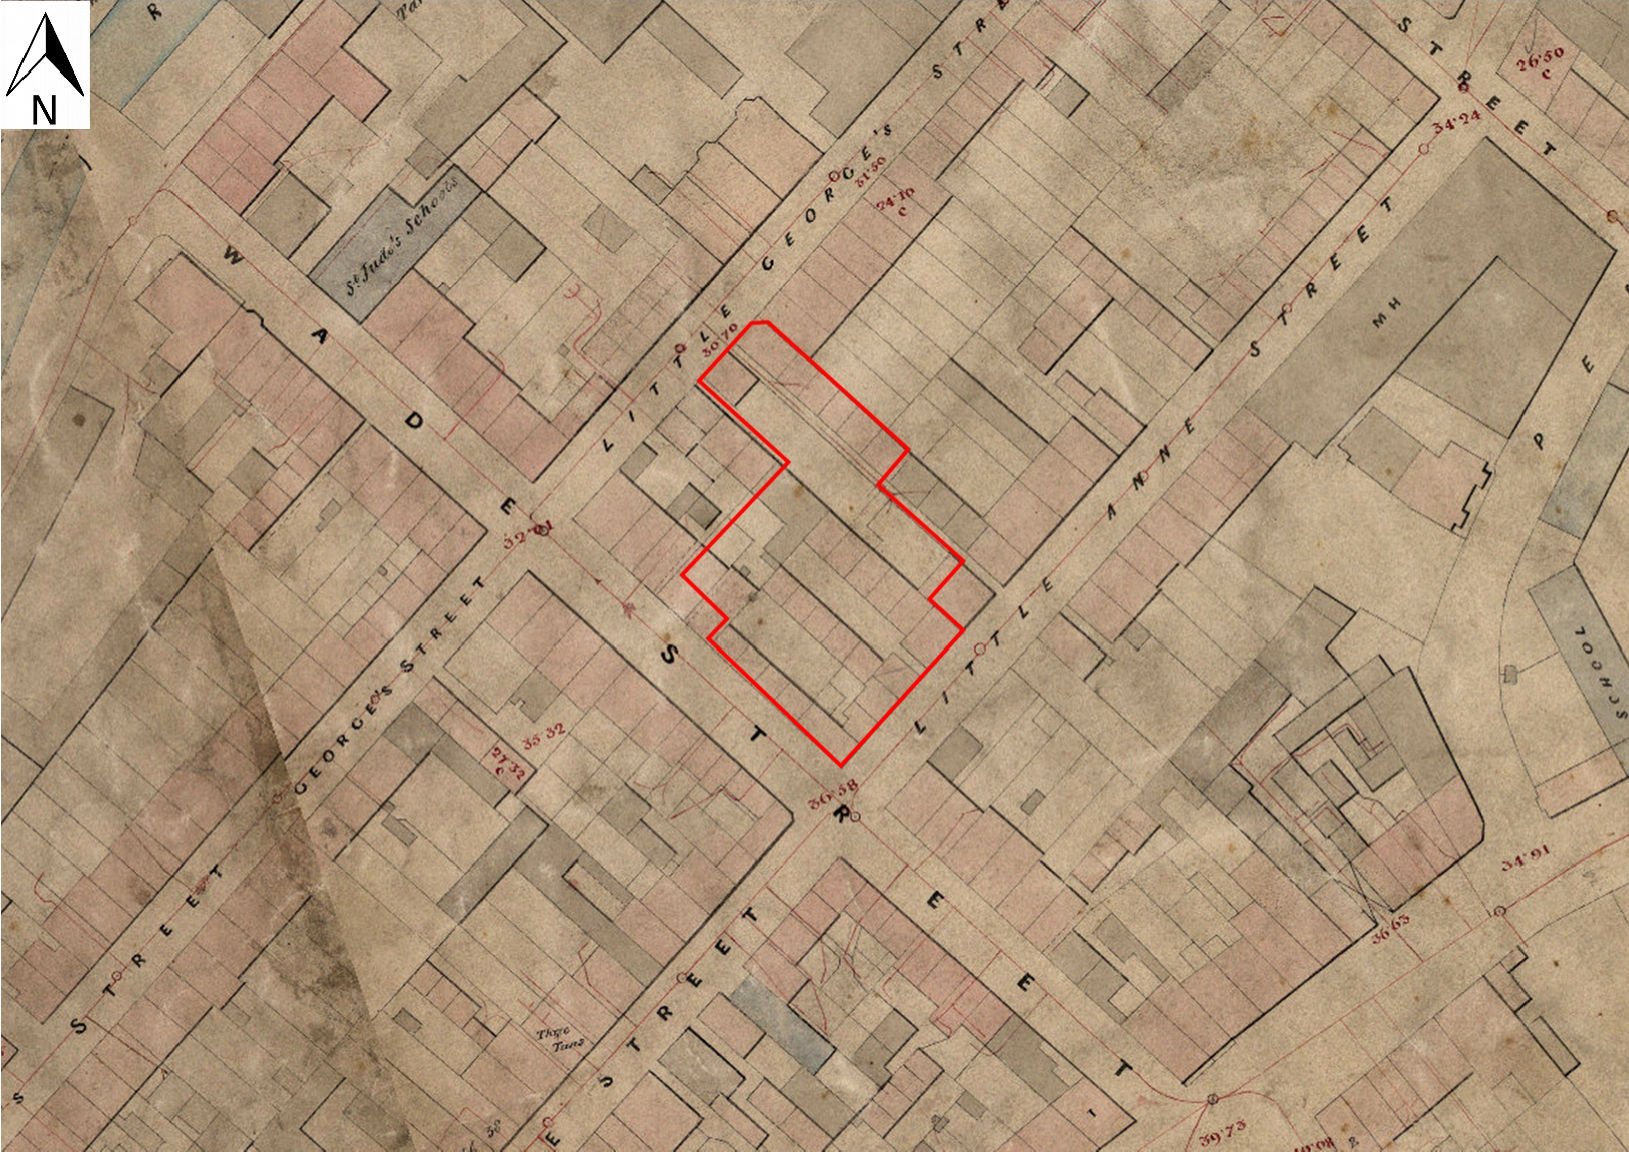
Figure 5: Extract from tithe map of St Phillip and St Jacob parish, 1847, showing excavation site outlined in red. Indicative only, best fit to this survey. Source: Bristol City Council
Figure 6: Extract from Ashmead's map of Bristol of 1855, showing excavation site outlined in red. Indicative only, best fit to this survey. Source: Bristol City Council
Figure 7: Extract from Ashmead's map of Bristol of 1874, showing excavation site outlined in red. Indicative only, best fit to this survey. Source: Bristol City Council
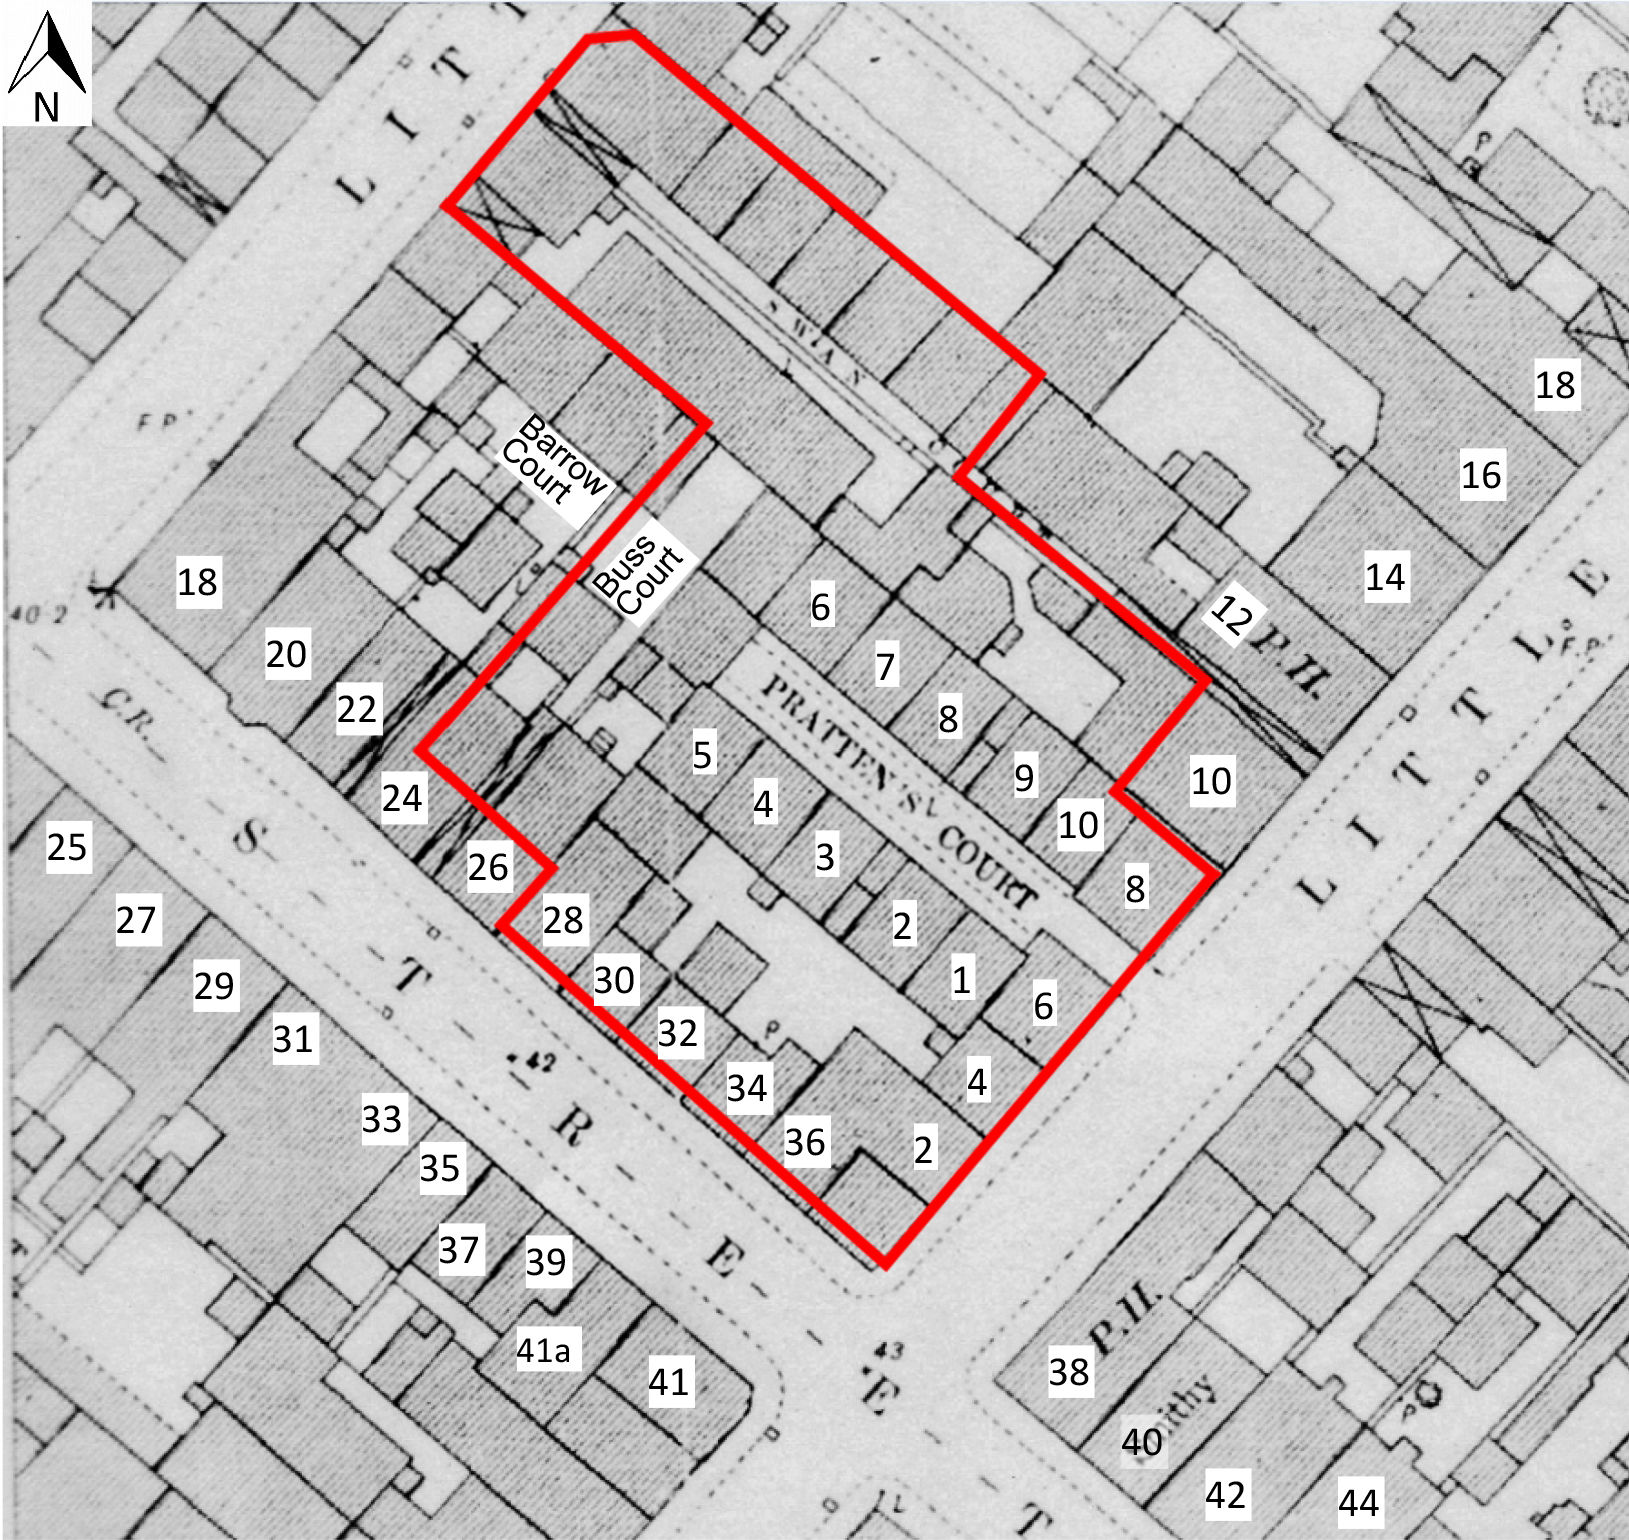
Figure 8: Extract from OS First Edition 1:500 plan, 1881-82, showing excavation site outlined in red. Contemporary house numbers indicated so far as they are known. Source: Bristol Record Office
Figure 9: Extract from compulsory purchase order plan, 1935, showing excavation site outlined in red. Note that the street line formerly encompassing numbers 20-26 Wade Street had by this date been stepped back. Source: BRO Modern Records 8160A
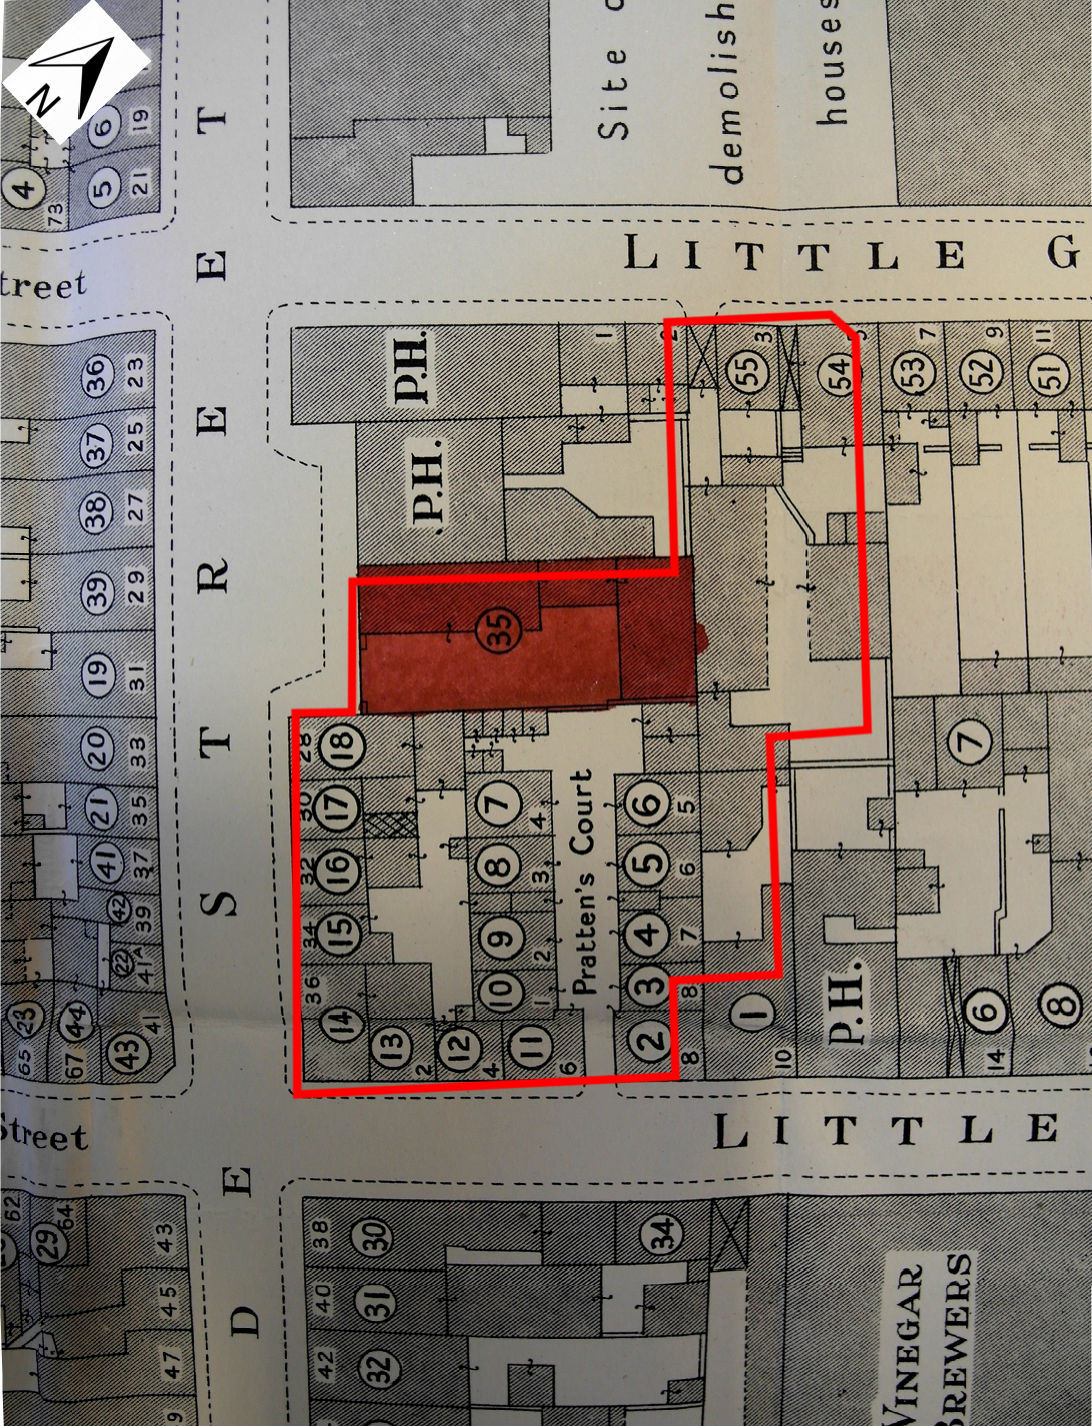
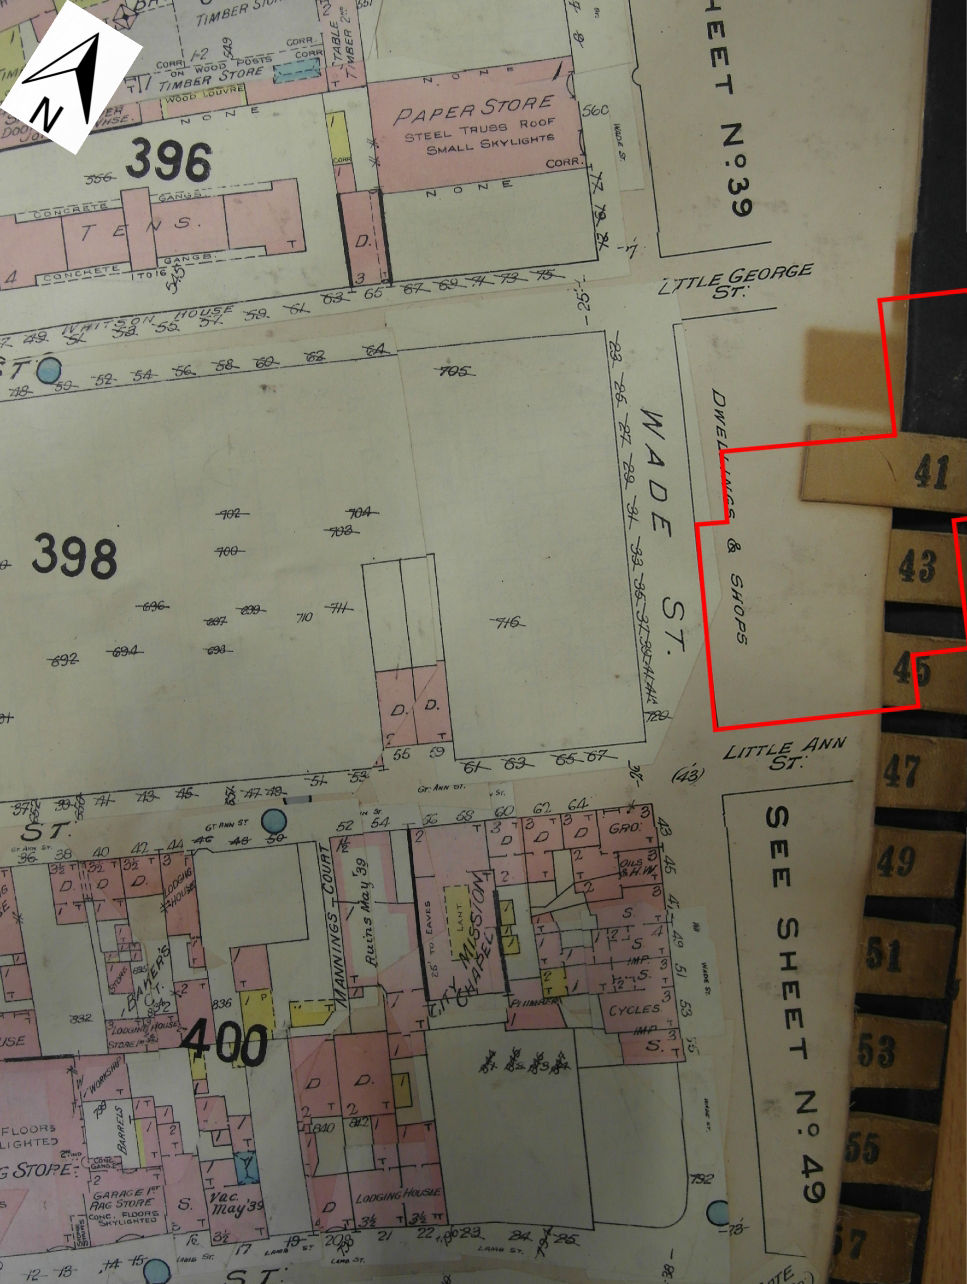
Figure 10: Extract from Goad insurance plan, revised up to 1939. Position of excavation outlined in red. Source: Bristol Record Office 40904/2
Figure 11: Detailed plan of excavation Area A
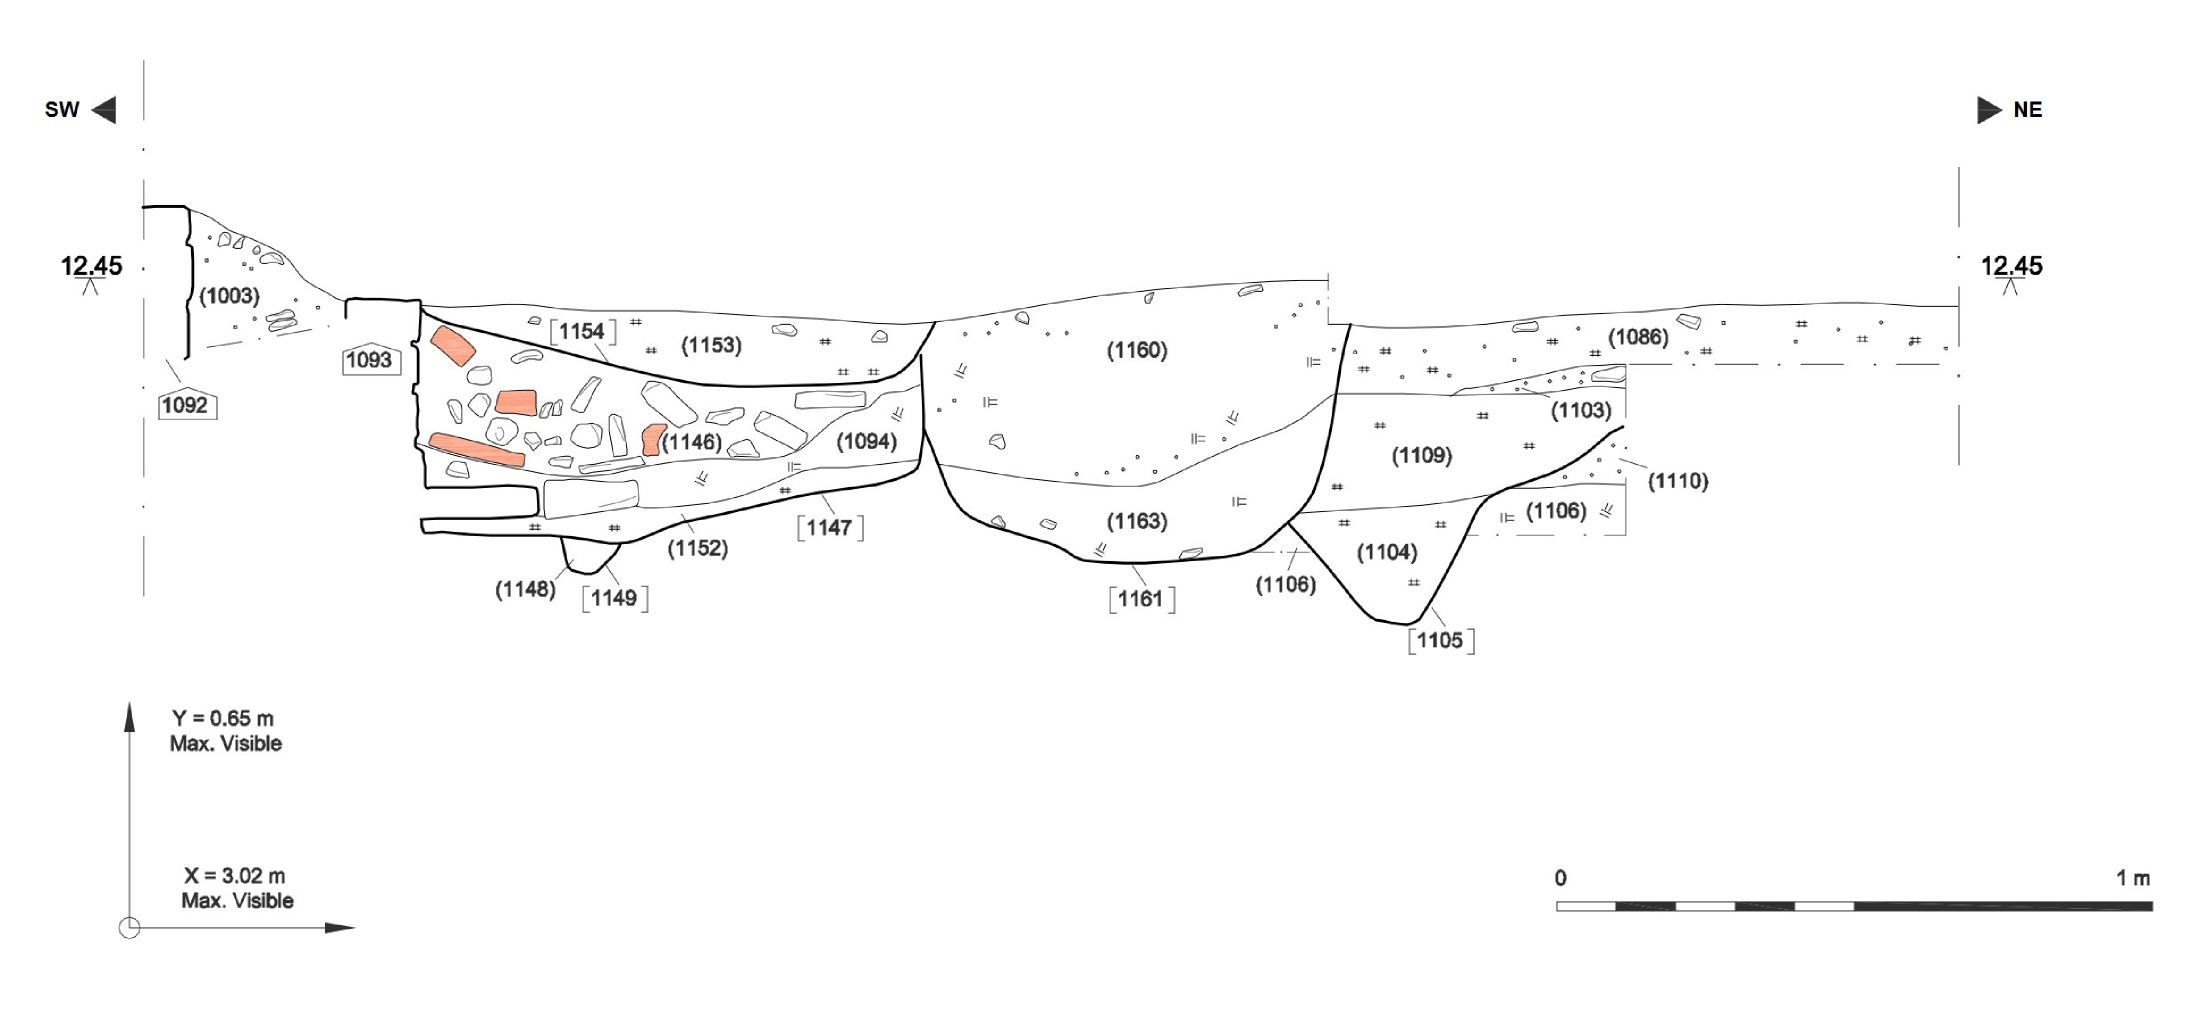
Figure 12: North-west facing section, Area A
Figure 13:South-east facing section, Area A
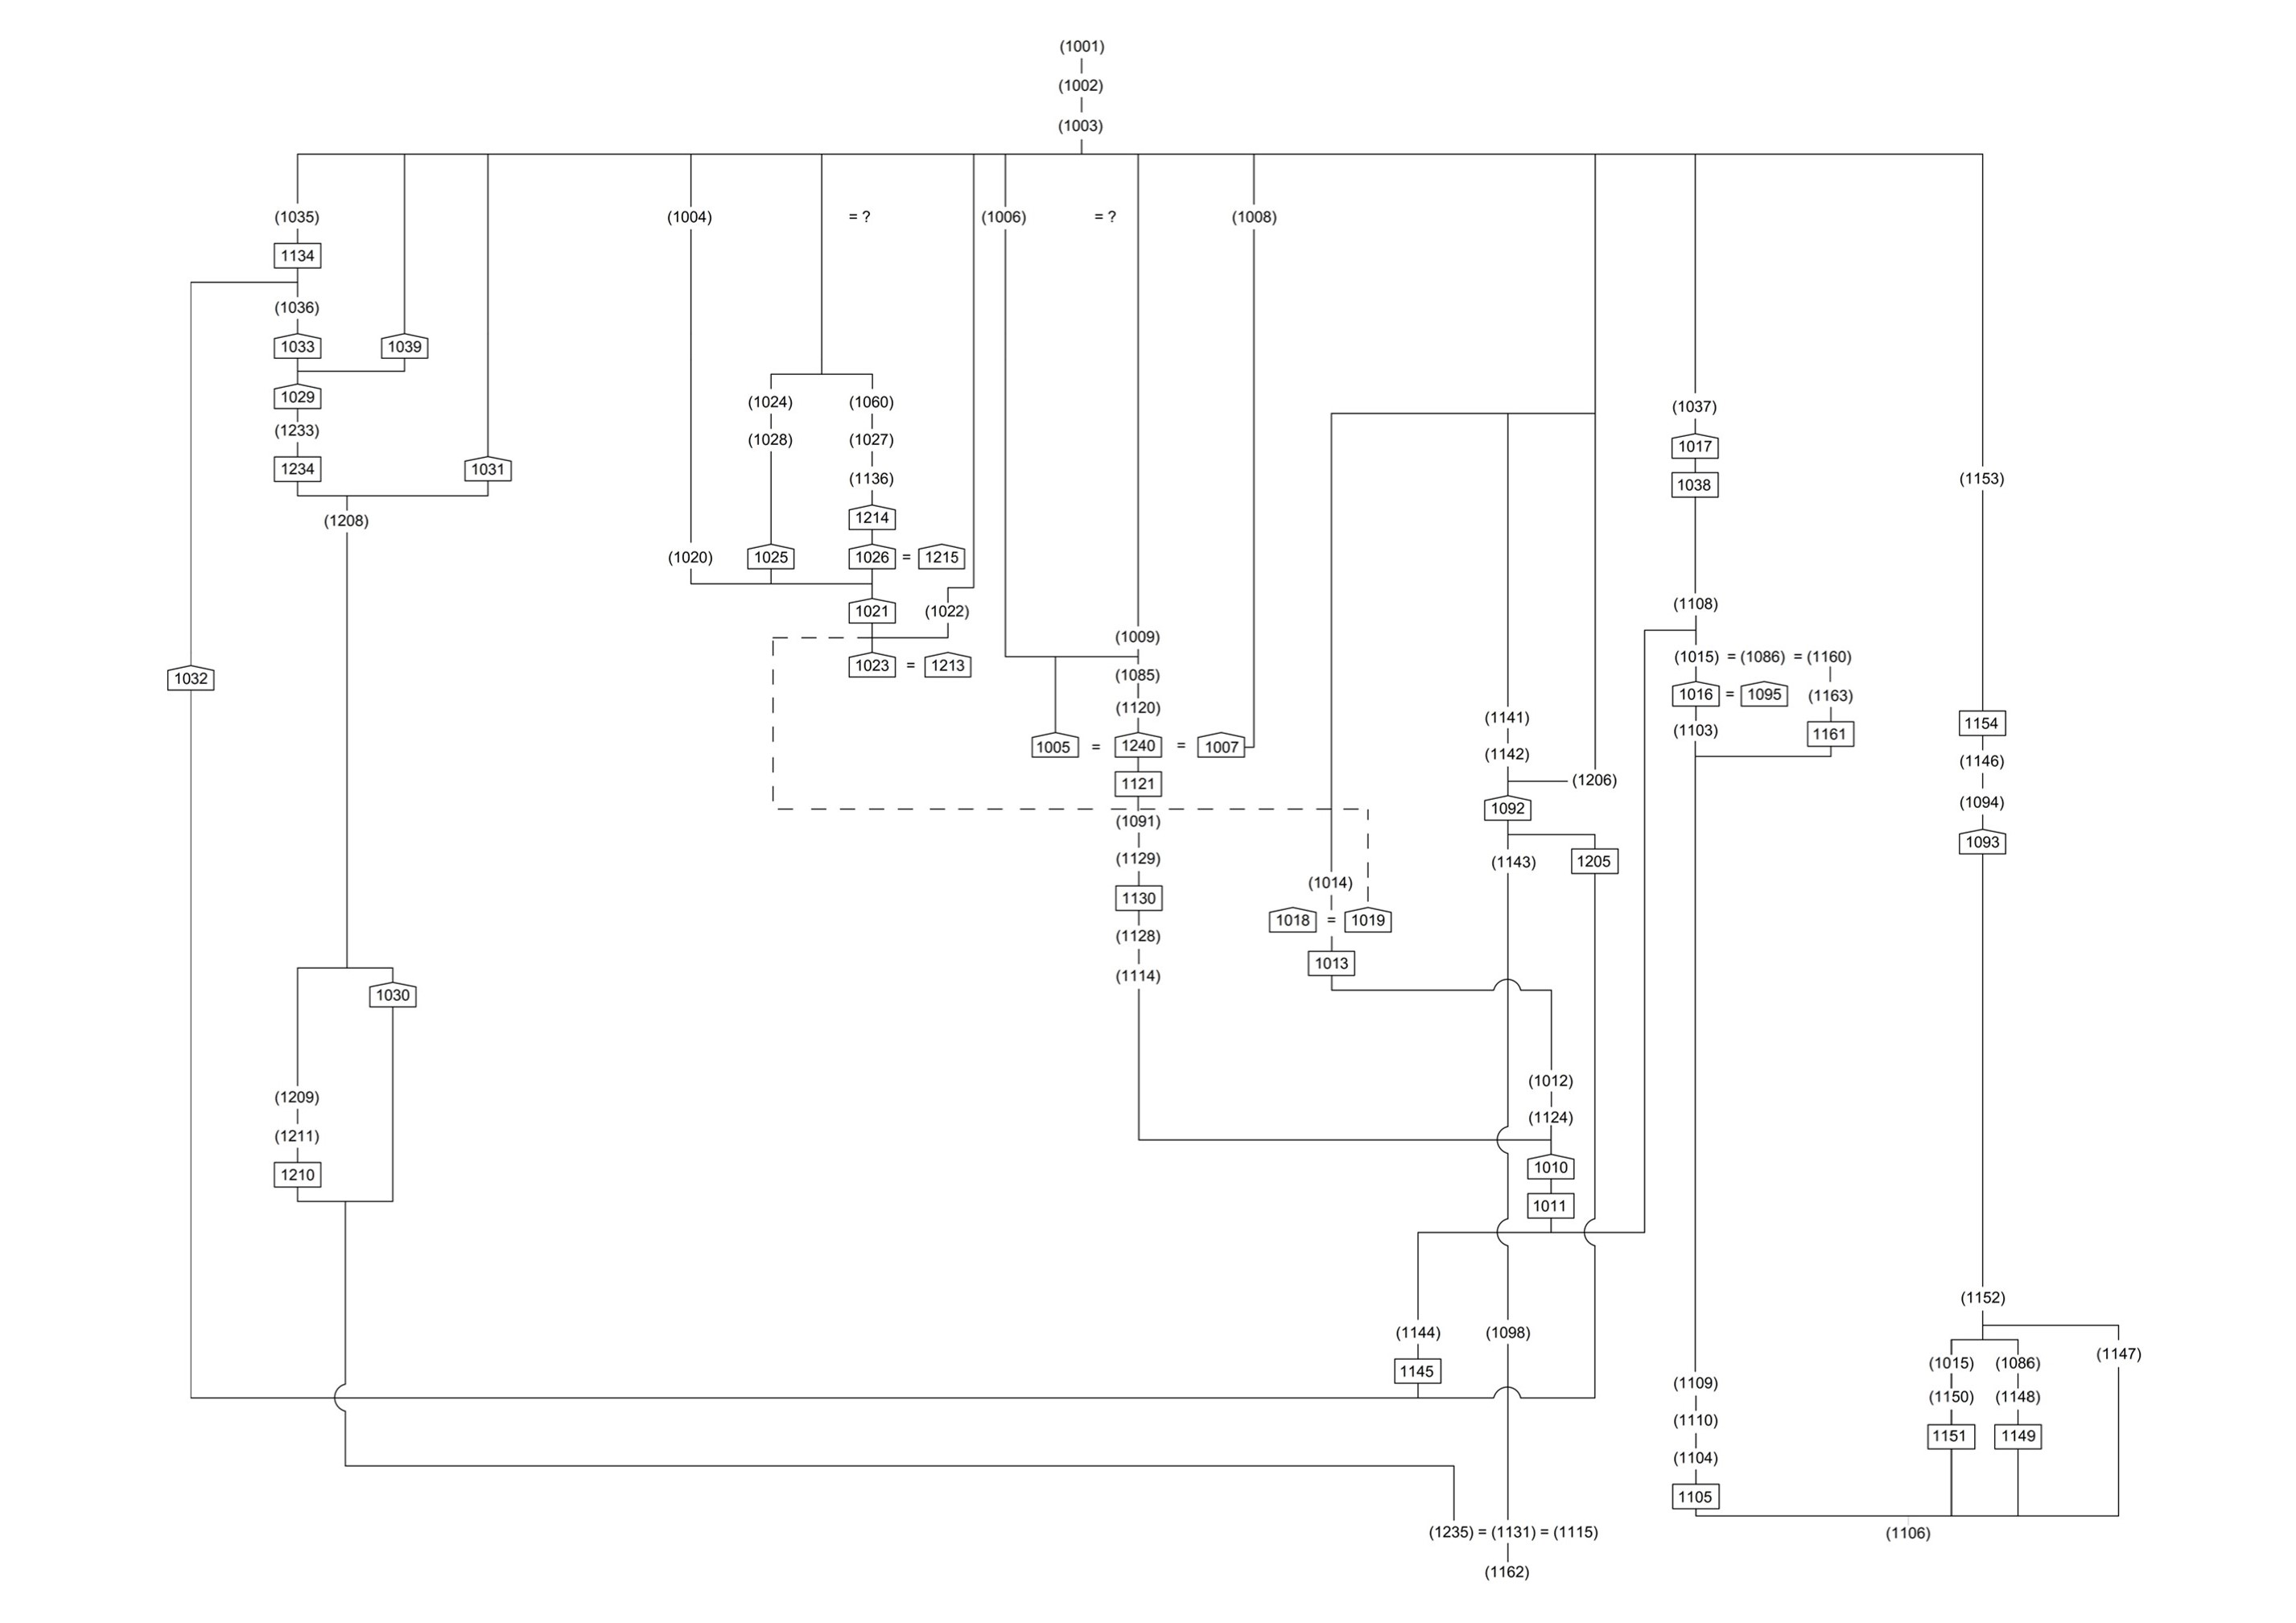
Figure 14: Site matrix, Area A
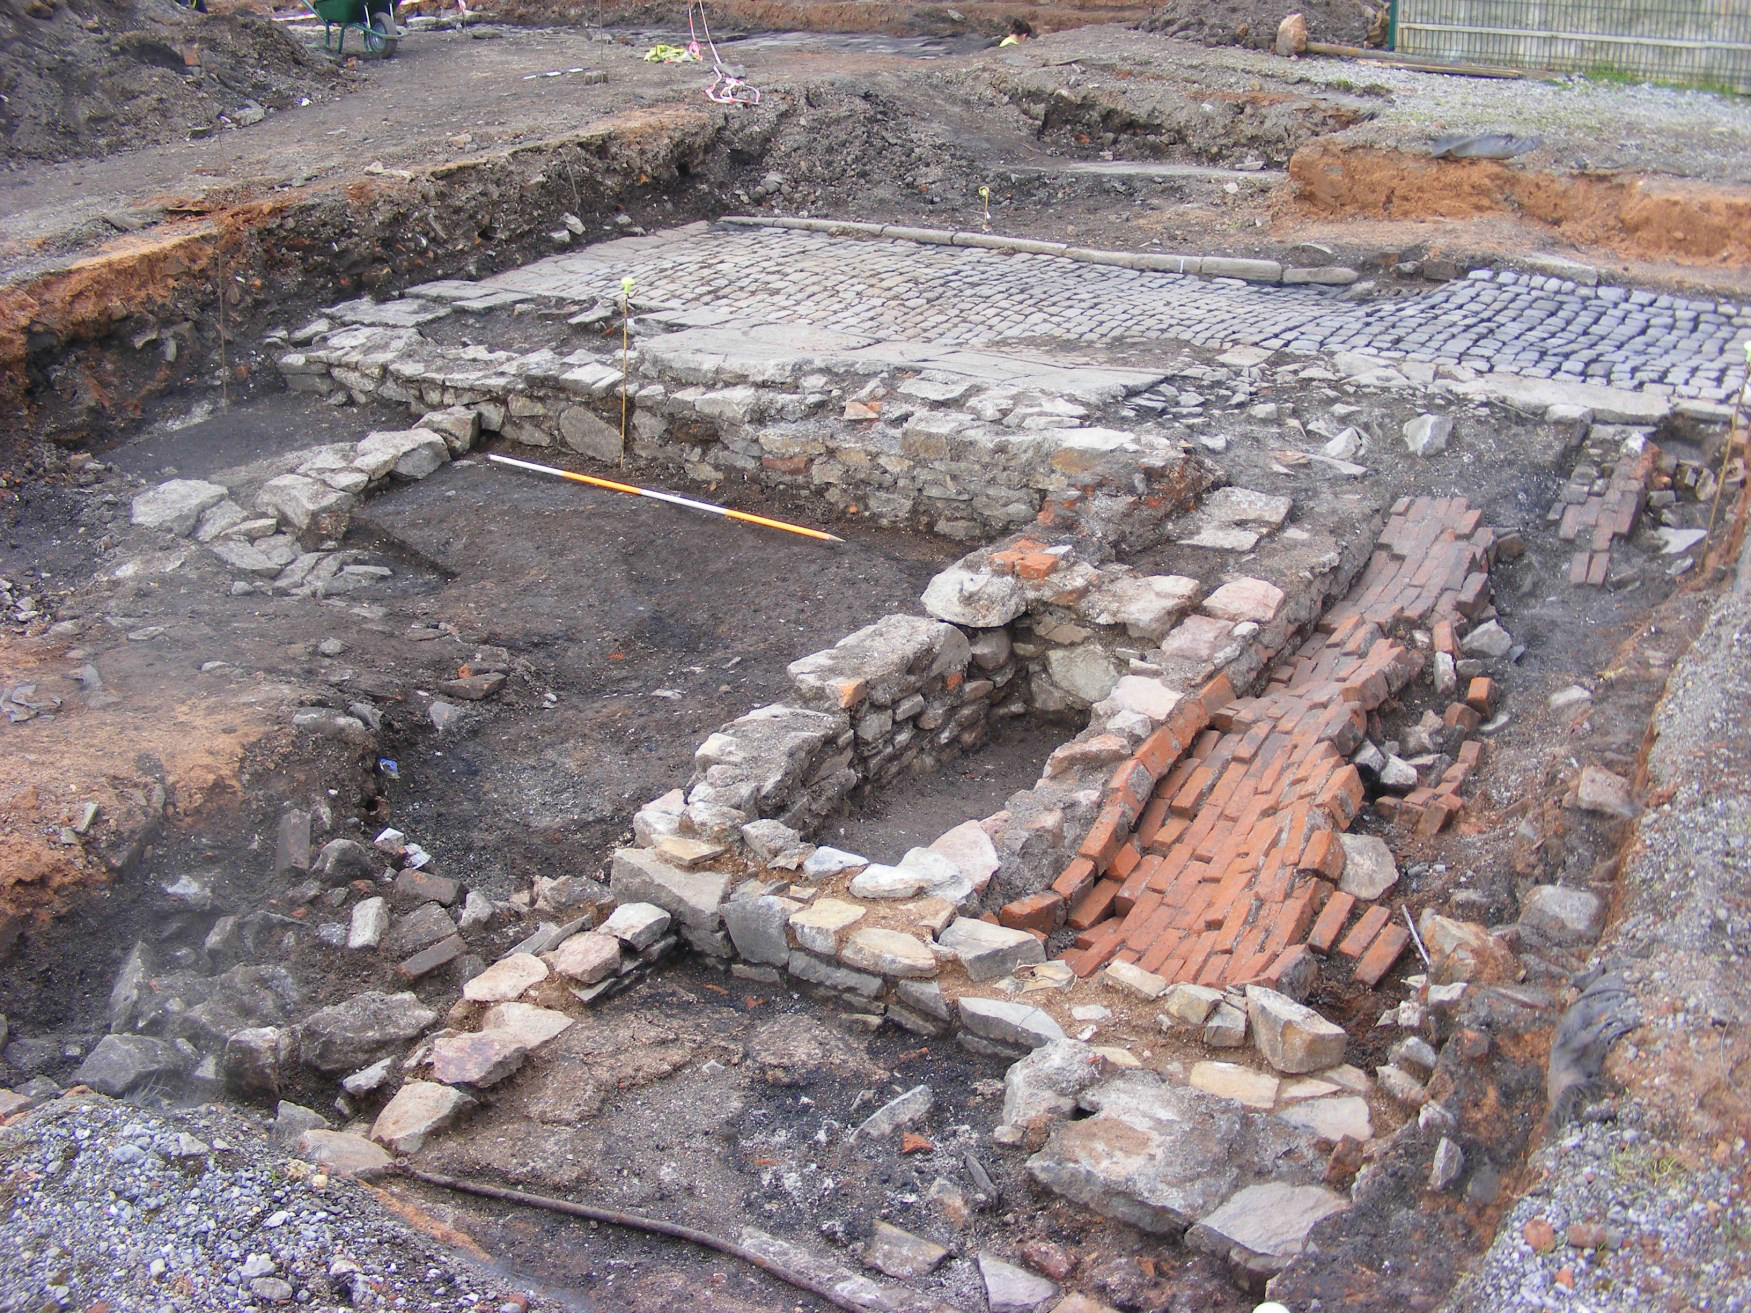
Figure 15: General view of Area A almost fully excavated, looking north. Collapsed brick vault (1026) of cellar (1021) in foreground, probably belonging to 6 Little Anne St; cobbled surface of Pratten's Court (1005) and kerbing (1240), in background. Scale: 2m
Figure 16: Detail of brick vault and cellar, looking north-east. Scales: 1m and 2m
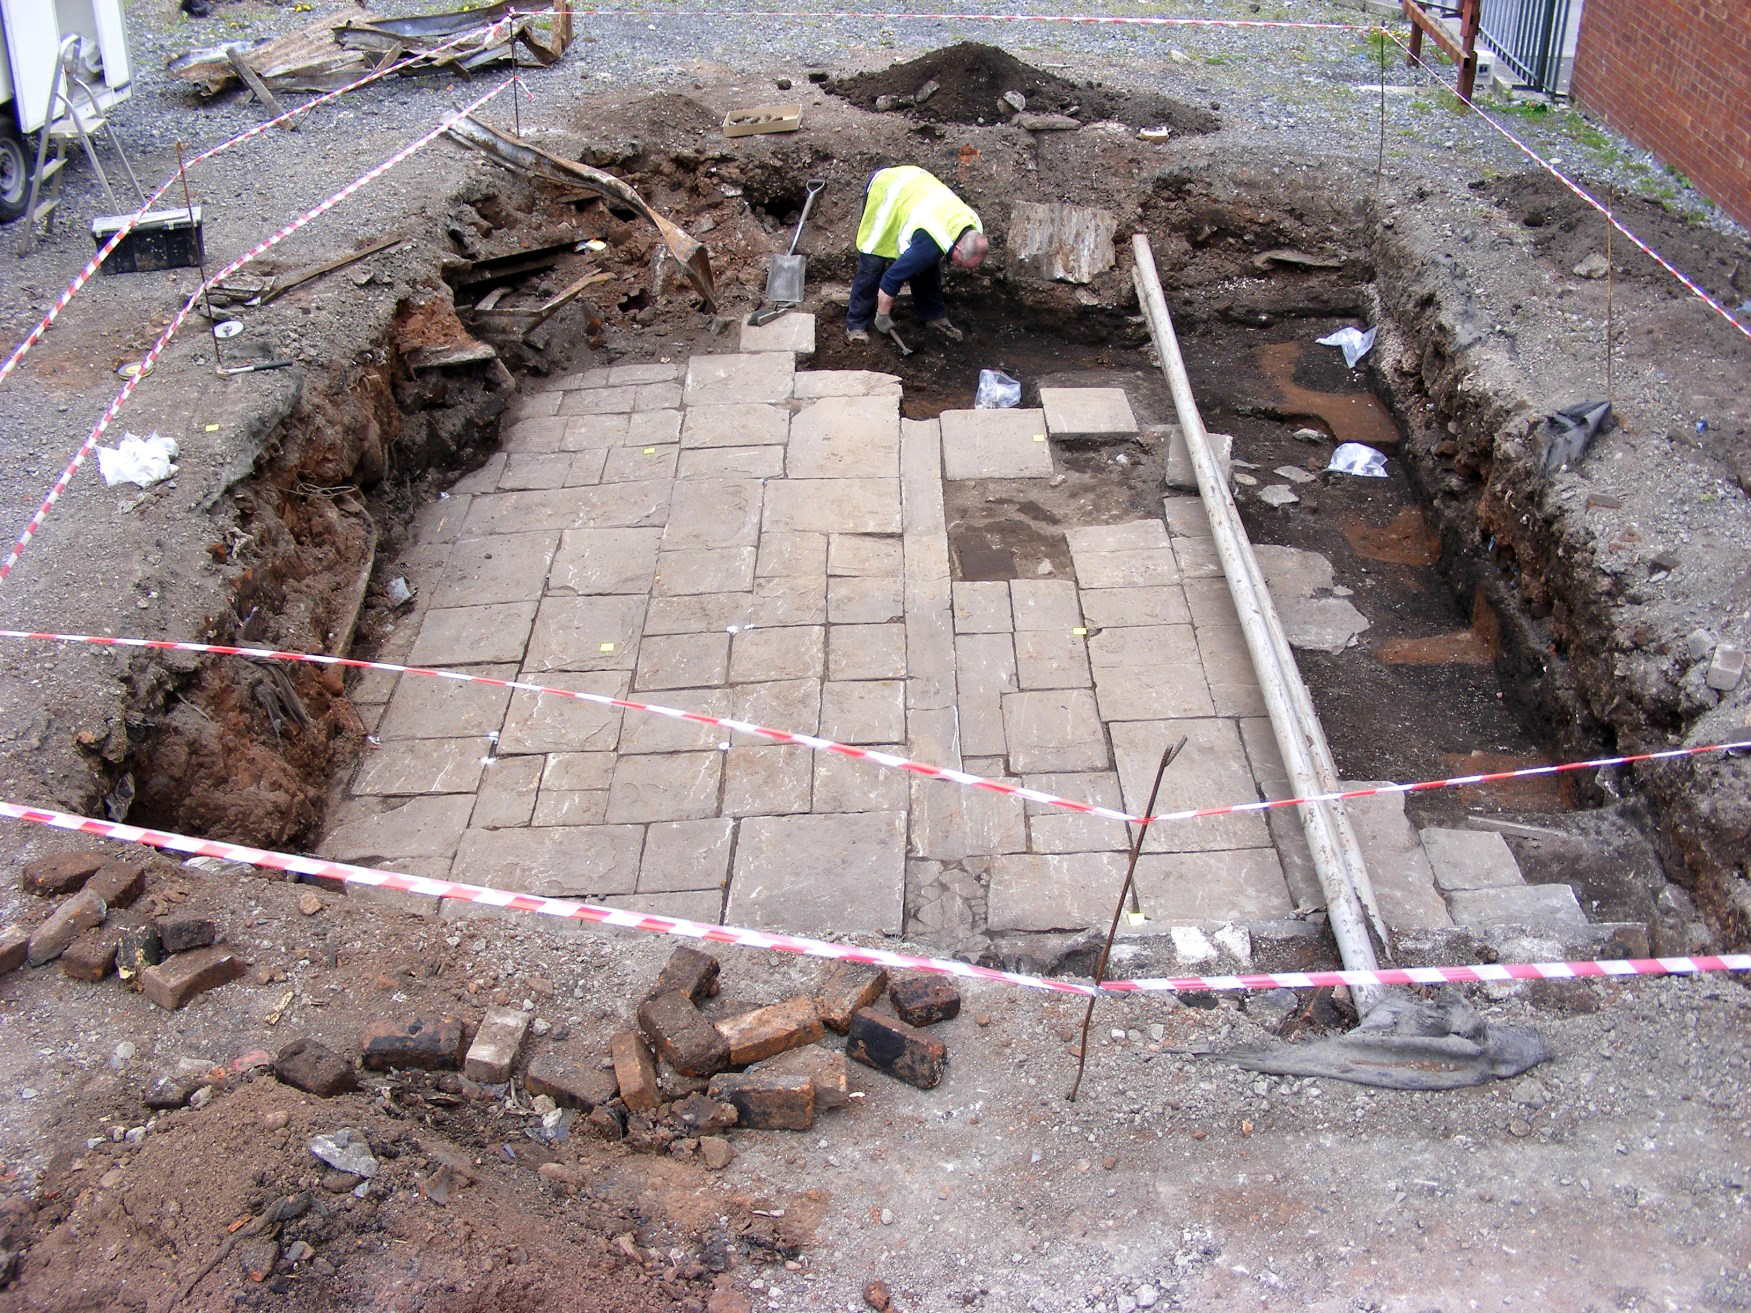
Figure 17: Cobbled surface (1005) of Pratten's Court fully exposed within Area A, looking south-east. Scales: 2×1m
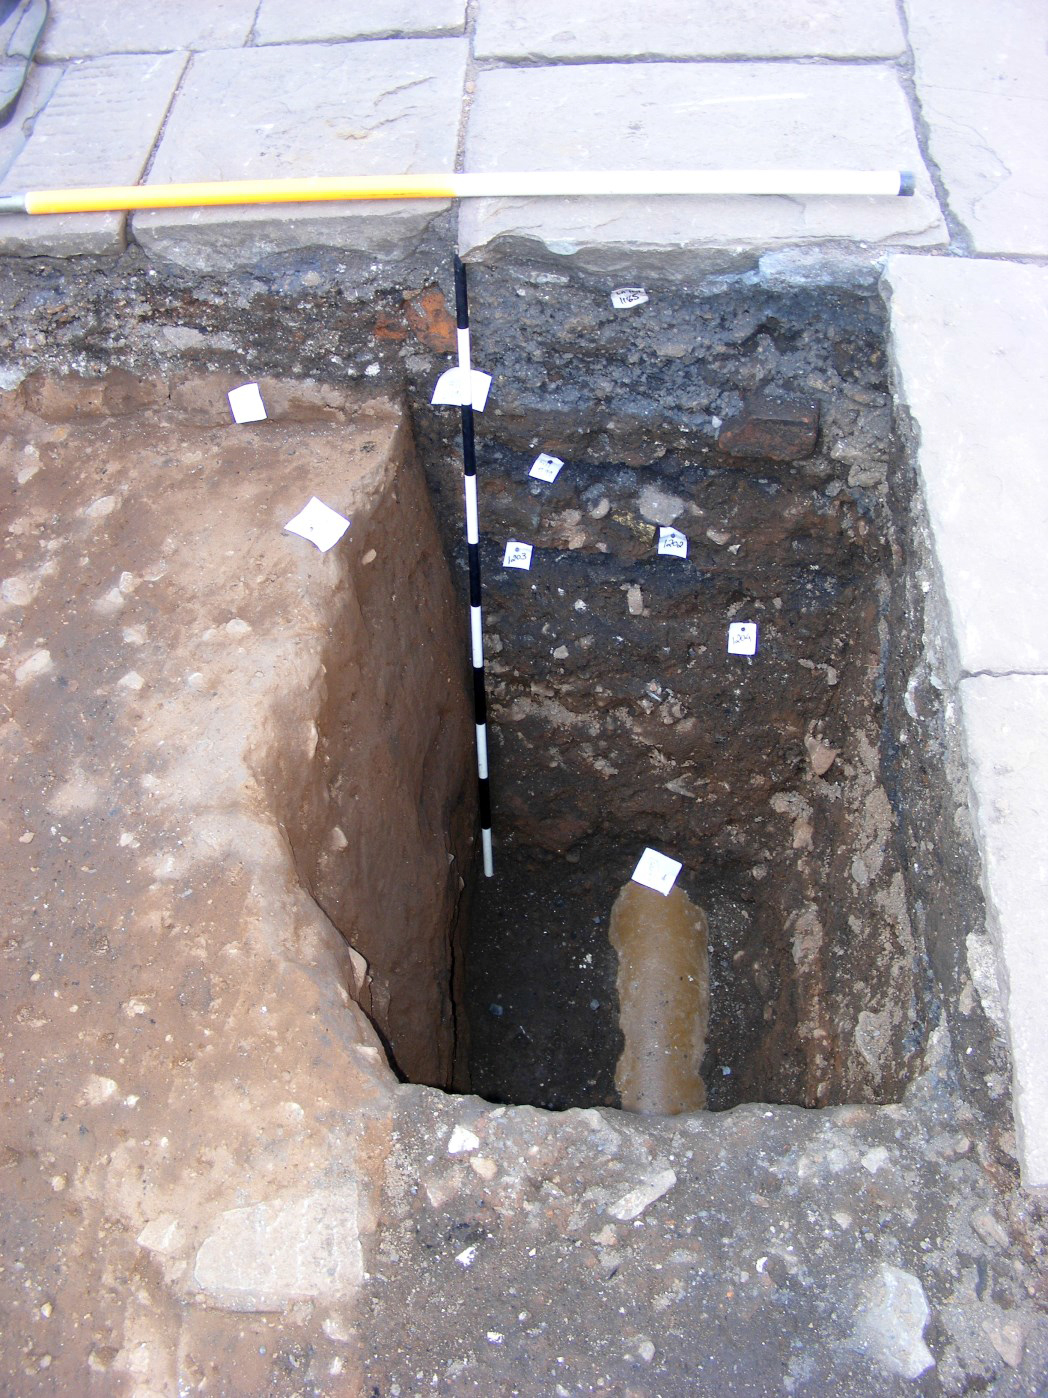
Figure 18: Section through pre-structural phase features, [1105] and associated cuts. View to south. Scales: 1×0.40m and 1×1m
Figure 19: Elevation of wall (1030), with wall (1029) butting against it on left-hand side of frame. Collapsed brick cellar vaulting (1026) in background. View to north-east. Scales: 1×1m and 1×0.25m
Figure 20: Section through deposits under cobbled surface of Pratten's Court (1005). Compare with Figure 12. View to south-east. Scales: 1×1m and 1×0.30m
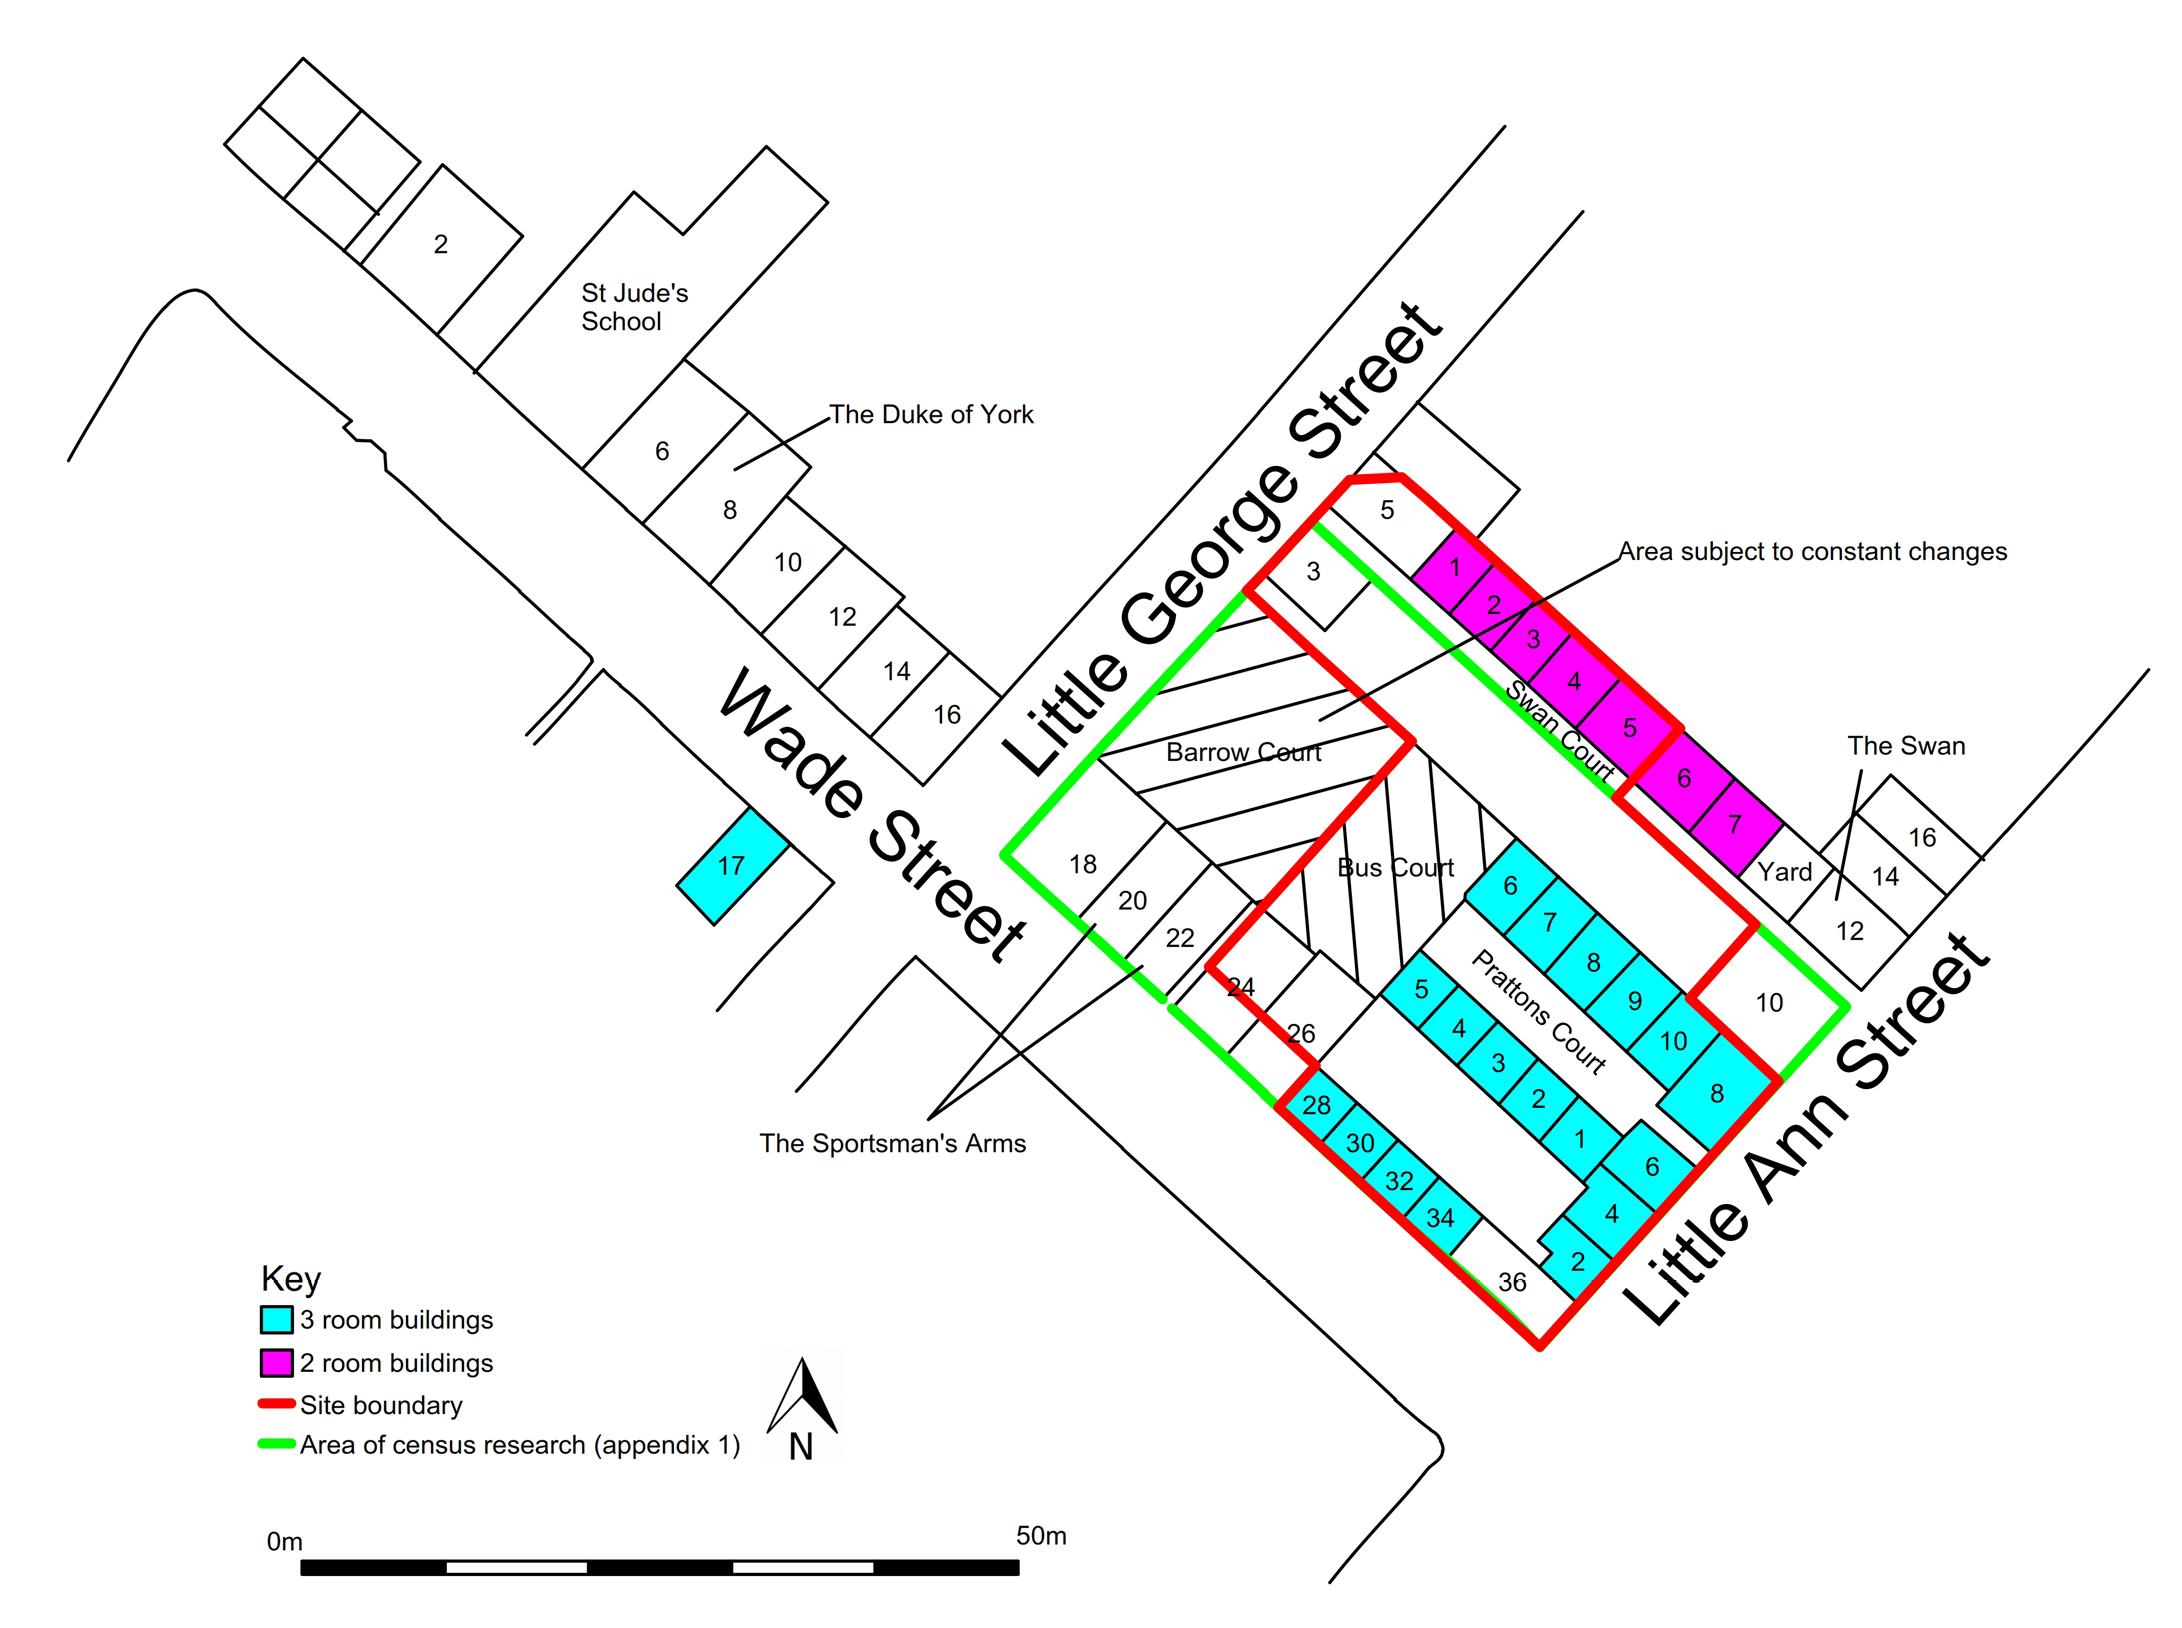
Figure 21: Simplified scale plan showing the study site in the second half of the 19th century, with house numbers, and annotated to indicate specific features of the layout in the light of the census records
Figure 22: Detailed plan of excavation Area B
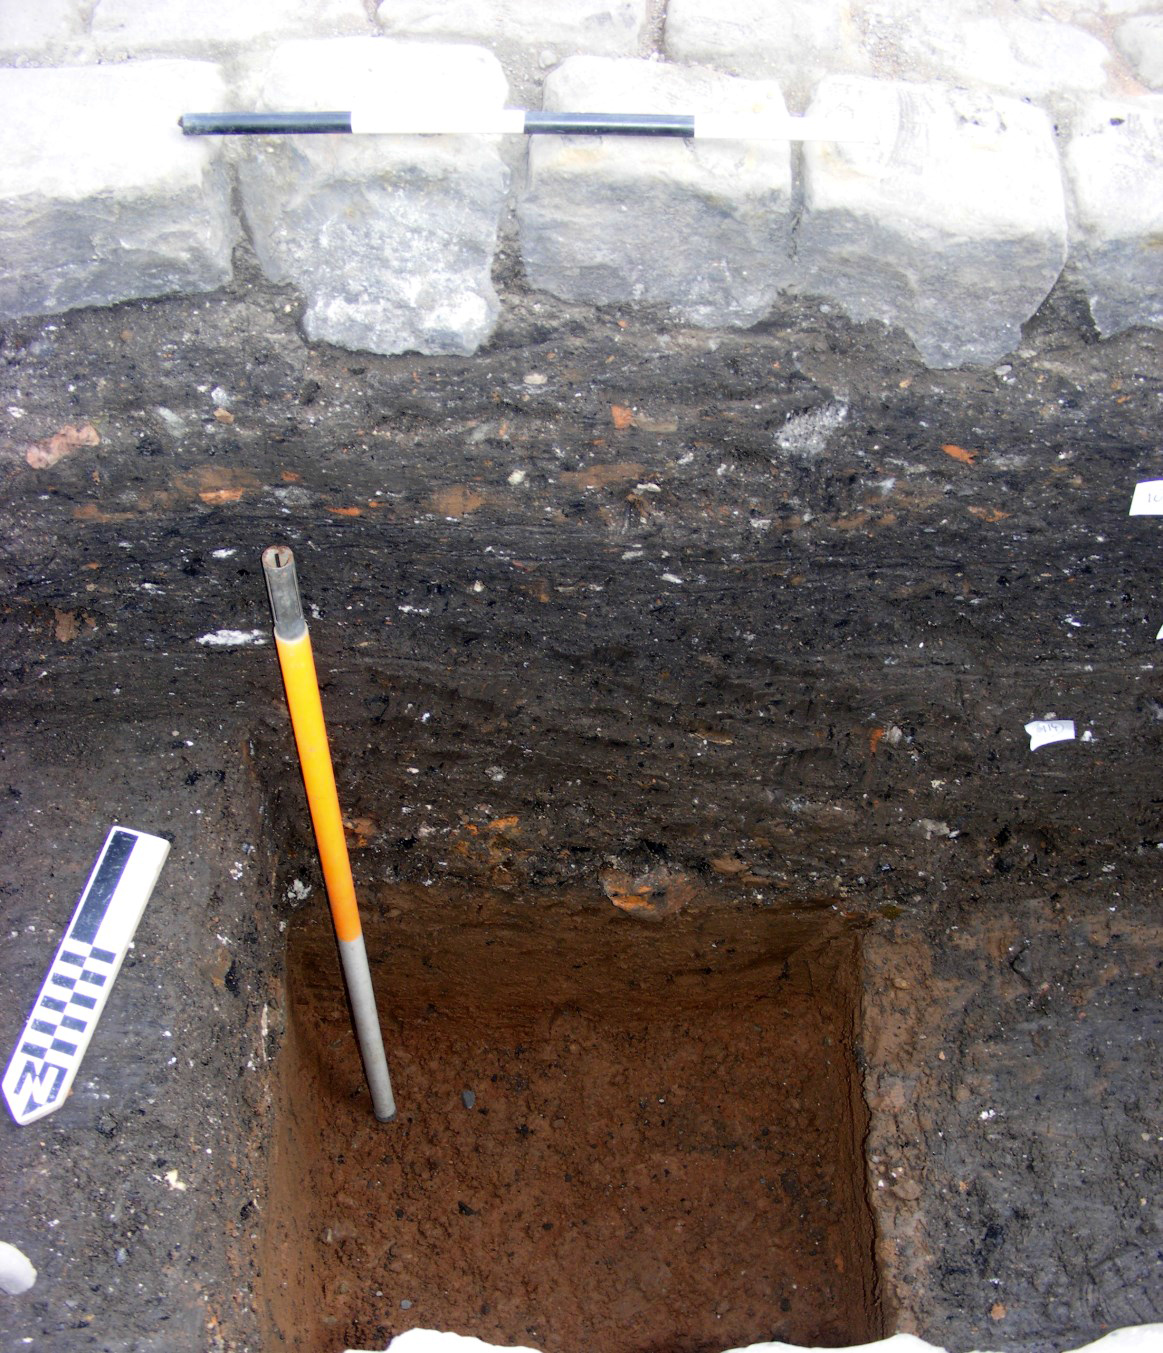
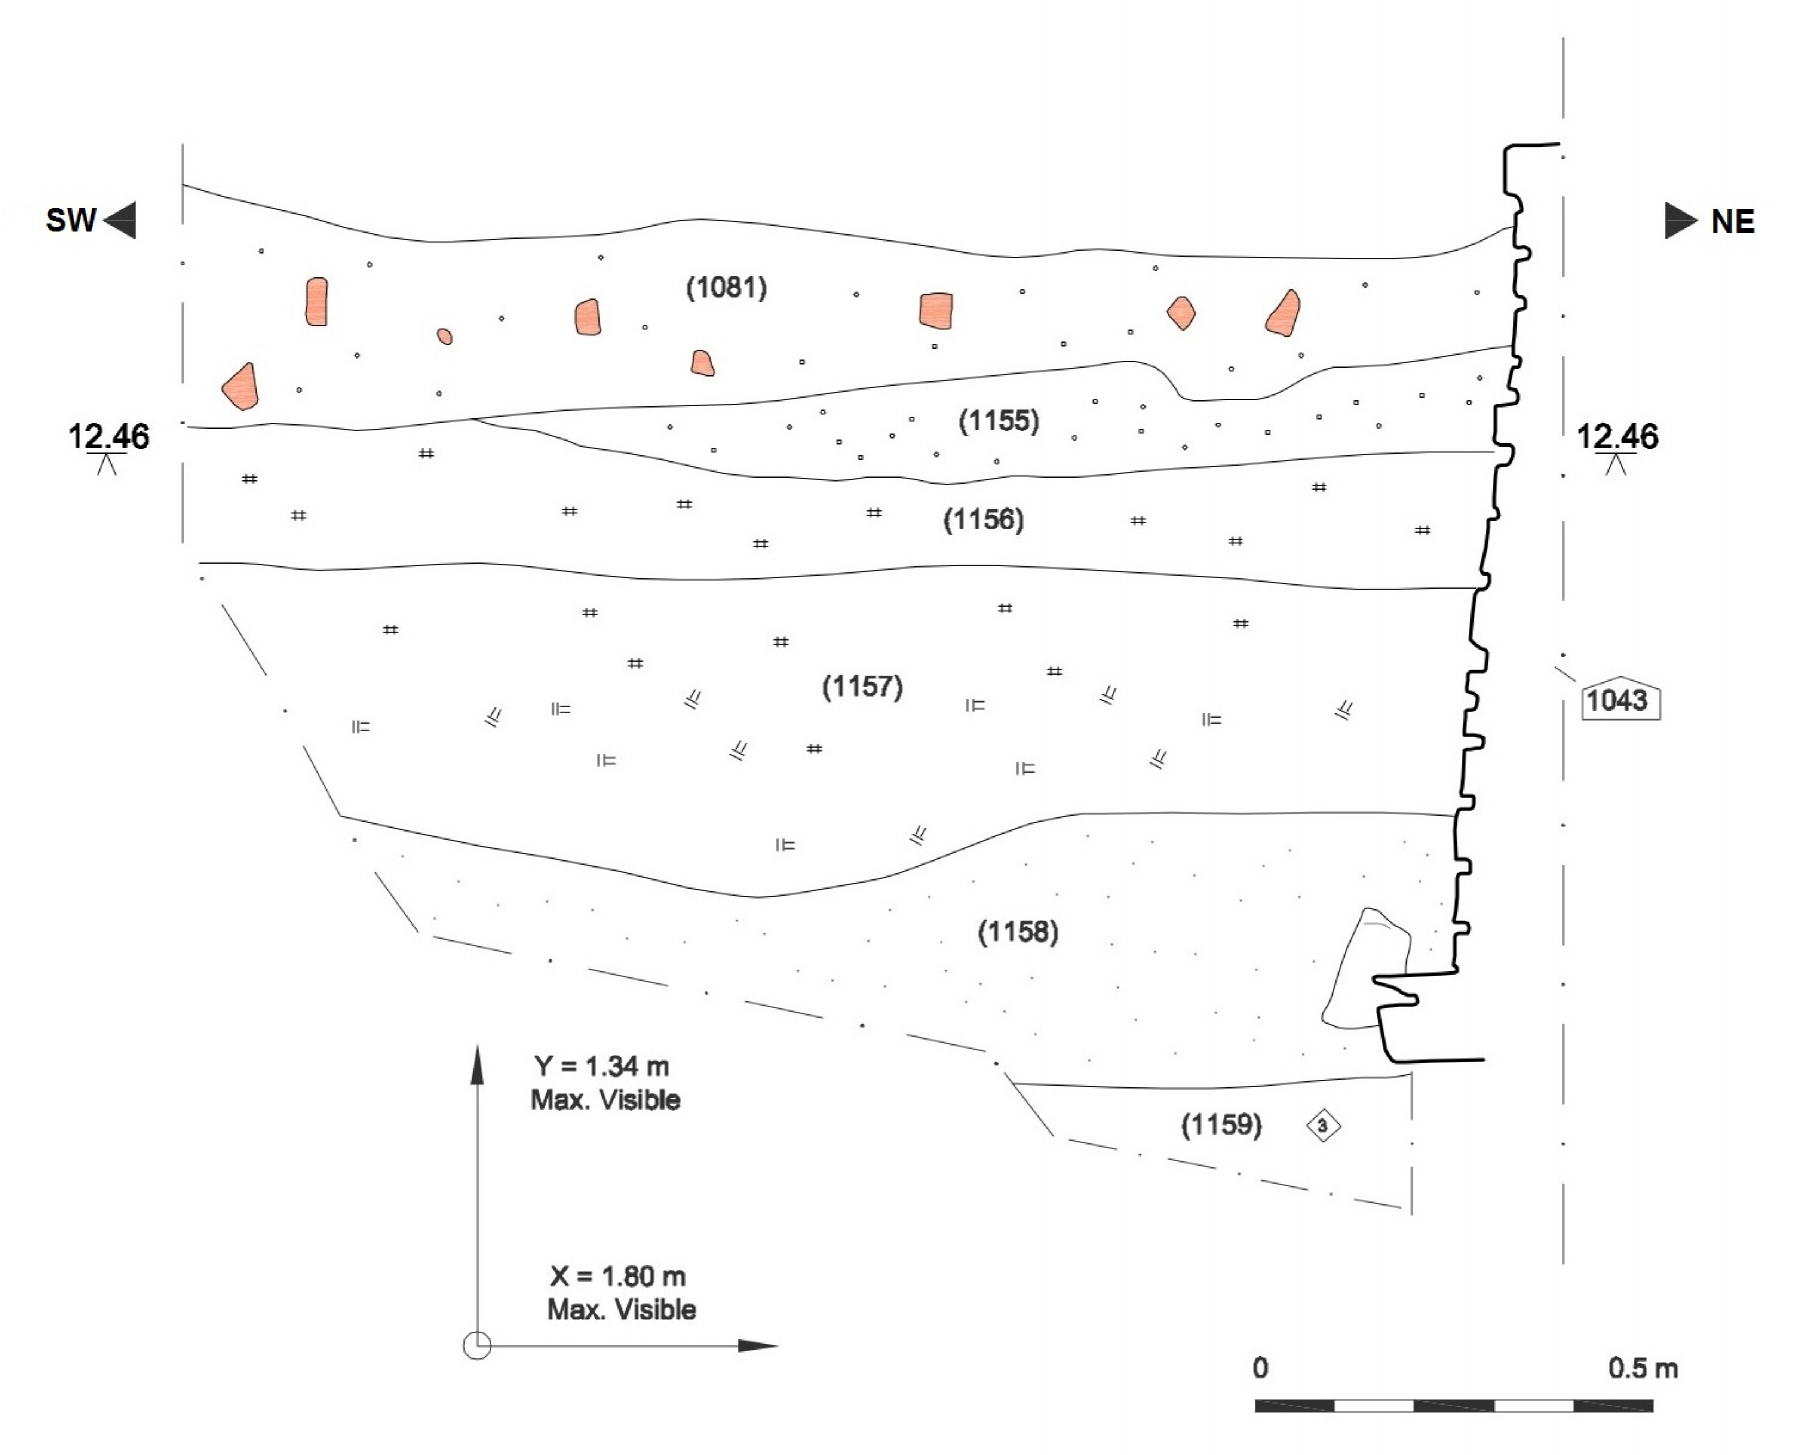
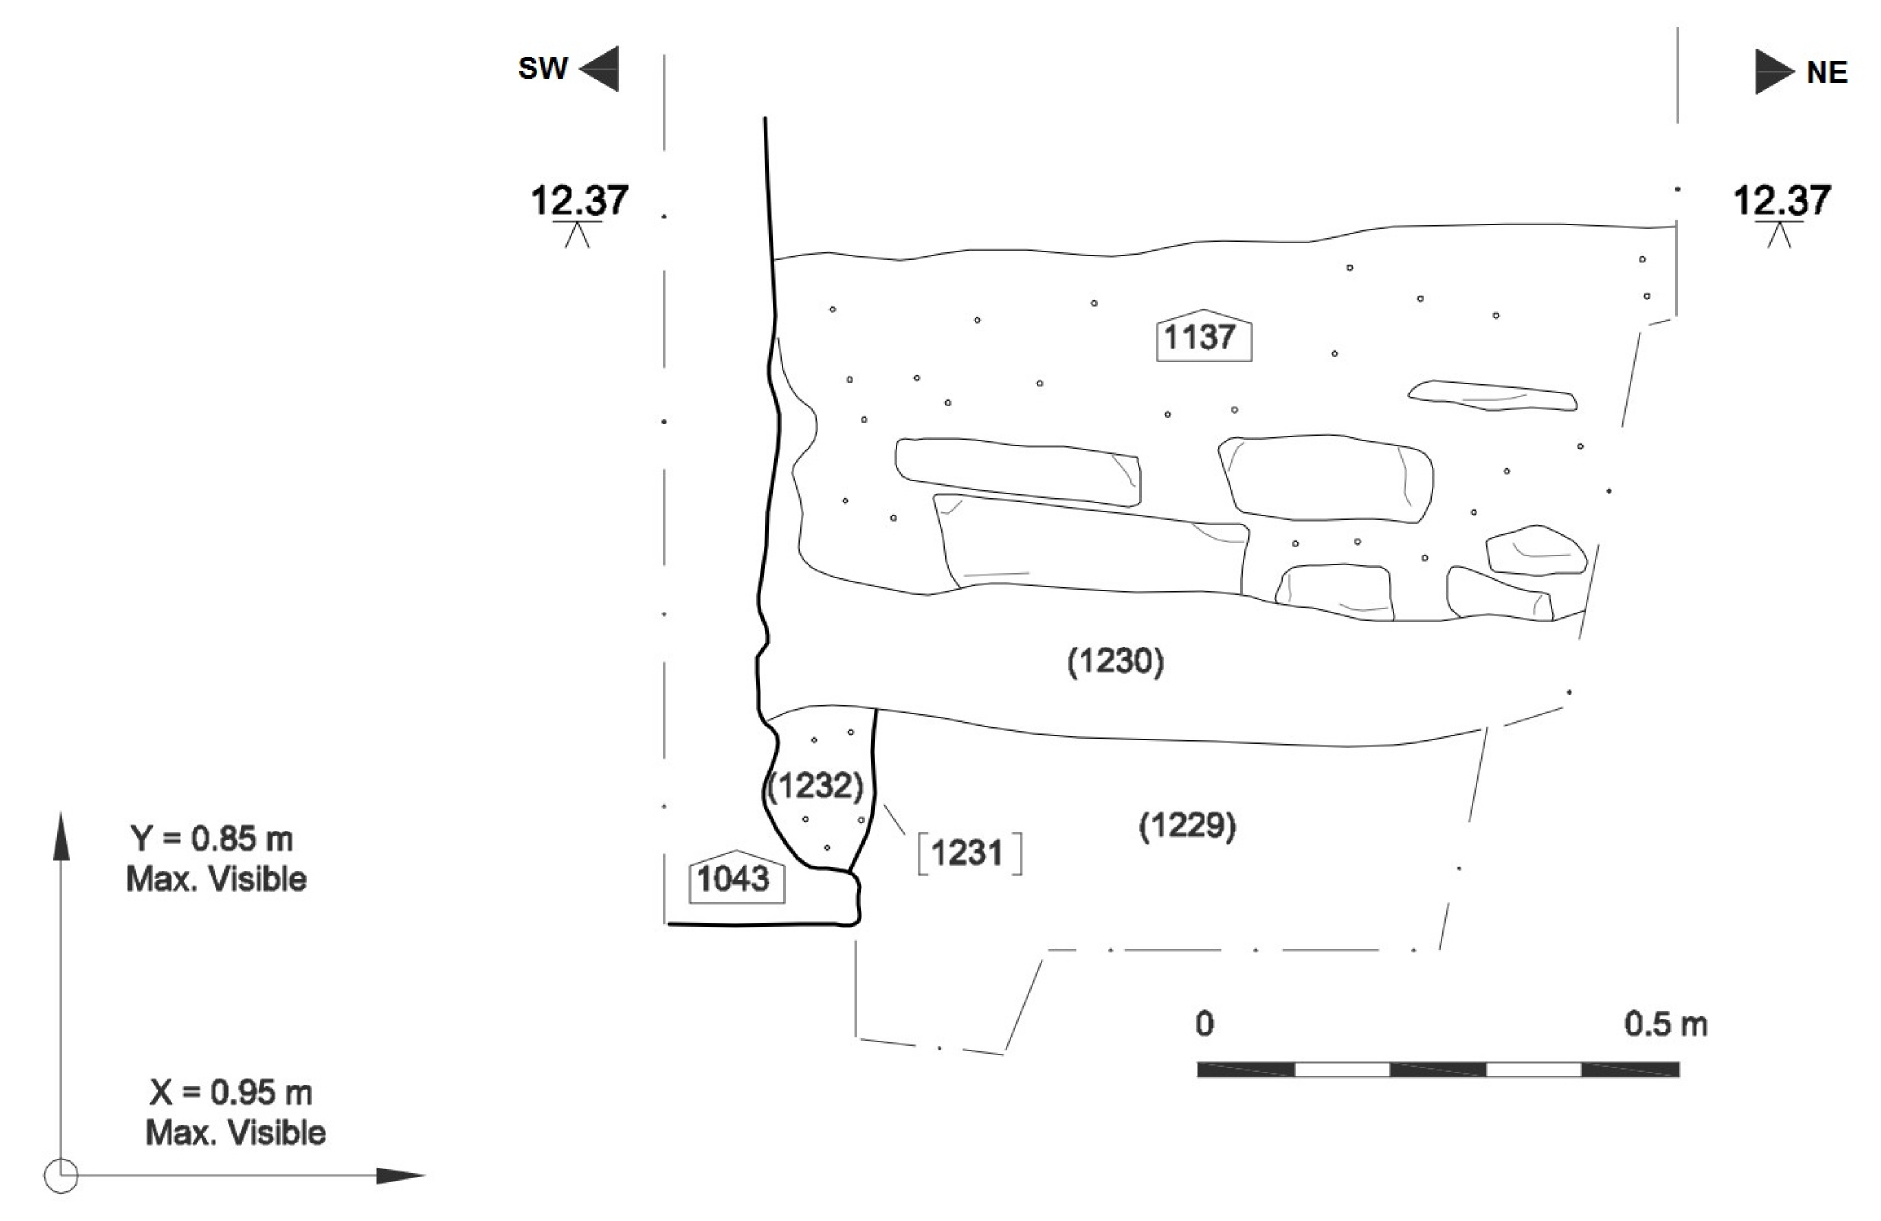
Figure 23: South-east facing section against main 'spine' wall (1043), Area B
Figure 24: South-east facing section against main 'spine' wall (1043), Area B
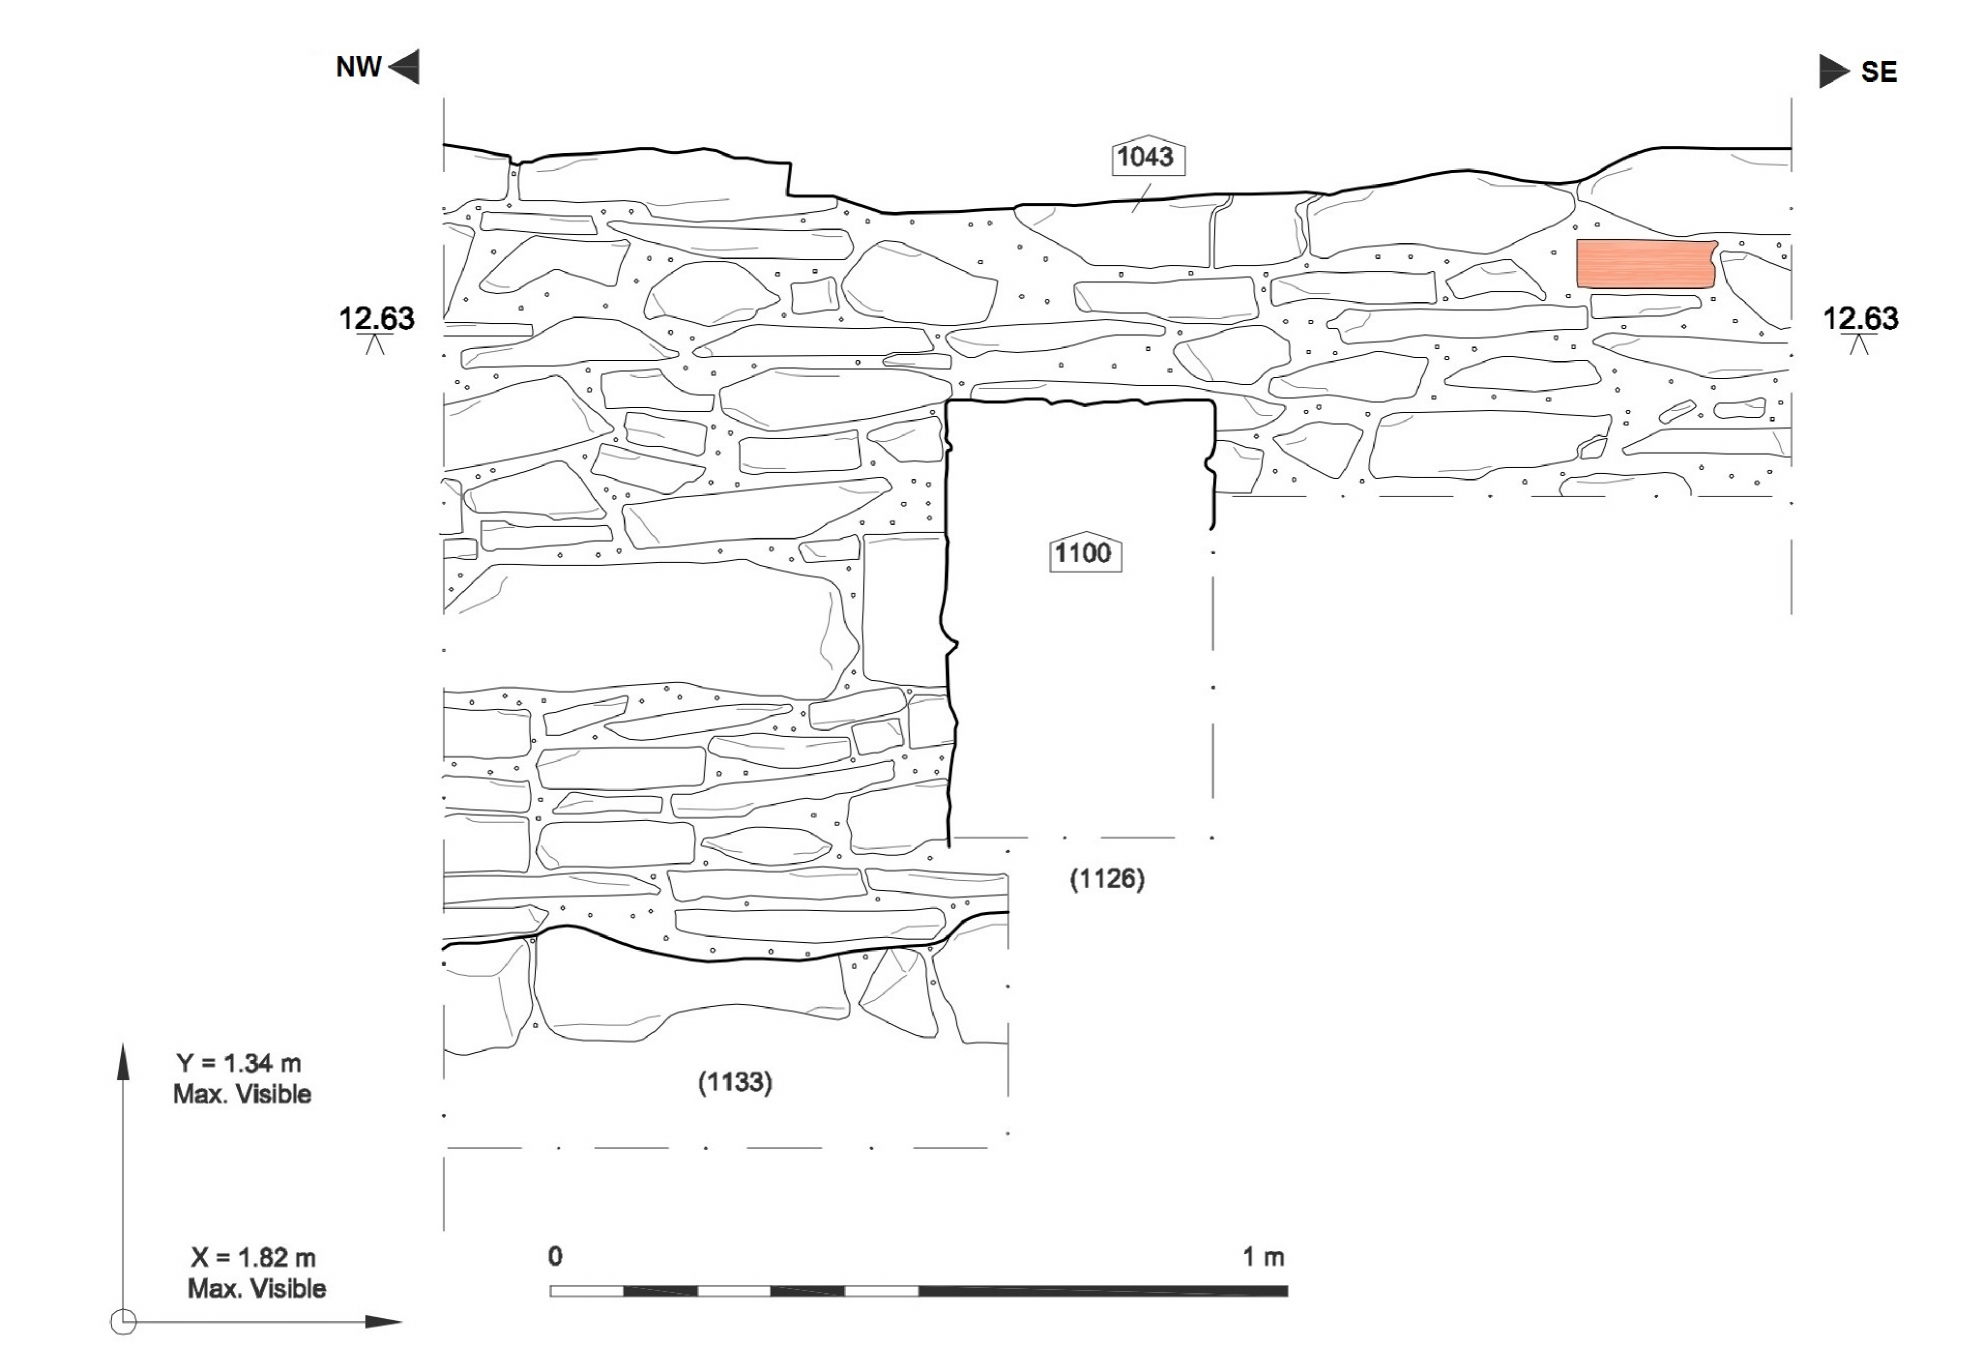
Figure 25: South-west facing elevation against main 'spine' wall (1043), Area B
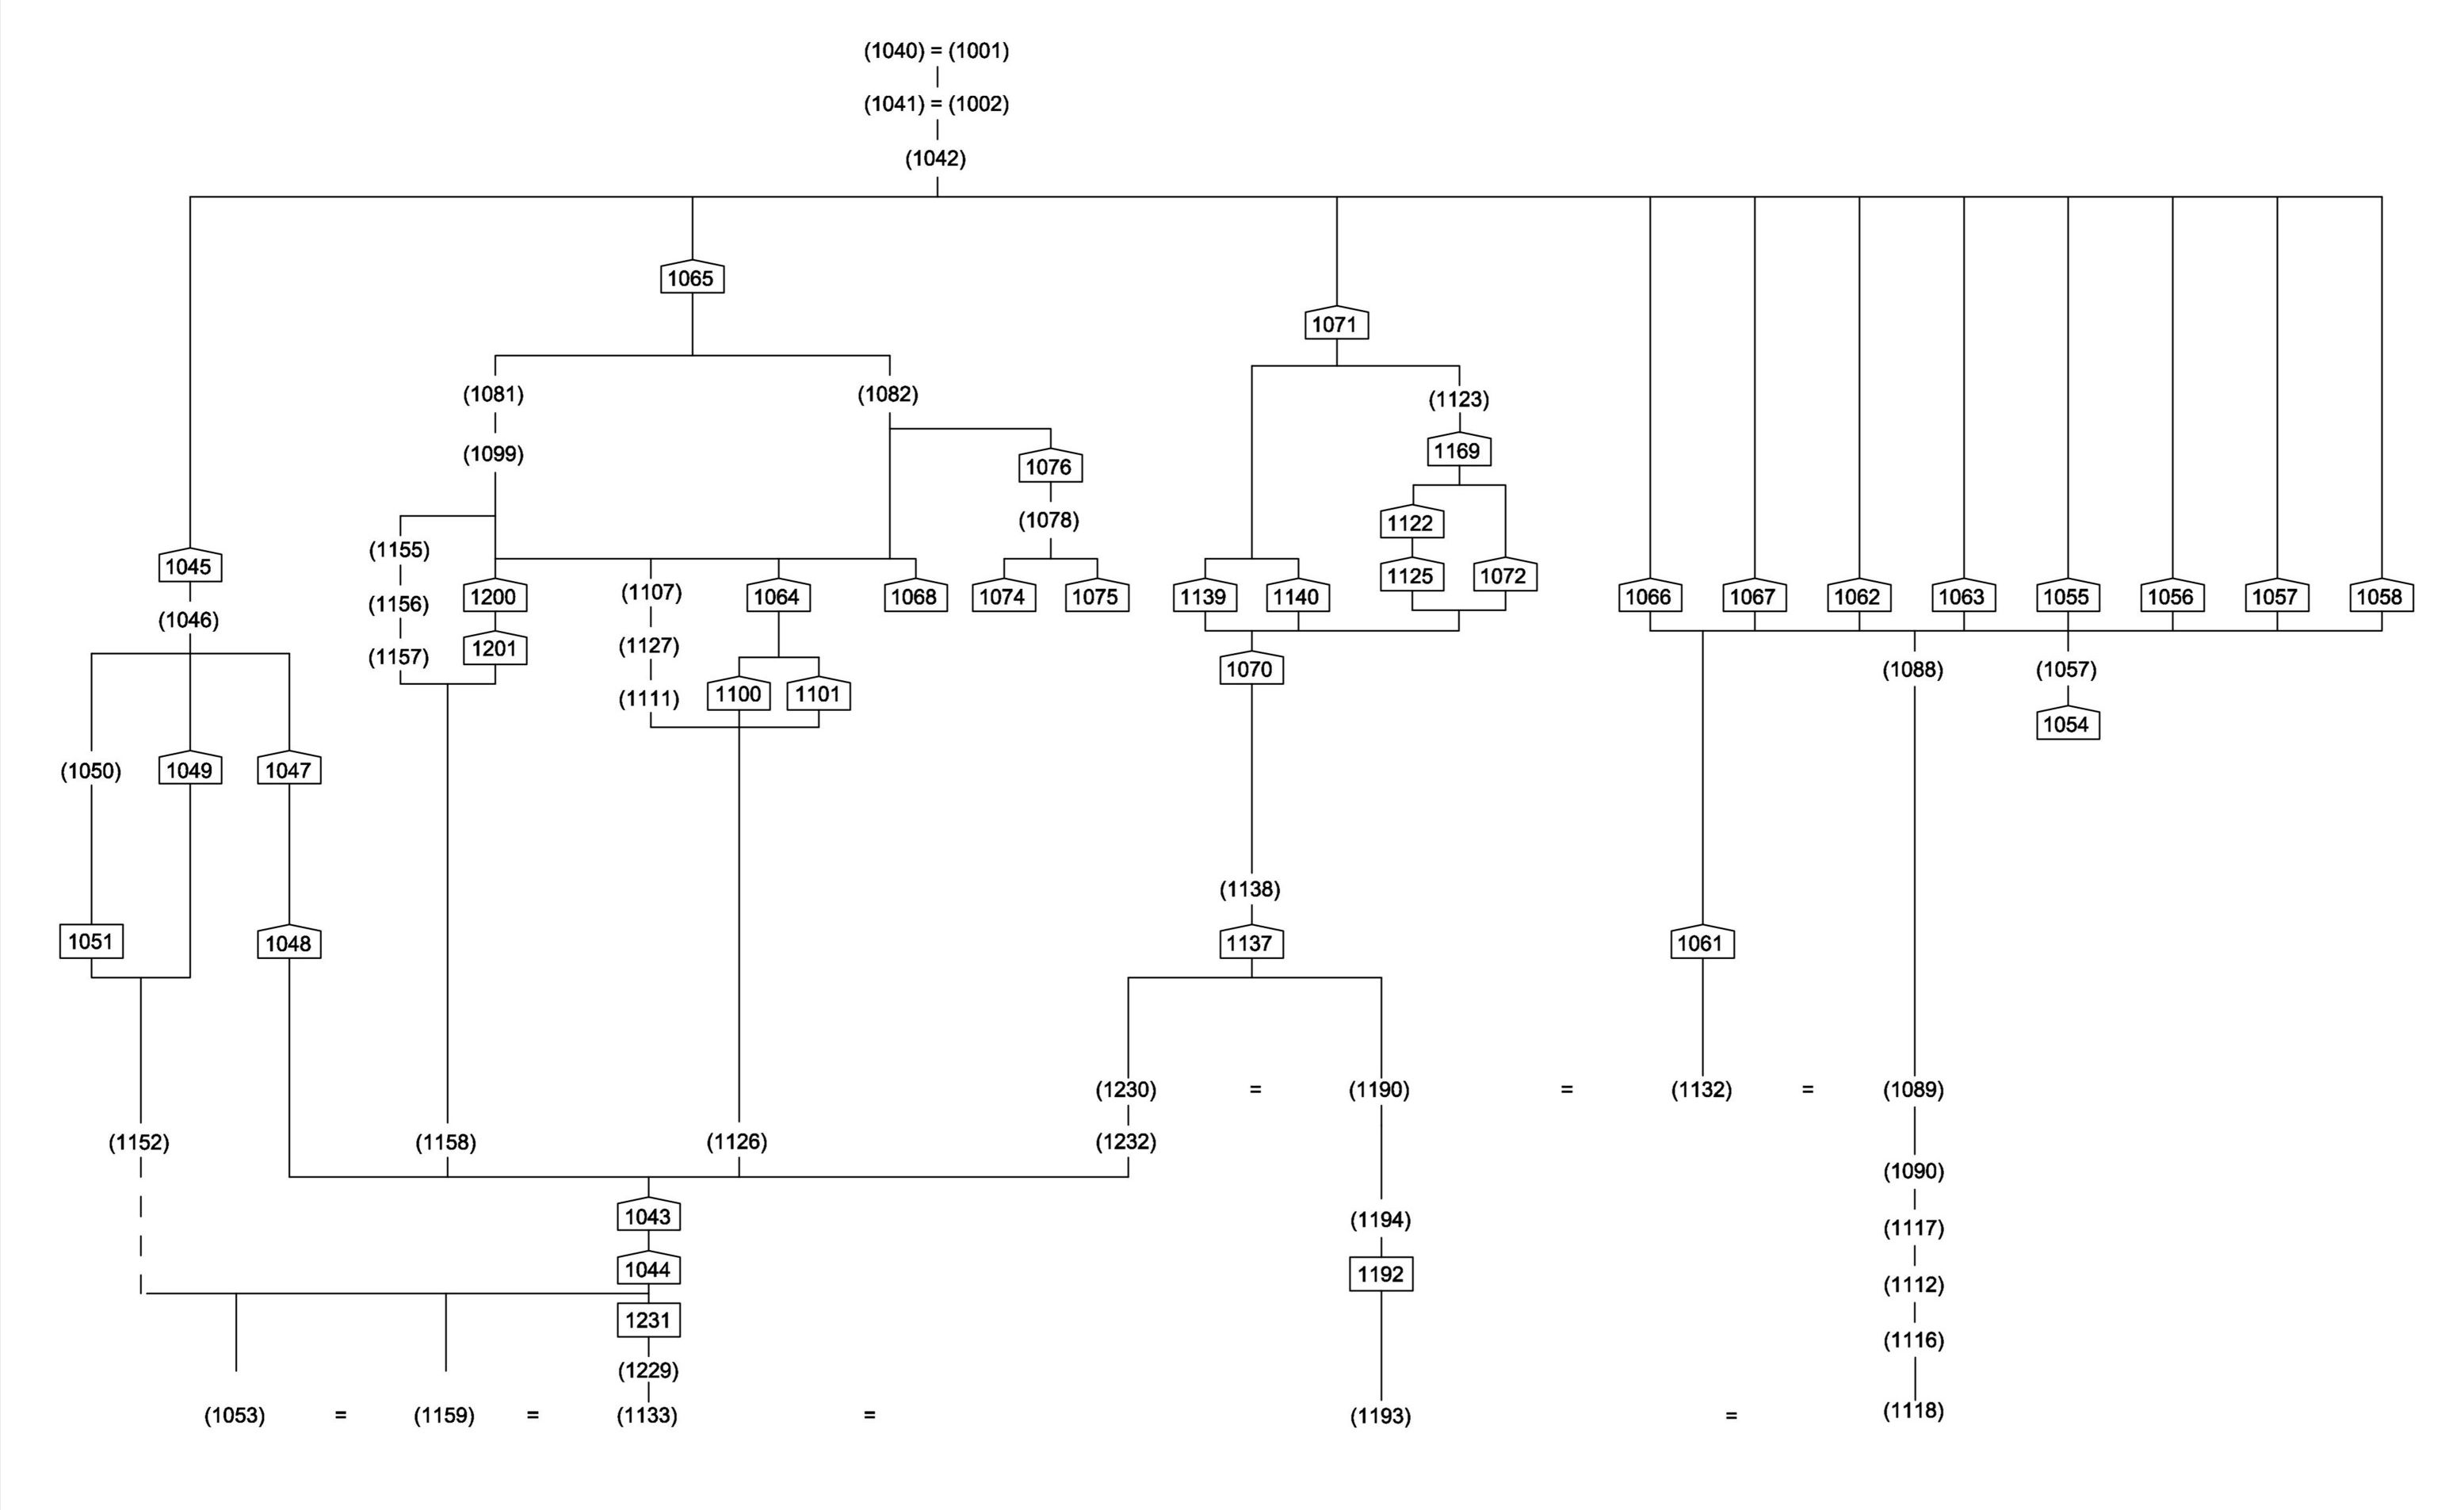
Figure 26: Site matrix, Area B
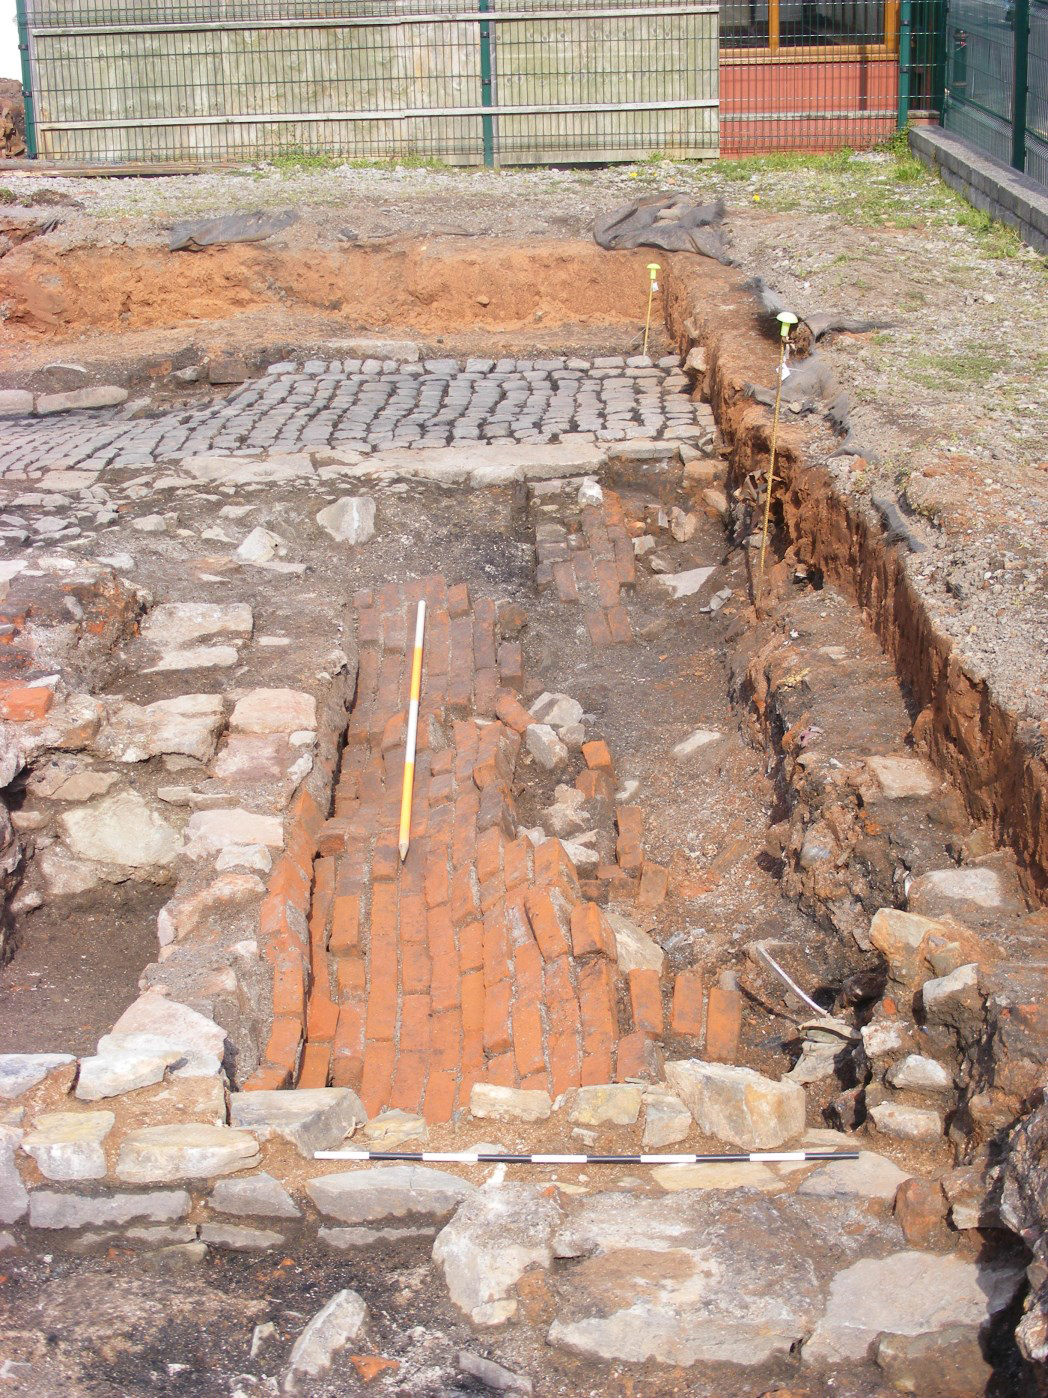
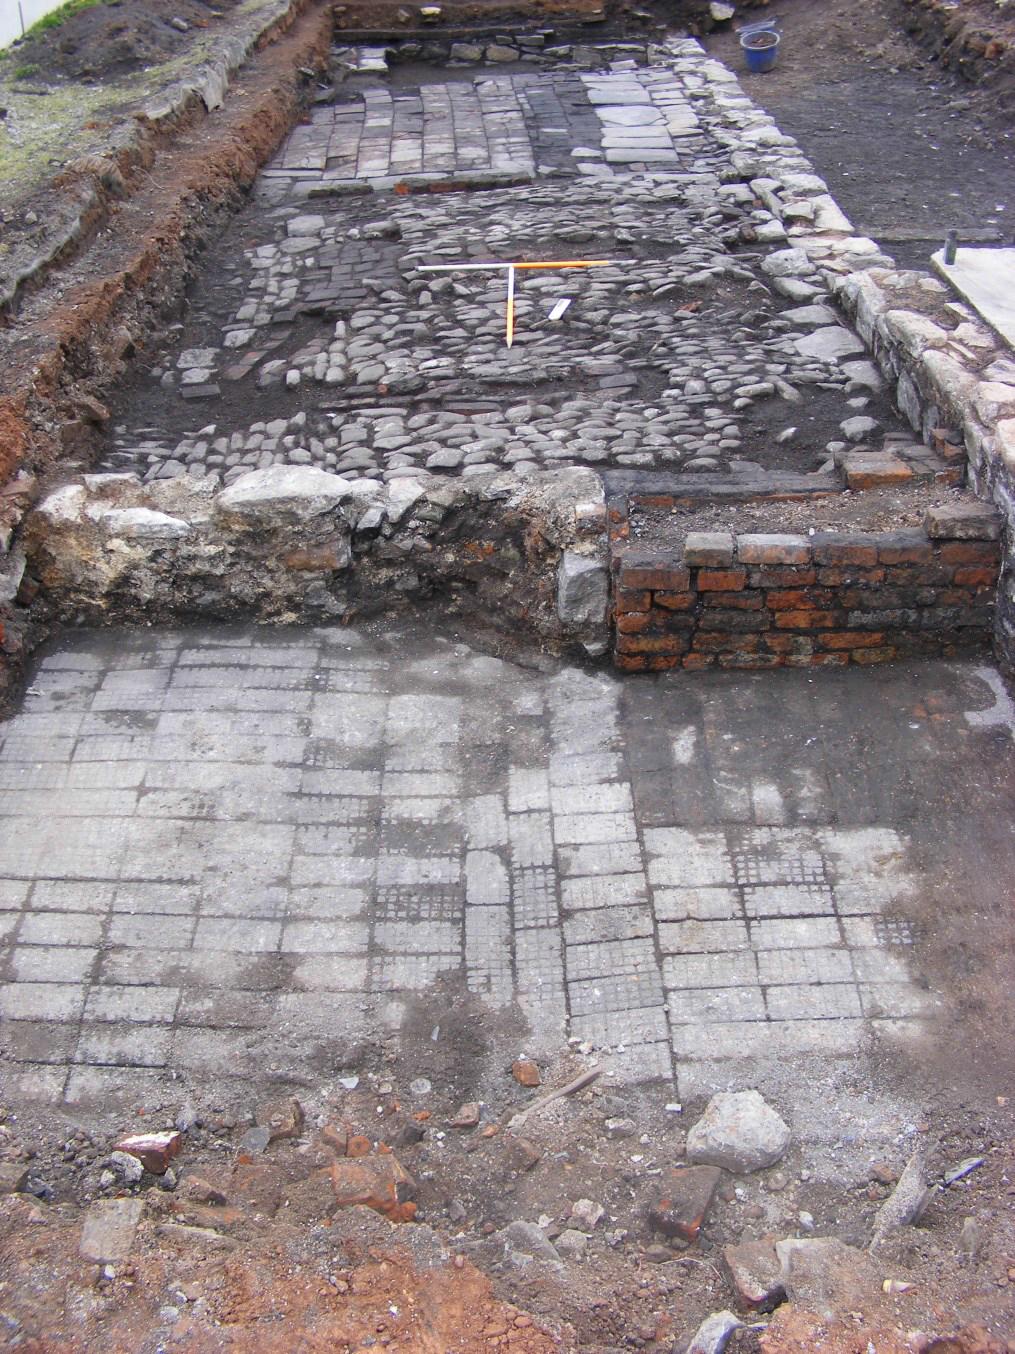
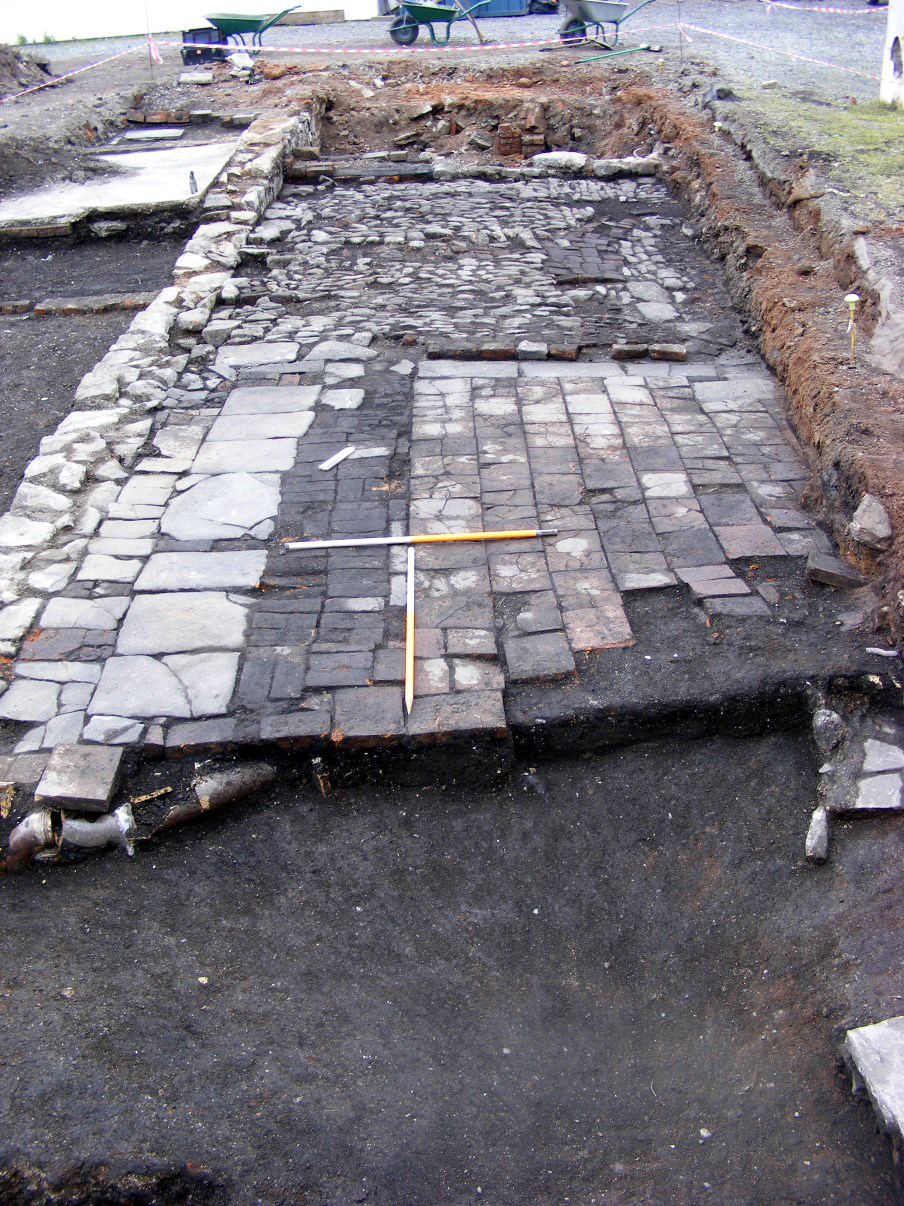
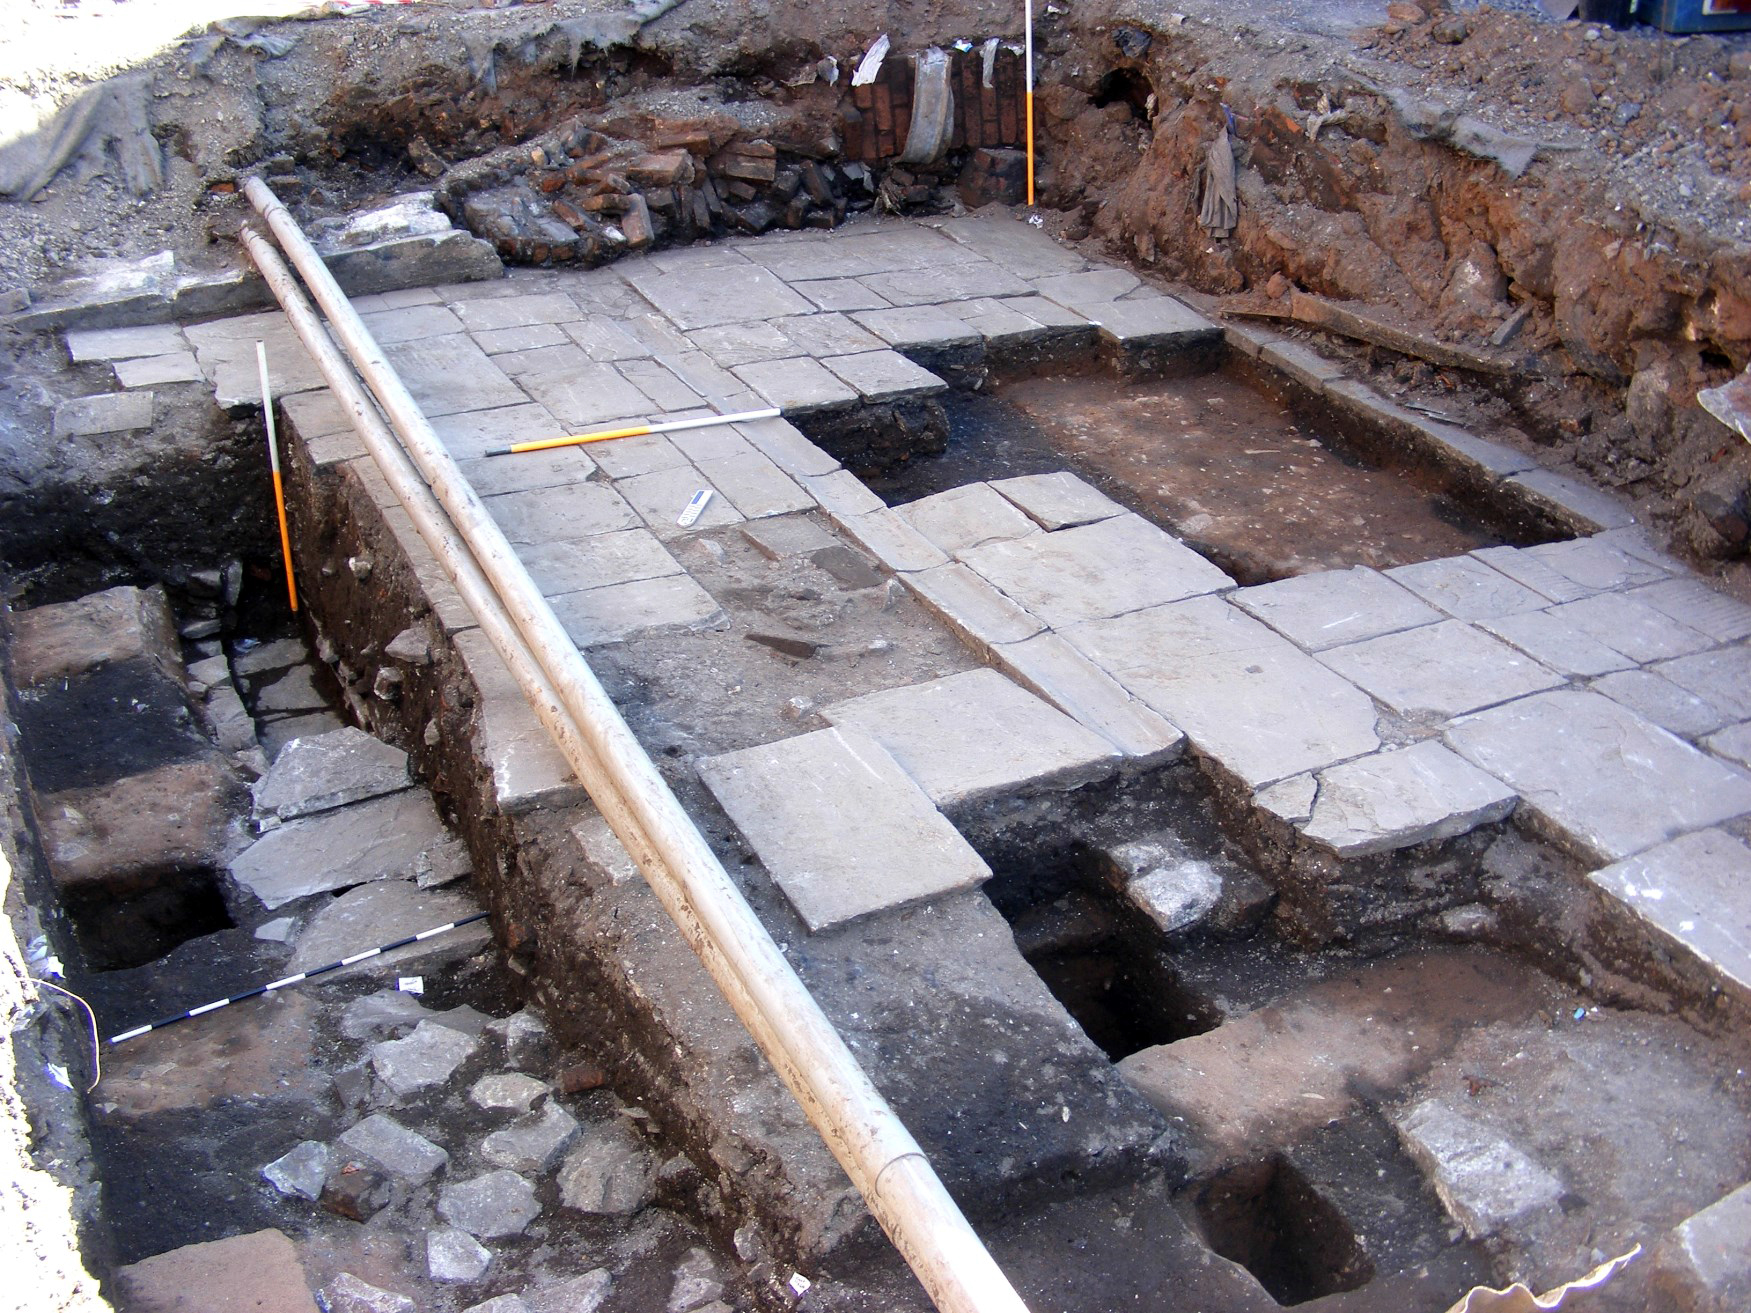
Figure 27: General view of Area B, nearing full excavation. Brick floor (1072) in foreground. The scales rest on a cobbled surface (1061) and associated brick drains. Other flagstone and brick surfaces in background. Together these features probably represent surfaces related to Swan Court. Note especially main 'spine' wall (1043) in top right of frame. View to south-east. Scales: 2×1m
Figure 28: General view of Area B, showing surfaces associated with Swan Court. Main 'spine' wall (1043) runs down left-hand side of frame. View to north-west. Scales: 2×1m
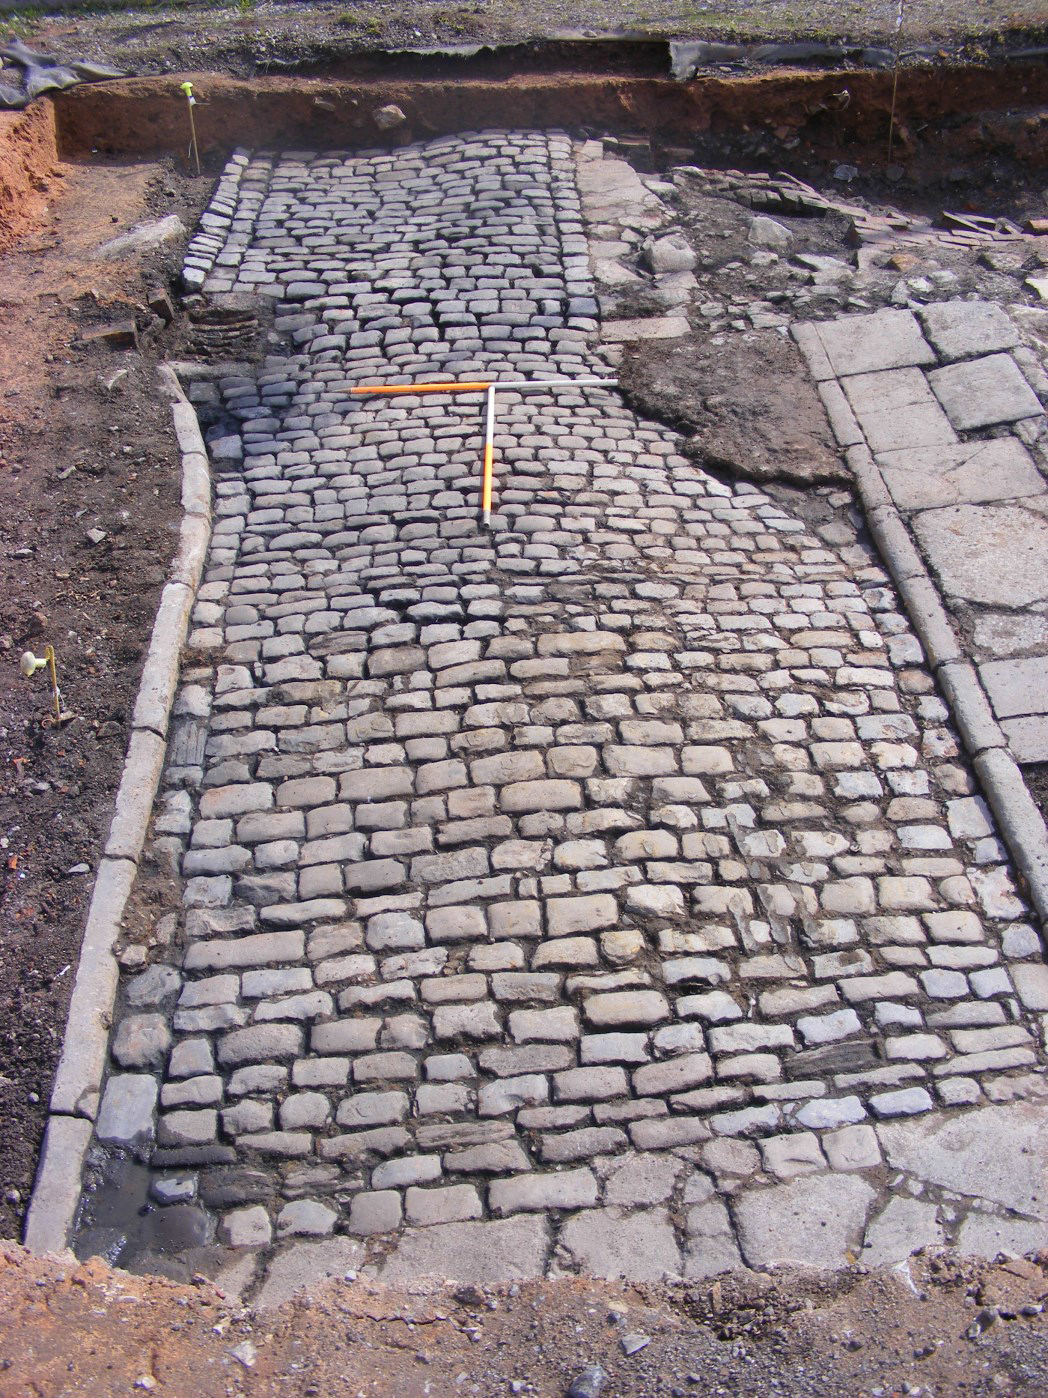
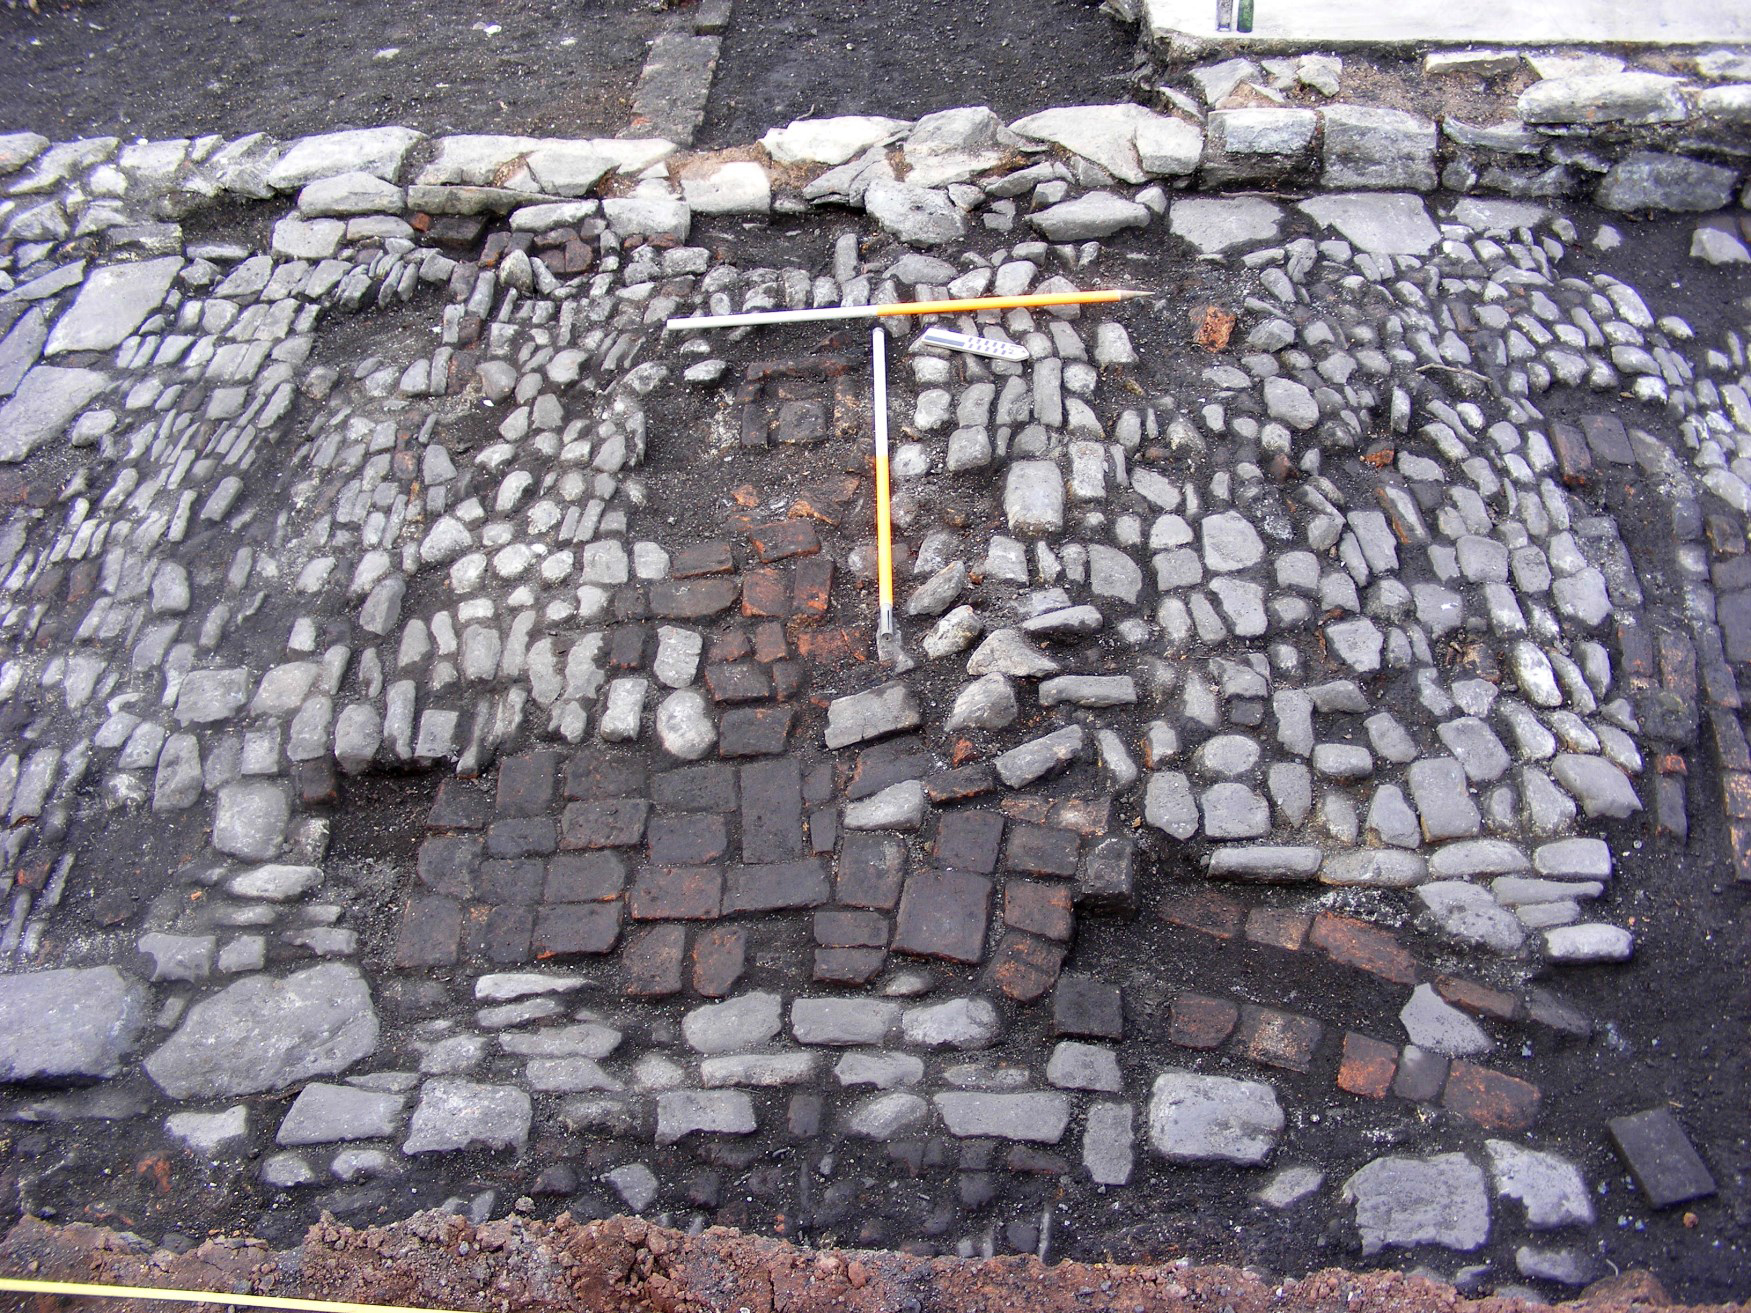
Figure 29: Detail of cobbled surface (1061), with brick drains (1067) in foreground, and (1066) on right-hand side of frame. Main 'spine' wall (1043) in background. View to south-west. Scales: 2×1m
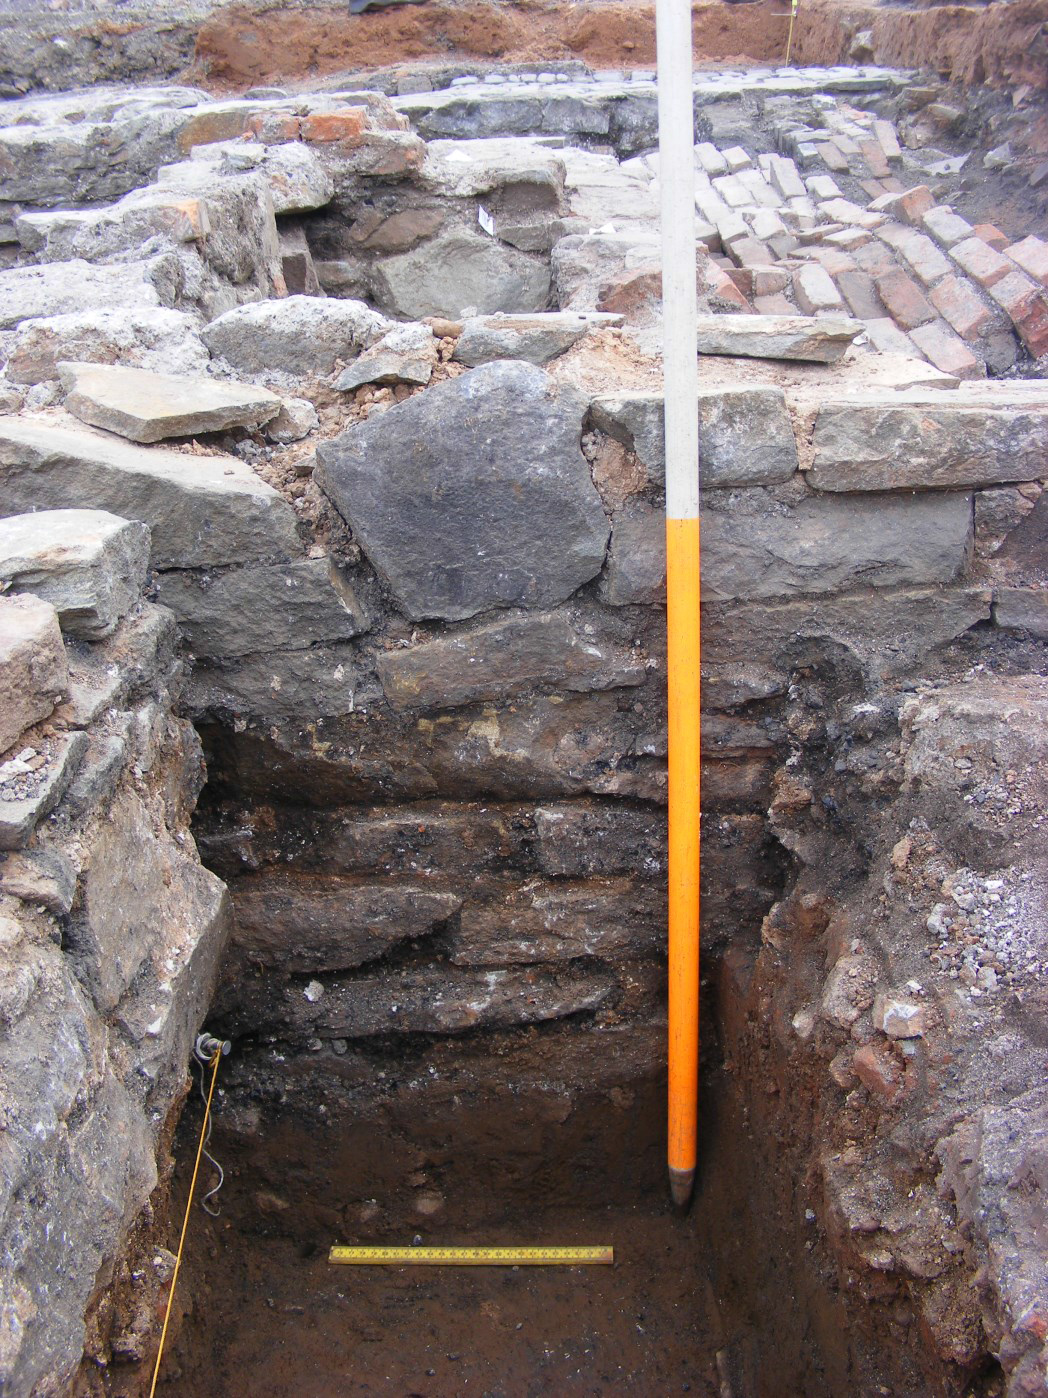
Figure 30: Section through deposits on south-west side of main 'spine' wall (1043). The wall, with its footing, is seen on the right-hand side of the frame. View to north-west. Scales: 2×1m. Compare with Figure 23
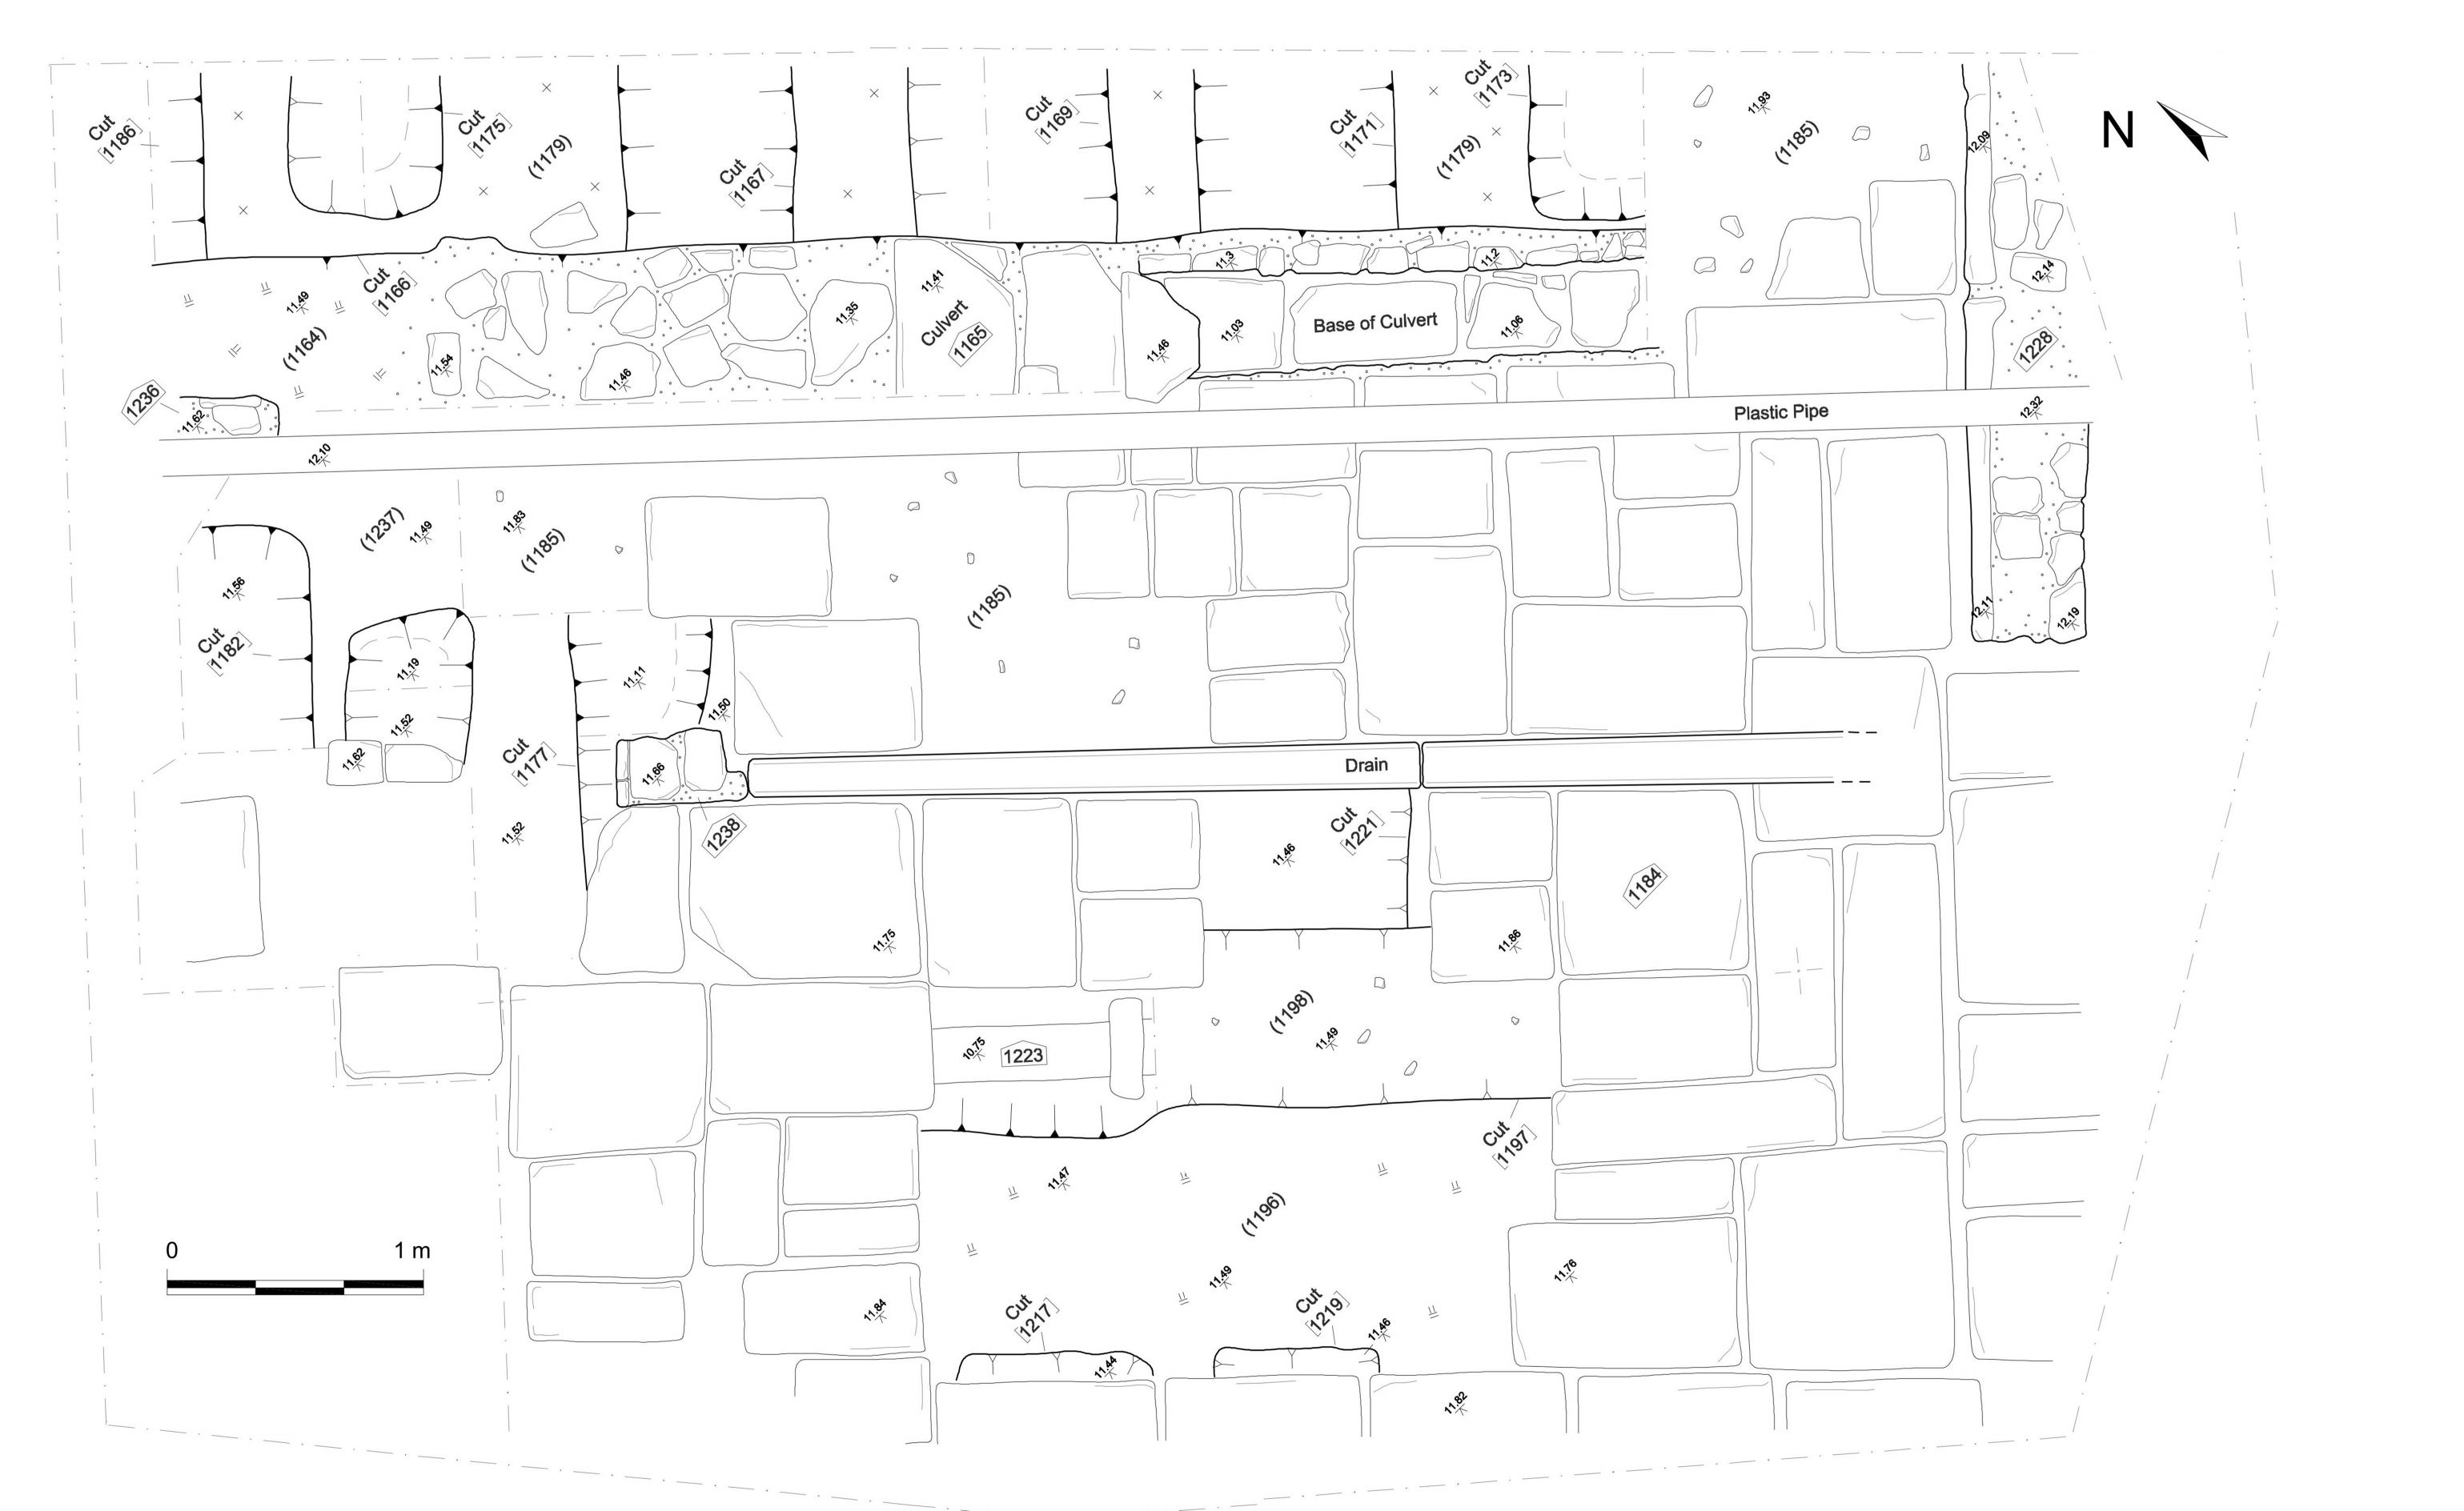
Figure 31: Detailed plan of excavation Area C
Figure 32: South-west facing section through antecedent linear cut features, Area C
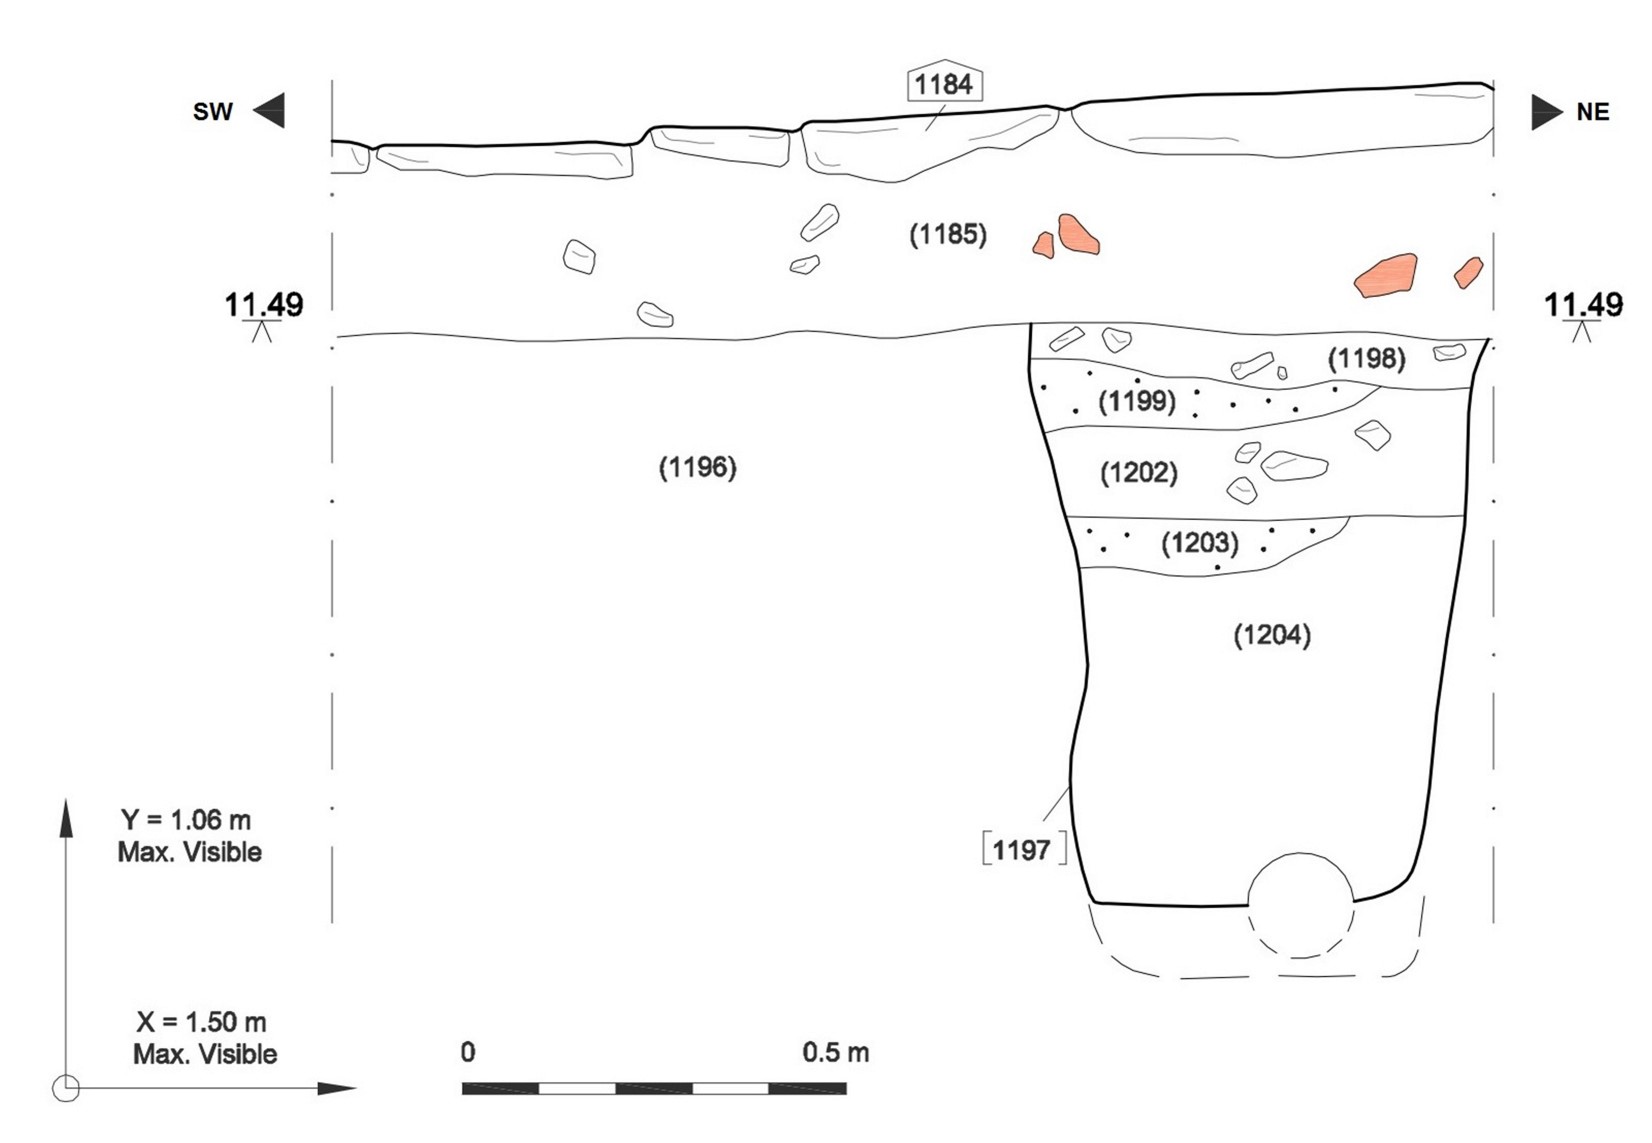
Figure 33: South-east facing section through cut for ceramic drain [1197], Area C
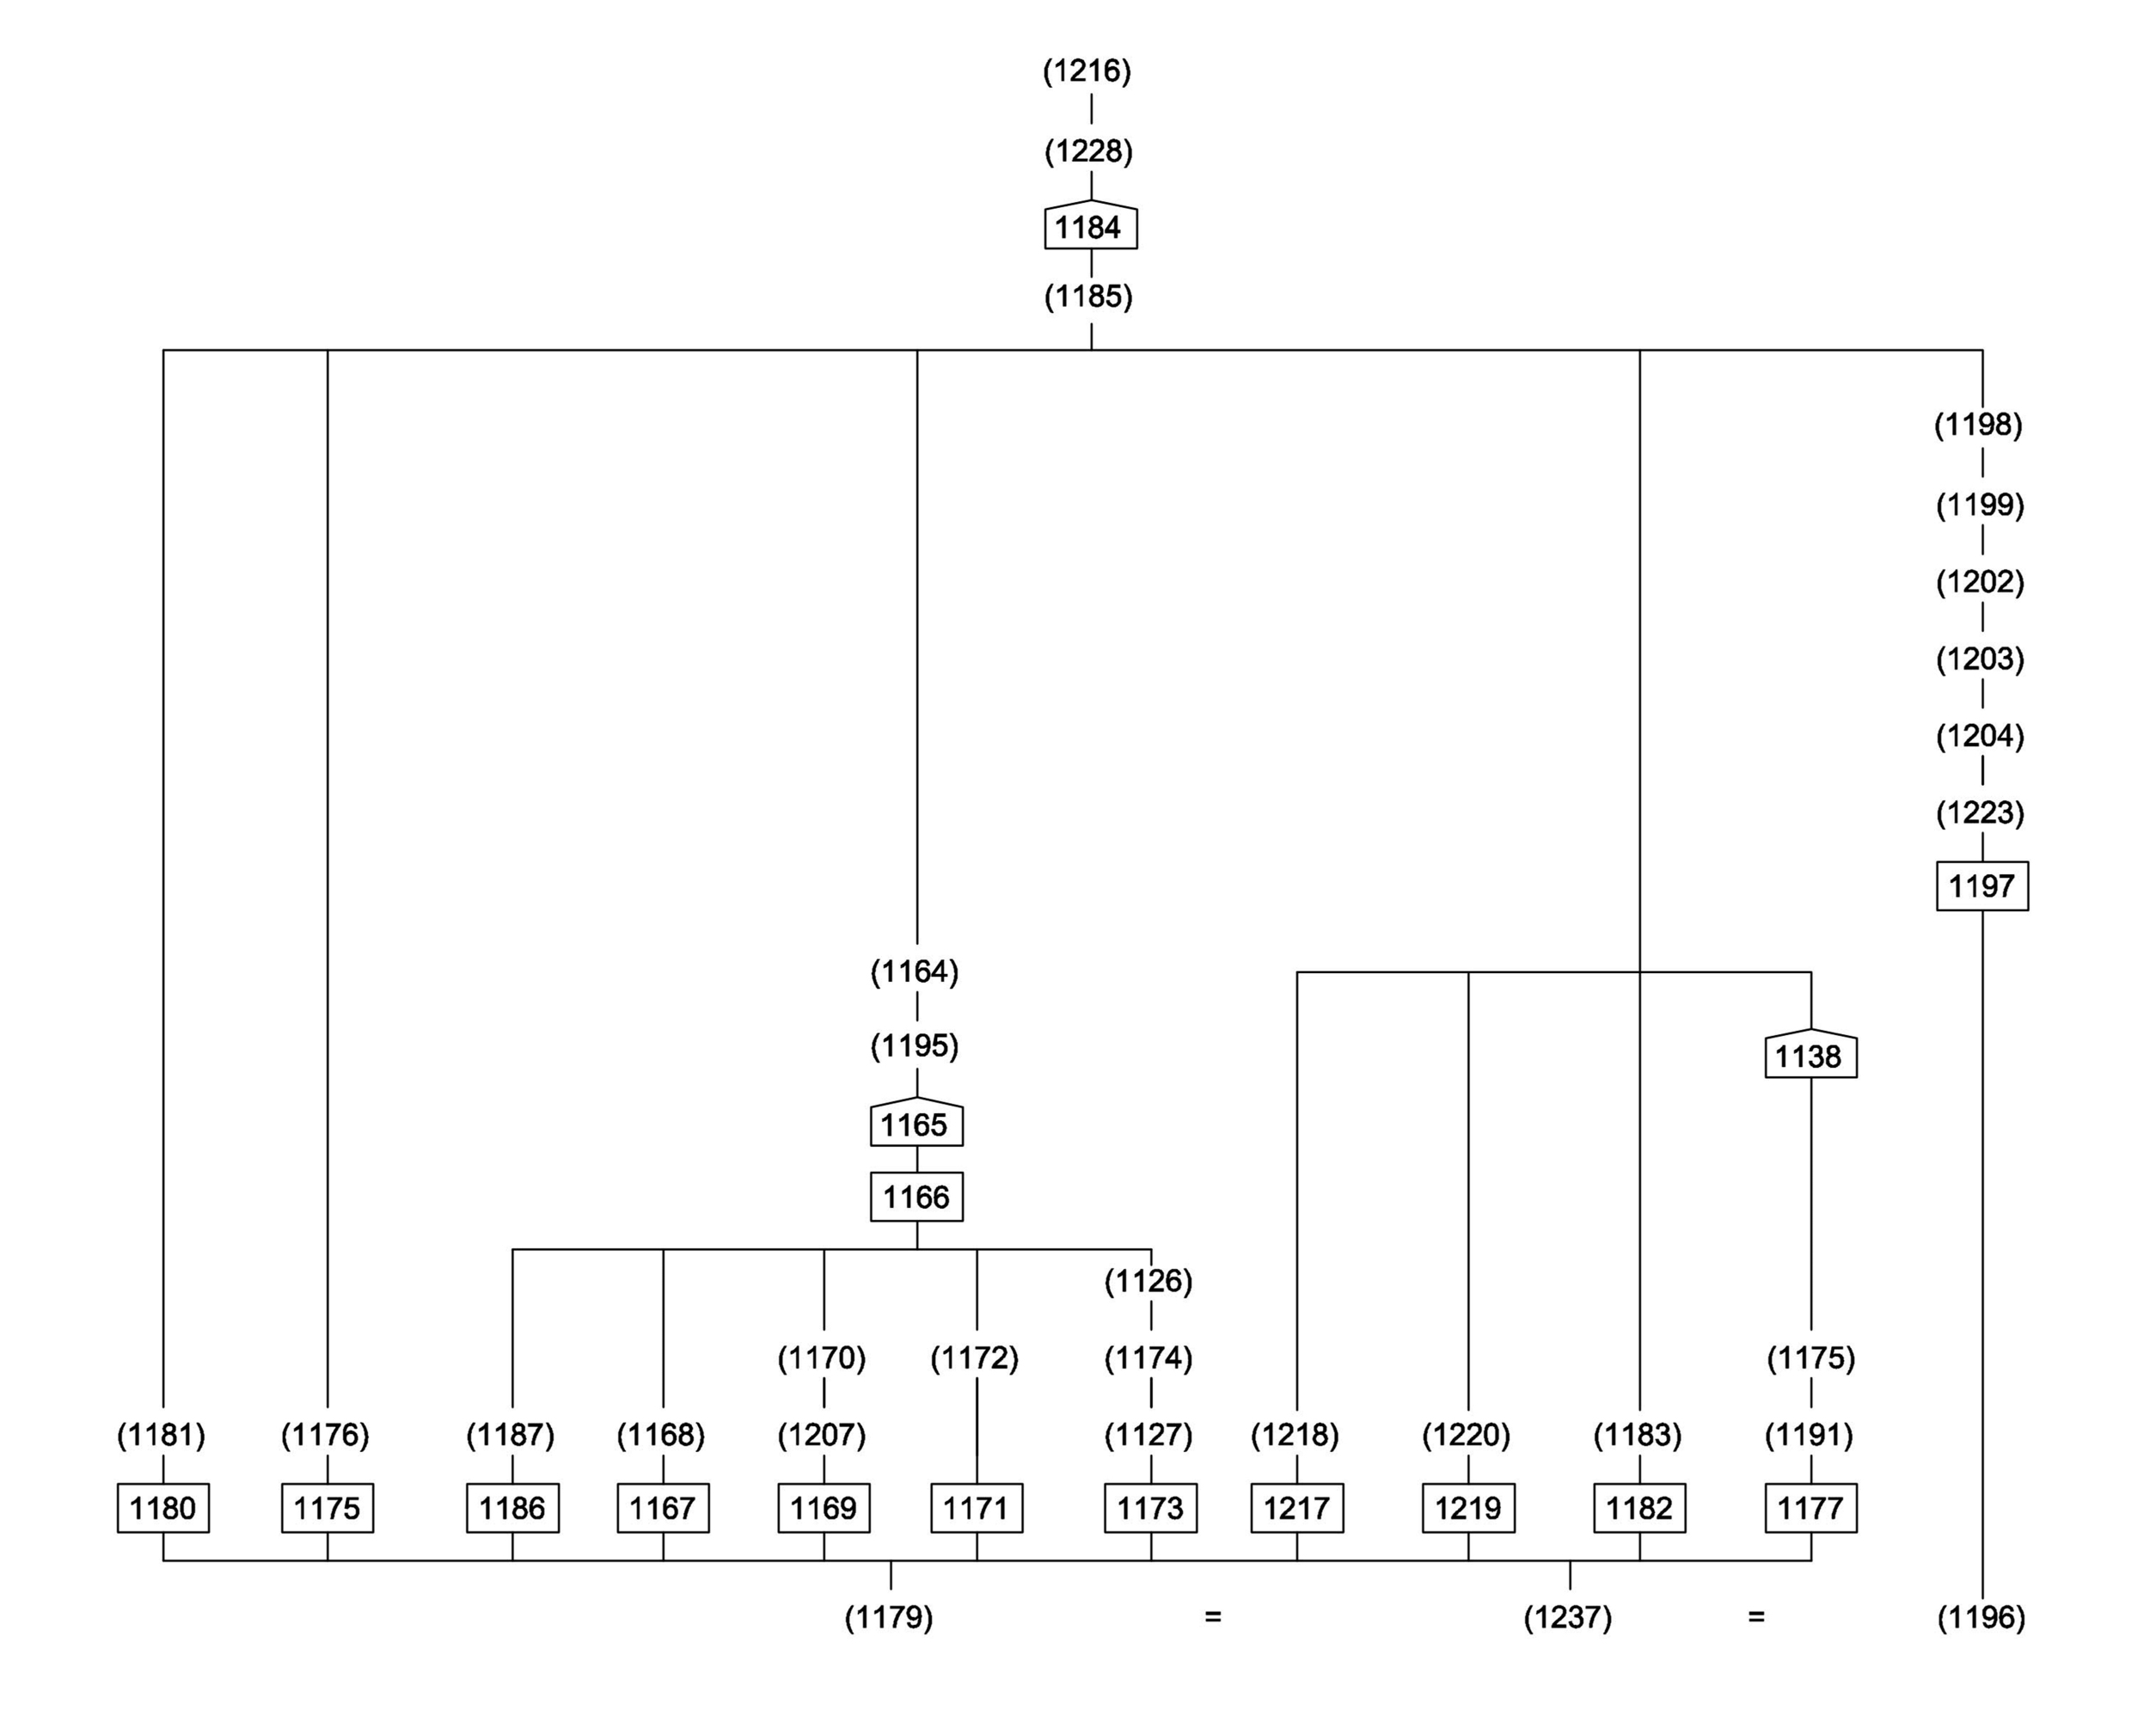
Figure 34: Site matrix, Area C
Figure 35: General view of Area C, partially excavated, showing flagstone surface (1184), overlain by modern dump and levelling deposits. View to north-west
Figure 36: General view of Area C fully excavated. To the left-hand side of the frame, an intervention through flagstone surface (1184) revealed a series of antecedent linear cuts; towards upper right, a cut for a late 19th or 20th century ceramic drain was sealed by the flags (see Figure 37). View to south. Scales: 4×1m
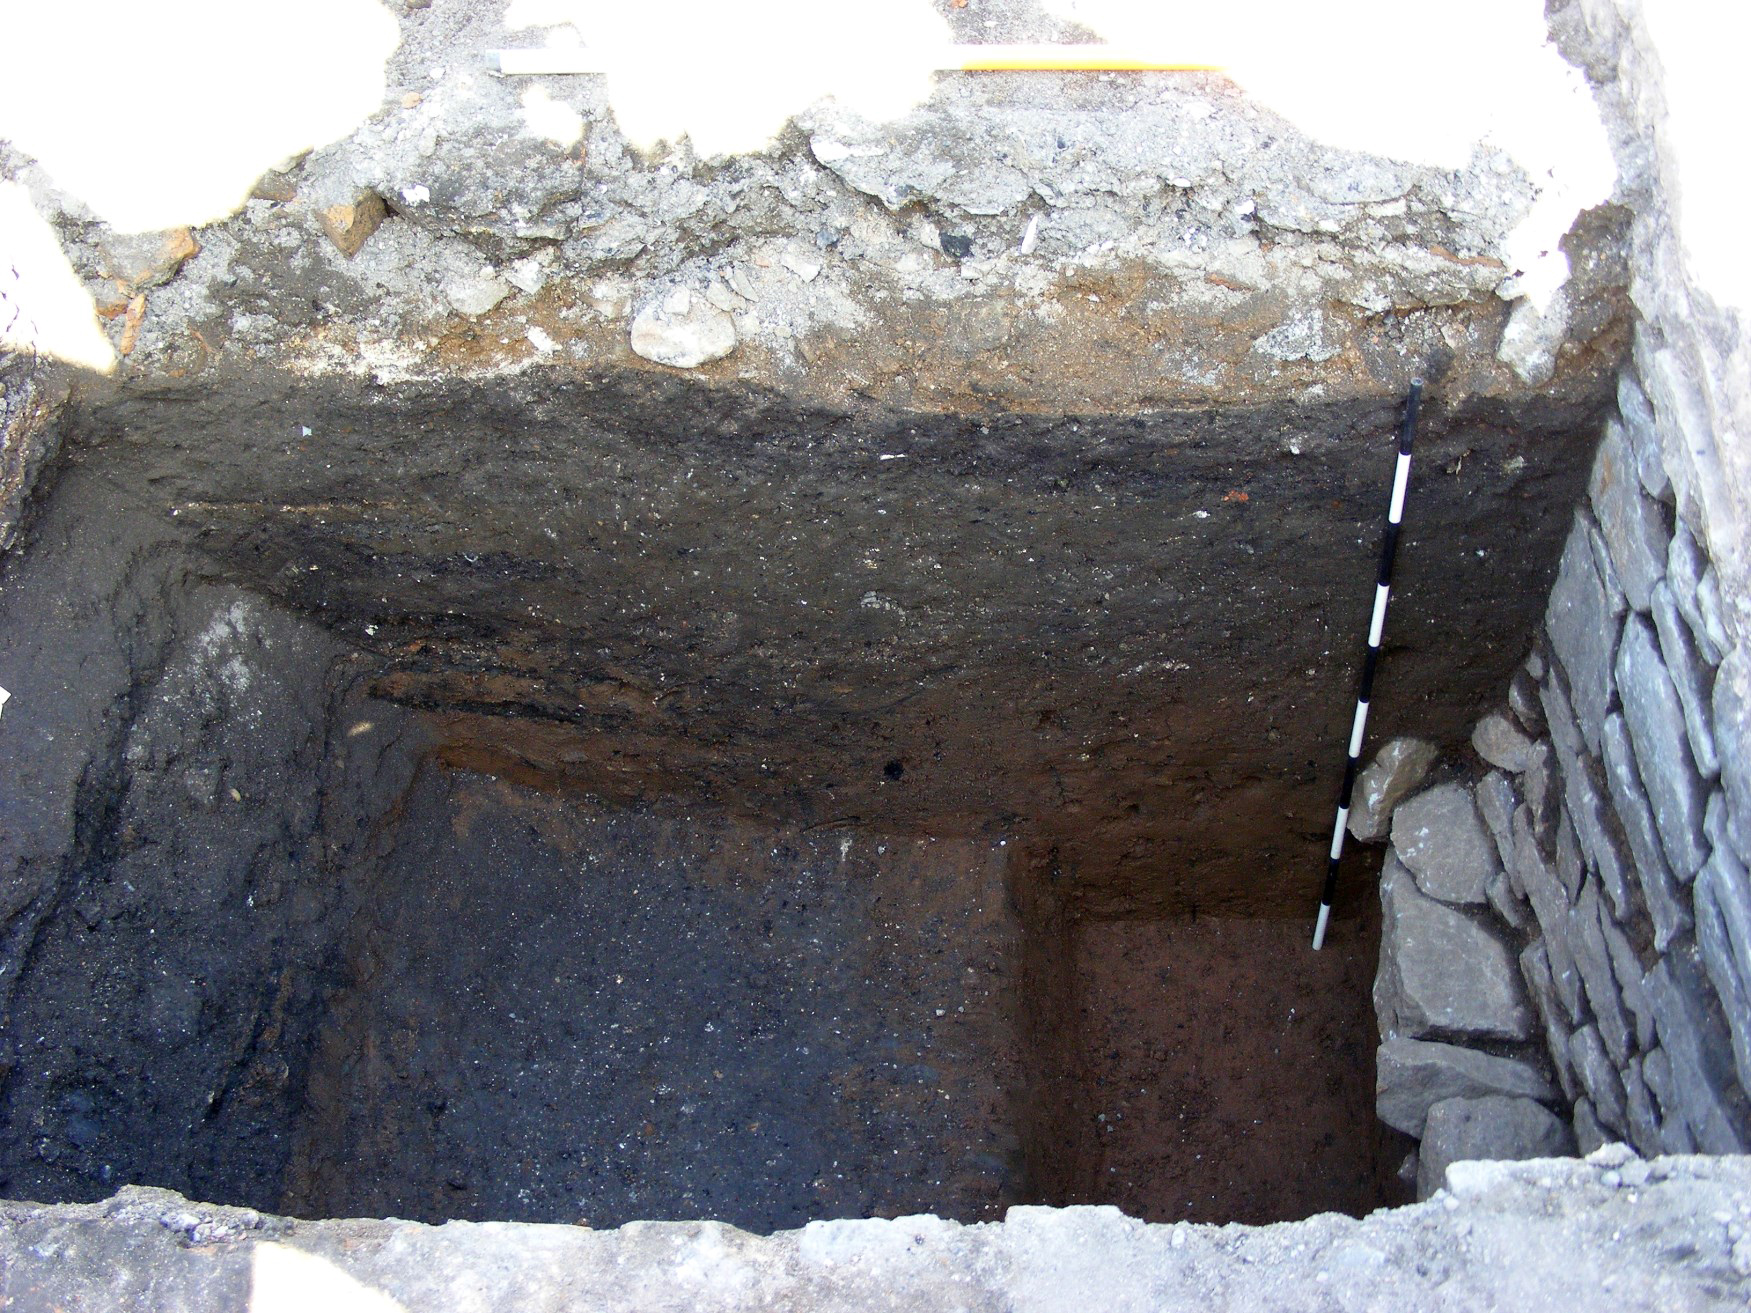
Figure 37: Section showing cut [1197] for modern ceramic drain, and associated fills and deposits, sealed by flagstone surface (1184). See also Figure 33. View to north-west. Scales: 2×1m
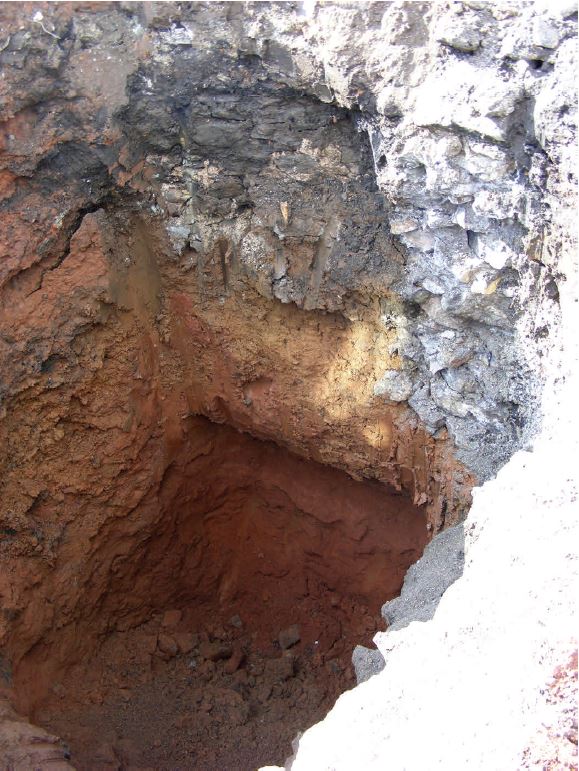
Figure 38: North-east facing section after removal of Well 118, showing Wall 119 (to right of frame), Wall 120 (in centre, top), the natural substrate (Redcliffe Sandstone, Context 124) in base, overlain by alluvial silt (Context 123) and various redeposited layers
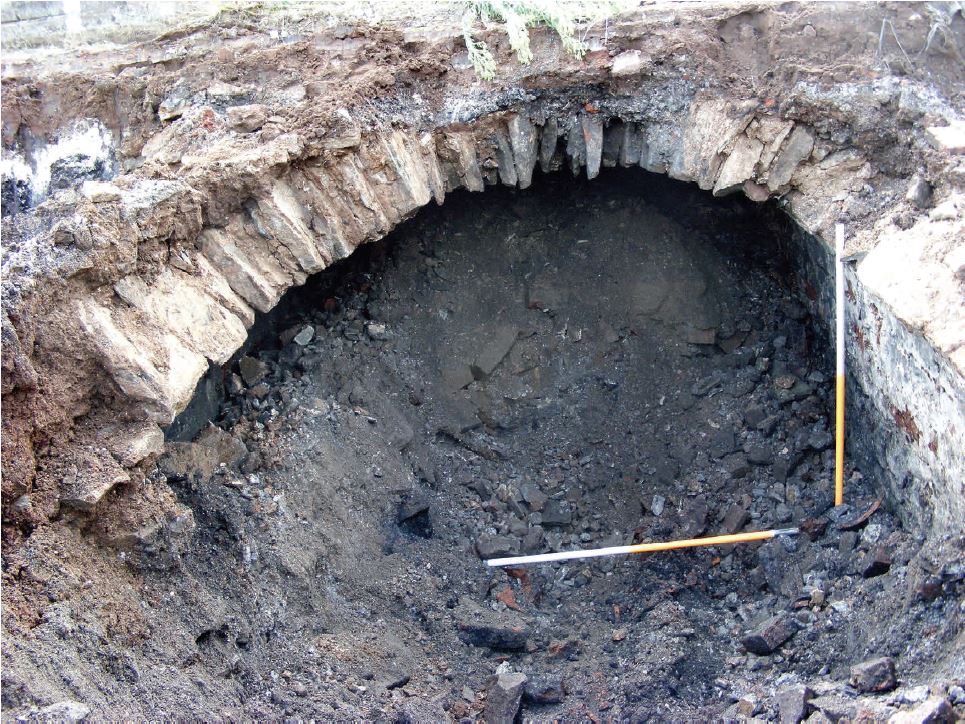
Figure 39: South-east facing view of sandstone cellar vaulting (103) fronting Little Anne Street, with Wall 106 to right of frame. Scales: 2×1m
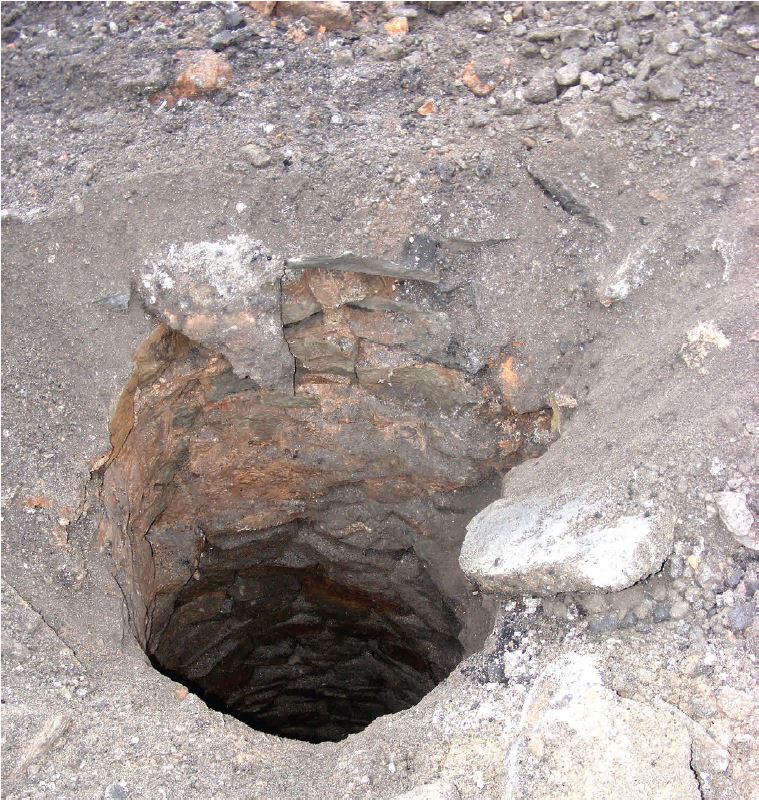
Figure 40: Well 171, showing Pennant Sandstone lining
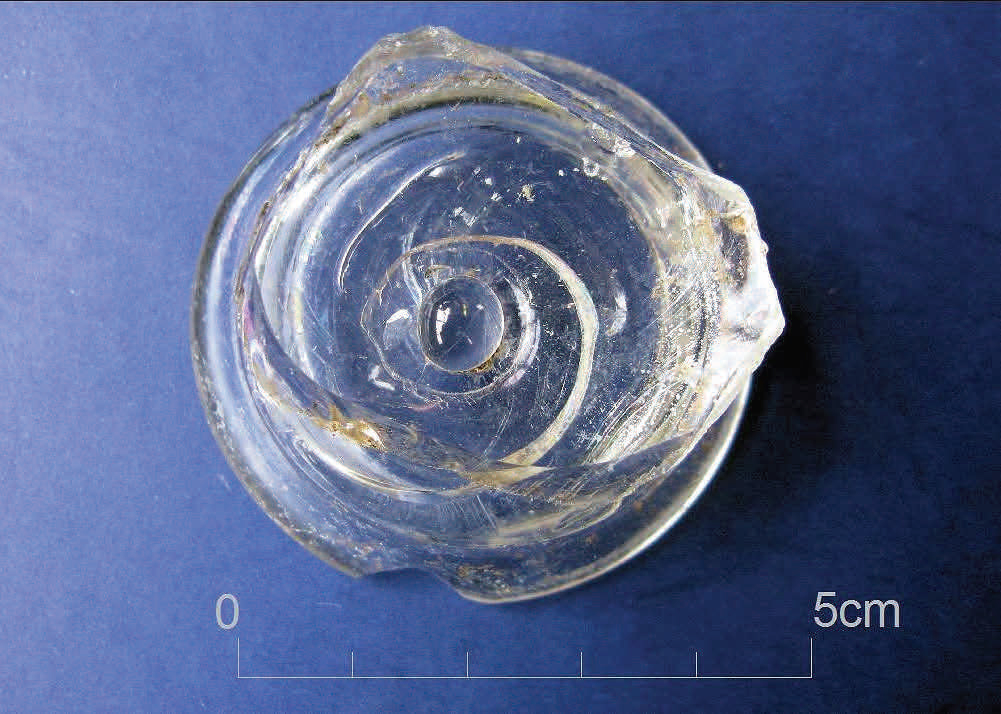
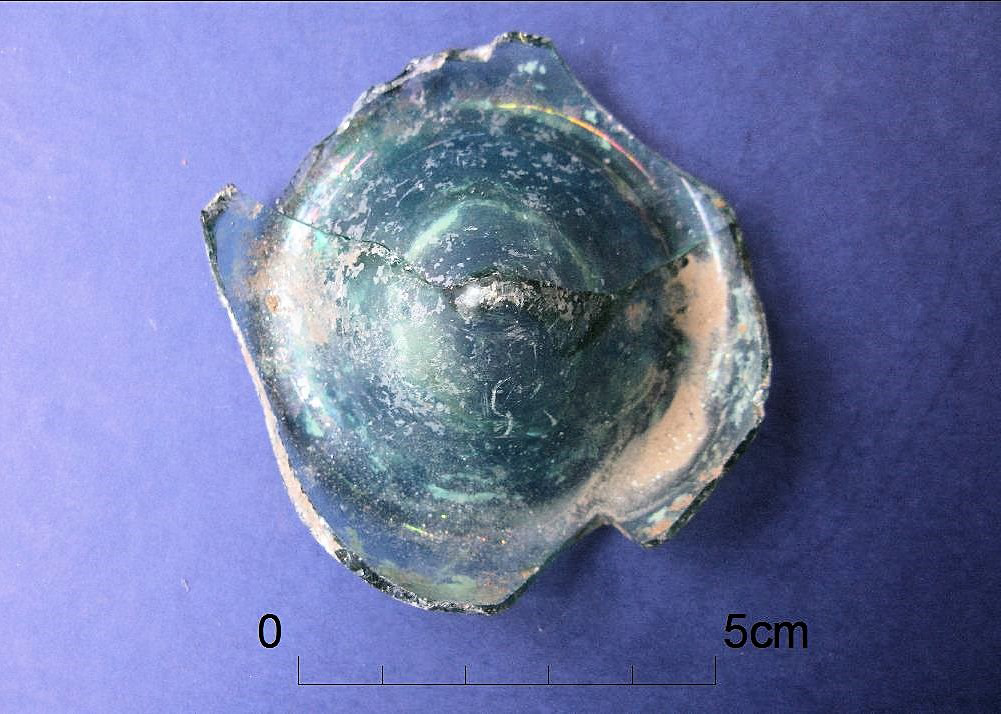
Figure 41: Base shard of probable posset cup of 18th century date (context 1181)
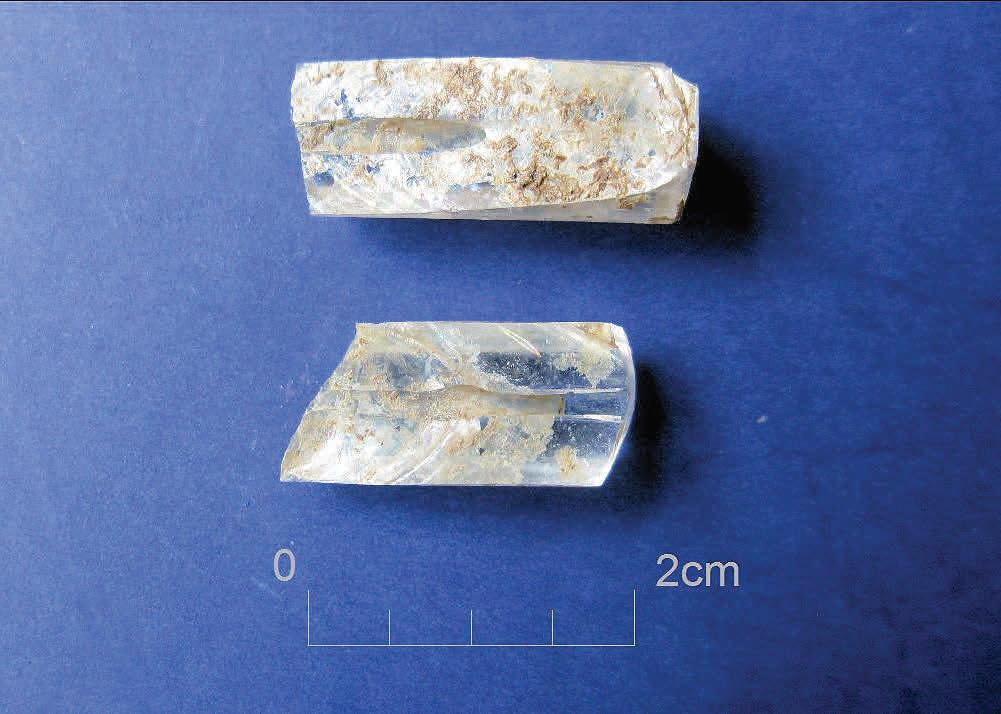
Figure 42: Small Find 33: glass tube in two fragments (possible thermometer), 18th century date (context 1094)
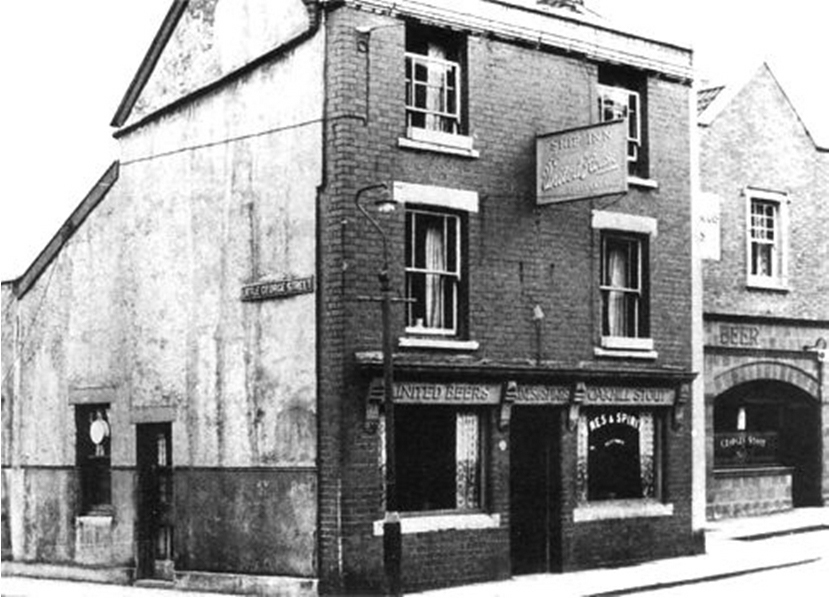
Figure 43: The Ship Inn. No known copyright restrictions (Bristol's Lost Pubs)
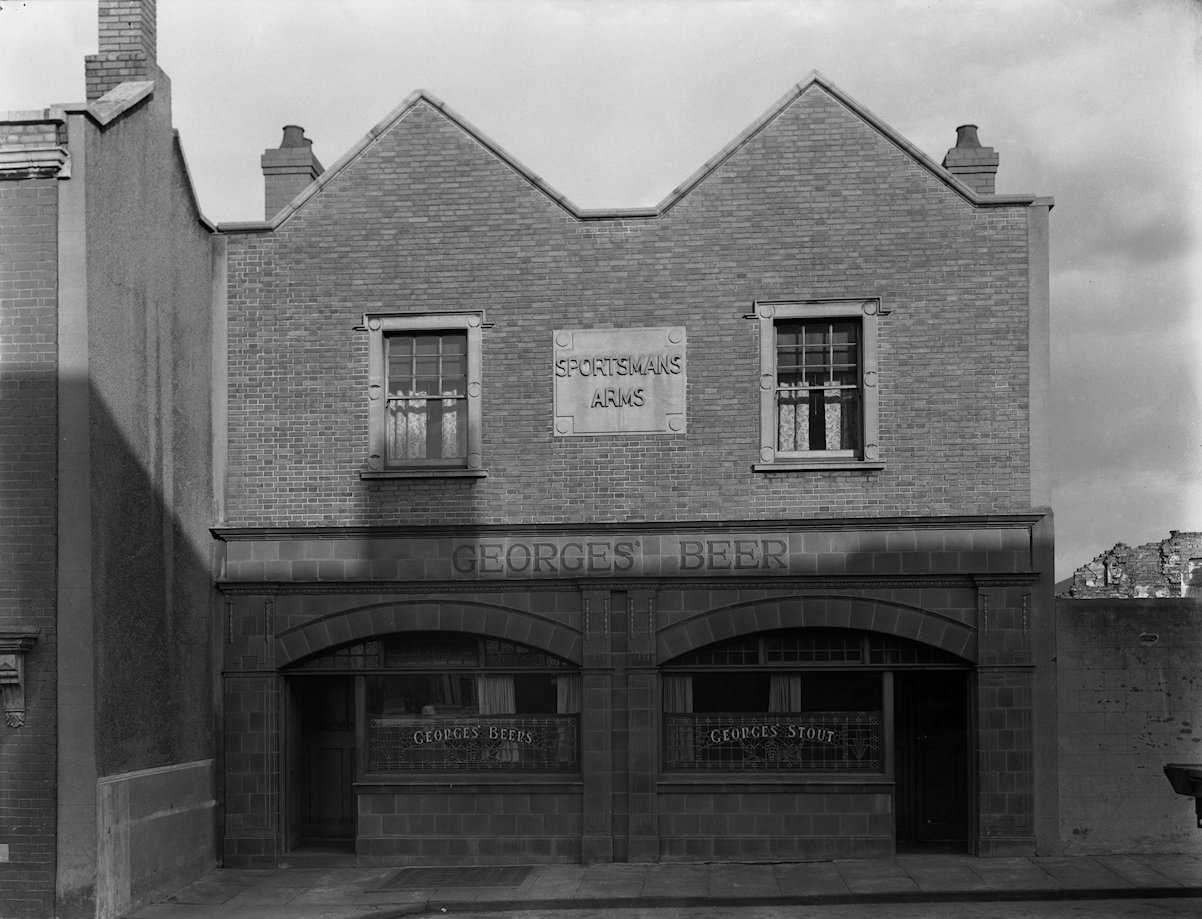
Figure 44: The Sportsman's Arms, built between 1871 and 1881. Image credit: Bristol Museum HC3247. Taken from KnowYourPlace (also see Bristol's Lost Pubs)
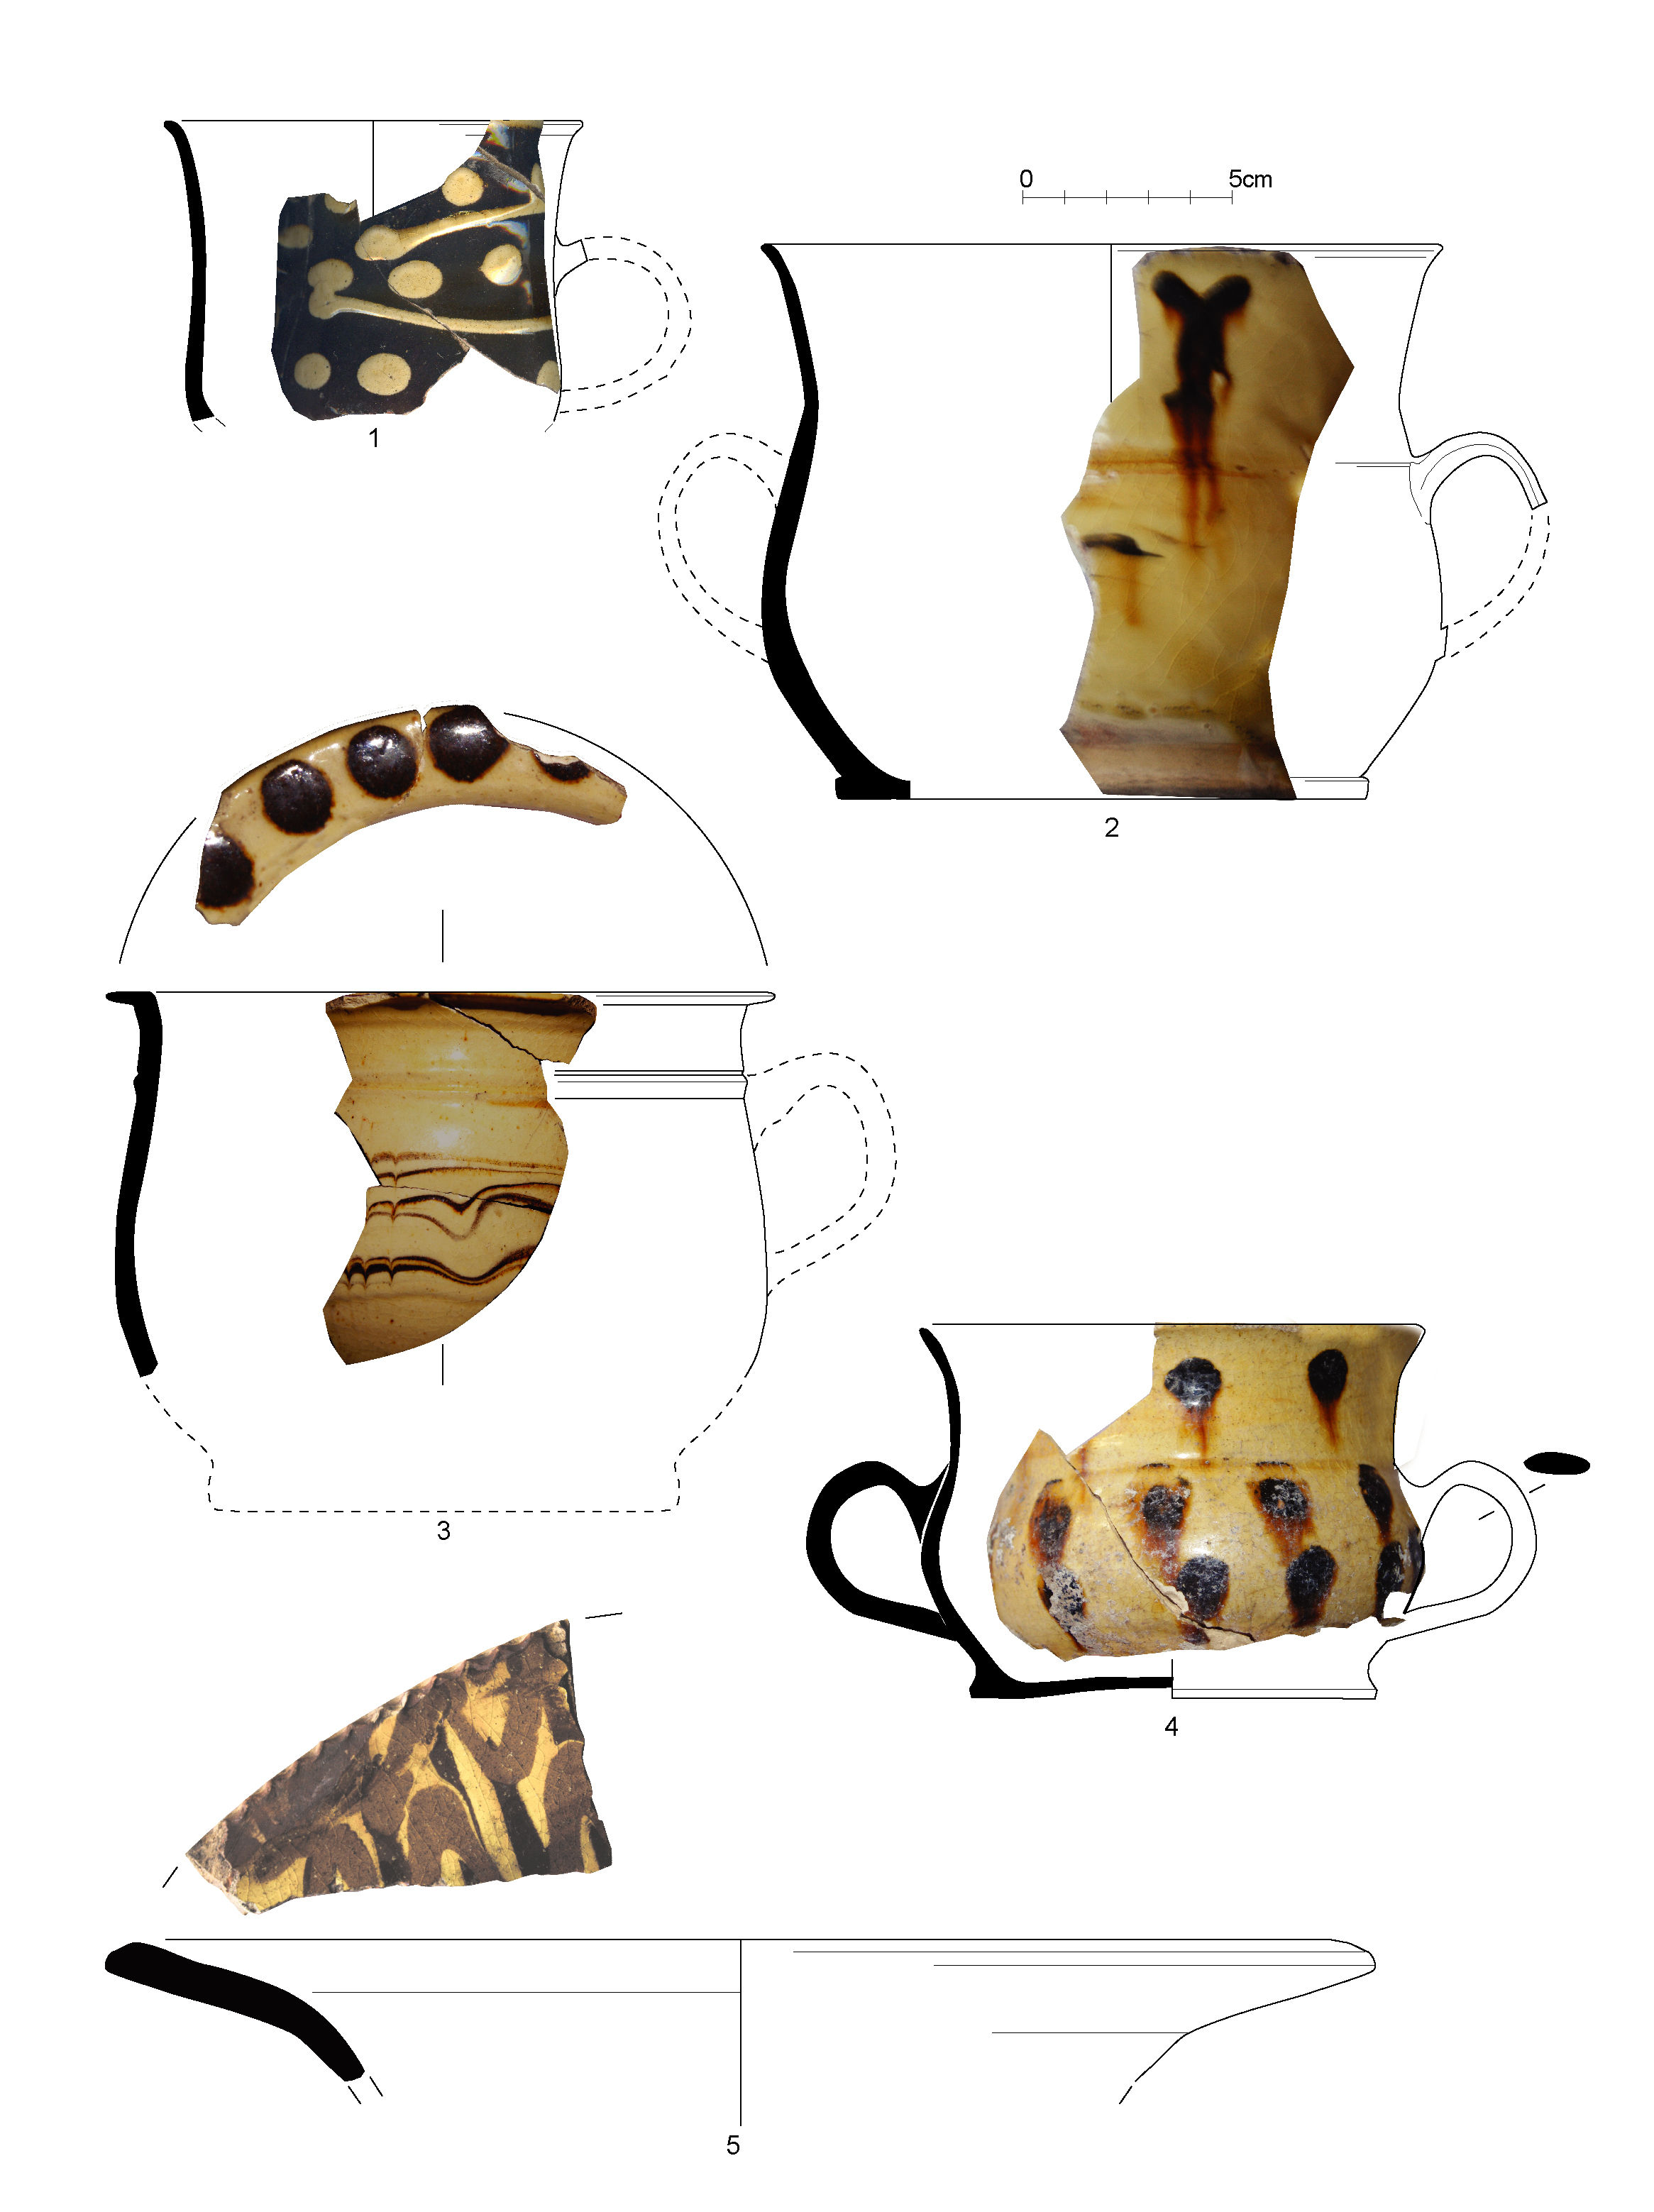
Figure 45: Yellow slipwares (BPT100)
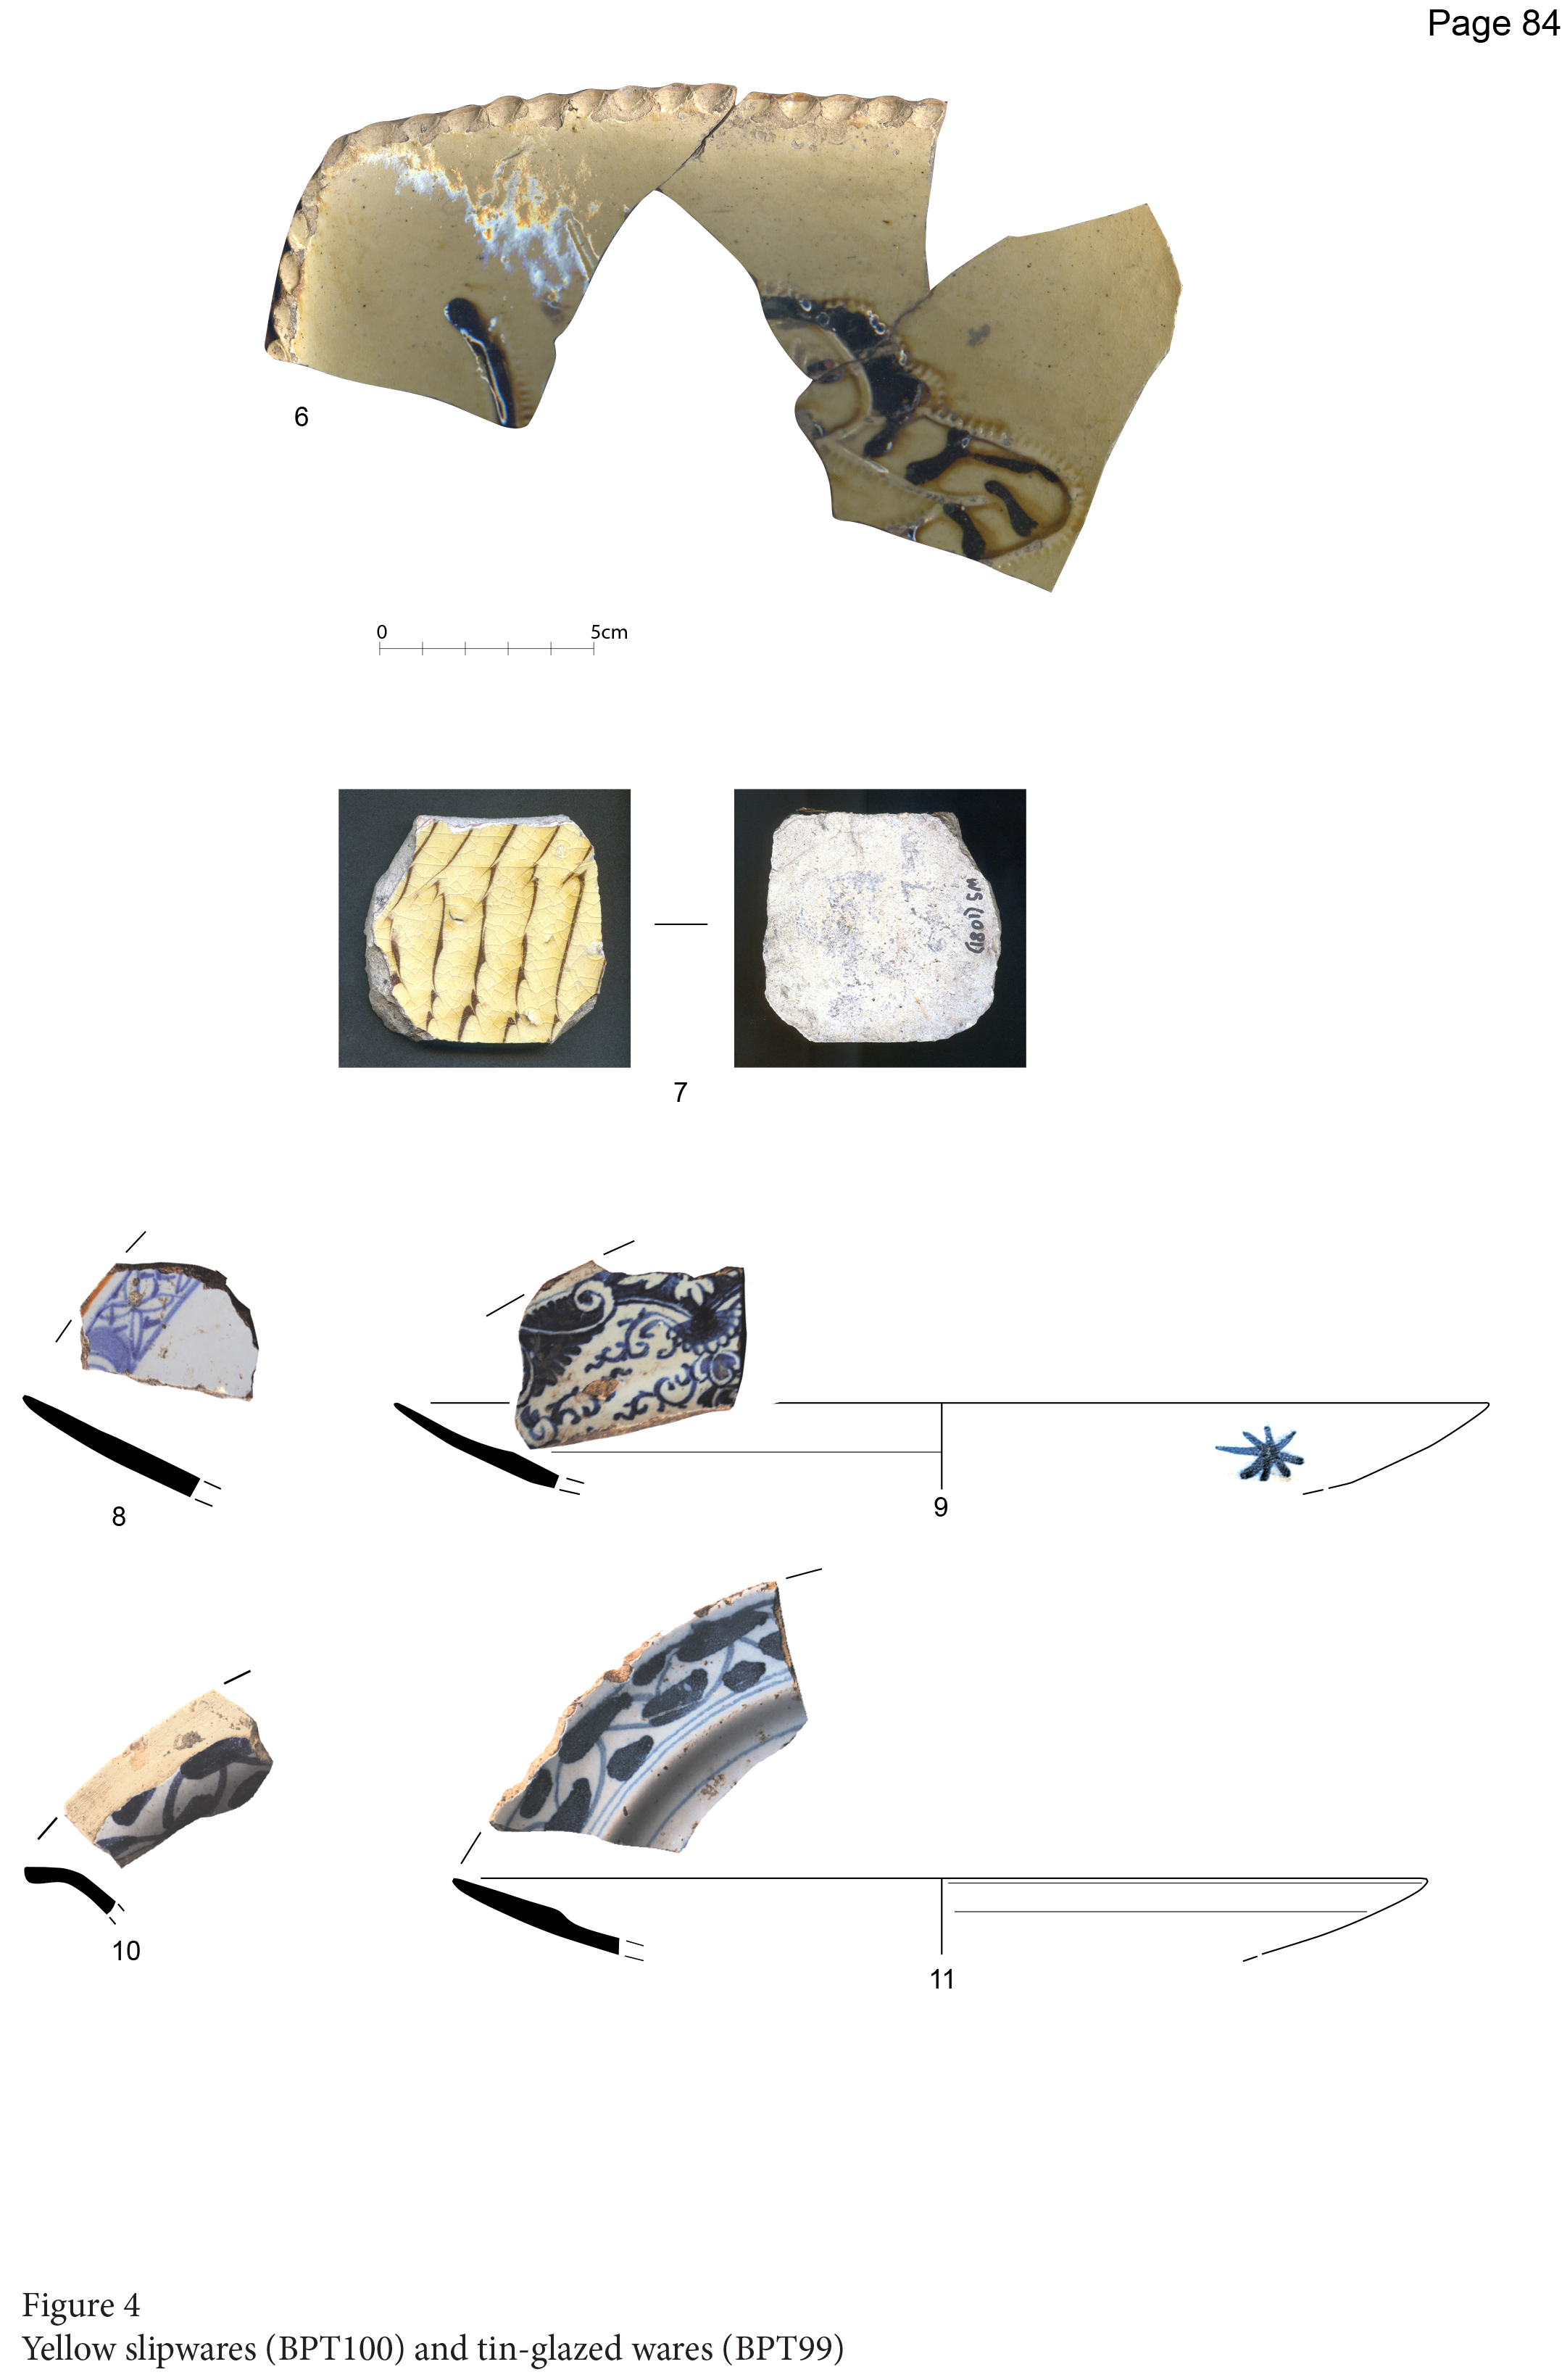
Figure 46: Yellow slipwares (BPT100) and tin-glazed wares (BPT99)
Figure 47: Tin-glazed wares (BPT99)
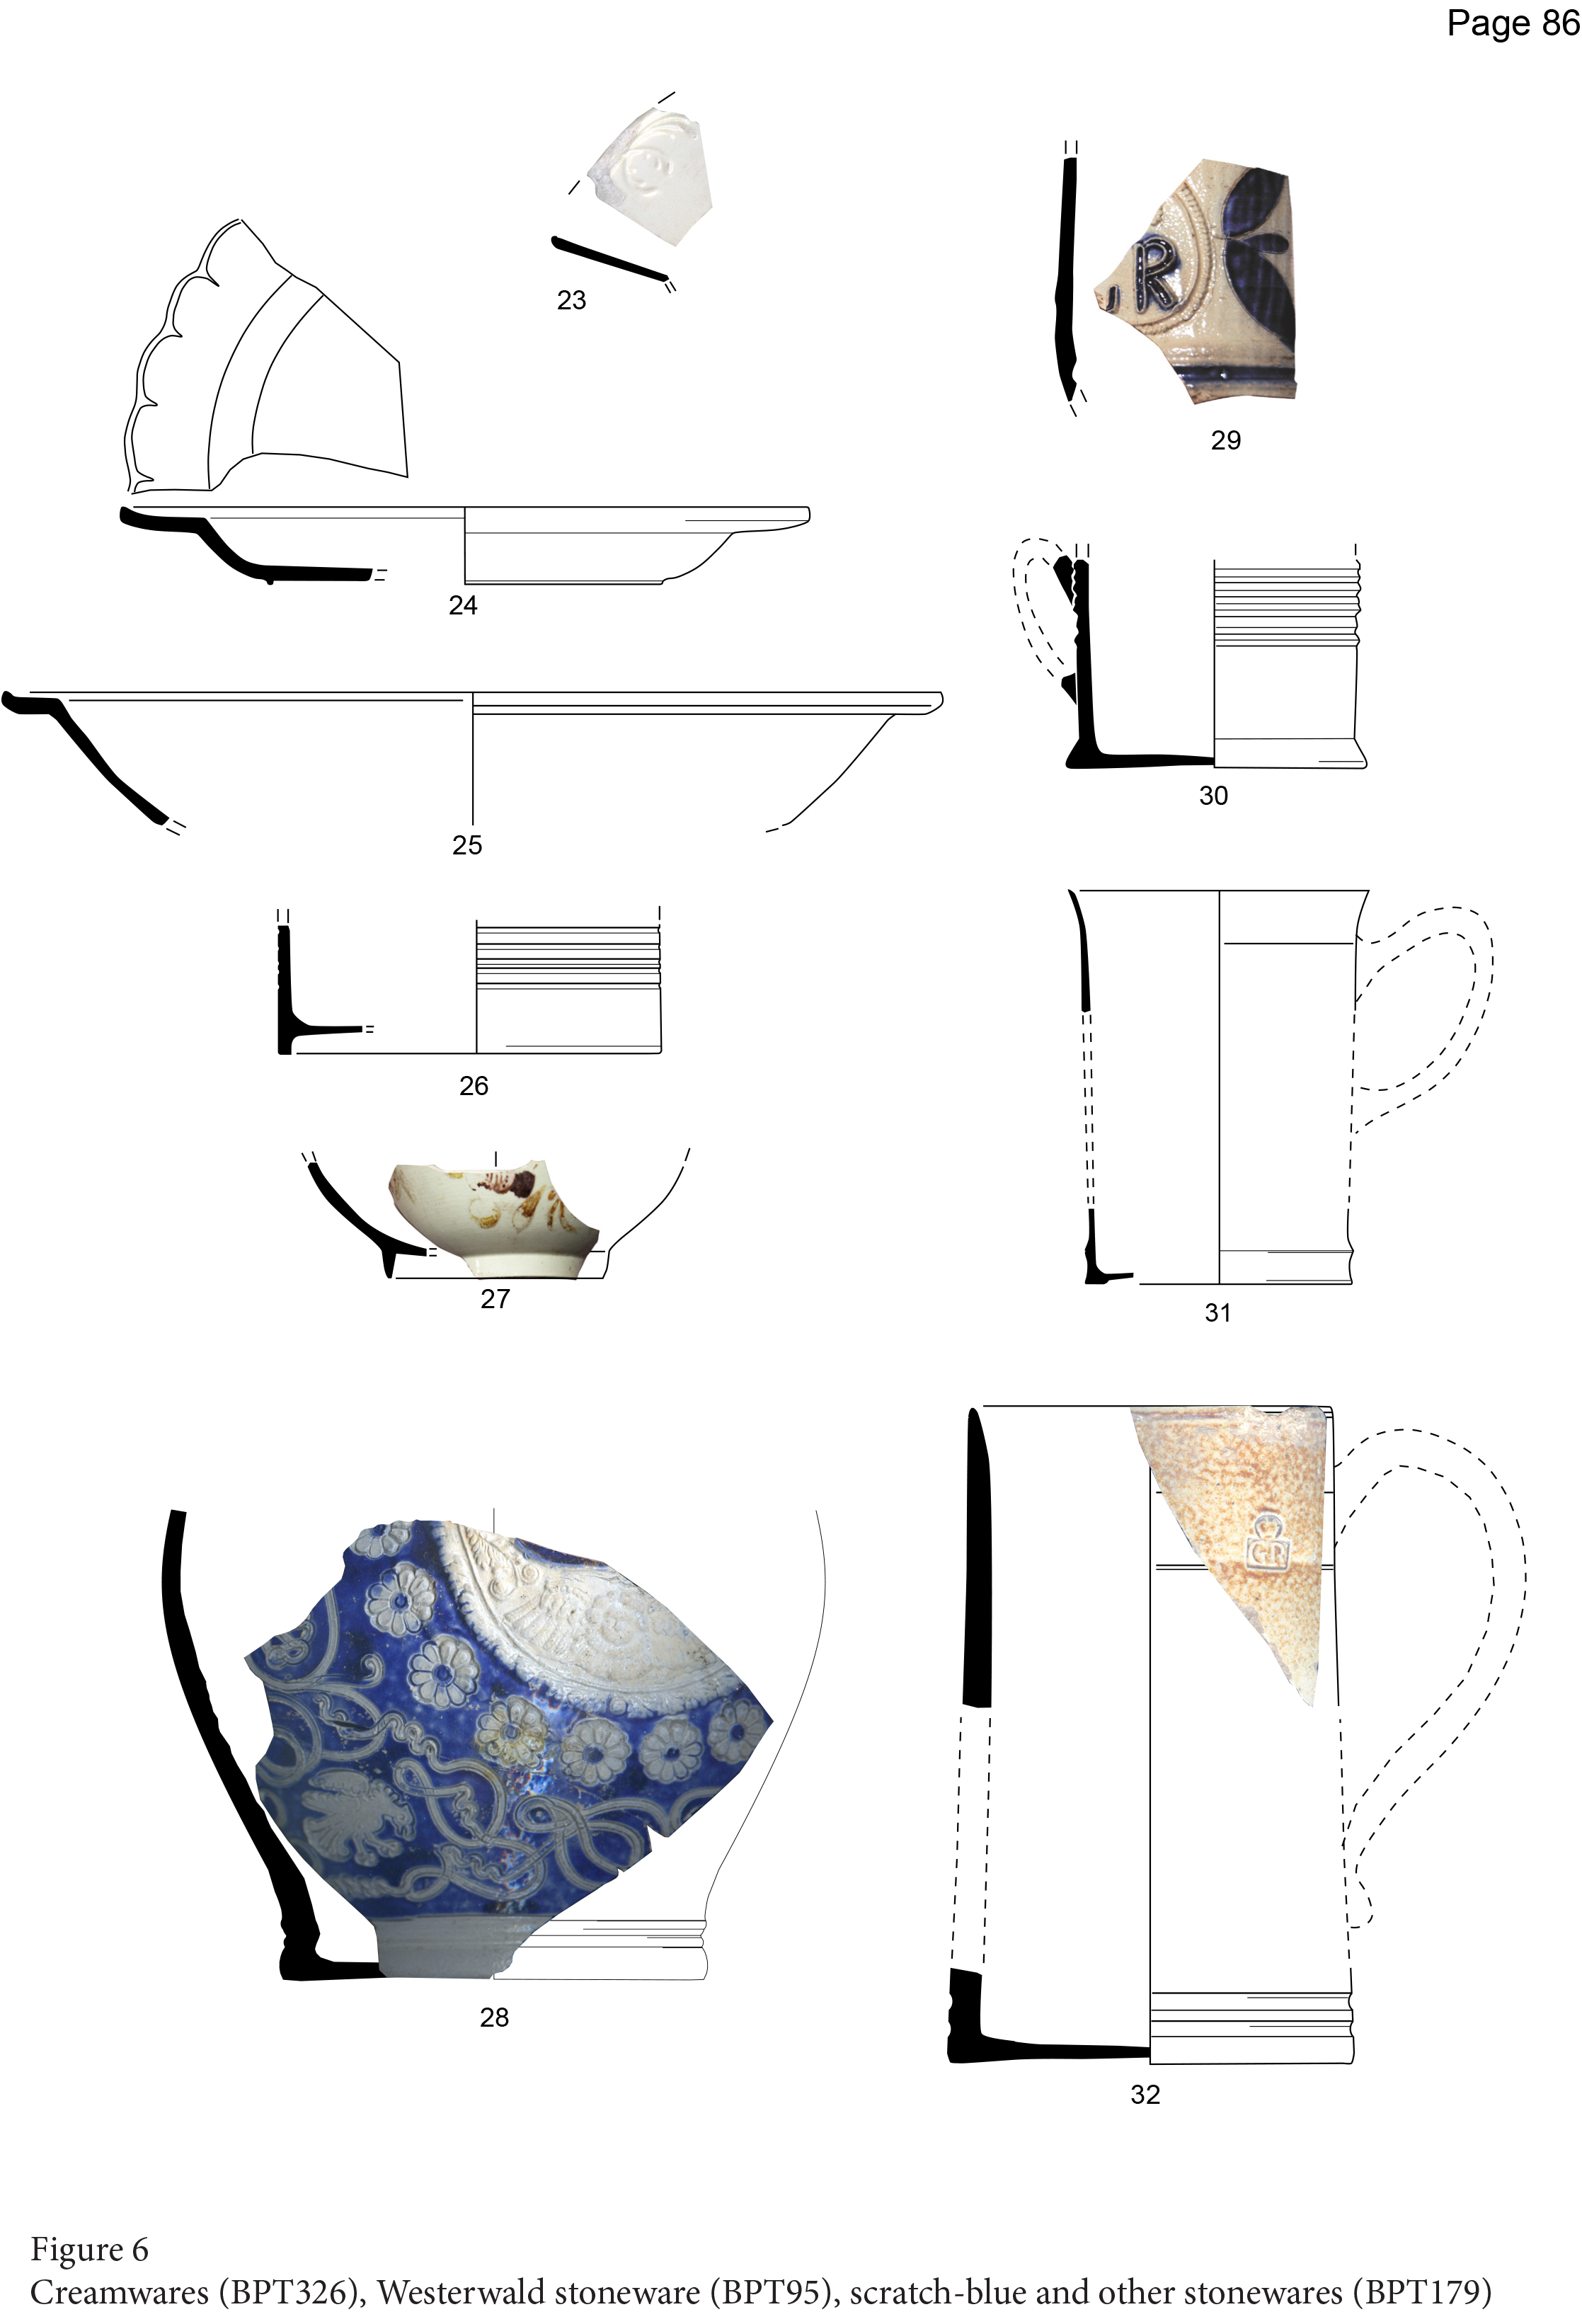
Figure 48: Creamwares (BPT326), Westerwald stoneware (BPT95), scratch-blue and other stonewares (BPT179)
Figure 49: Unfinished ware, flower pots and modern glazed red earthenwares (BPT336)
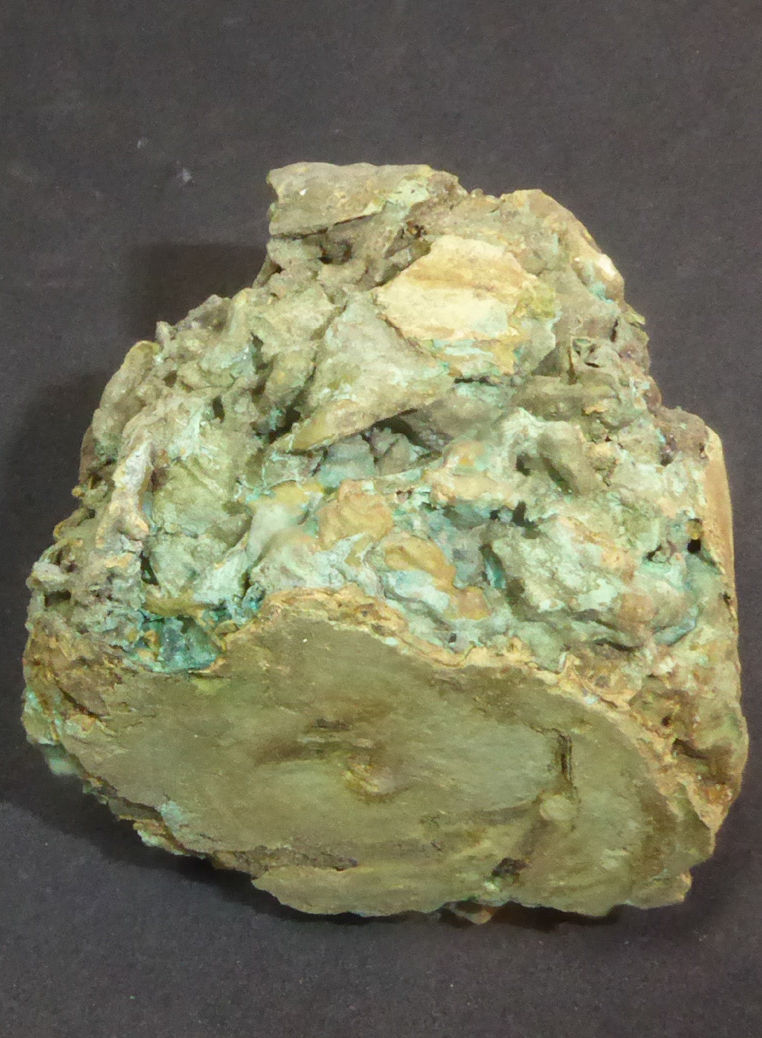
Figure 50a and 50b: The base of a North Devon gravel-tempered jar with a thin film of residue on the interior surface (sample AG103), from context 1145
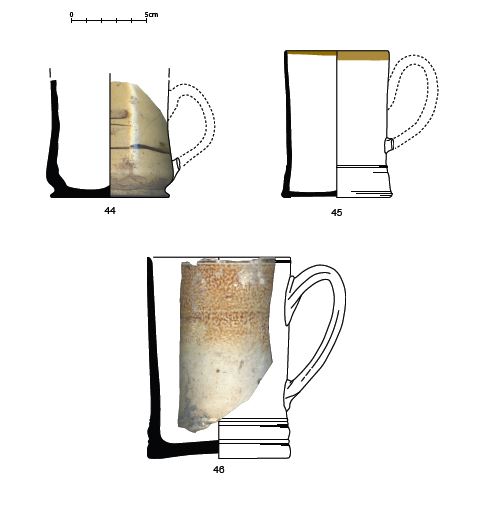
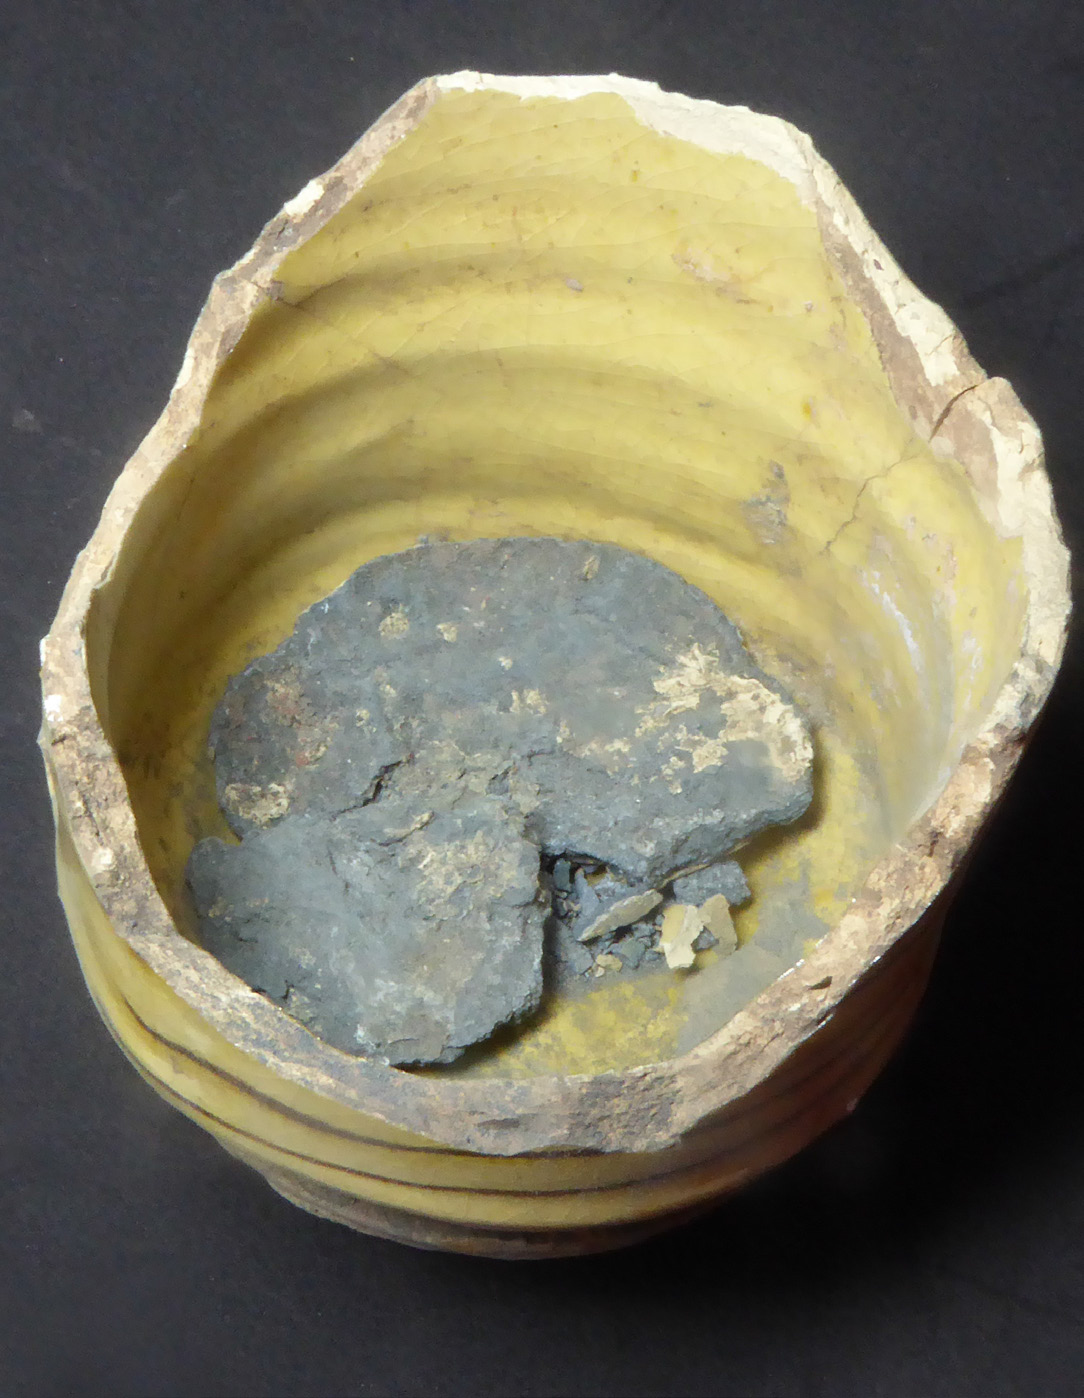
Figure 51: Three mugs found with contents still inside (context 1145)
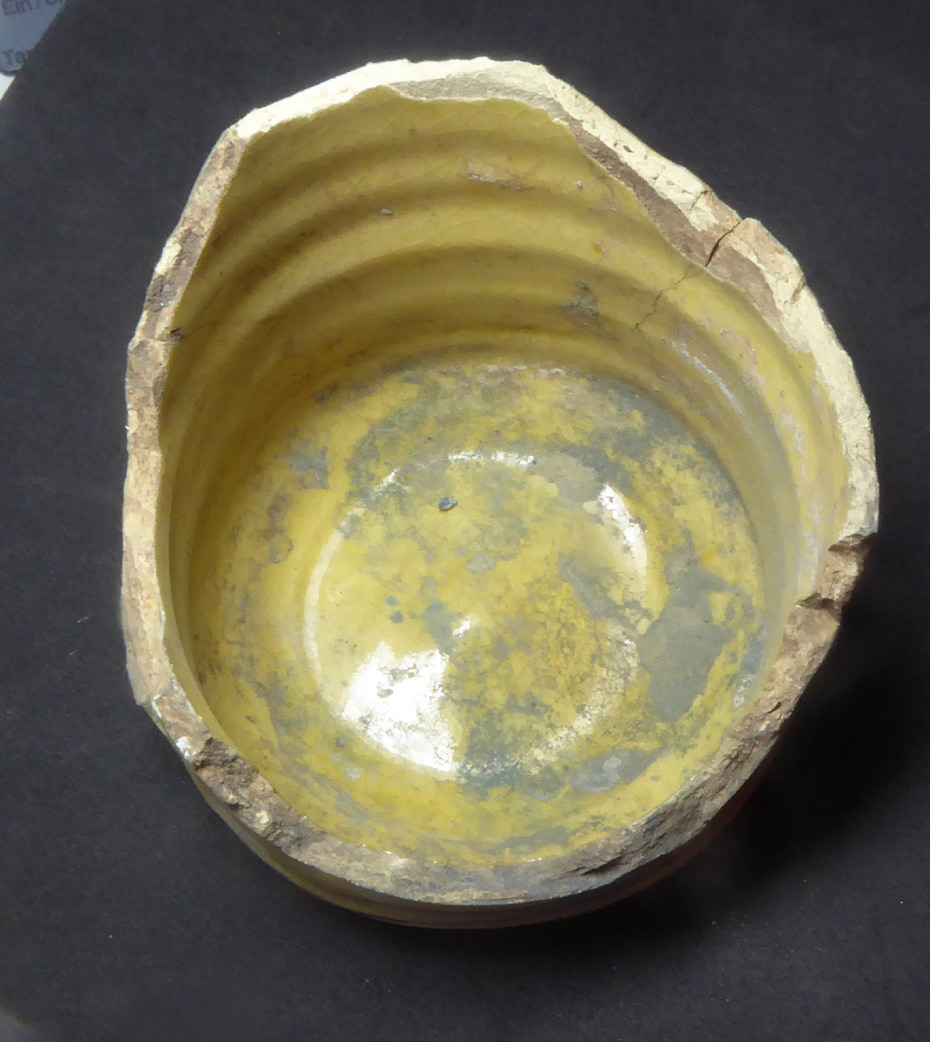
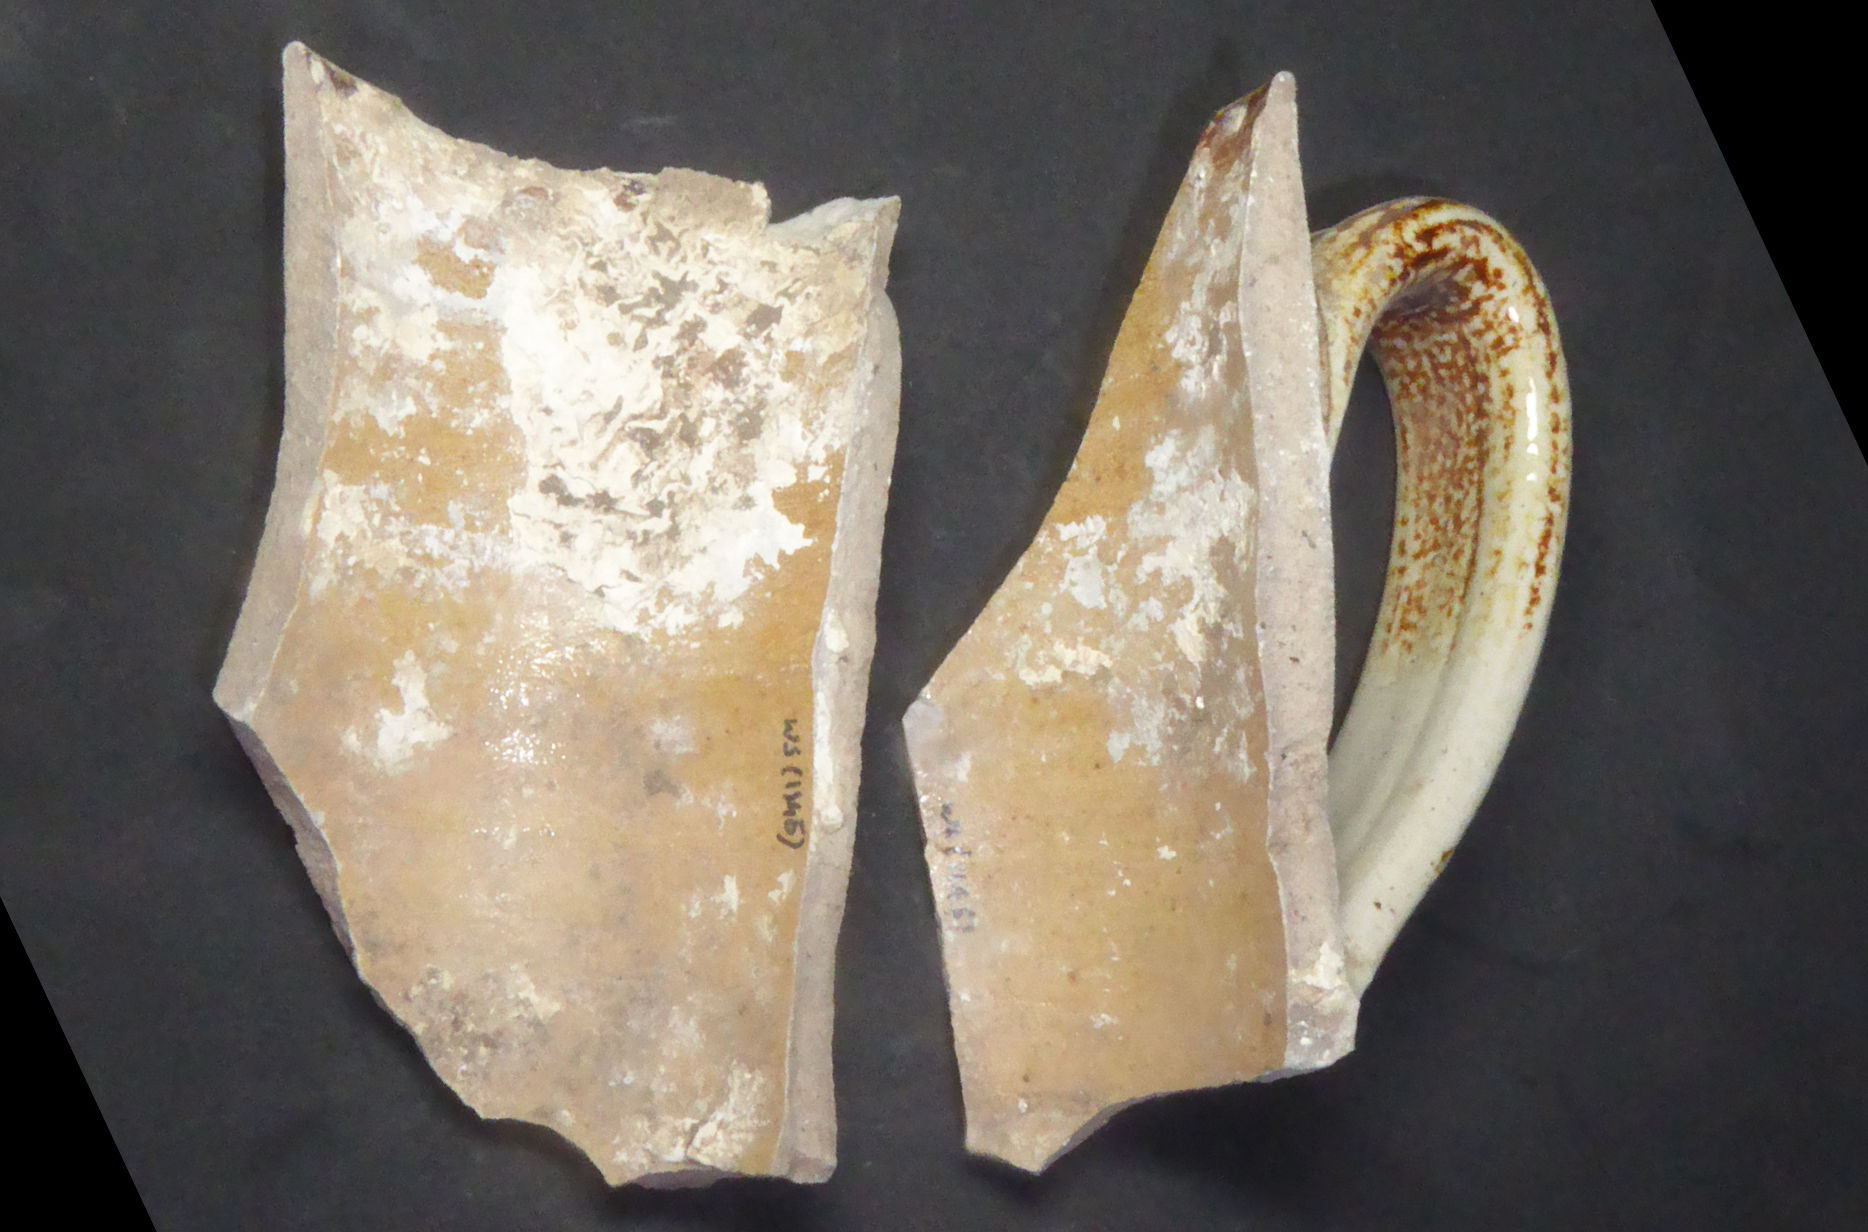
Figure 52a, 52b and 52c: A Bristol slipware mug (No. 44) (sample AG100), from context 1145
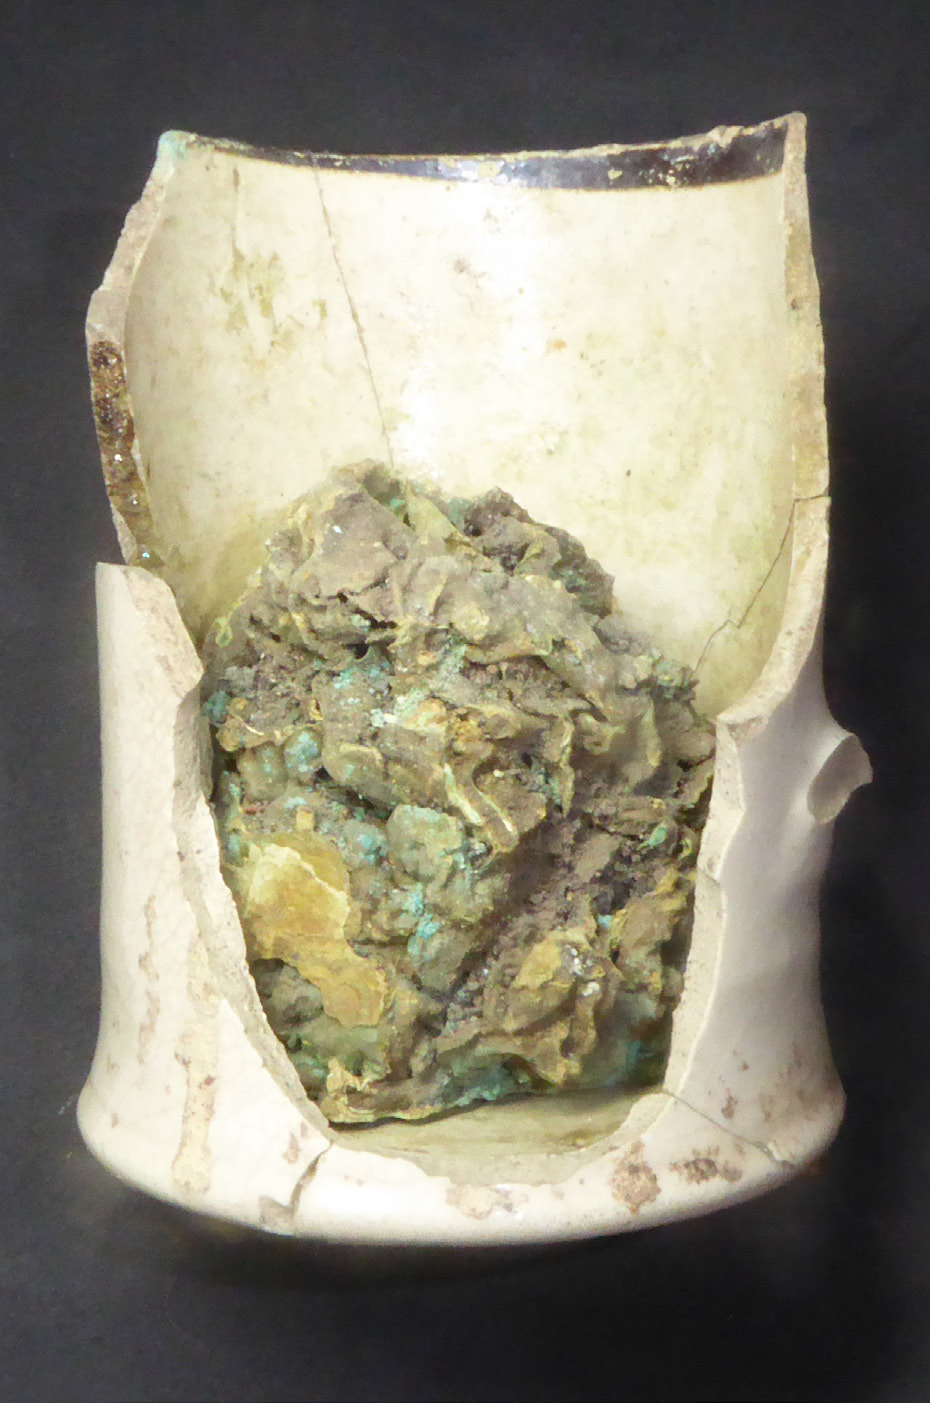
Figure 53a, 53b, 53c and 53d: A plain dipped white stoneware mug (No. 45) (sample AG101), from context 1145
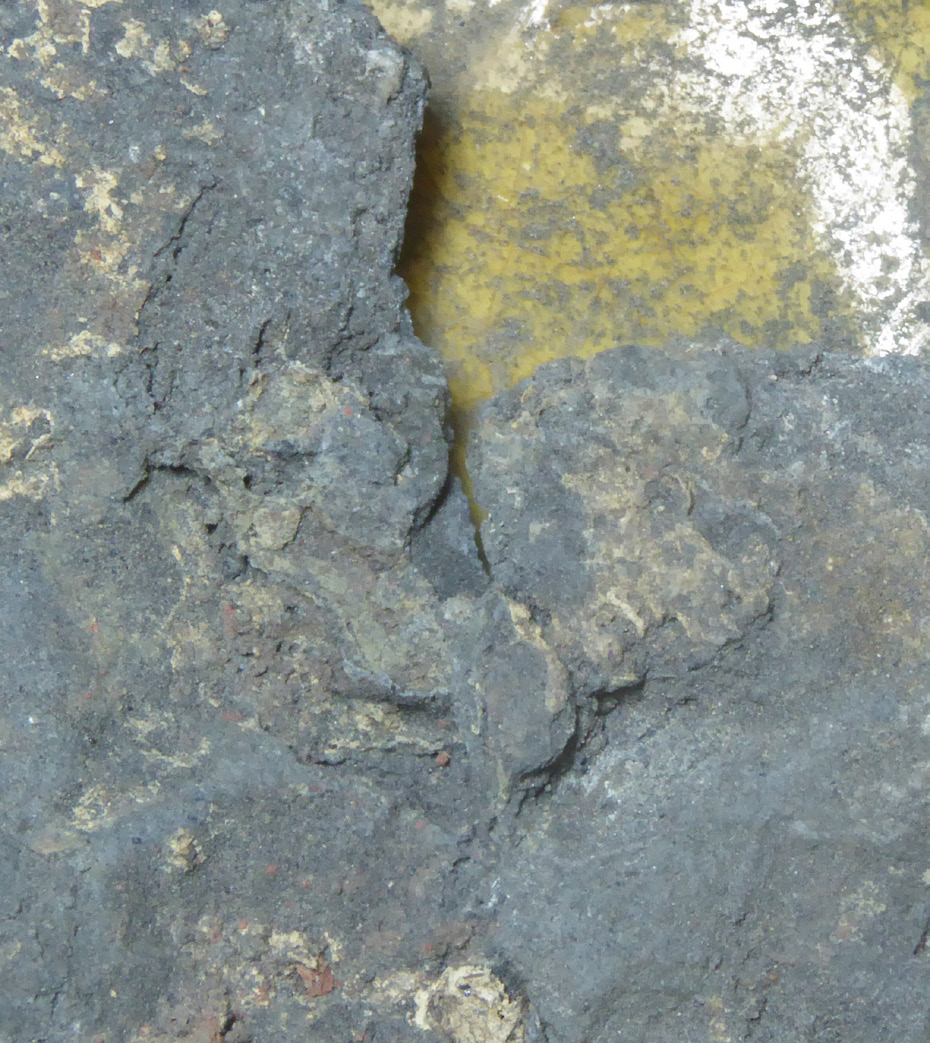
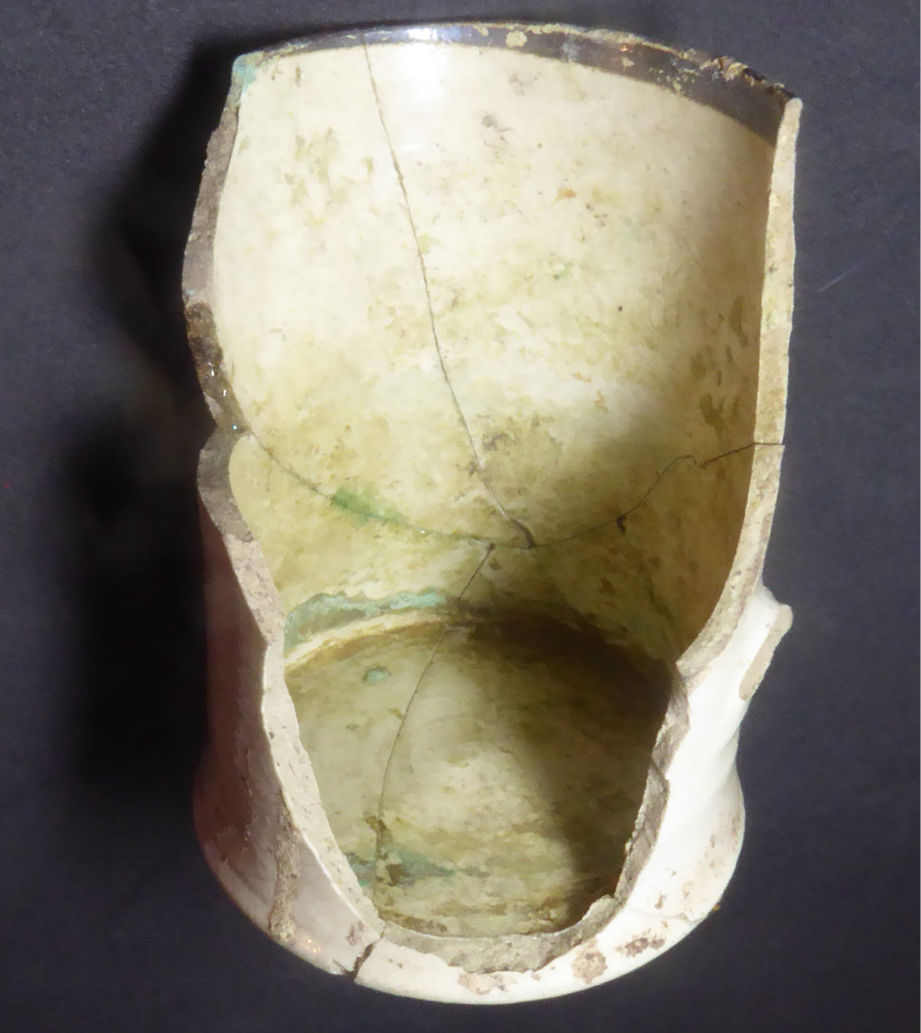
Figure 54a and 54b: A stoneware mug (No. 46) with residues on the interior surface (sample AG102), from context 1145
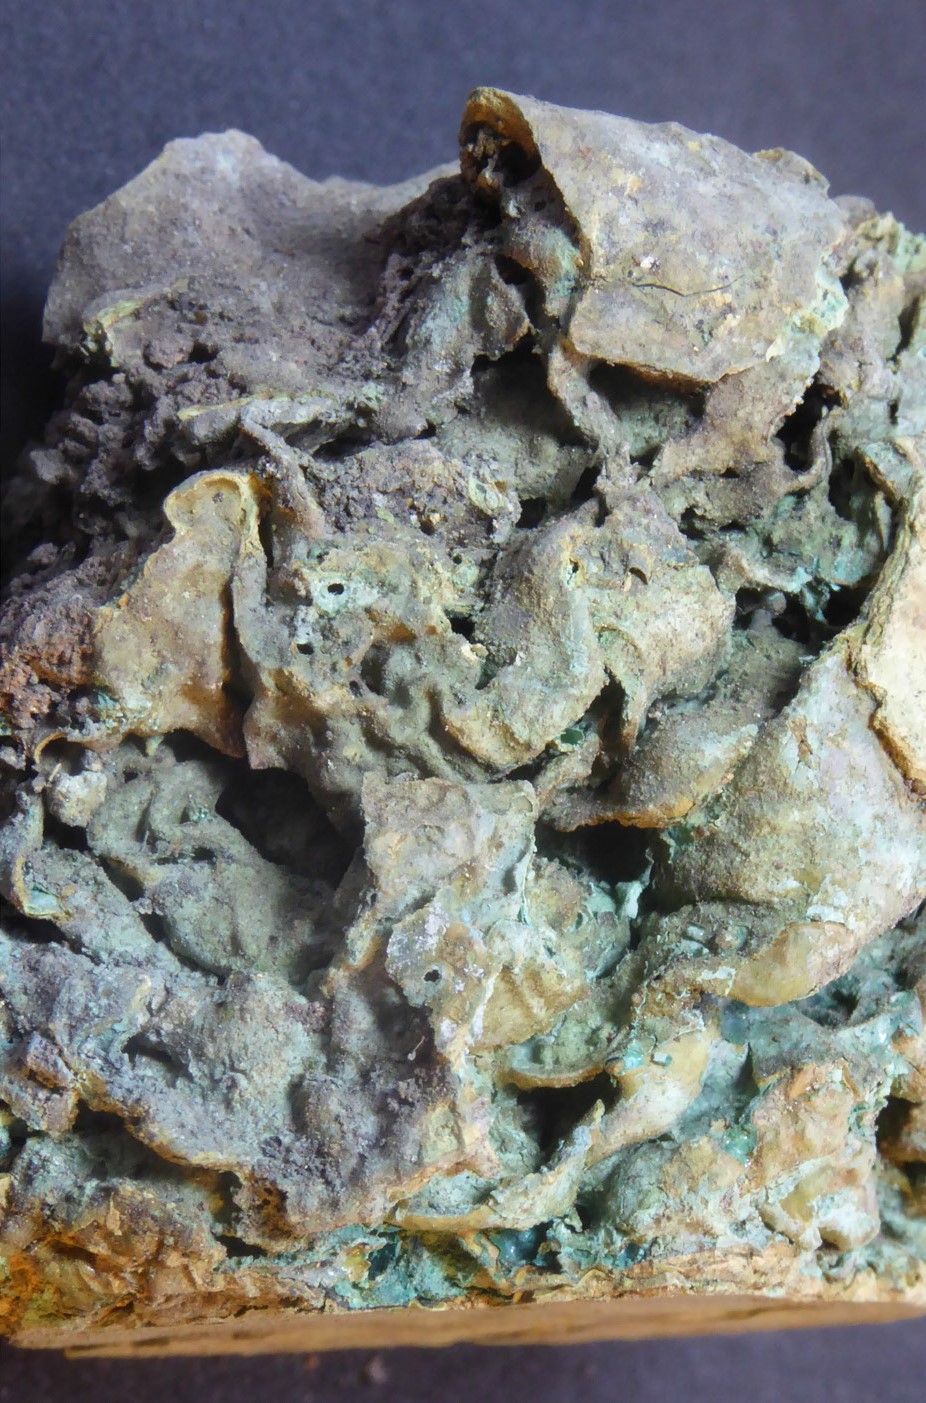
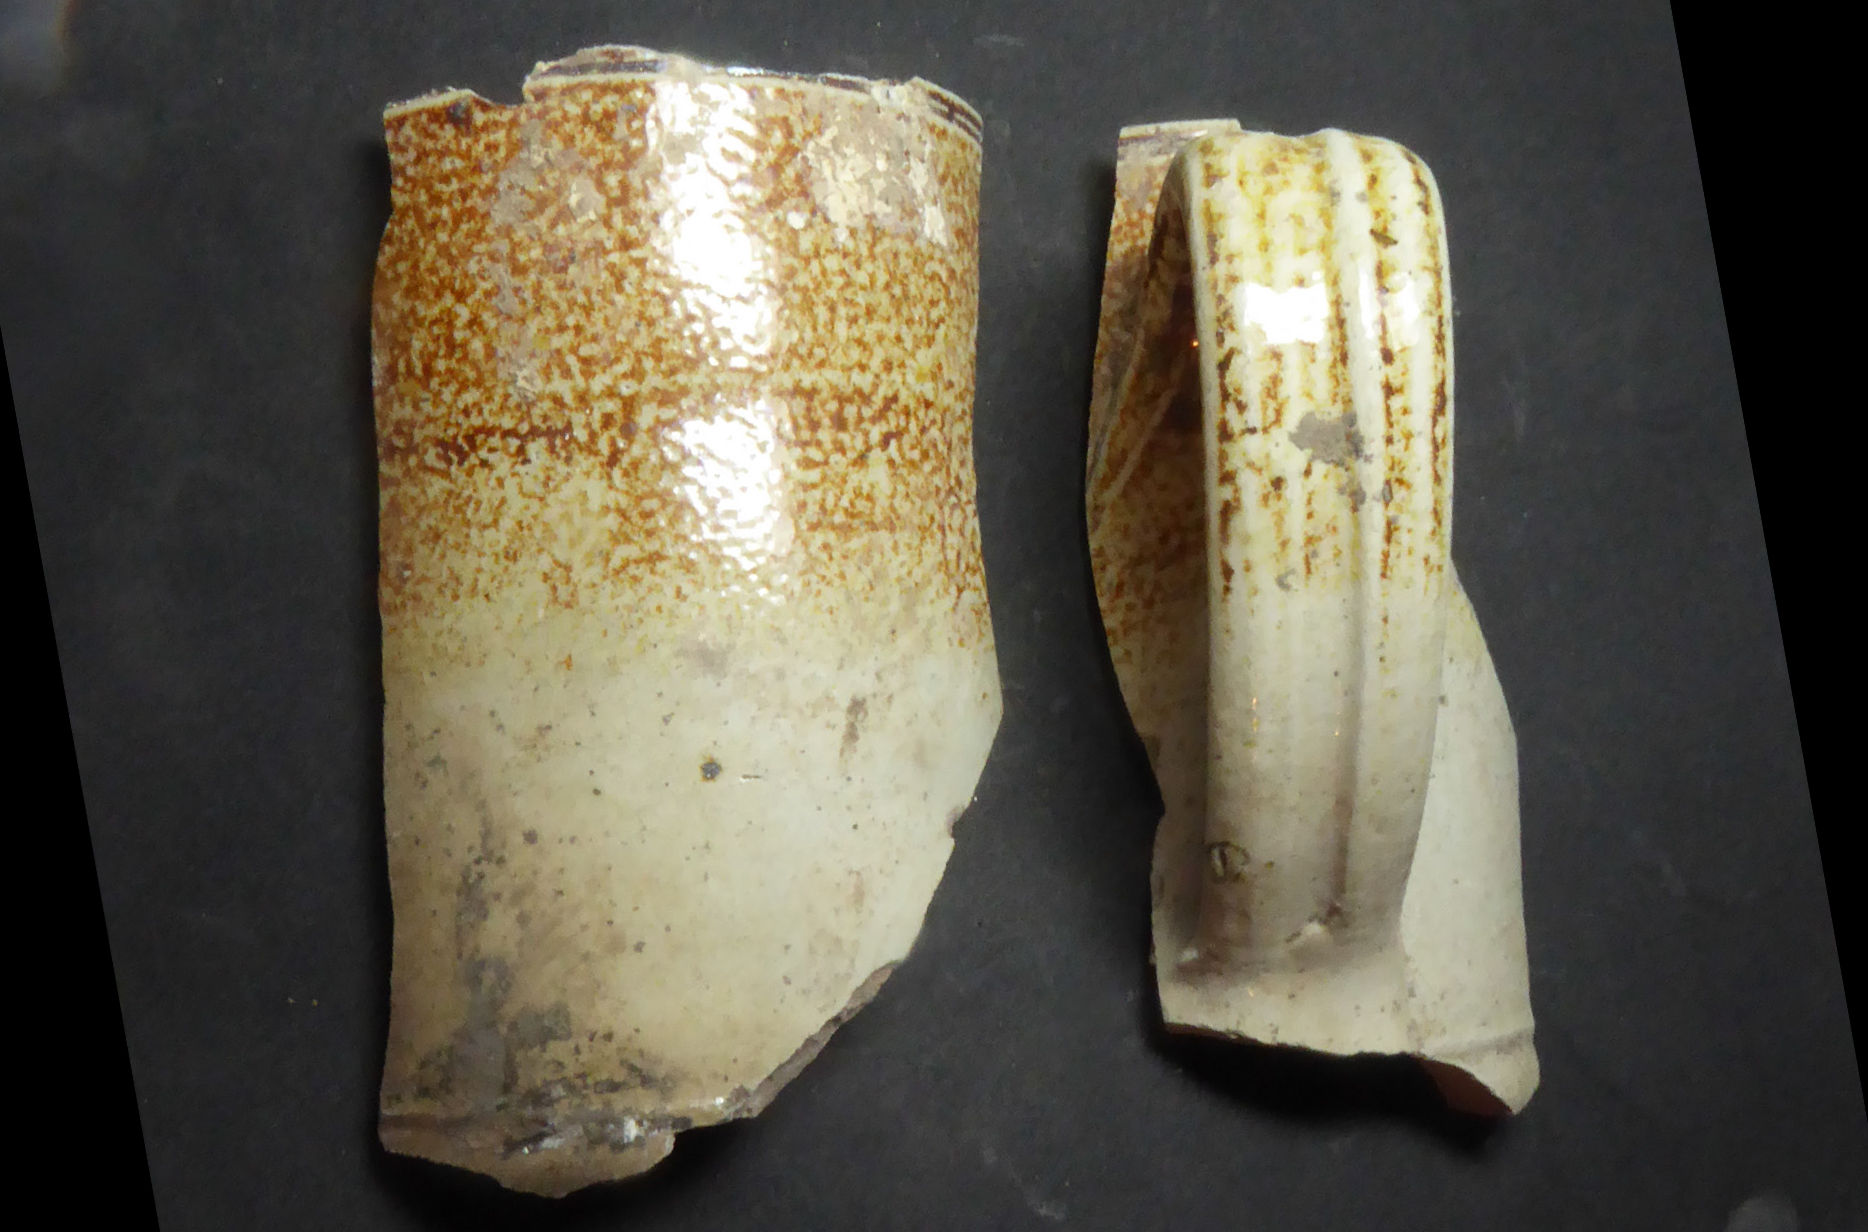
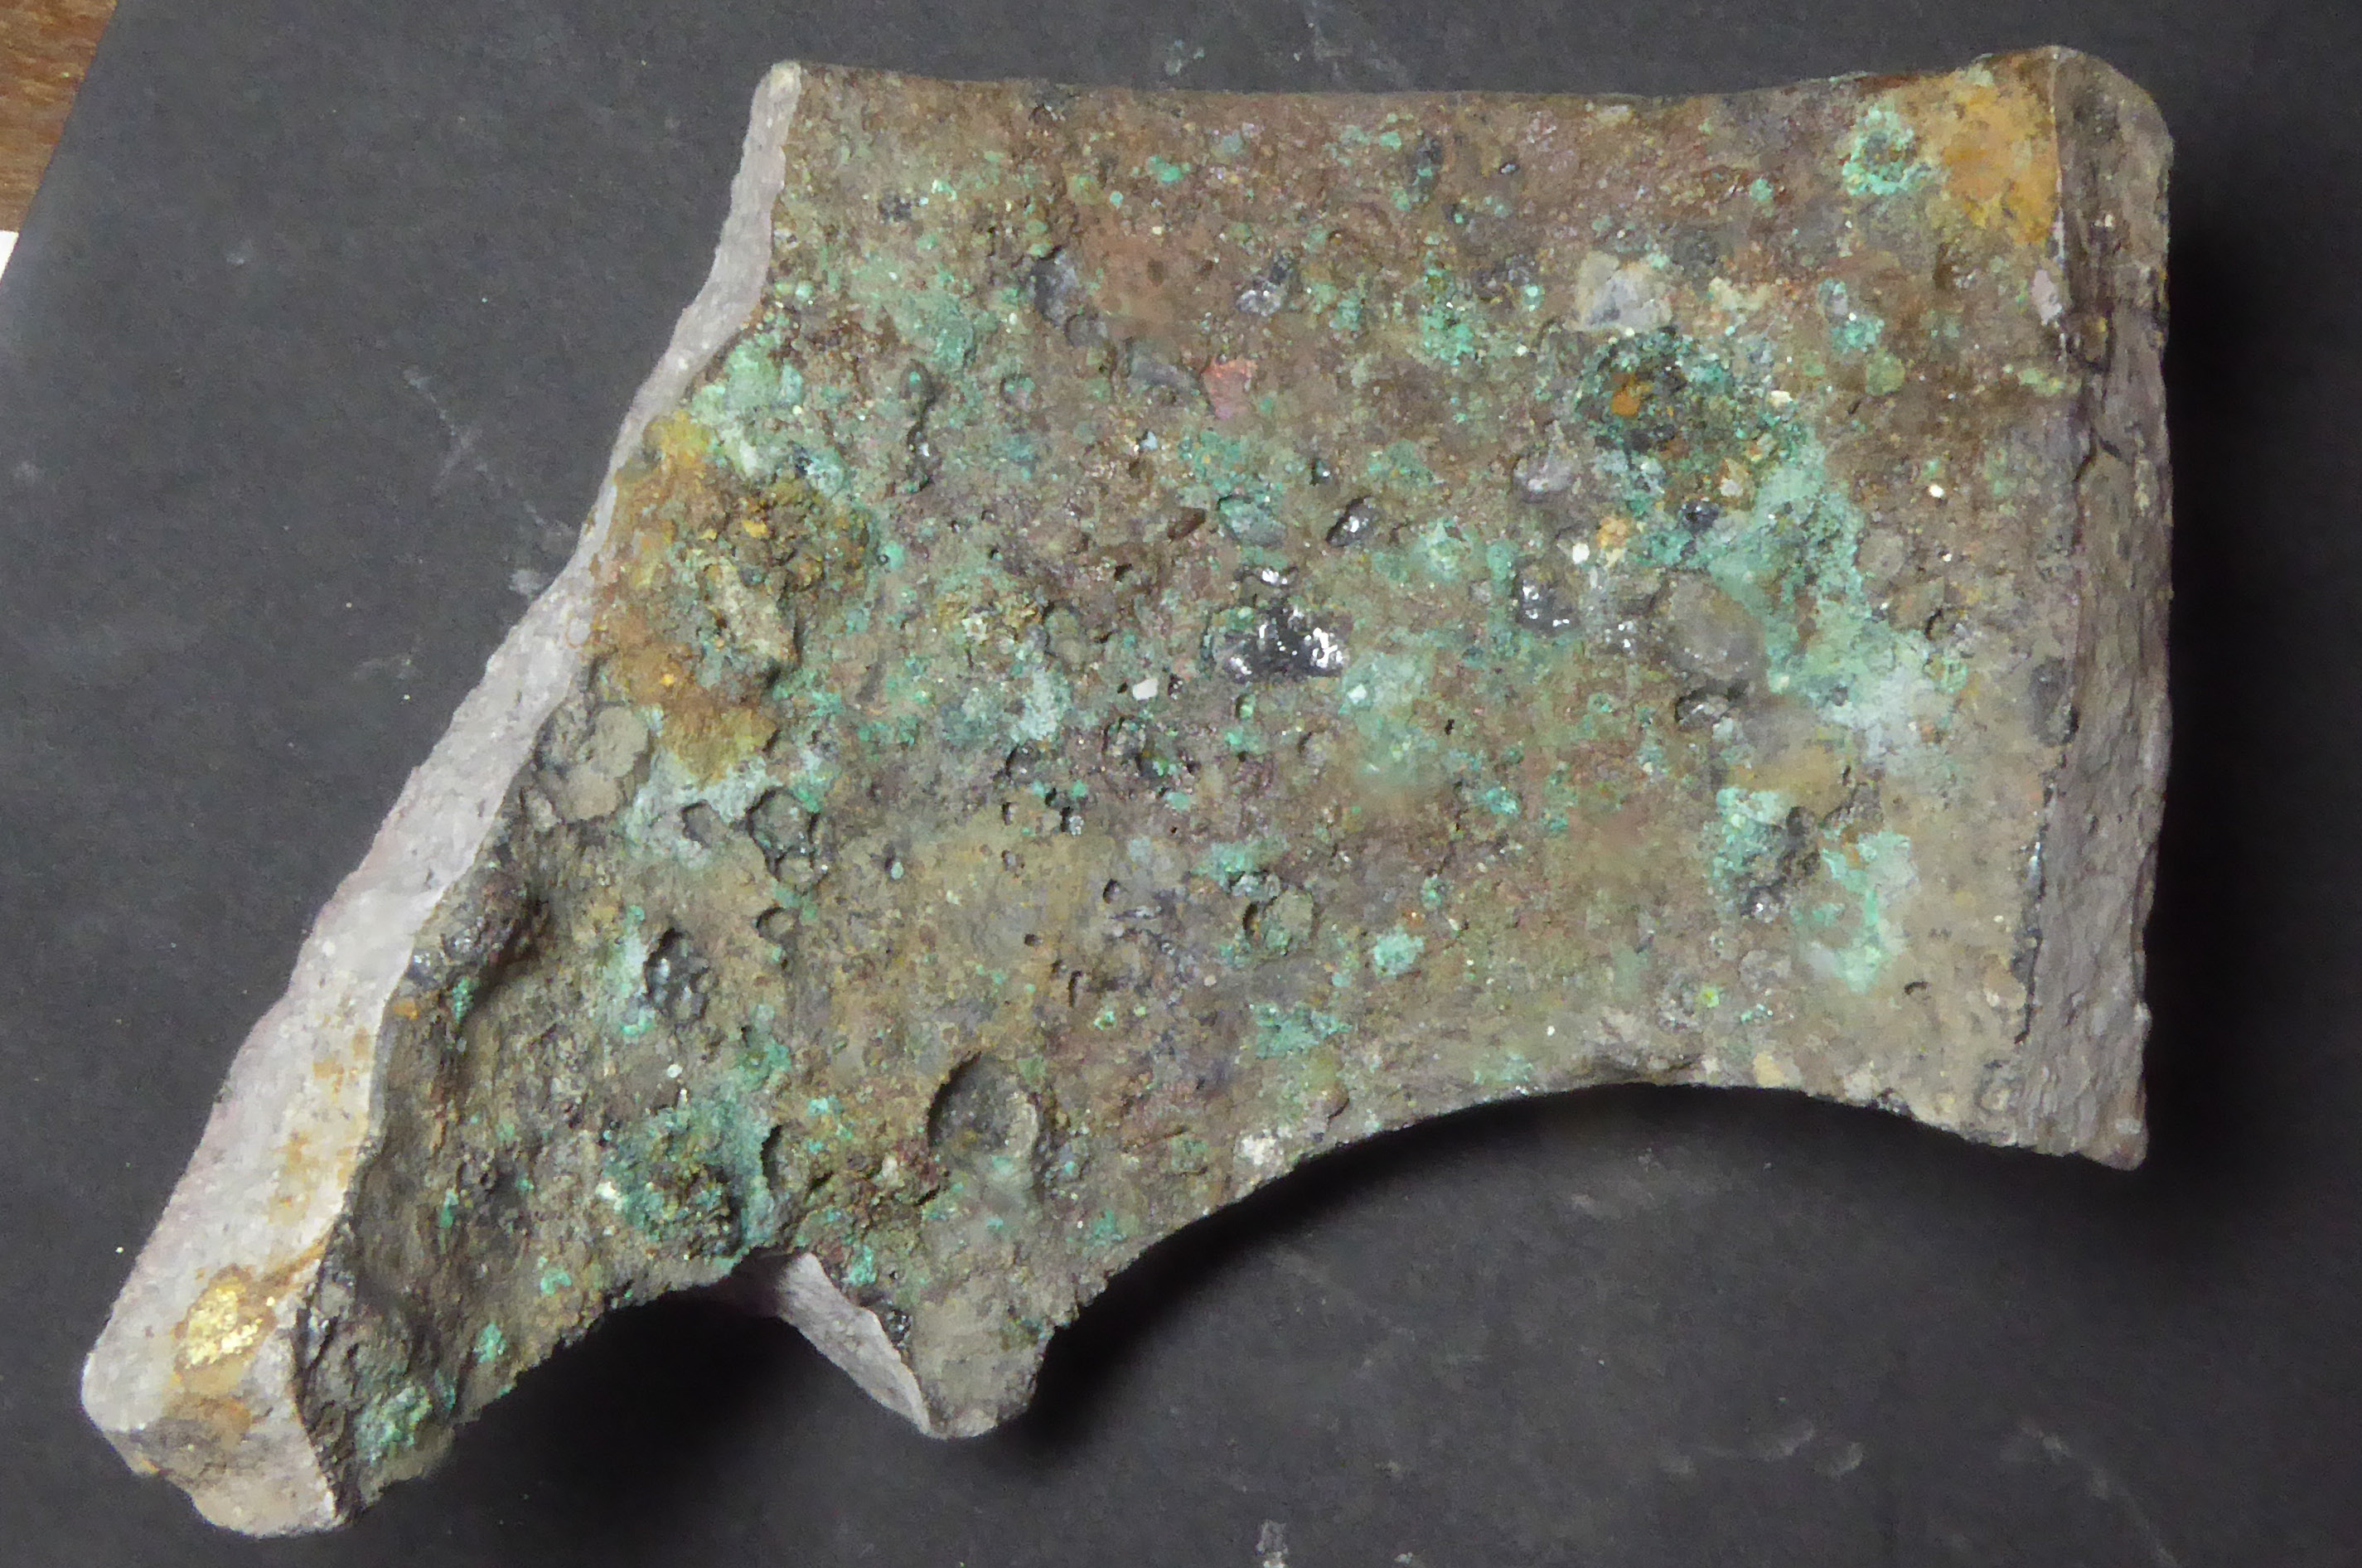
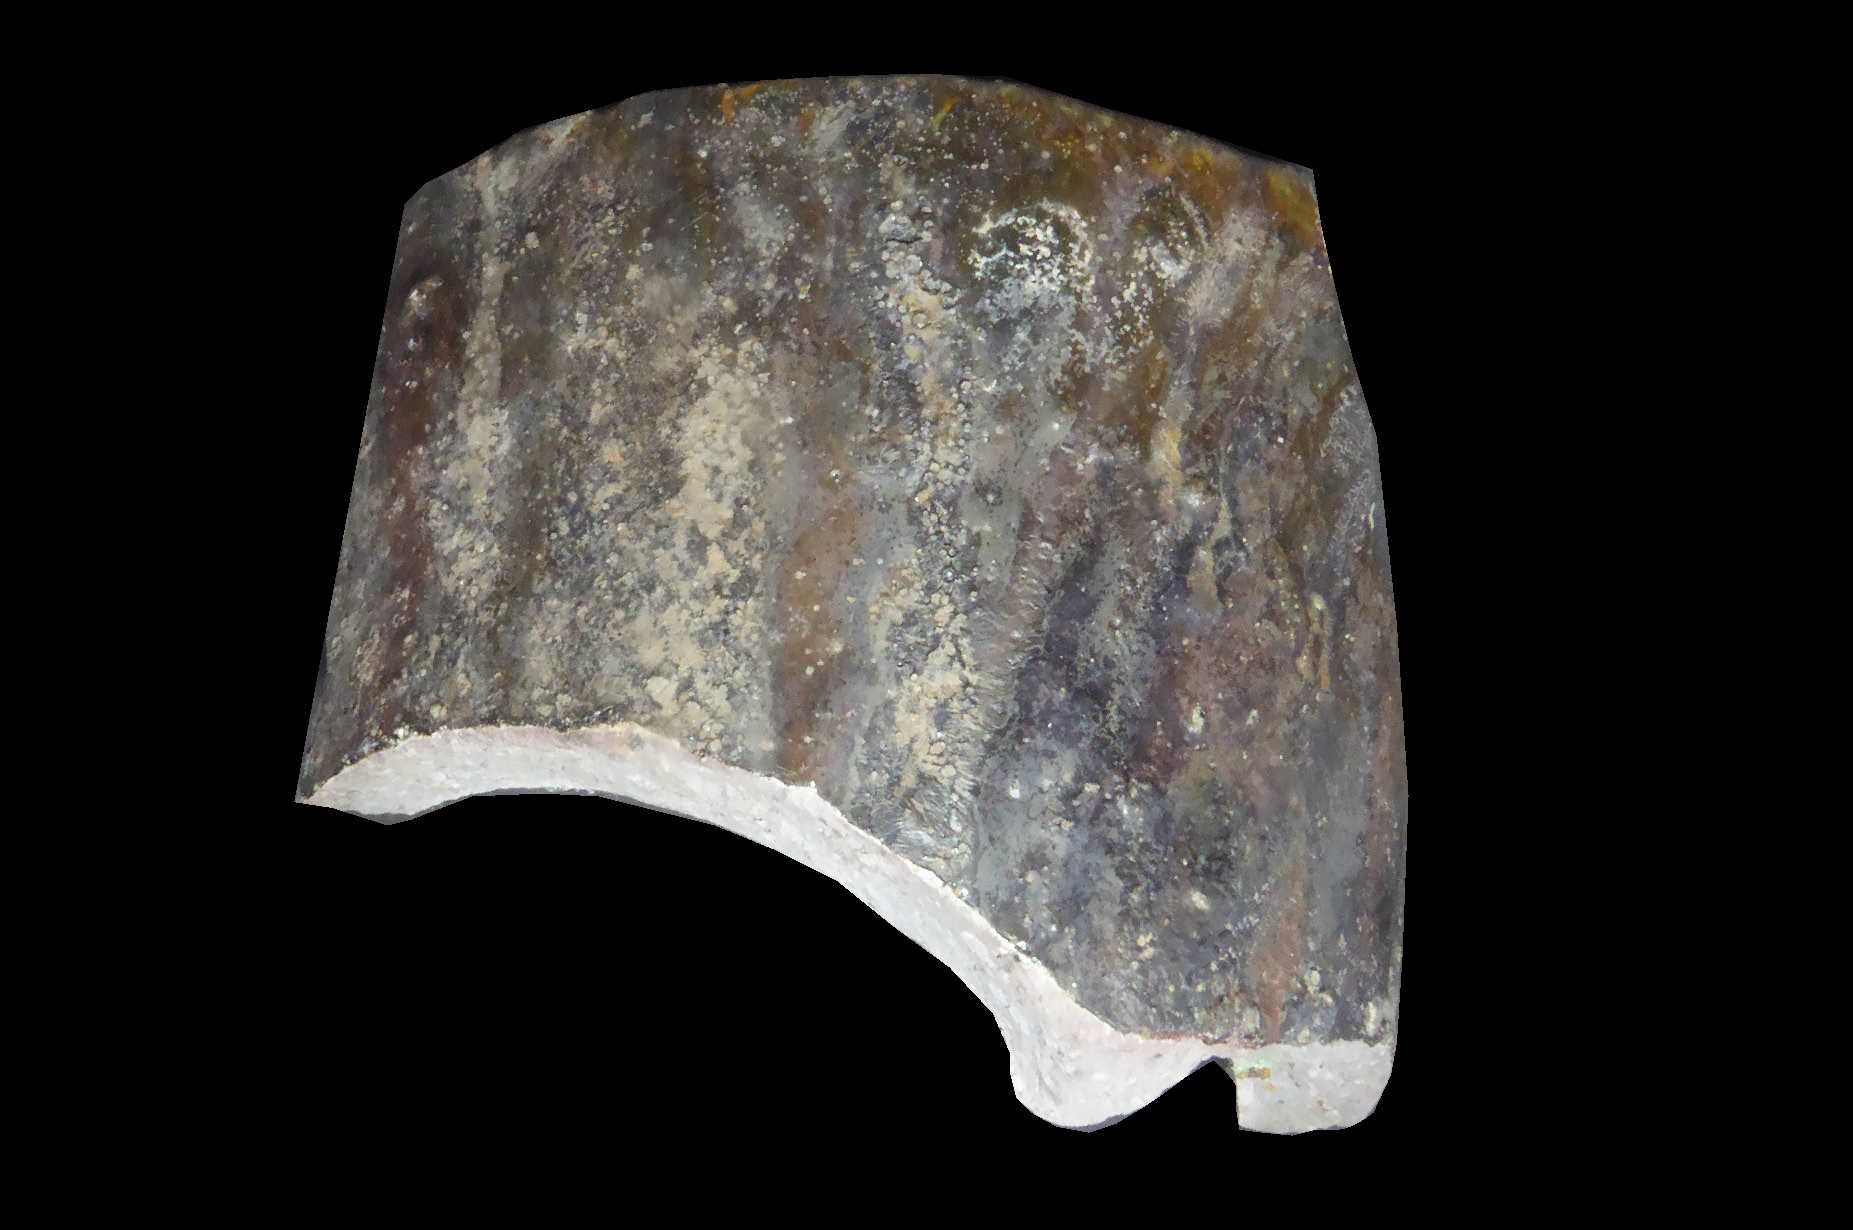
Figure 55a and 55b: A glazed half-round tile with metal residues still inside (sample AG104), from context 1181
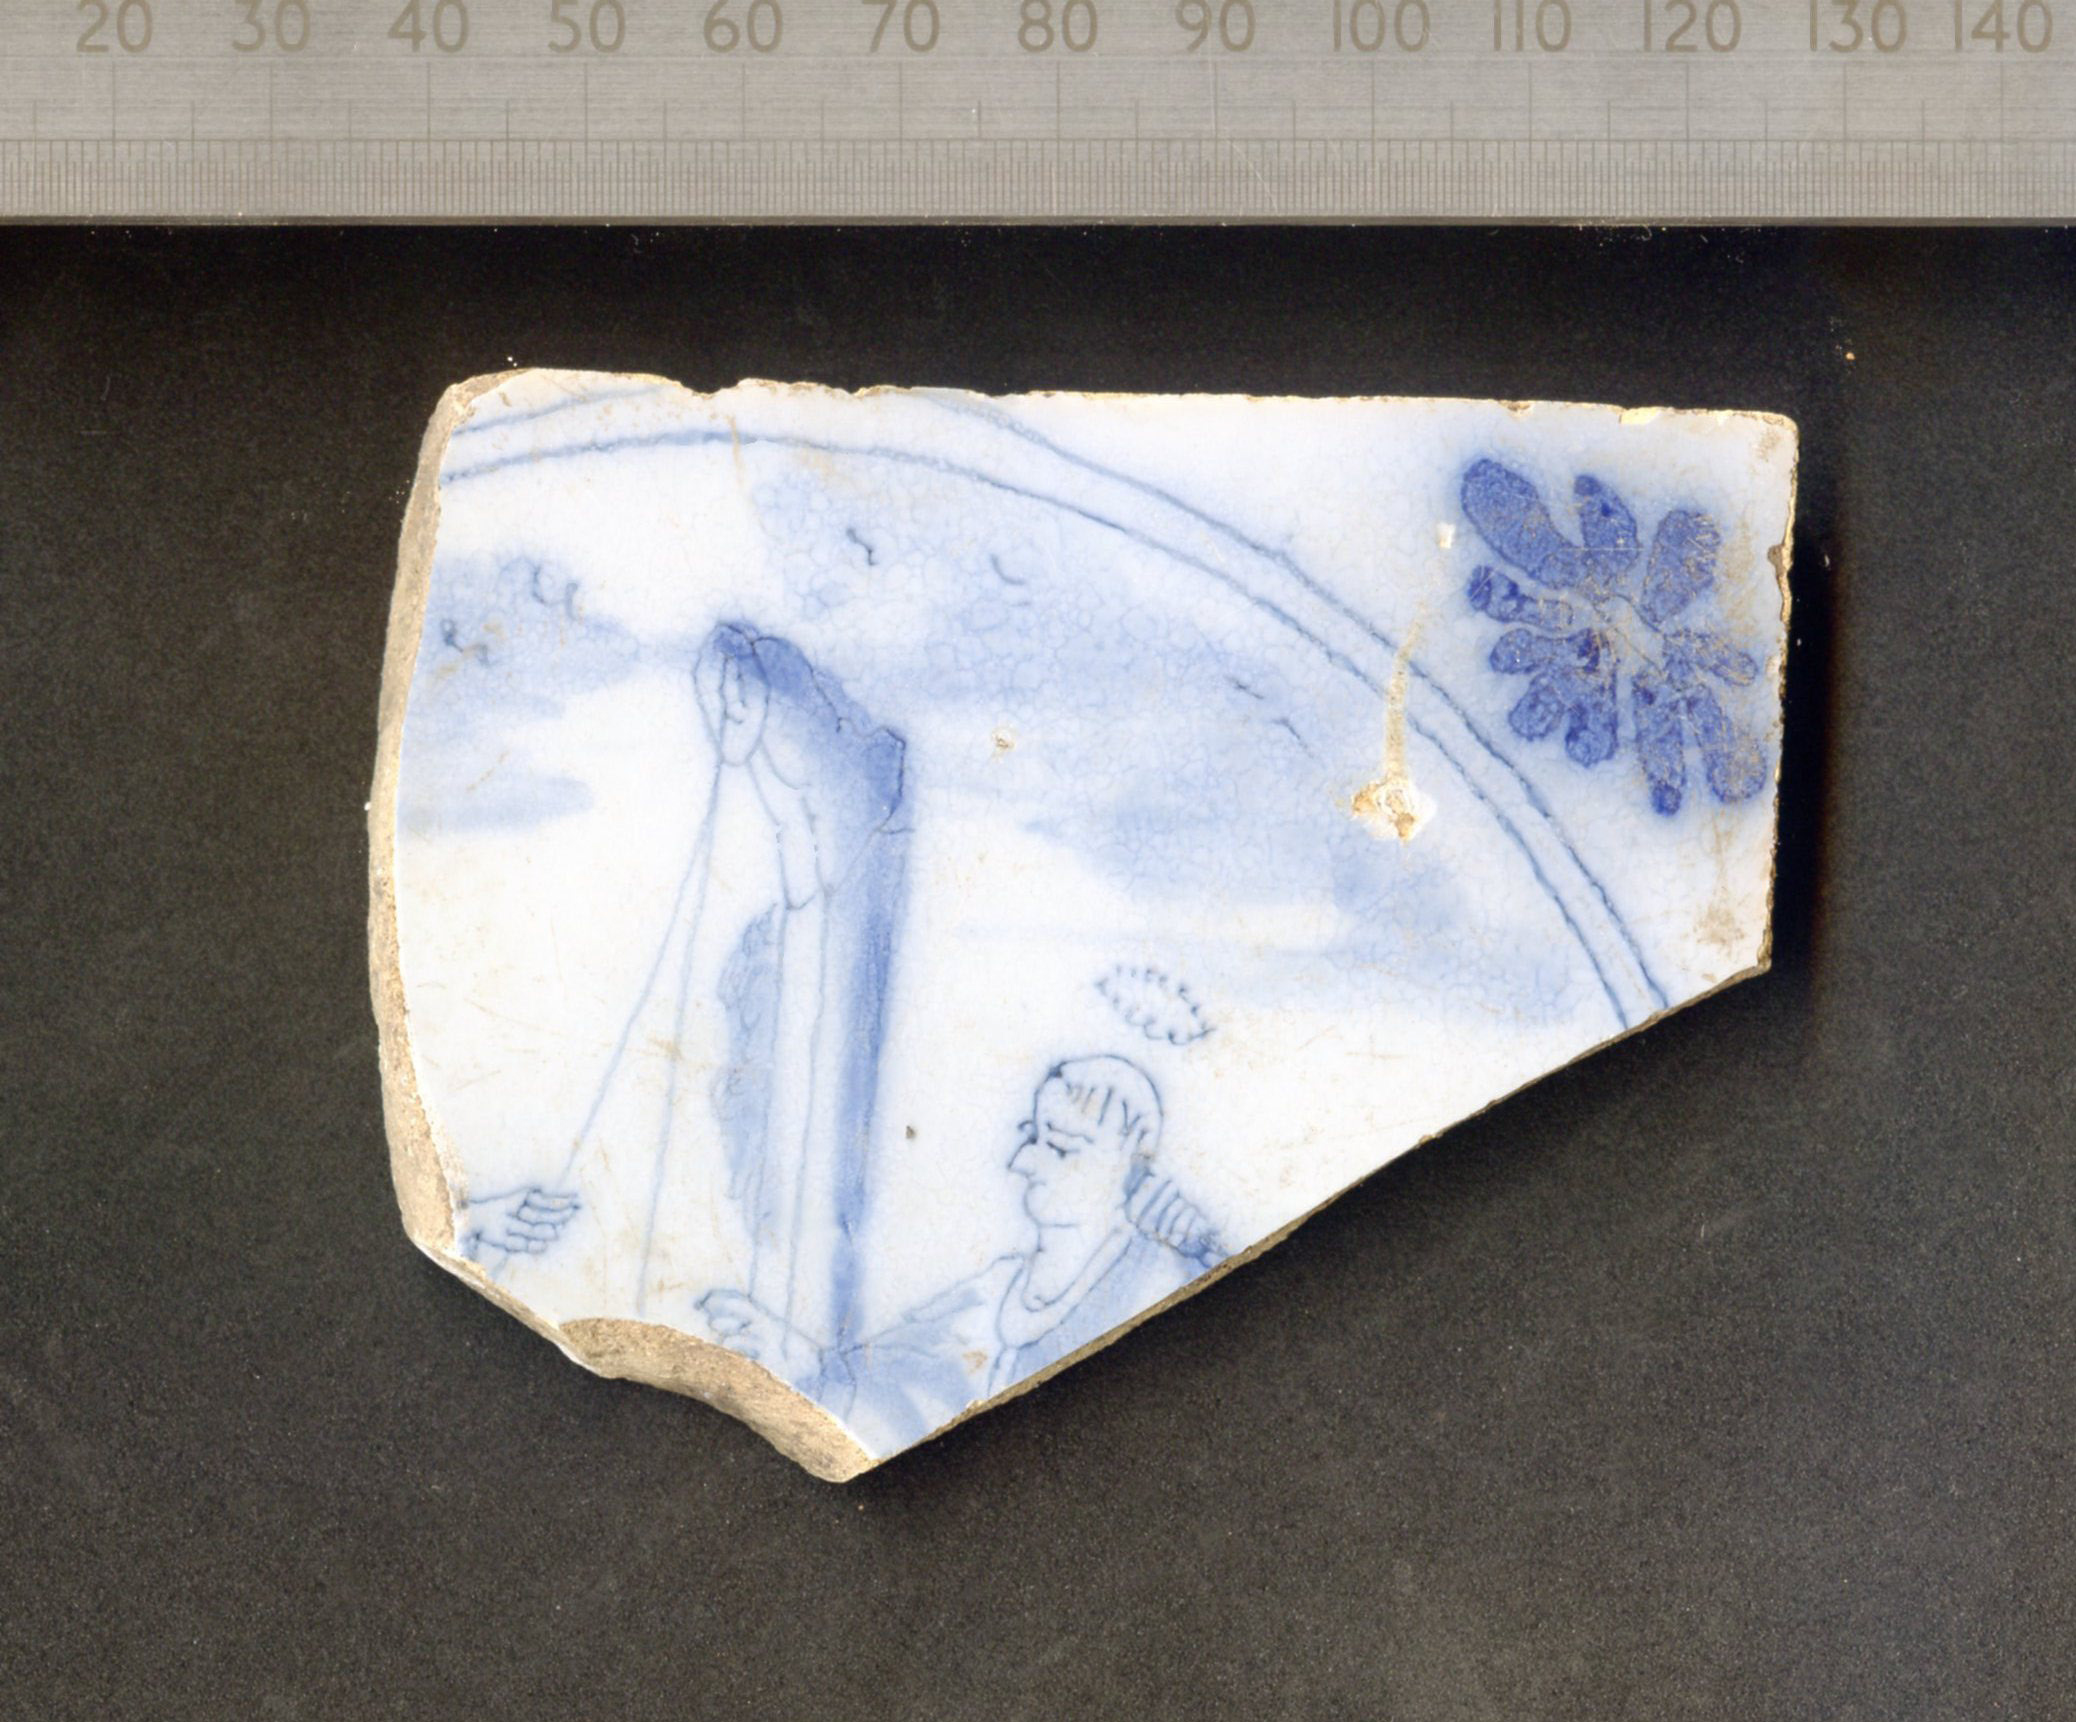
Figure 56: Delft wall tile from context 1160
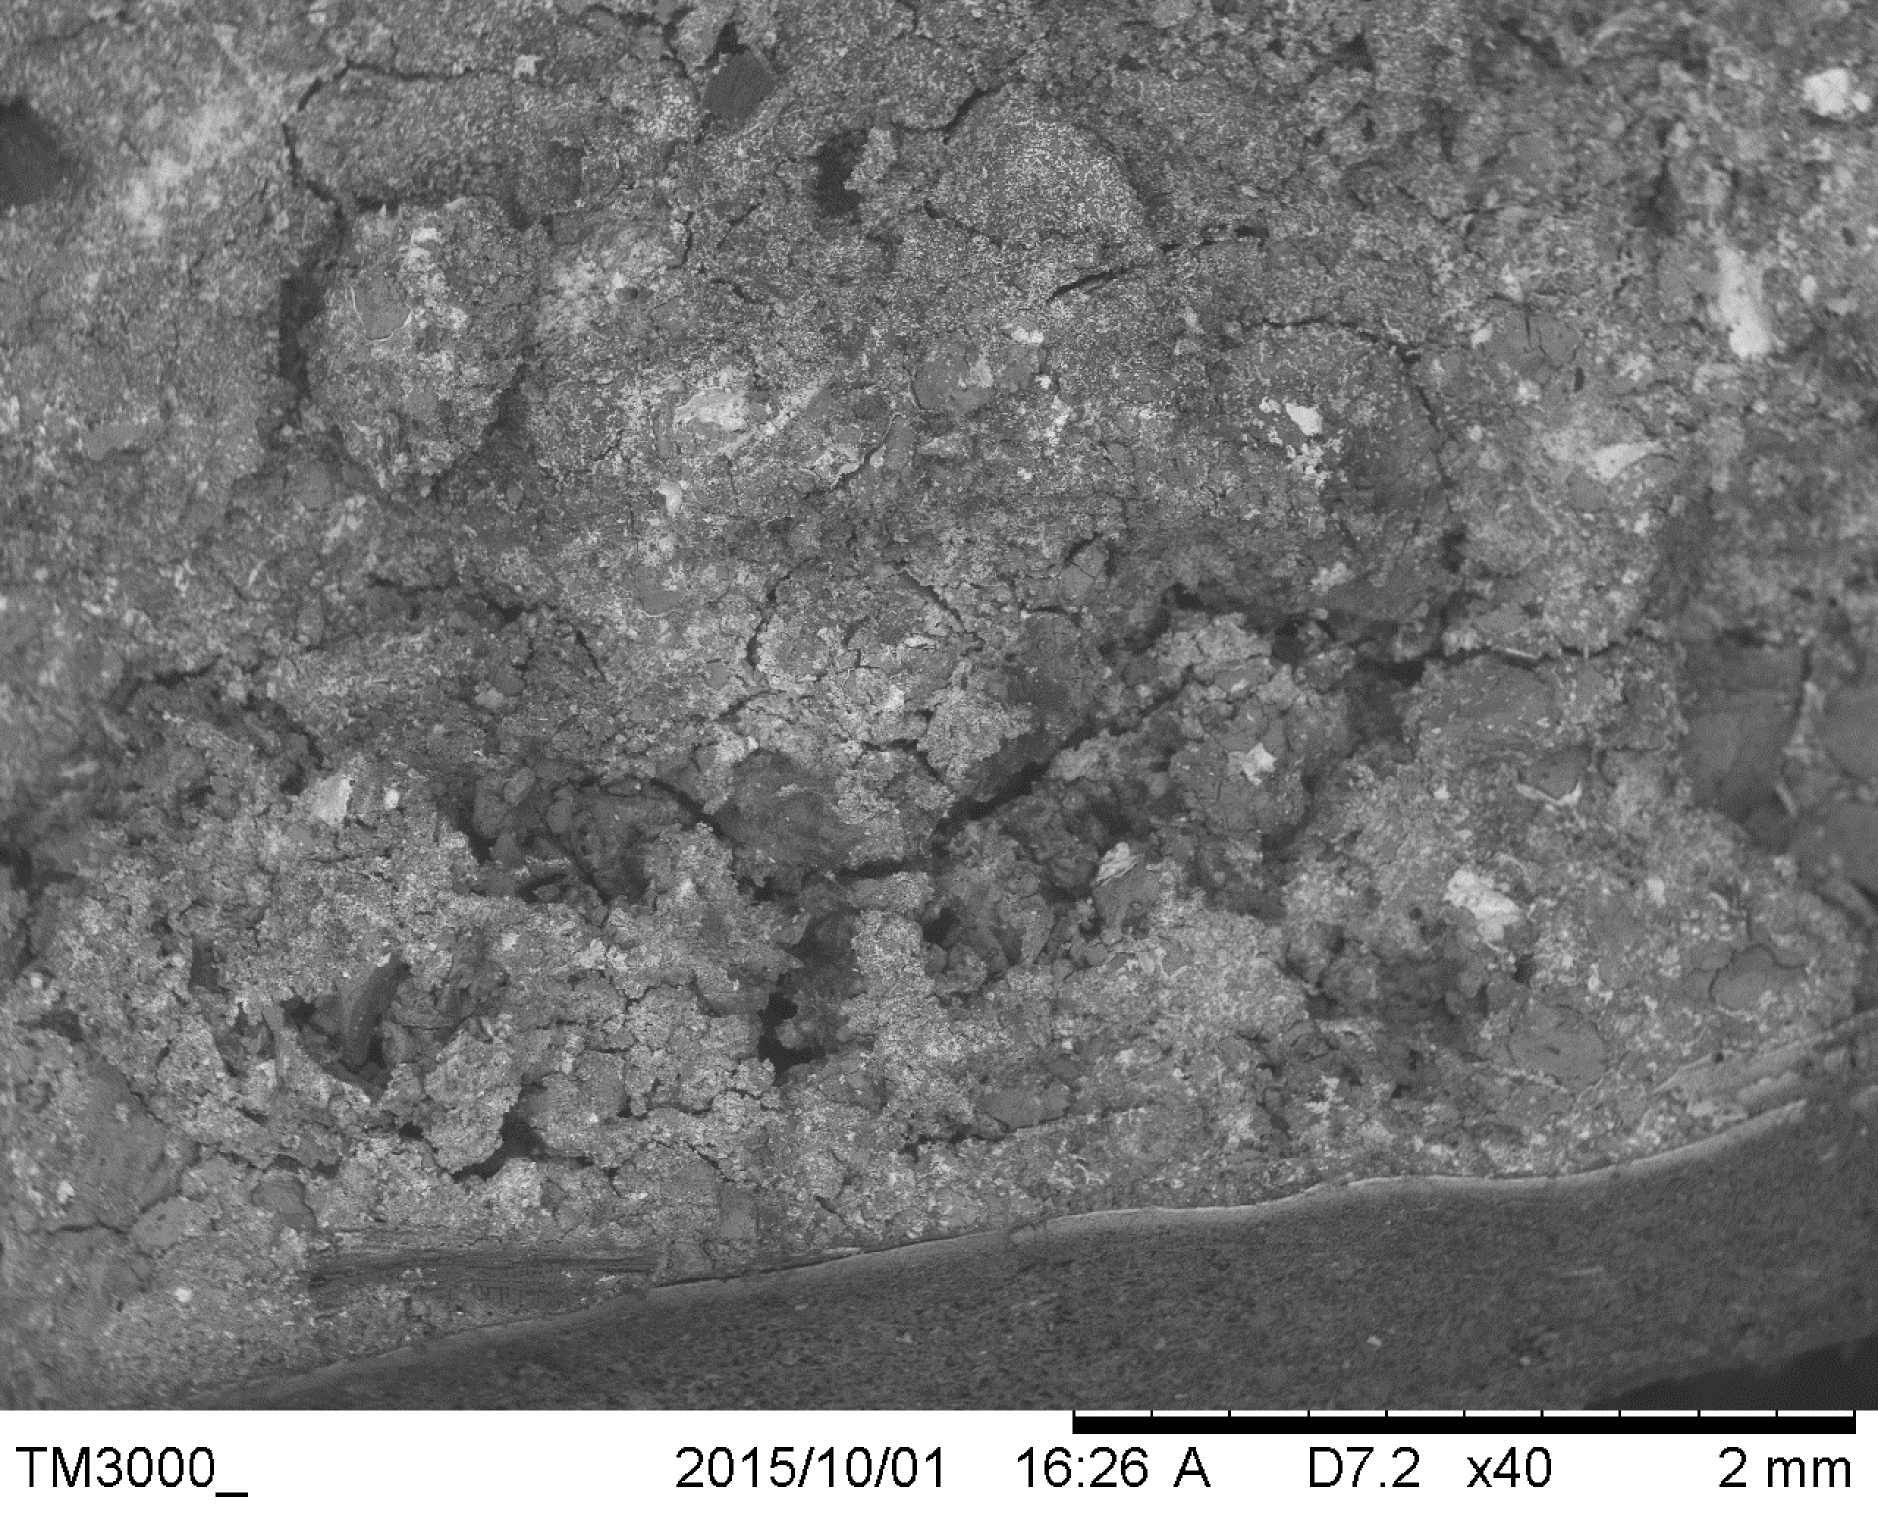
Figure 57: Back-Scattered Electron Image of AG100 showing a heterogeneous, but uniform inorganic composition. The brighter spots in the image are mostly composed of lead and iron and the darker areas are a mixture of sulphur, aluminium, silicon, and calcium
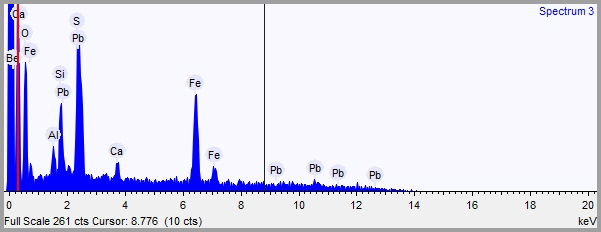
Figure 58: EDS spectrum AG100
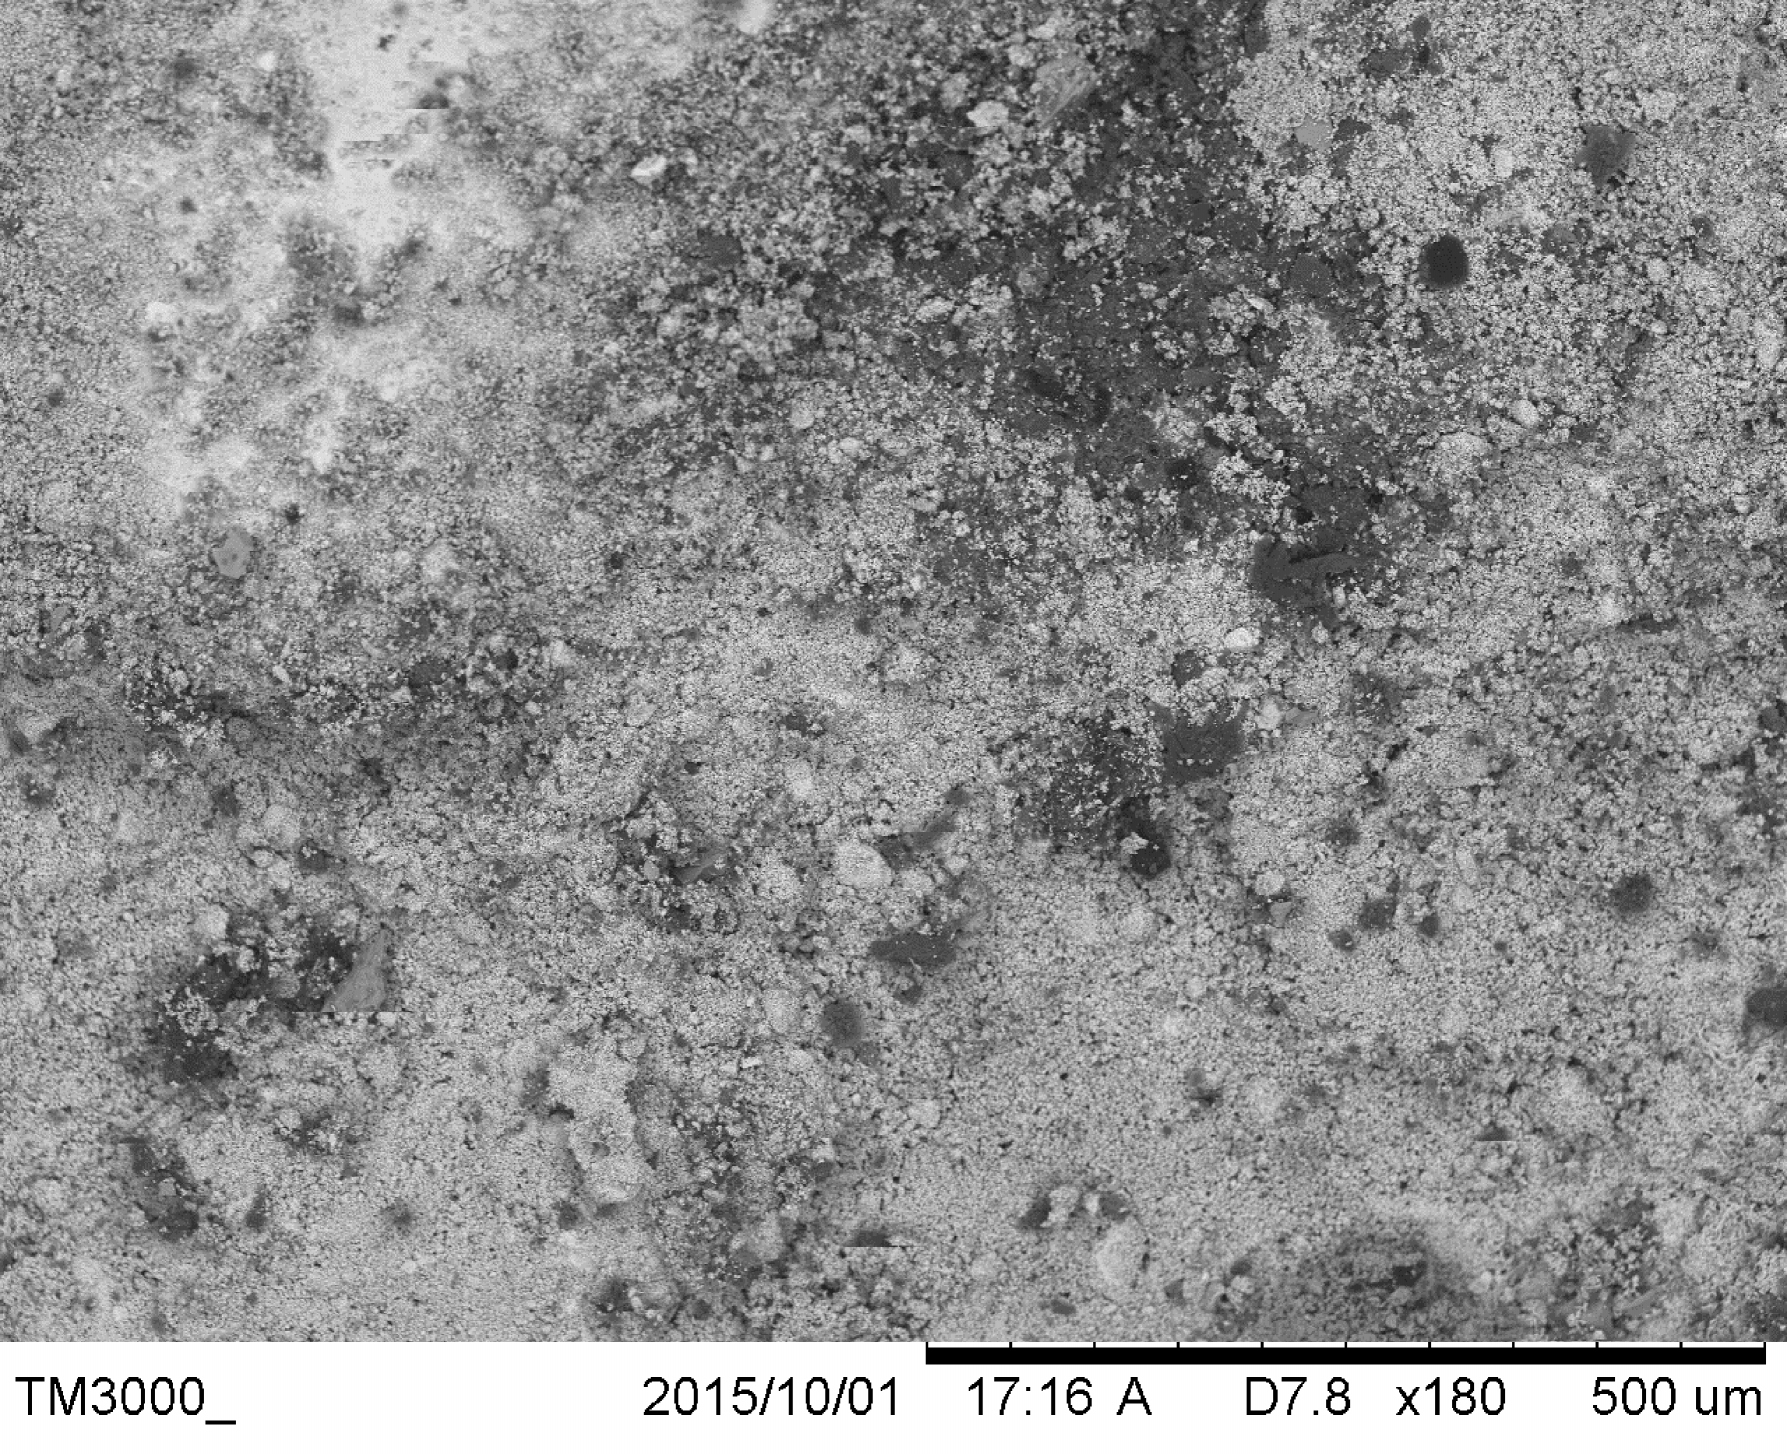
Figure 59: Back-Scattered Electron Image of AG101 showing a heterogeneous, but uniform inorganic composition. The brighter spots are mostly composed of lead and copper and the darker areas are a mixture of sulphur, aluminium, silicon, phosphorus, calcium and iron
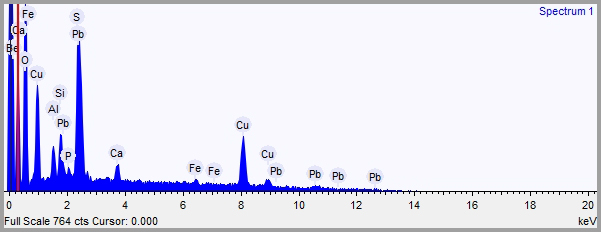
Figure 60: EDS spectrum of AG101
Figure 61: Back-Scattered Electron Image of AG102 showing a heterogeneous, but uniform inorganic composition. The brighter spots are mostly composed of lead. The darker areas are a mixture of aluminium, silicon, phosphorus, potassium, calcium and iron
Figure 62: EDS spectrum of AG102
Figure 63: Back-Scattered Electron image of a fragment of the residue from AG104. The fragment is composed mainly of Copper Oxide
Figure 64: EDS spectrum of AG104
Figure 65: Tobacco pipe bowl with cartouche, showing initial 'E' or 'F' above fleur de lys, with star below. Probable Oswald Type 15, dated 1660-80 (unstratified)
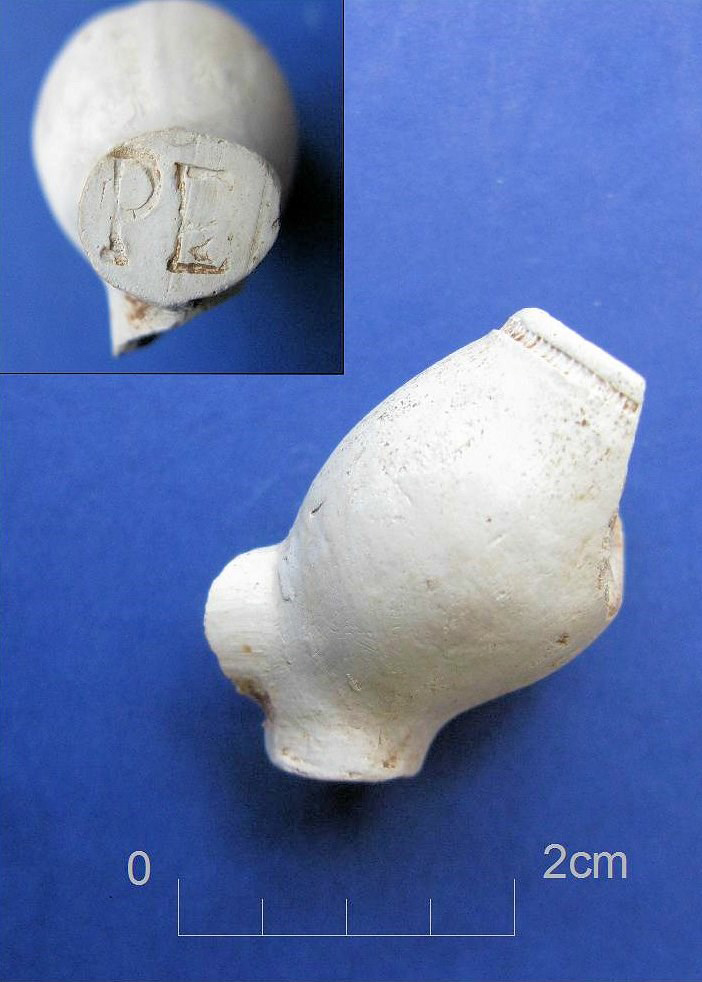
Figure 66: Tobacco pipe bowl fragment showing initials 'PE' on pedestal heel. Probable product of Philip Edwards I or II (fl. 1649-1702/3) (context 1126)
Figure 67: Complete tobacco pipe bowl showing Hanoverian coat of arms of newly formed United Kingdom. Probable product of Robert Tippett II or III (fl. 1660-1722) (context 152)
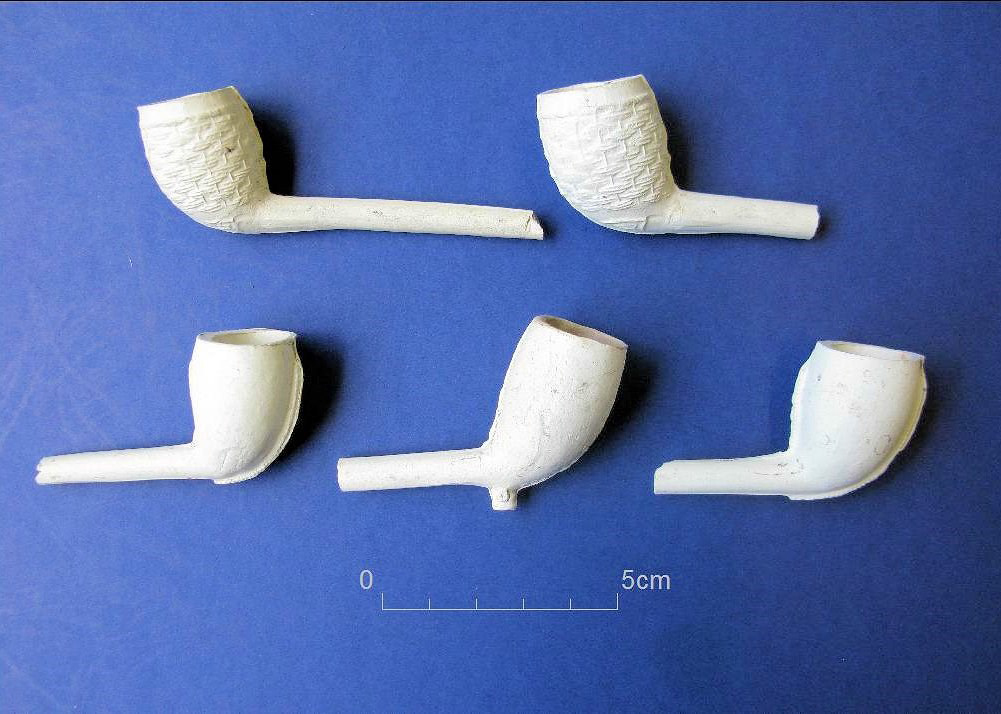
Figure 68: Selection of 19th-century clay tobacco pipes from context 174, probable products of the pipe factory at 26 Wade Street, run by the White/Wilkey families
Figure 69: Conjoining base sherds of probable jar of 18th century date (context 1090)
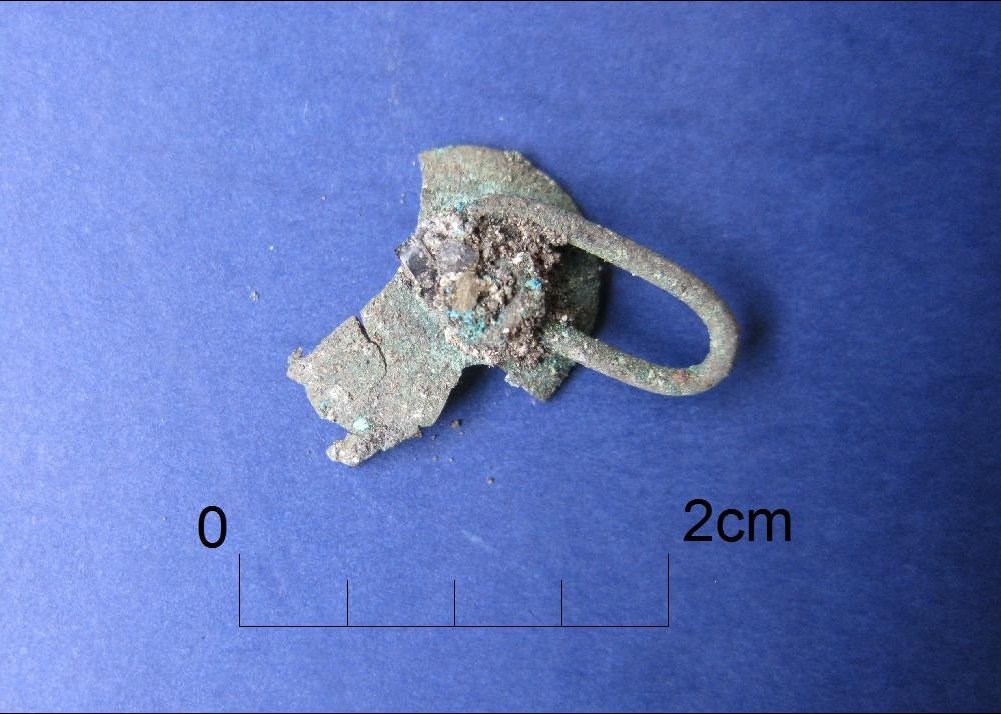
Figure 70: Small Find 11: Loop junction and domed back of copper-alloy cufflink, dated 17th century onwards (context 1138)
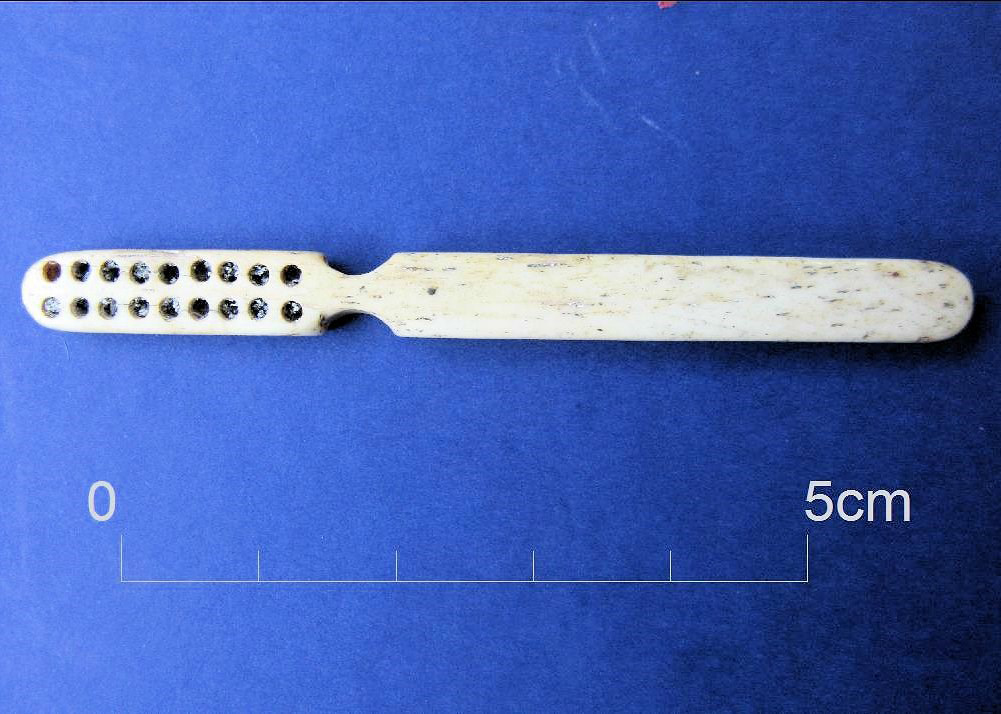
Figure 71: Small Find 4: Small polished bone brush, probable child's toothbrush, dated late 18th century onwards (context 1138)
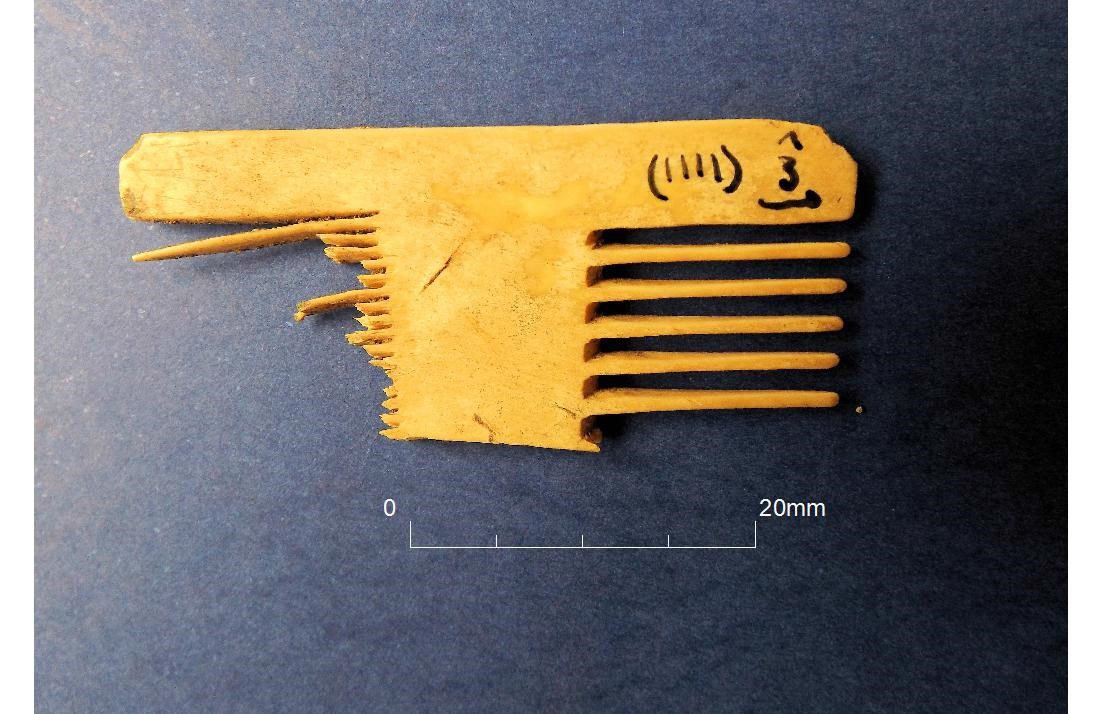
Figure 72: Small Find 3: Fragment of polished bone comb, dated 16th/17th century onwards (context 1111)
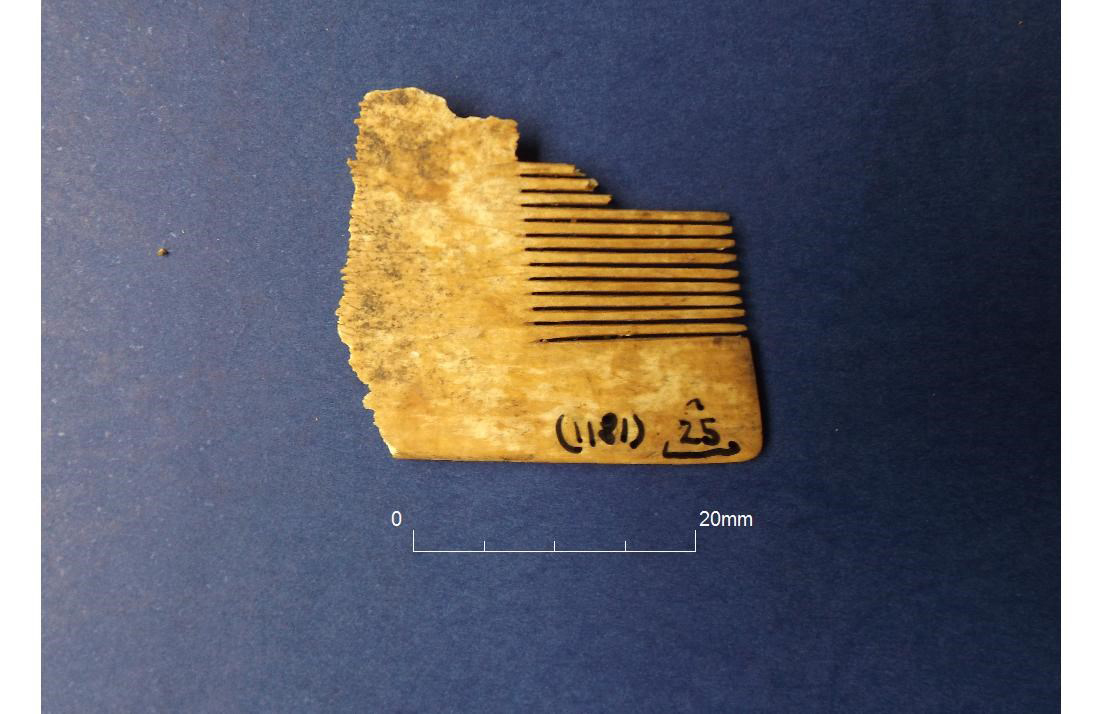
Figure 73: Small Find 25: Fragment of polished bone comb, dated 16th/17th century onwards (context 1181)
Internet Archaeology is an open access journal based in the Department of Archaeology, University of York. Except where otherwise noted, content from this work may be used under the terms of the Creative Commons Attribution 3.0 (CC BY) Unported licence, which permits unrestricted use, distribution, and reproduction in any medium, provided that attribution to the author(s), the title of the work, the Internet Archaeology journal and the relevant URL/DOI are given.
Terms and Conditions | Legal Statements | Privacy Policy | Cookies Policy | Citing Internet Archaeology
Internet Archaeology content is preserved for the long term with the Archaeology Data Service (ROR). Help sustain and support open access publication by donating to our Open Access Archaeology Fund.