All photos used in the text and linked from the database were taken by Richard White, Helen McPherson, Eleanor Hutcheon, Lynn Duncan, Eleanor Barton and Ilya de Vries and are published courtesy of Aberdeen Art Gallery and Museums Collections. All the plans and sections and database illustrations are by Jan Dunbar, Clare Yarrington and Tracey Caldwell.
3D fly-through model of the Carmelite Friary, Aberdeen
The model was commissioned by the authors and created in 2002 by PinkZeppelin. The model is based on excavation and historical research and is dated to the period c.1450. The video has no sound.
Figure 1: Carmelite houses in Scotland and Northern England
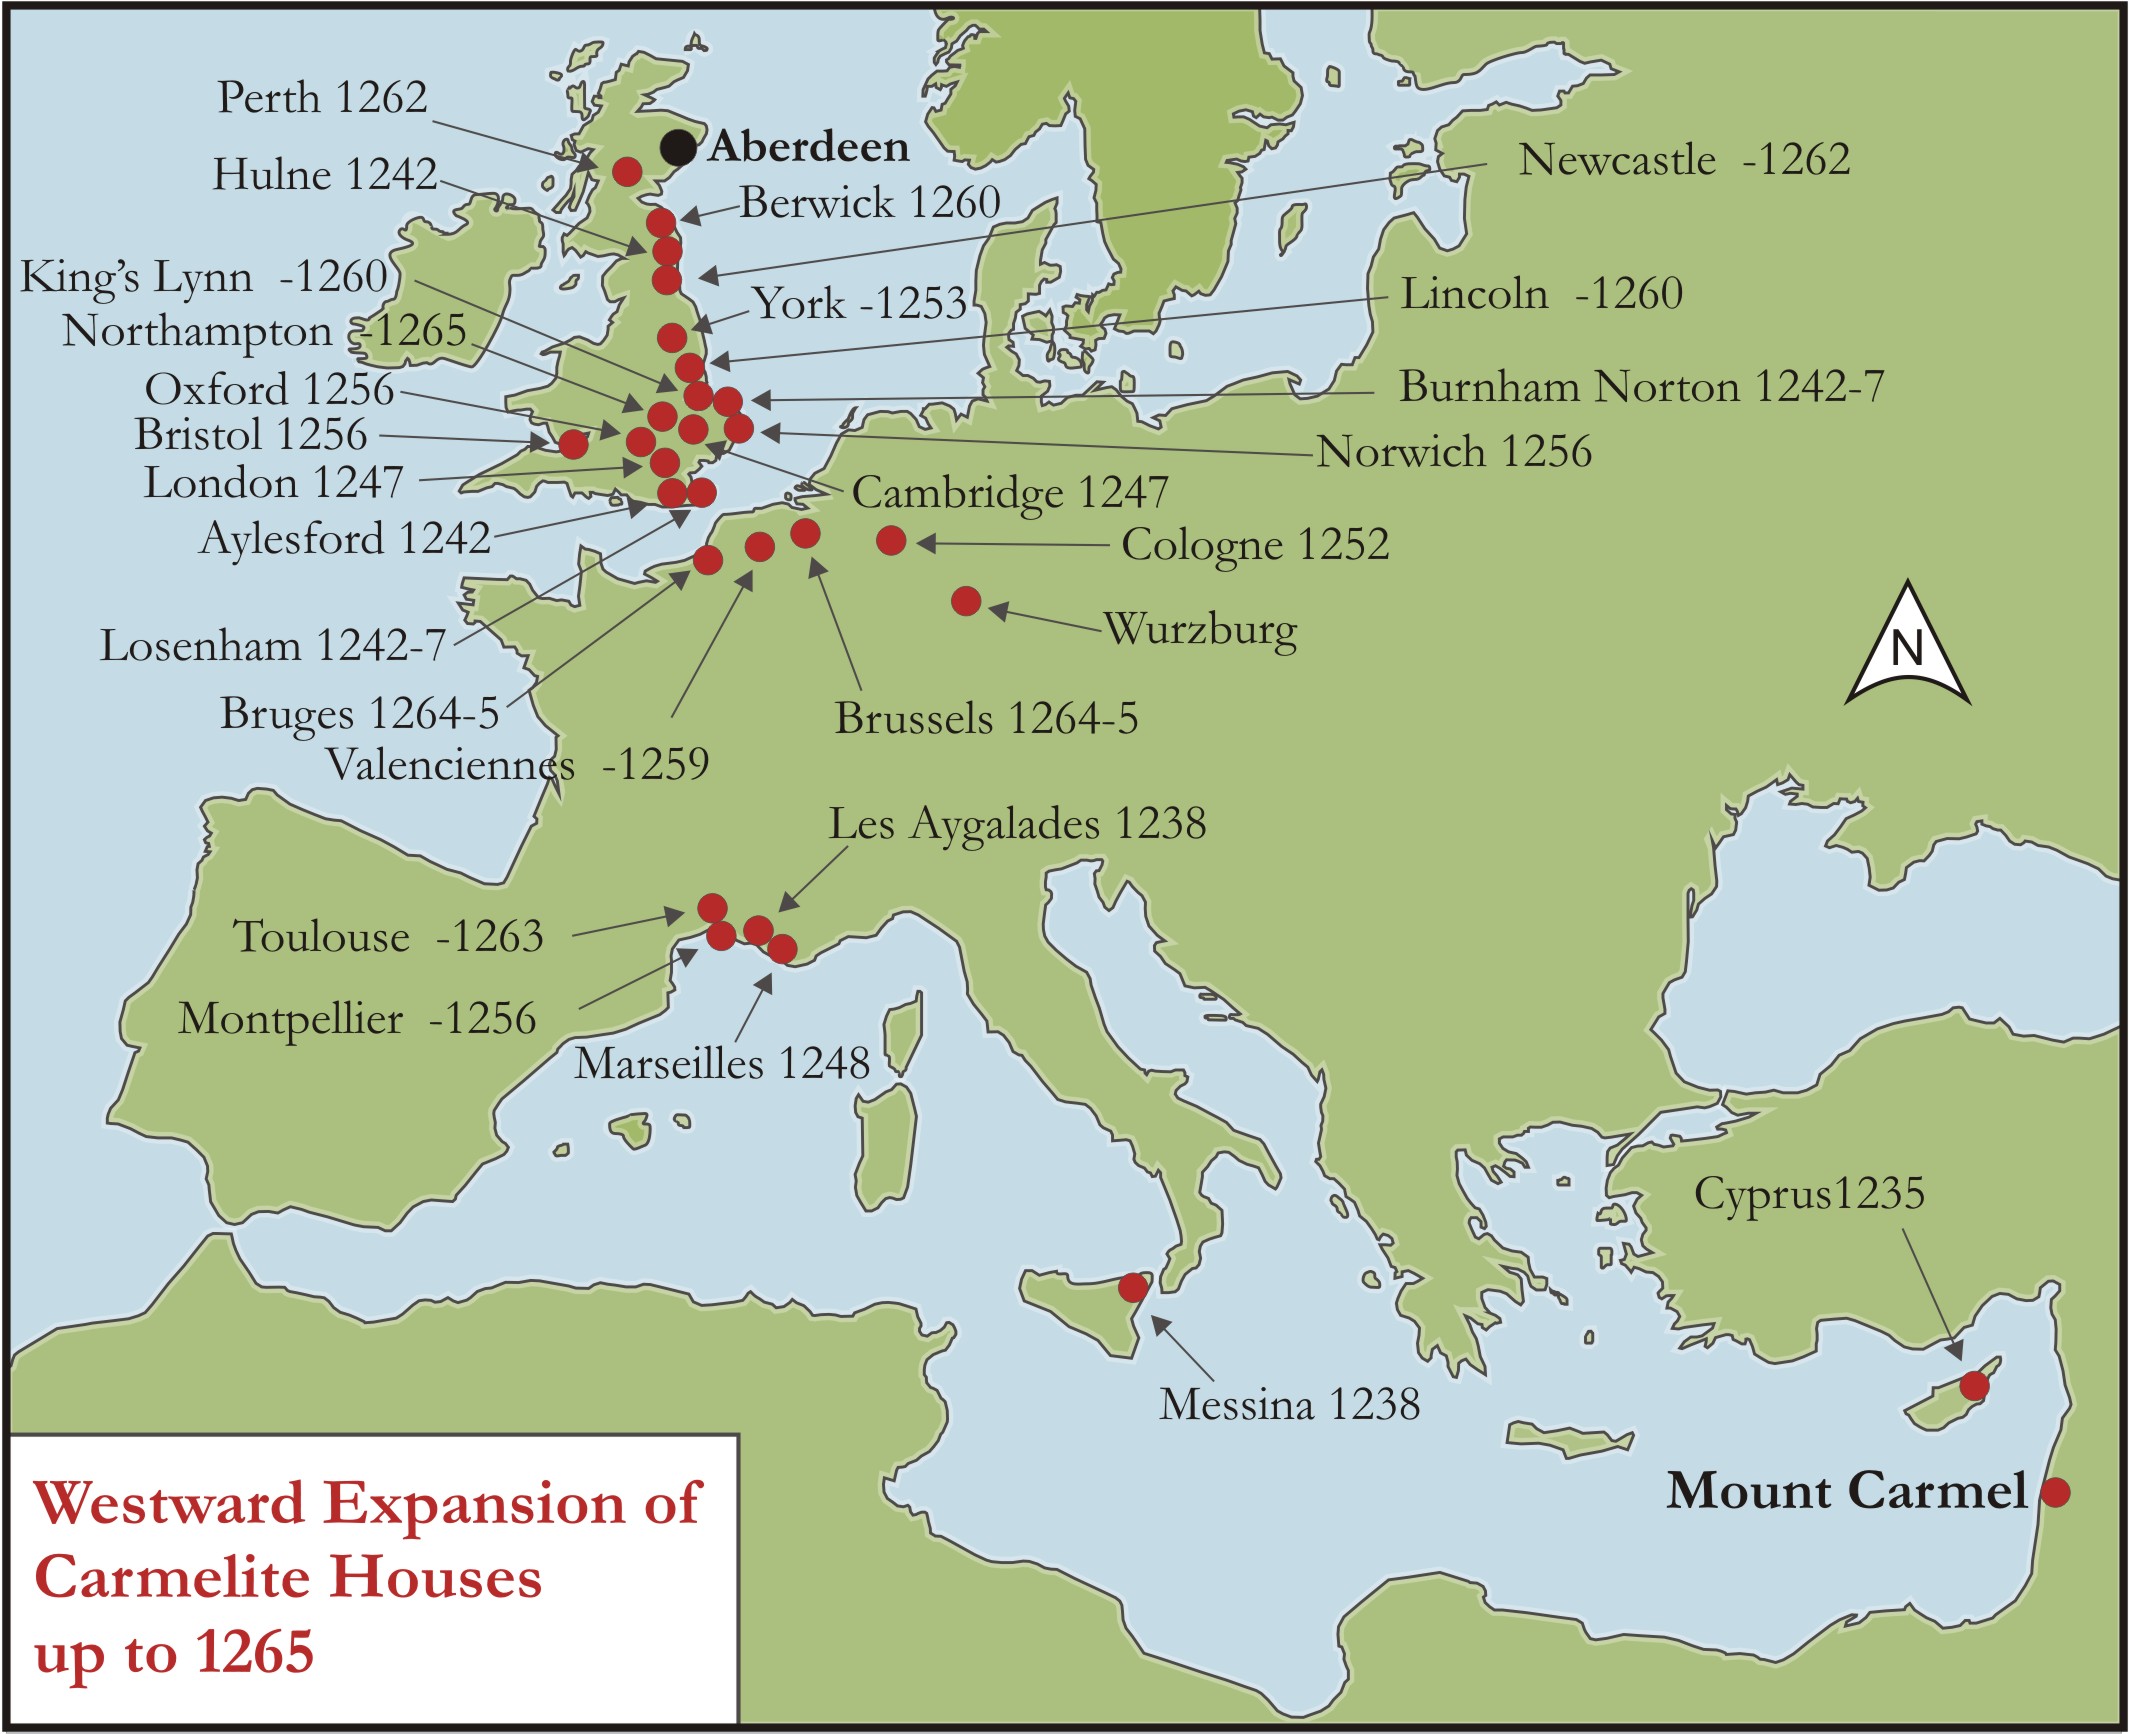
Figure 2: Westward expansion of Carmelite houses up to 1265
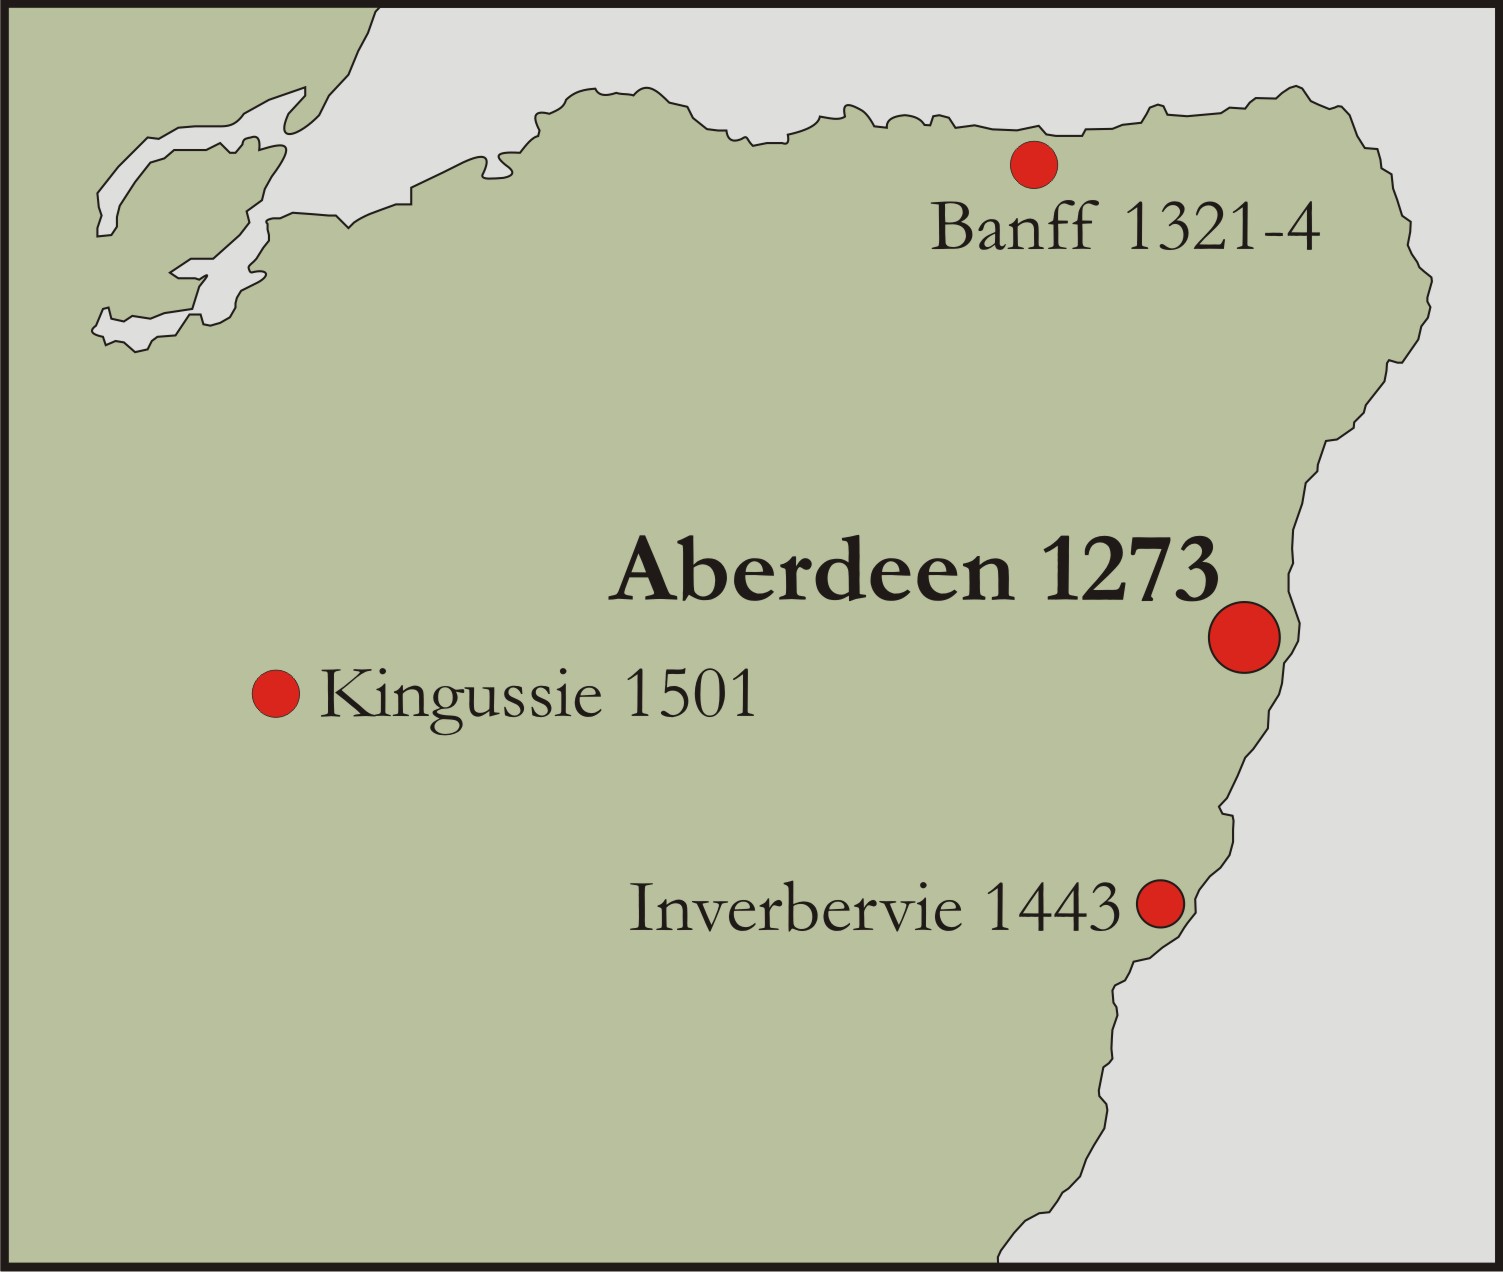
Figure 3: Carmelite houses in north-east Scotland
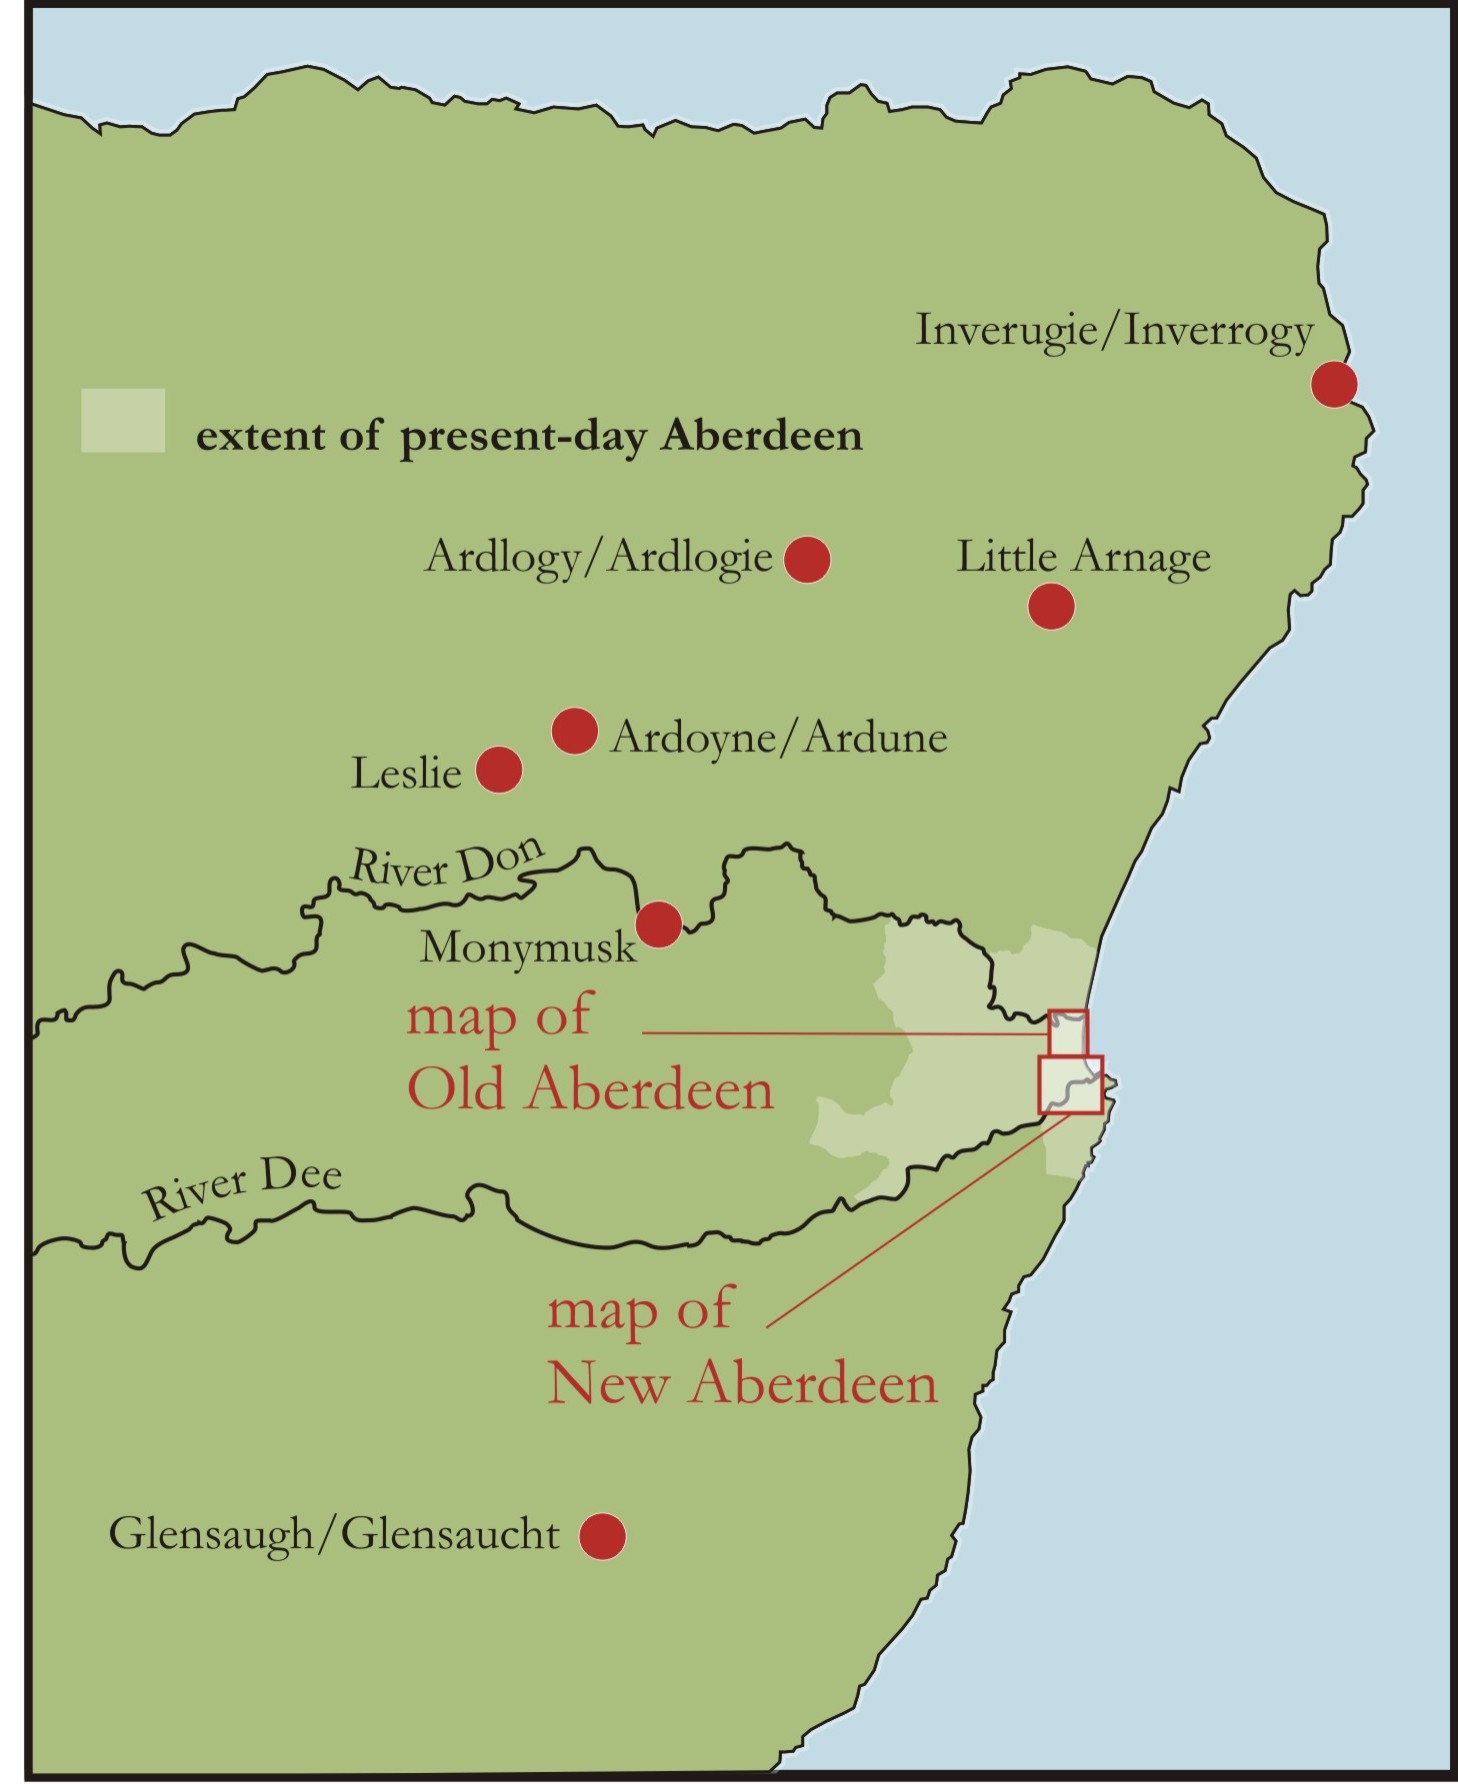
Figure 4: Old and New Aberdeen, with location of selected places mentioned in the text
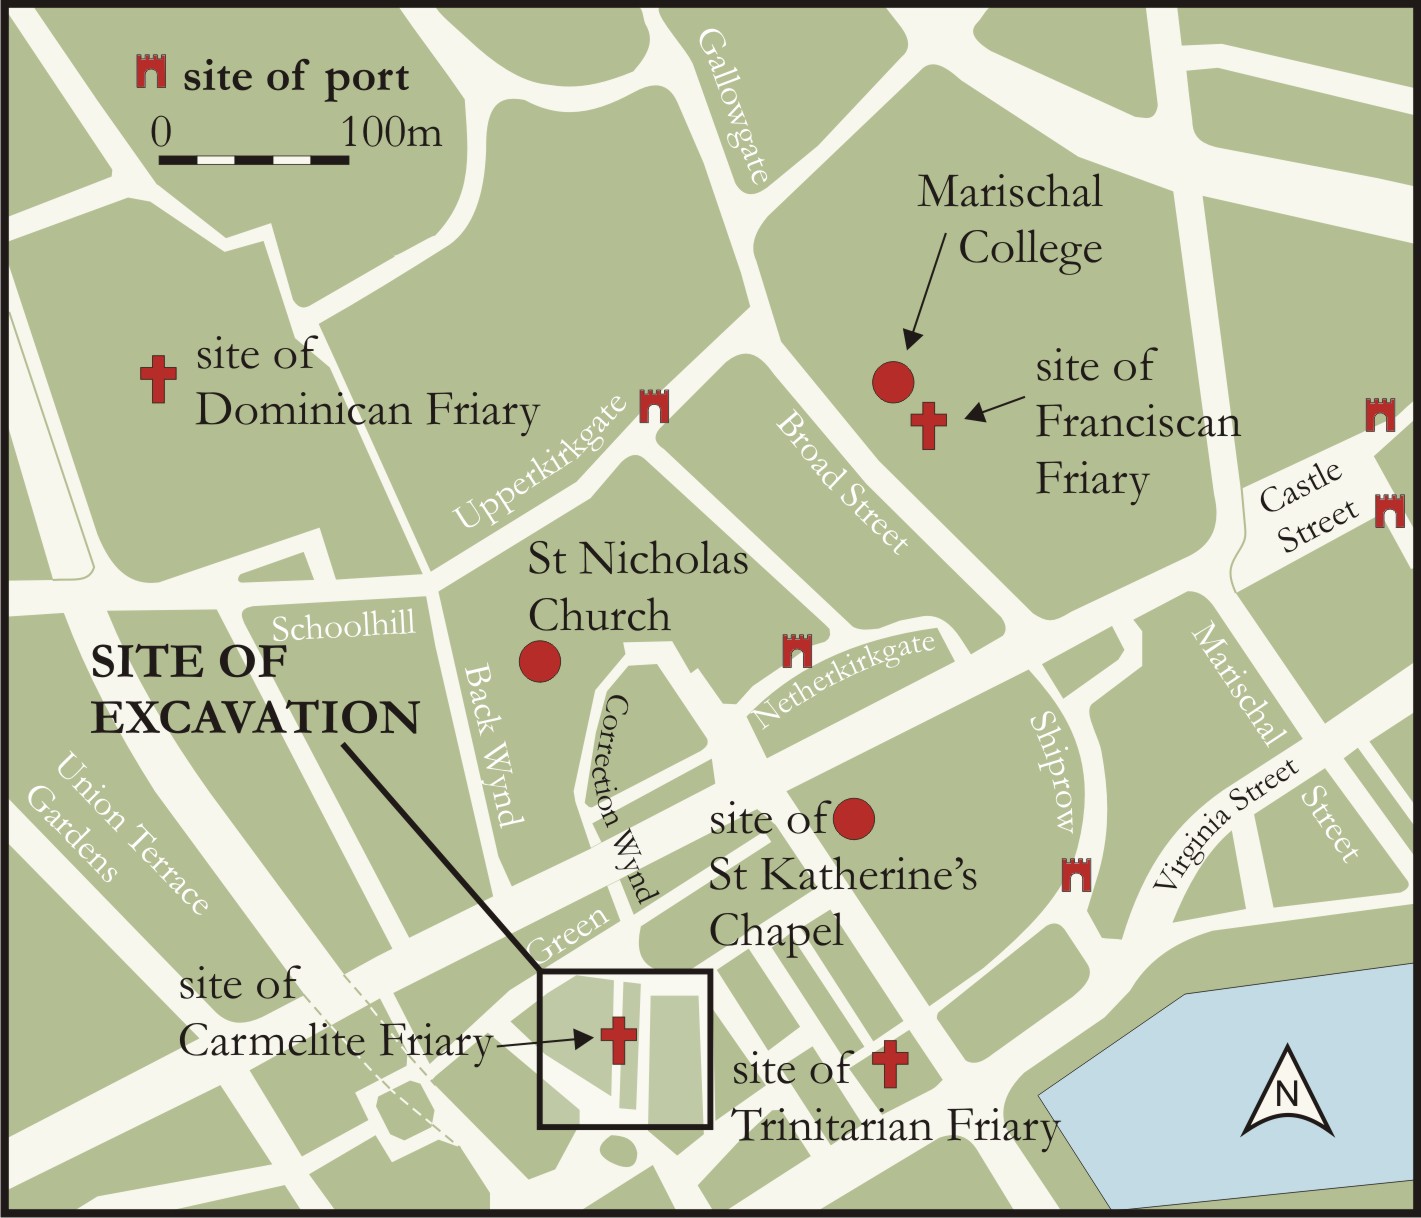
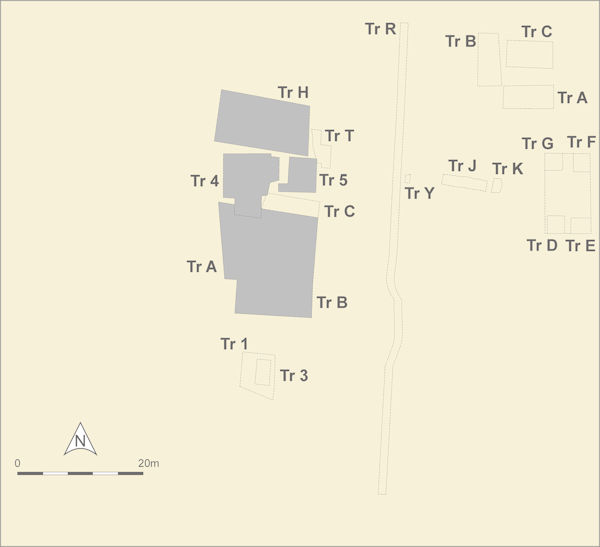
Figure 5: Location of Carmelite friary, other friaries and principal features of medieval burgh of Aberdeen
Figure 6: Old Aberdeen
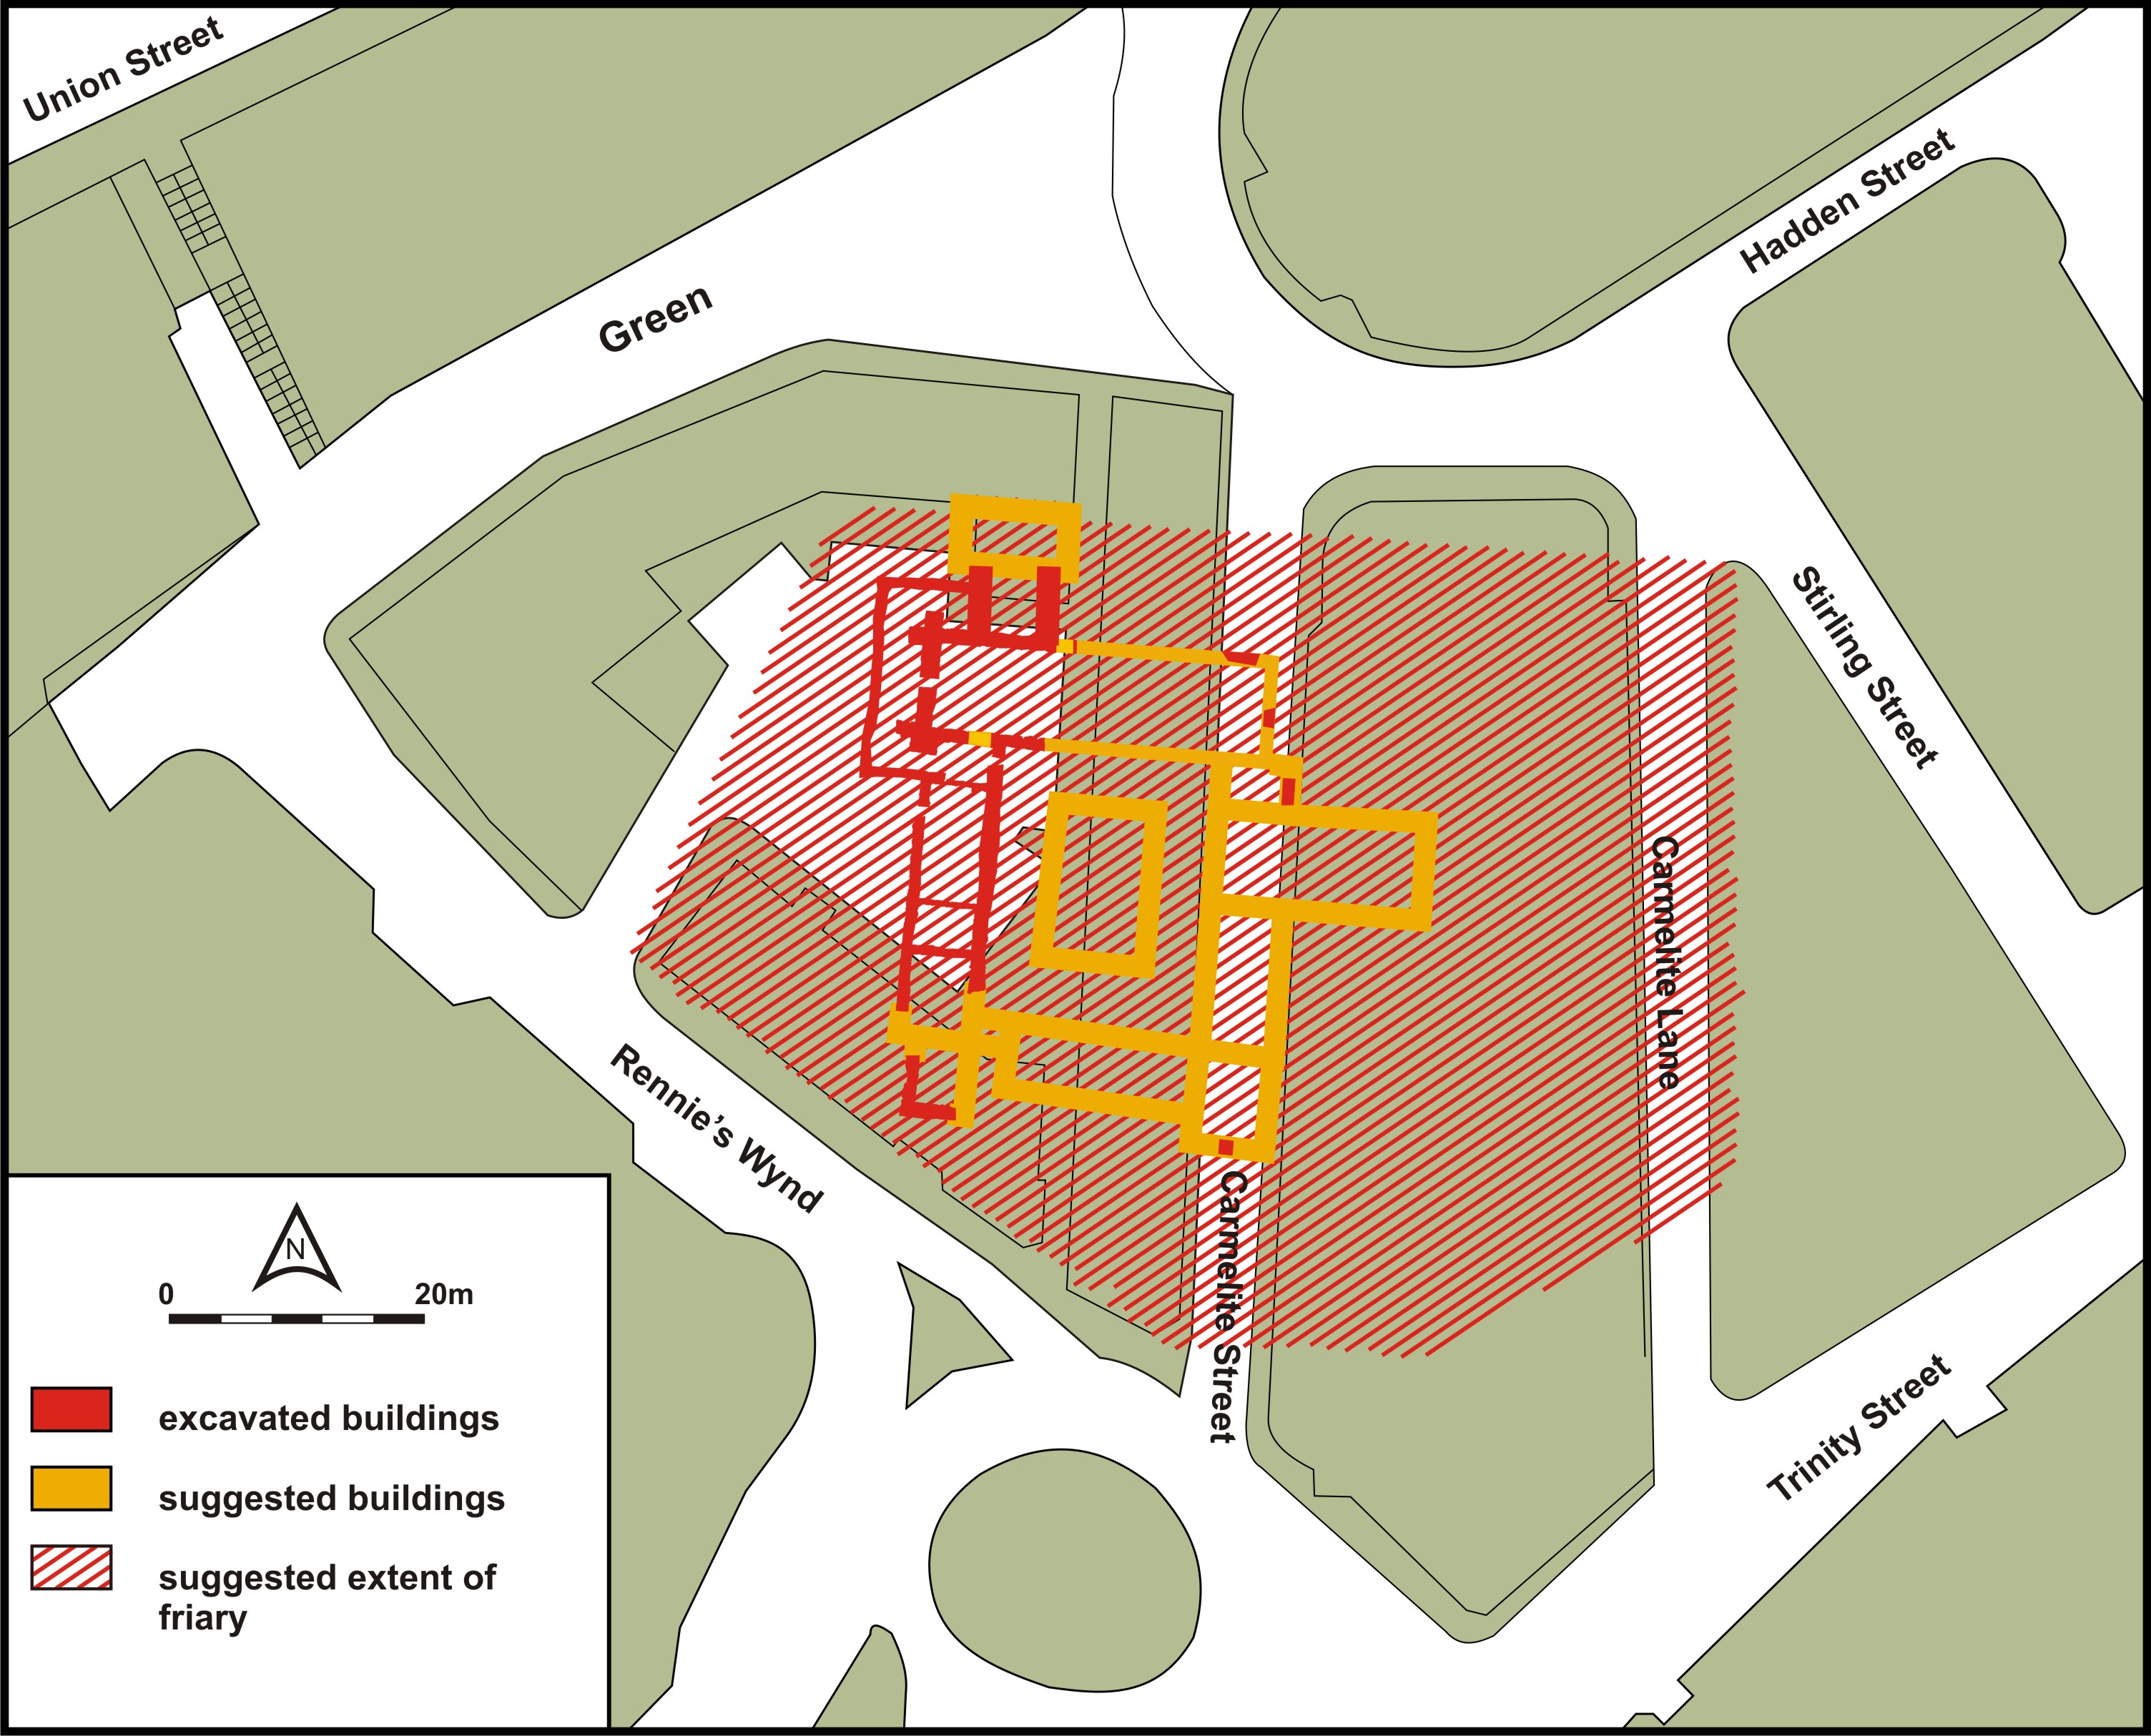
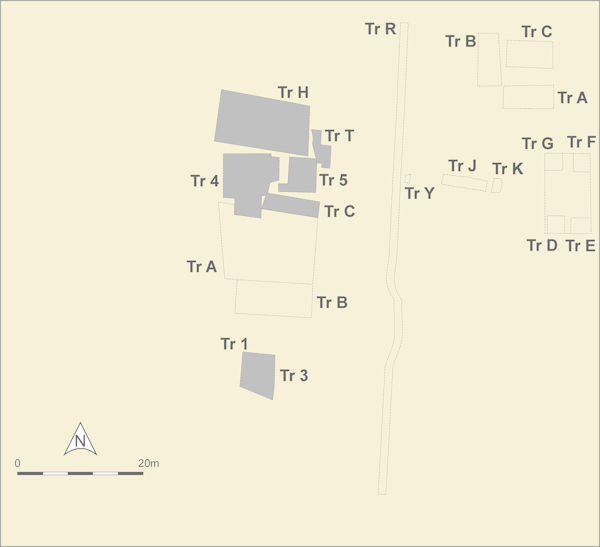
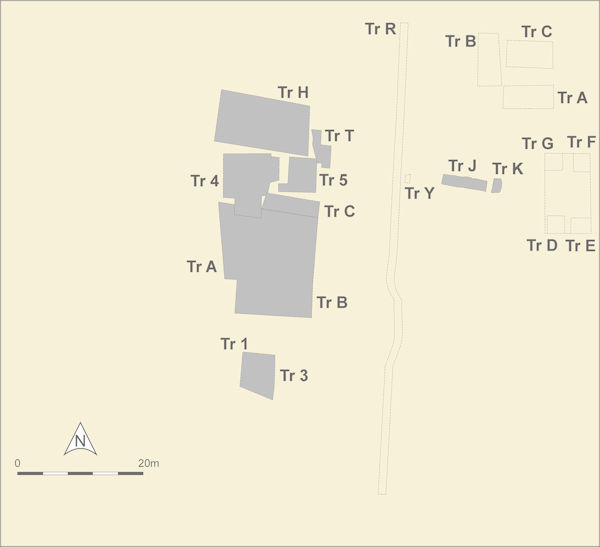
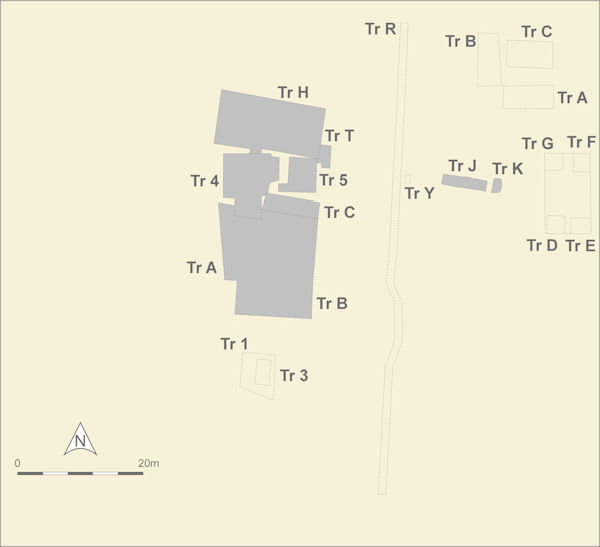
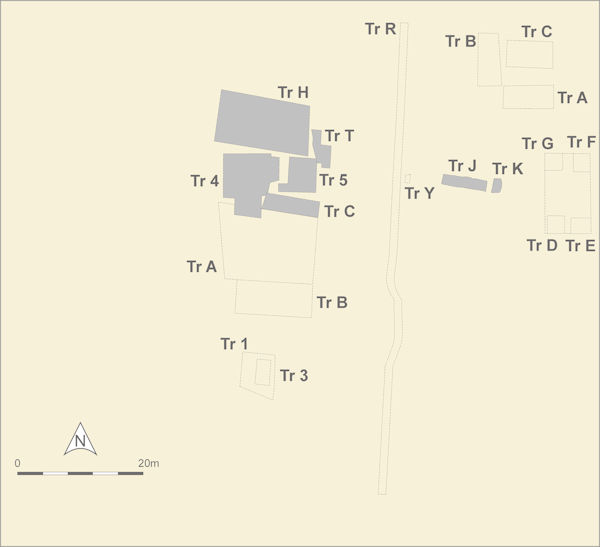
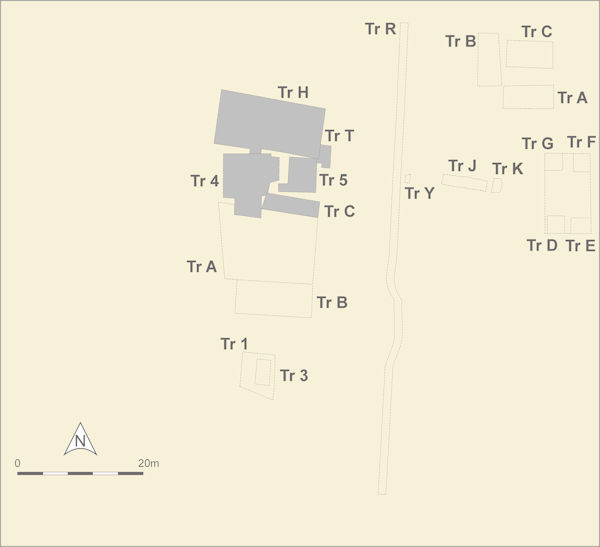
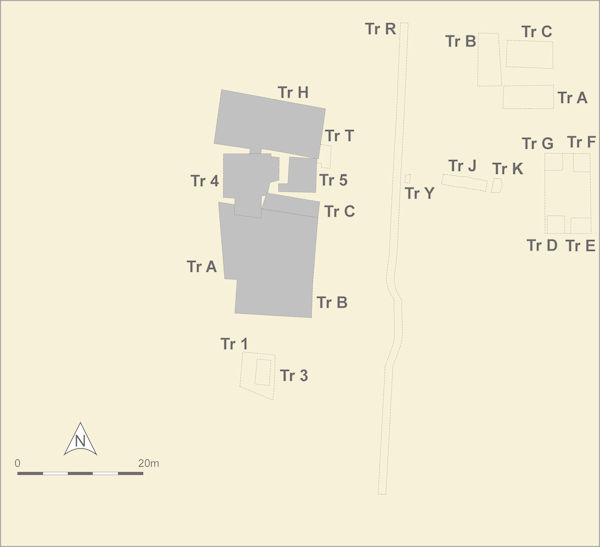
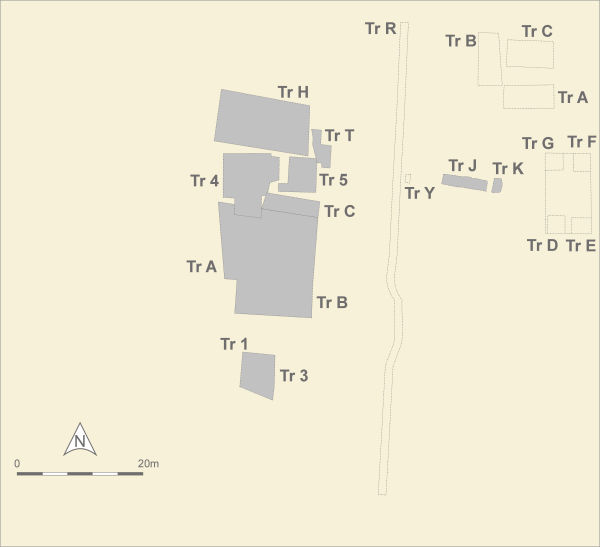
Figure 7: Detailed location plan of Carmelite friary
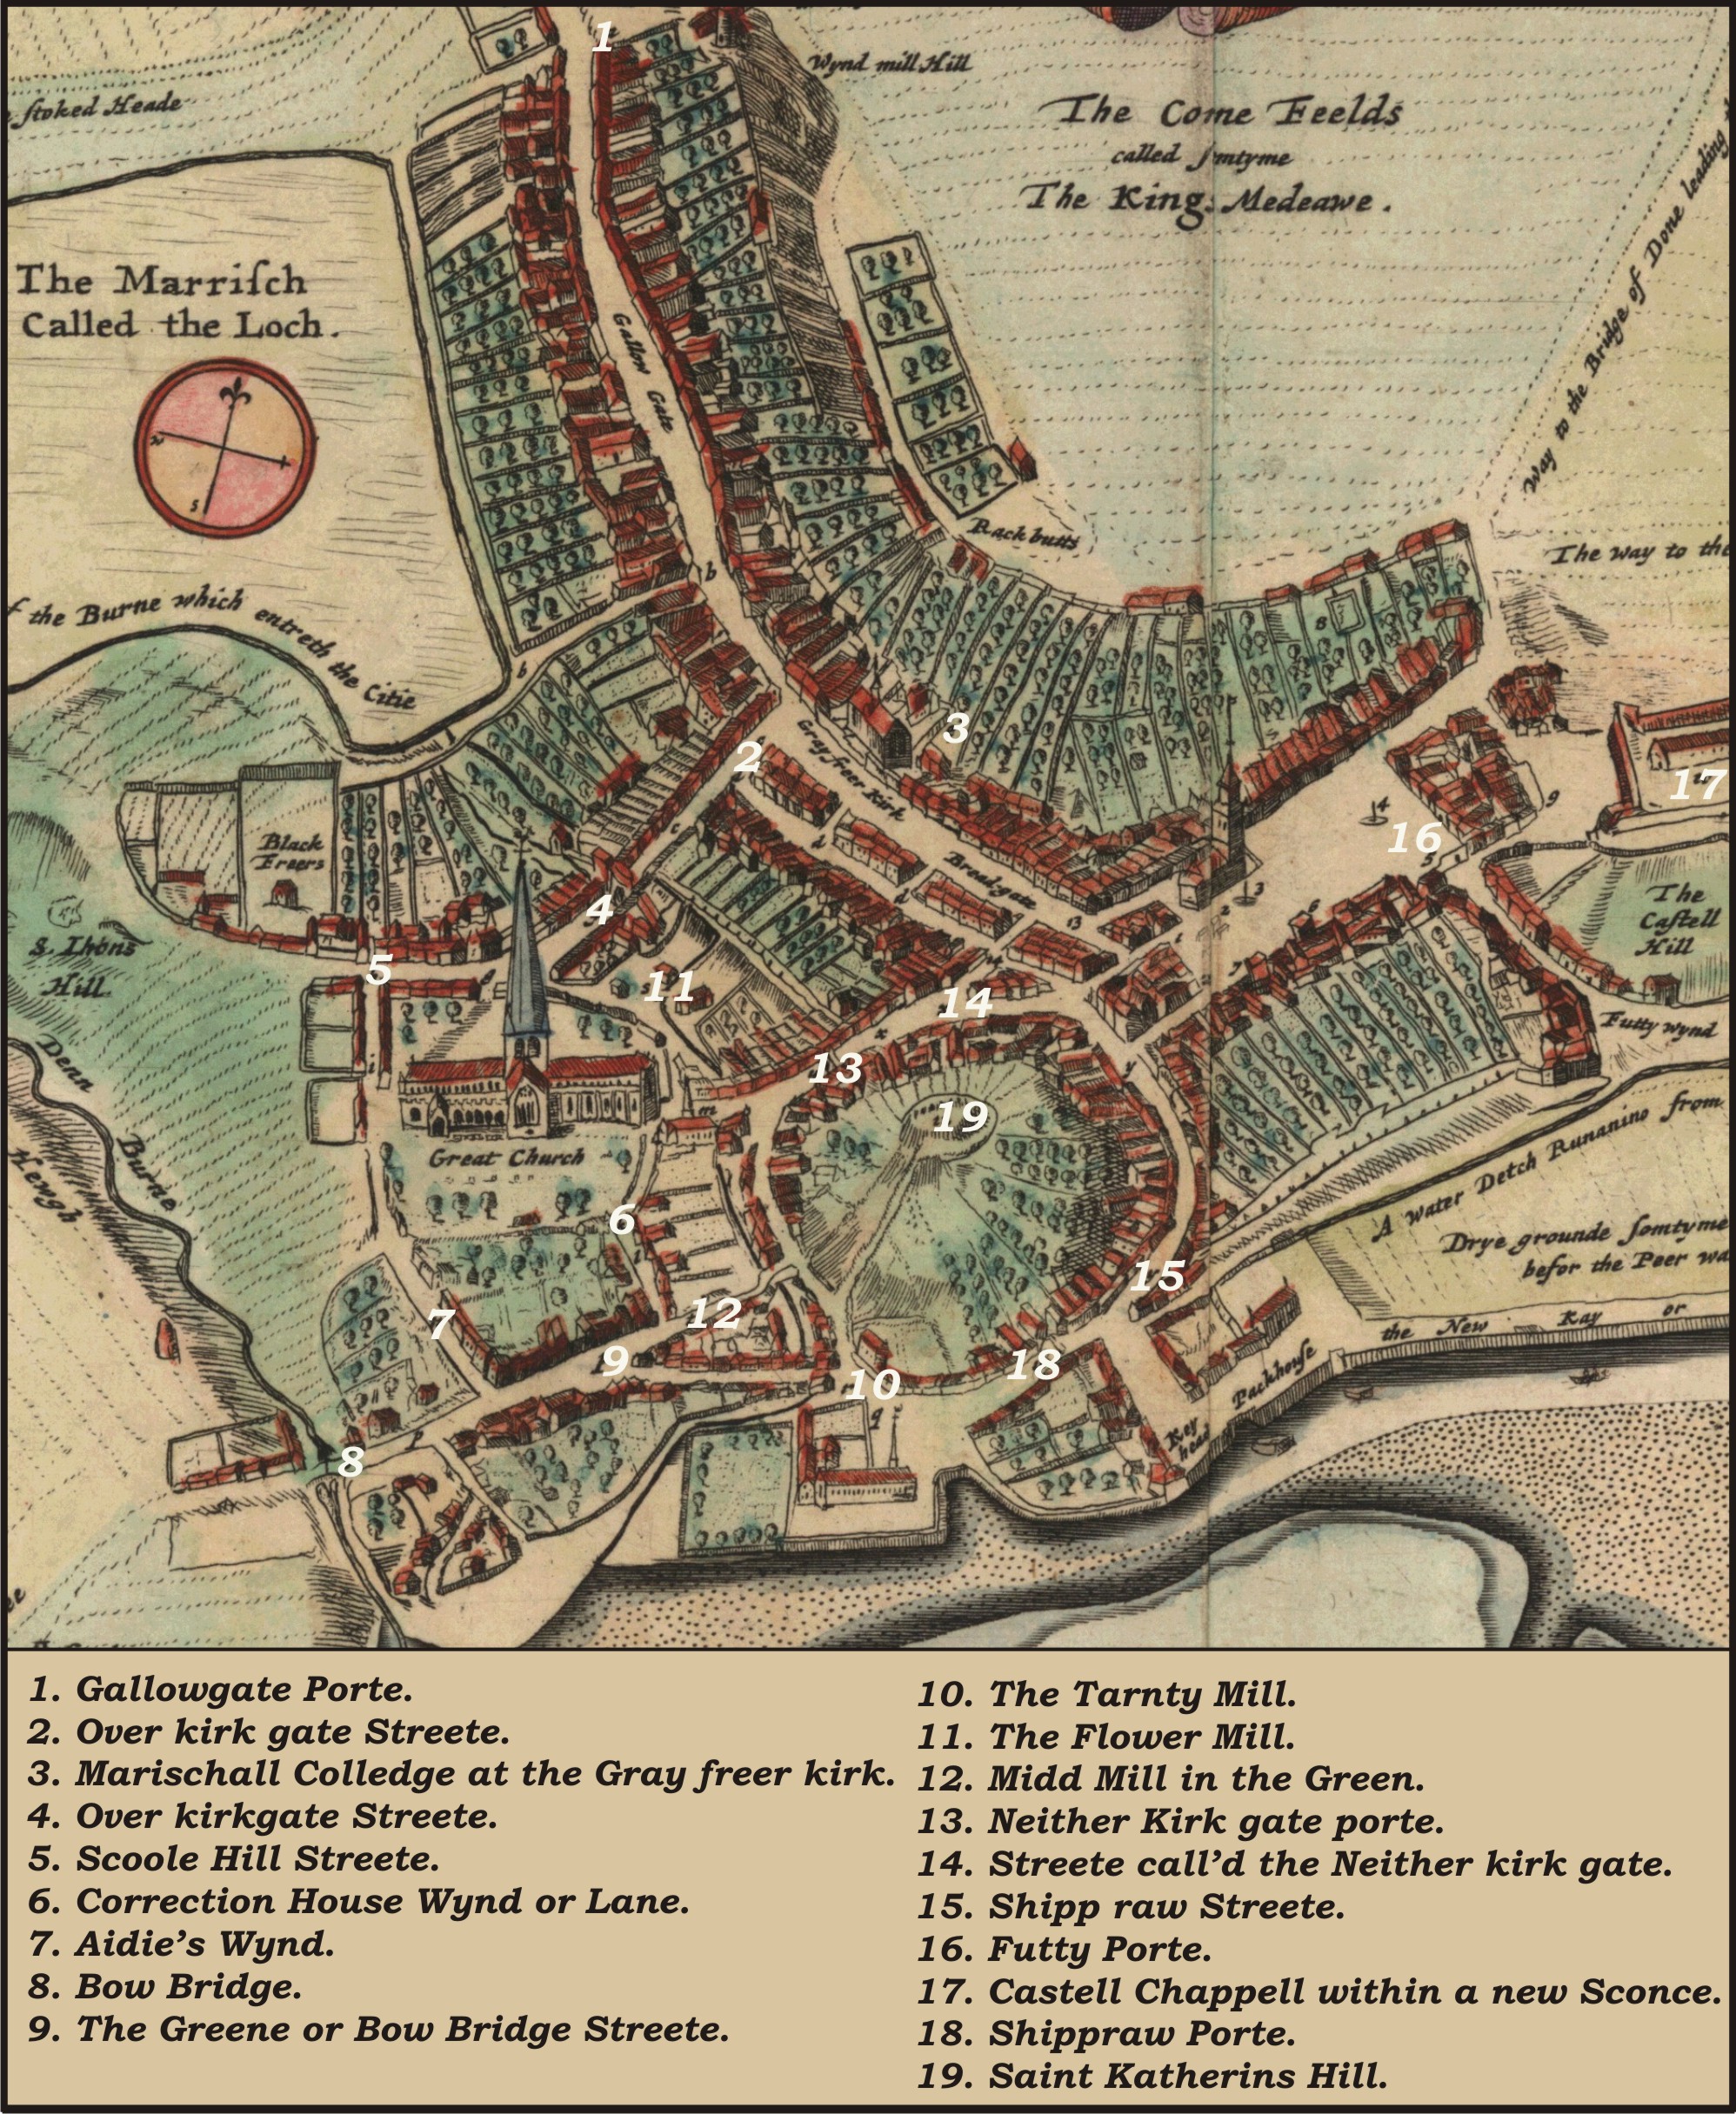
Figure 8: Annotated version of Parson Gordon's map of Aberdeen, 1661
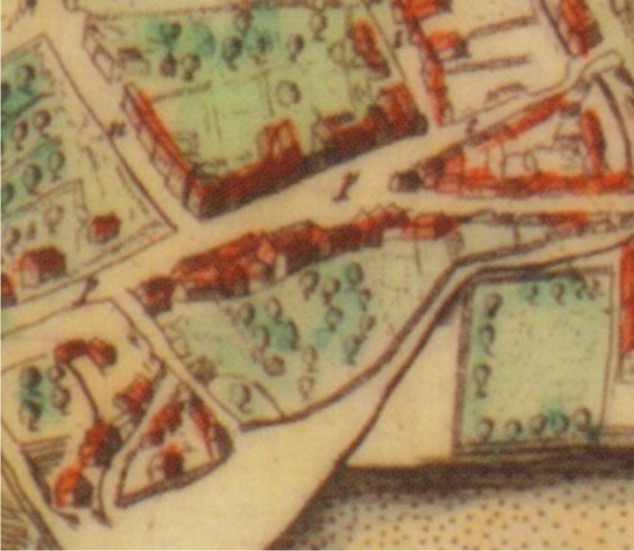
Figure 9: Extract from Parson Gordon's map of Aberdeen, 1661, showing site of Trinitarian friary, with its garden
Figure 10: Extract from 1867 Ordnance Survey map of Aberdeen, showing the Green, with former location of Carmelite friary to south
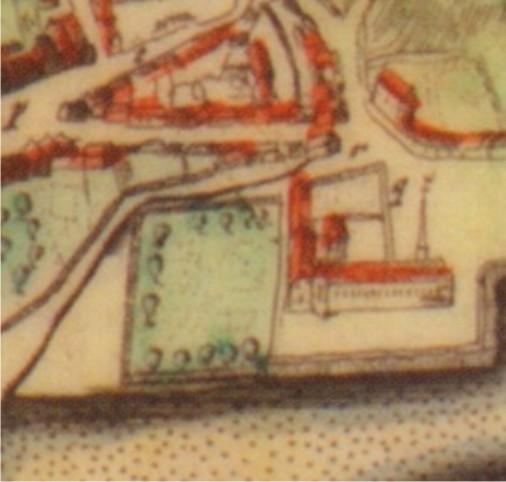
Figure 11: Extract from Parson Gordon's map of Aberdeen, 1661, showing former site of Carmelite friary, centre
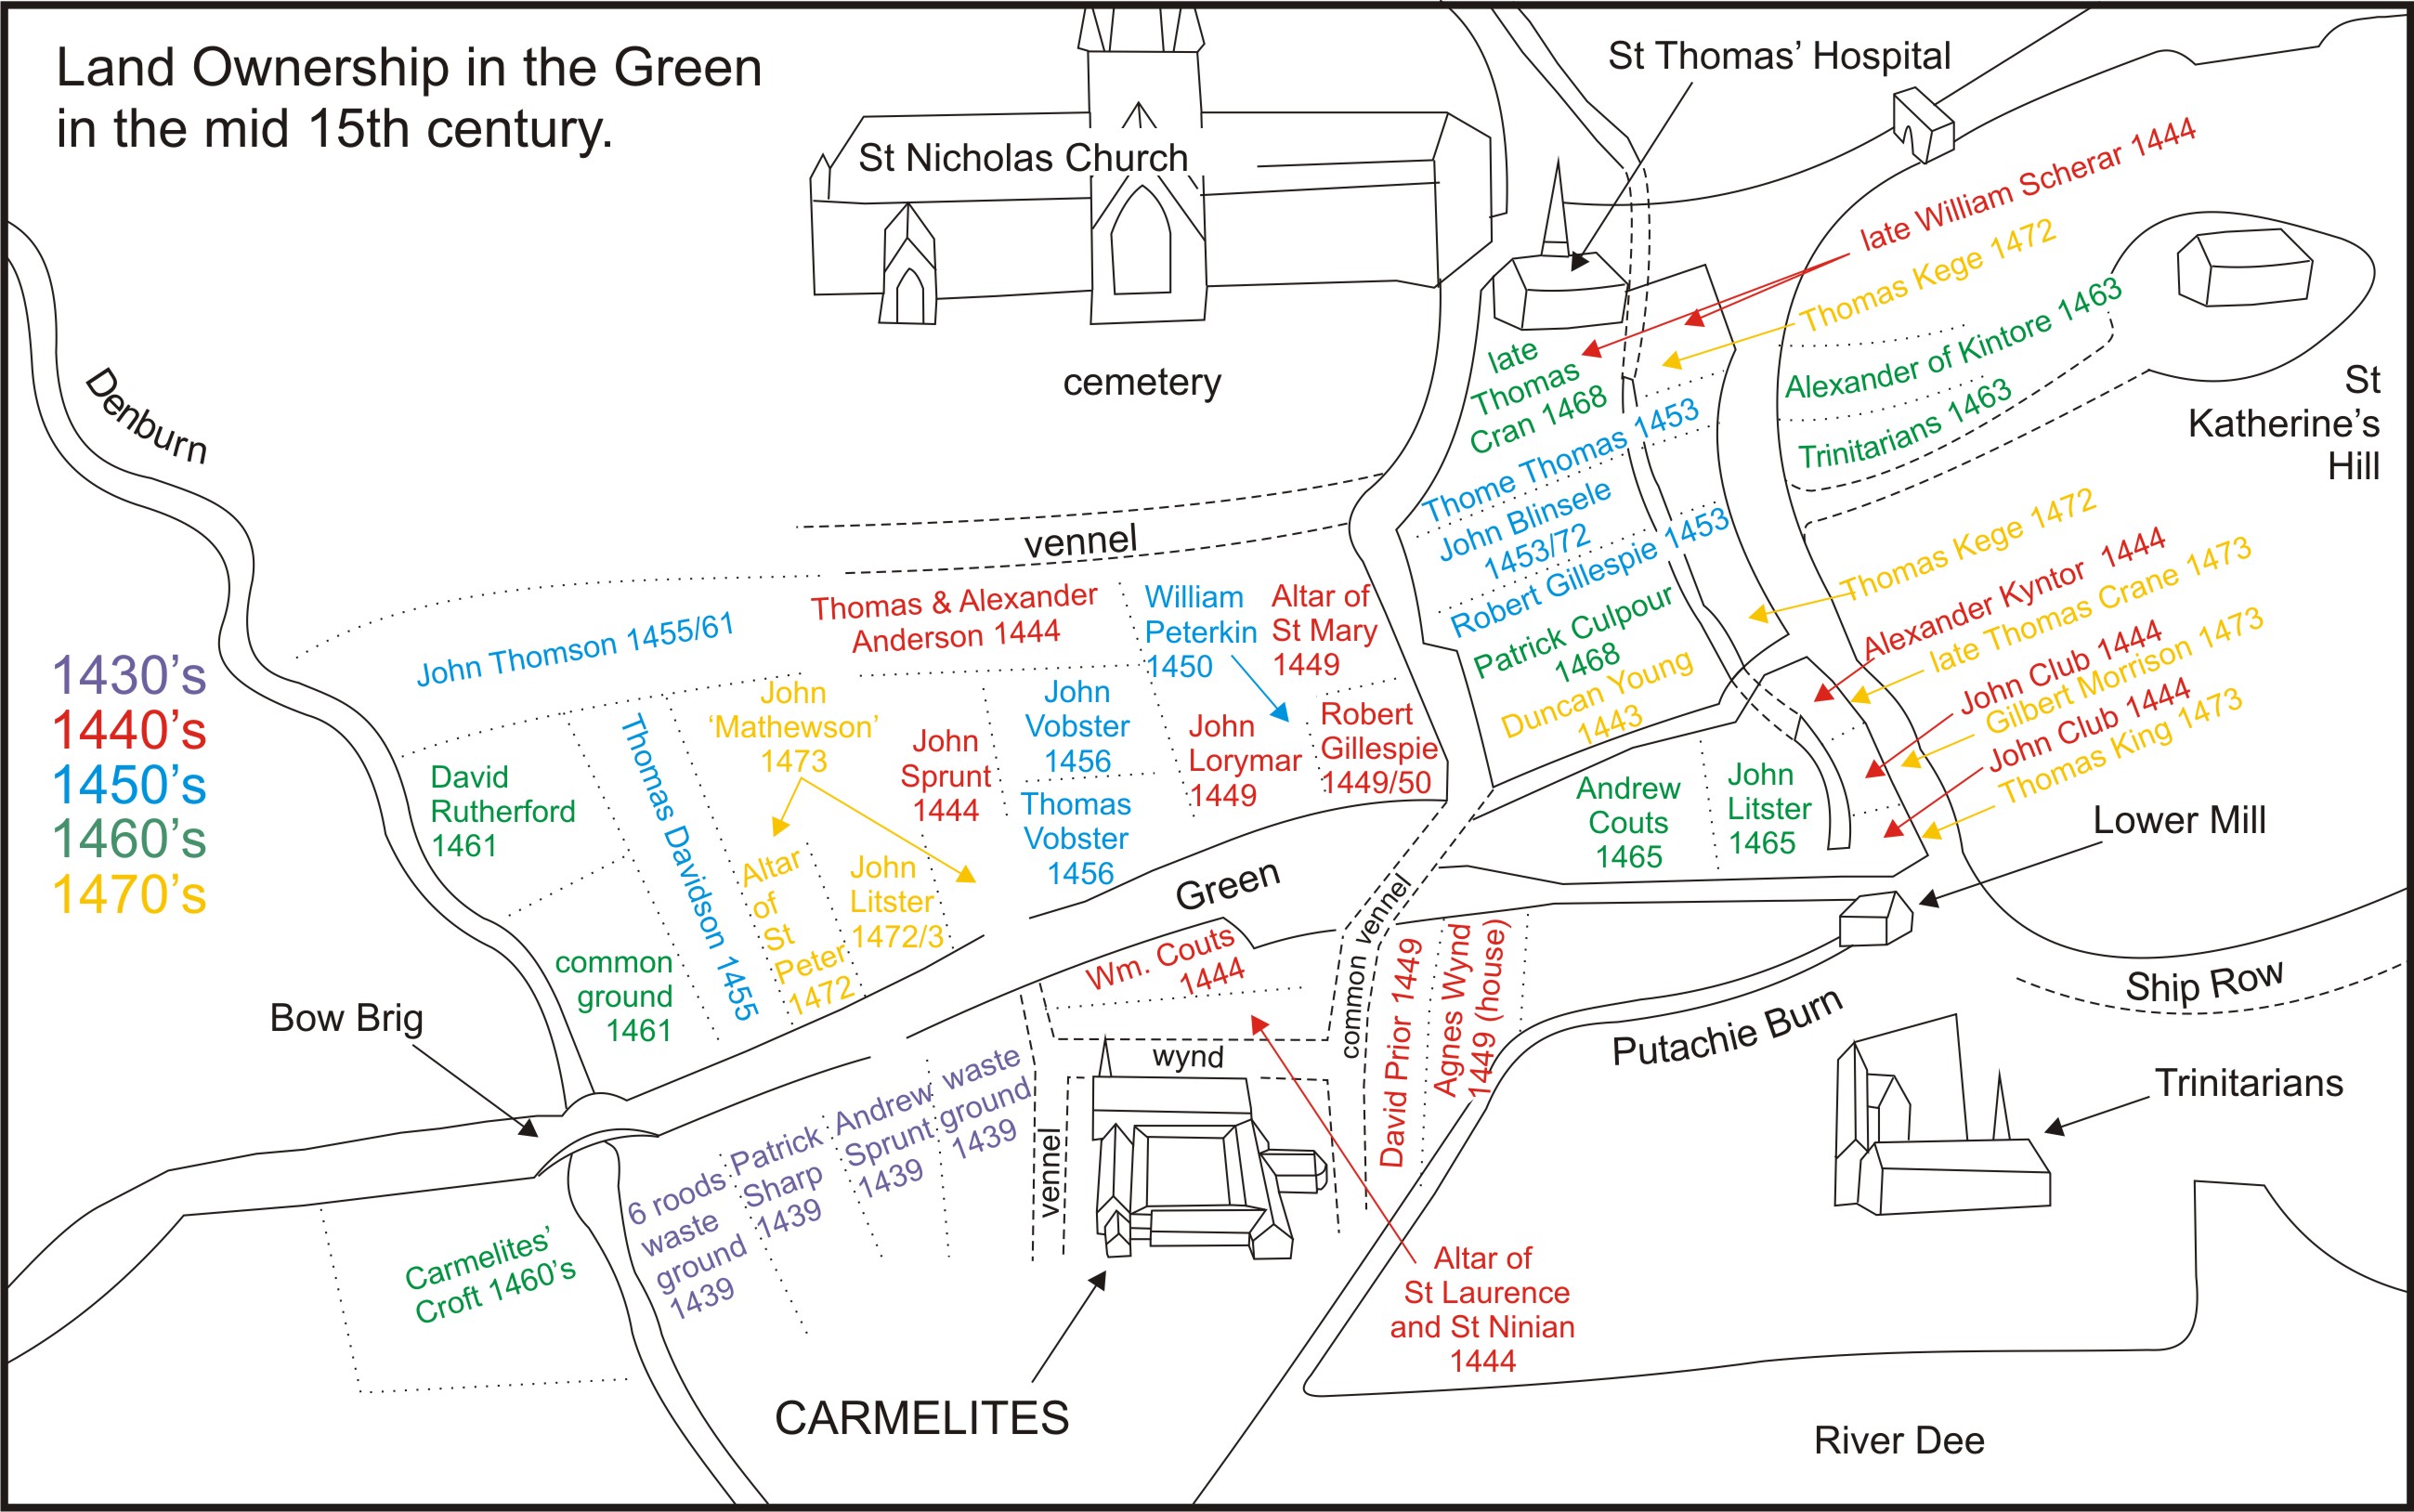
Figure 12: Land ownership in the Green in the mid-15th century
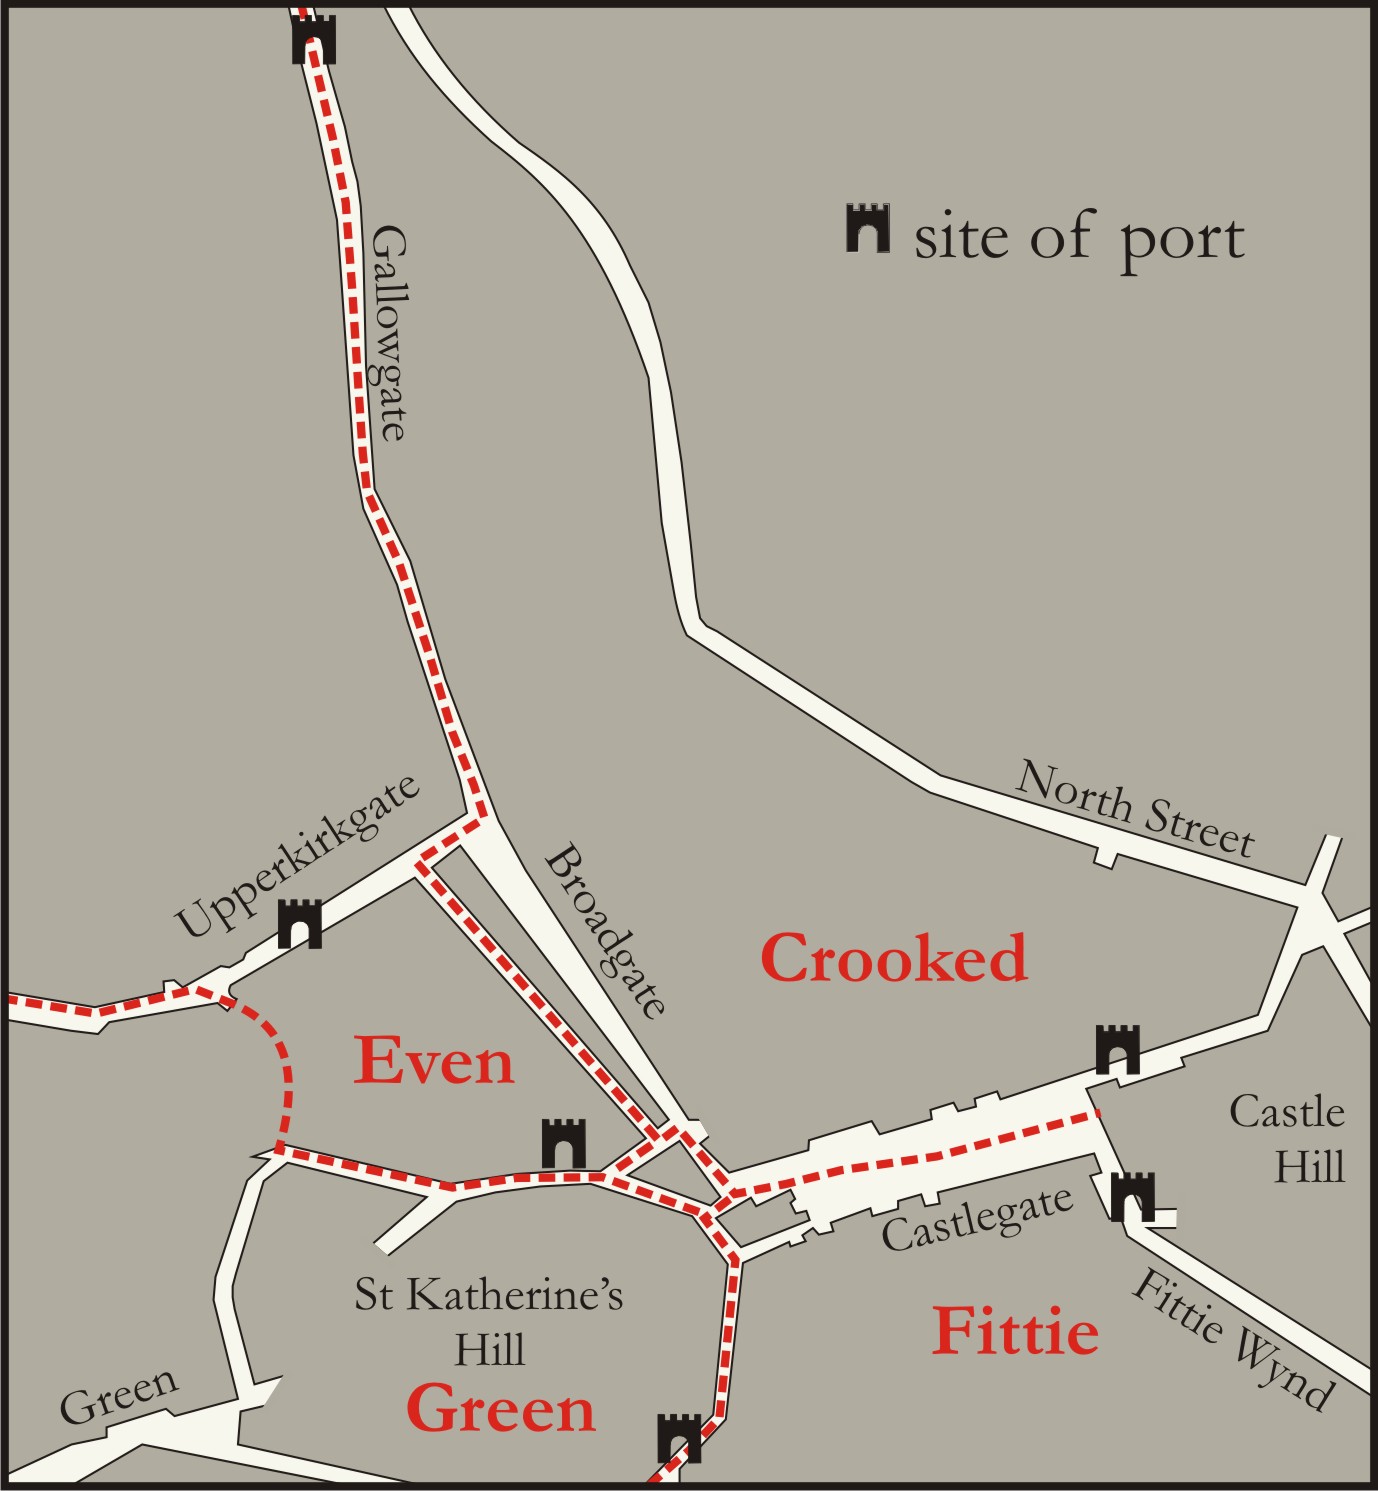
Figure 13: Aberdeen's four quarters
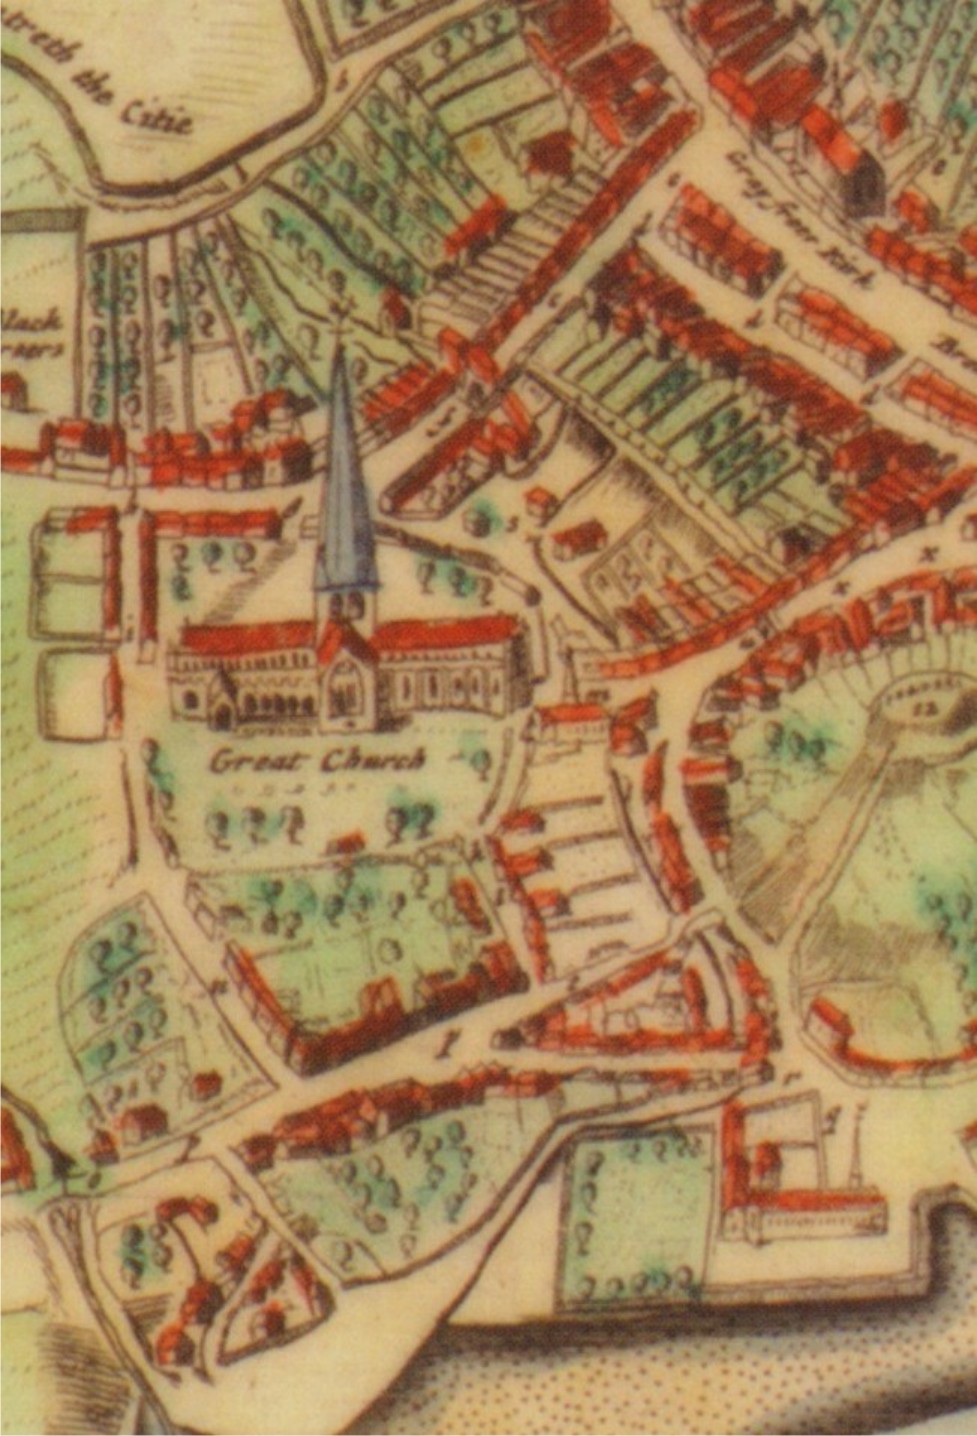
Figure 14: Extract from Parson Gordon's map of Aberdeen, 1661, showing St Nicholas Church, with the Green to south of it
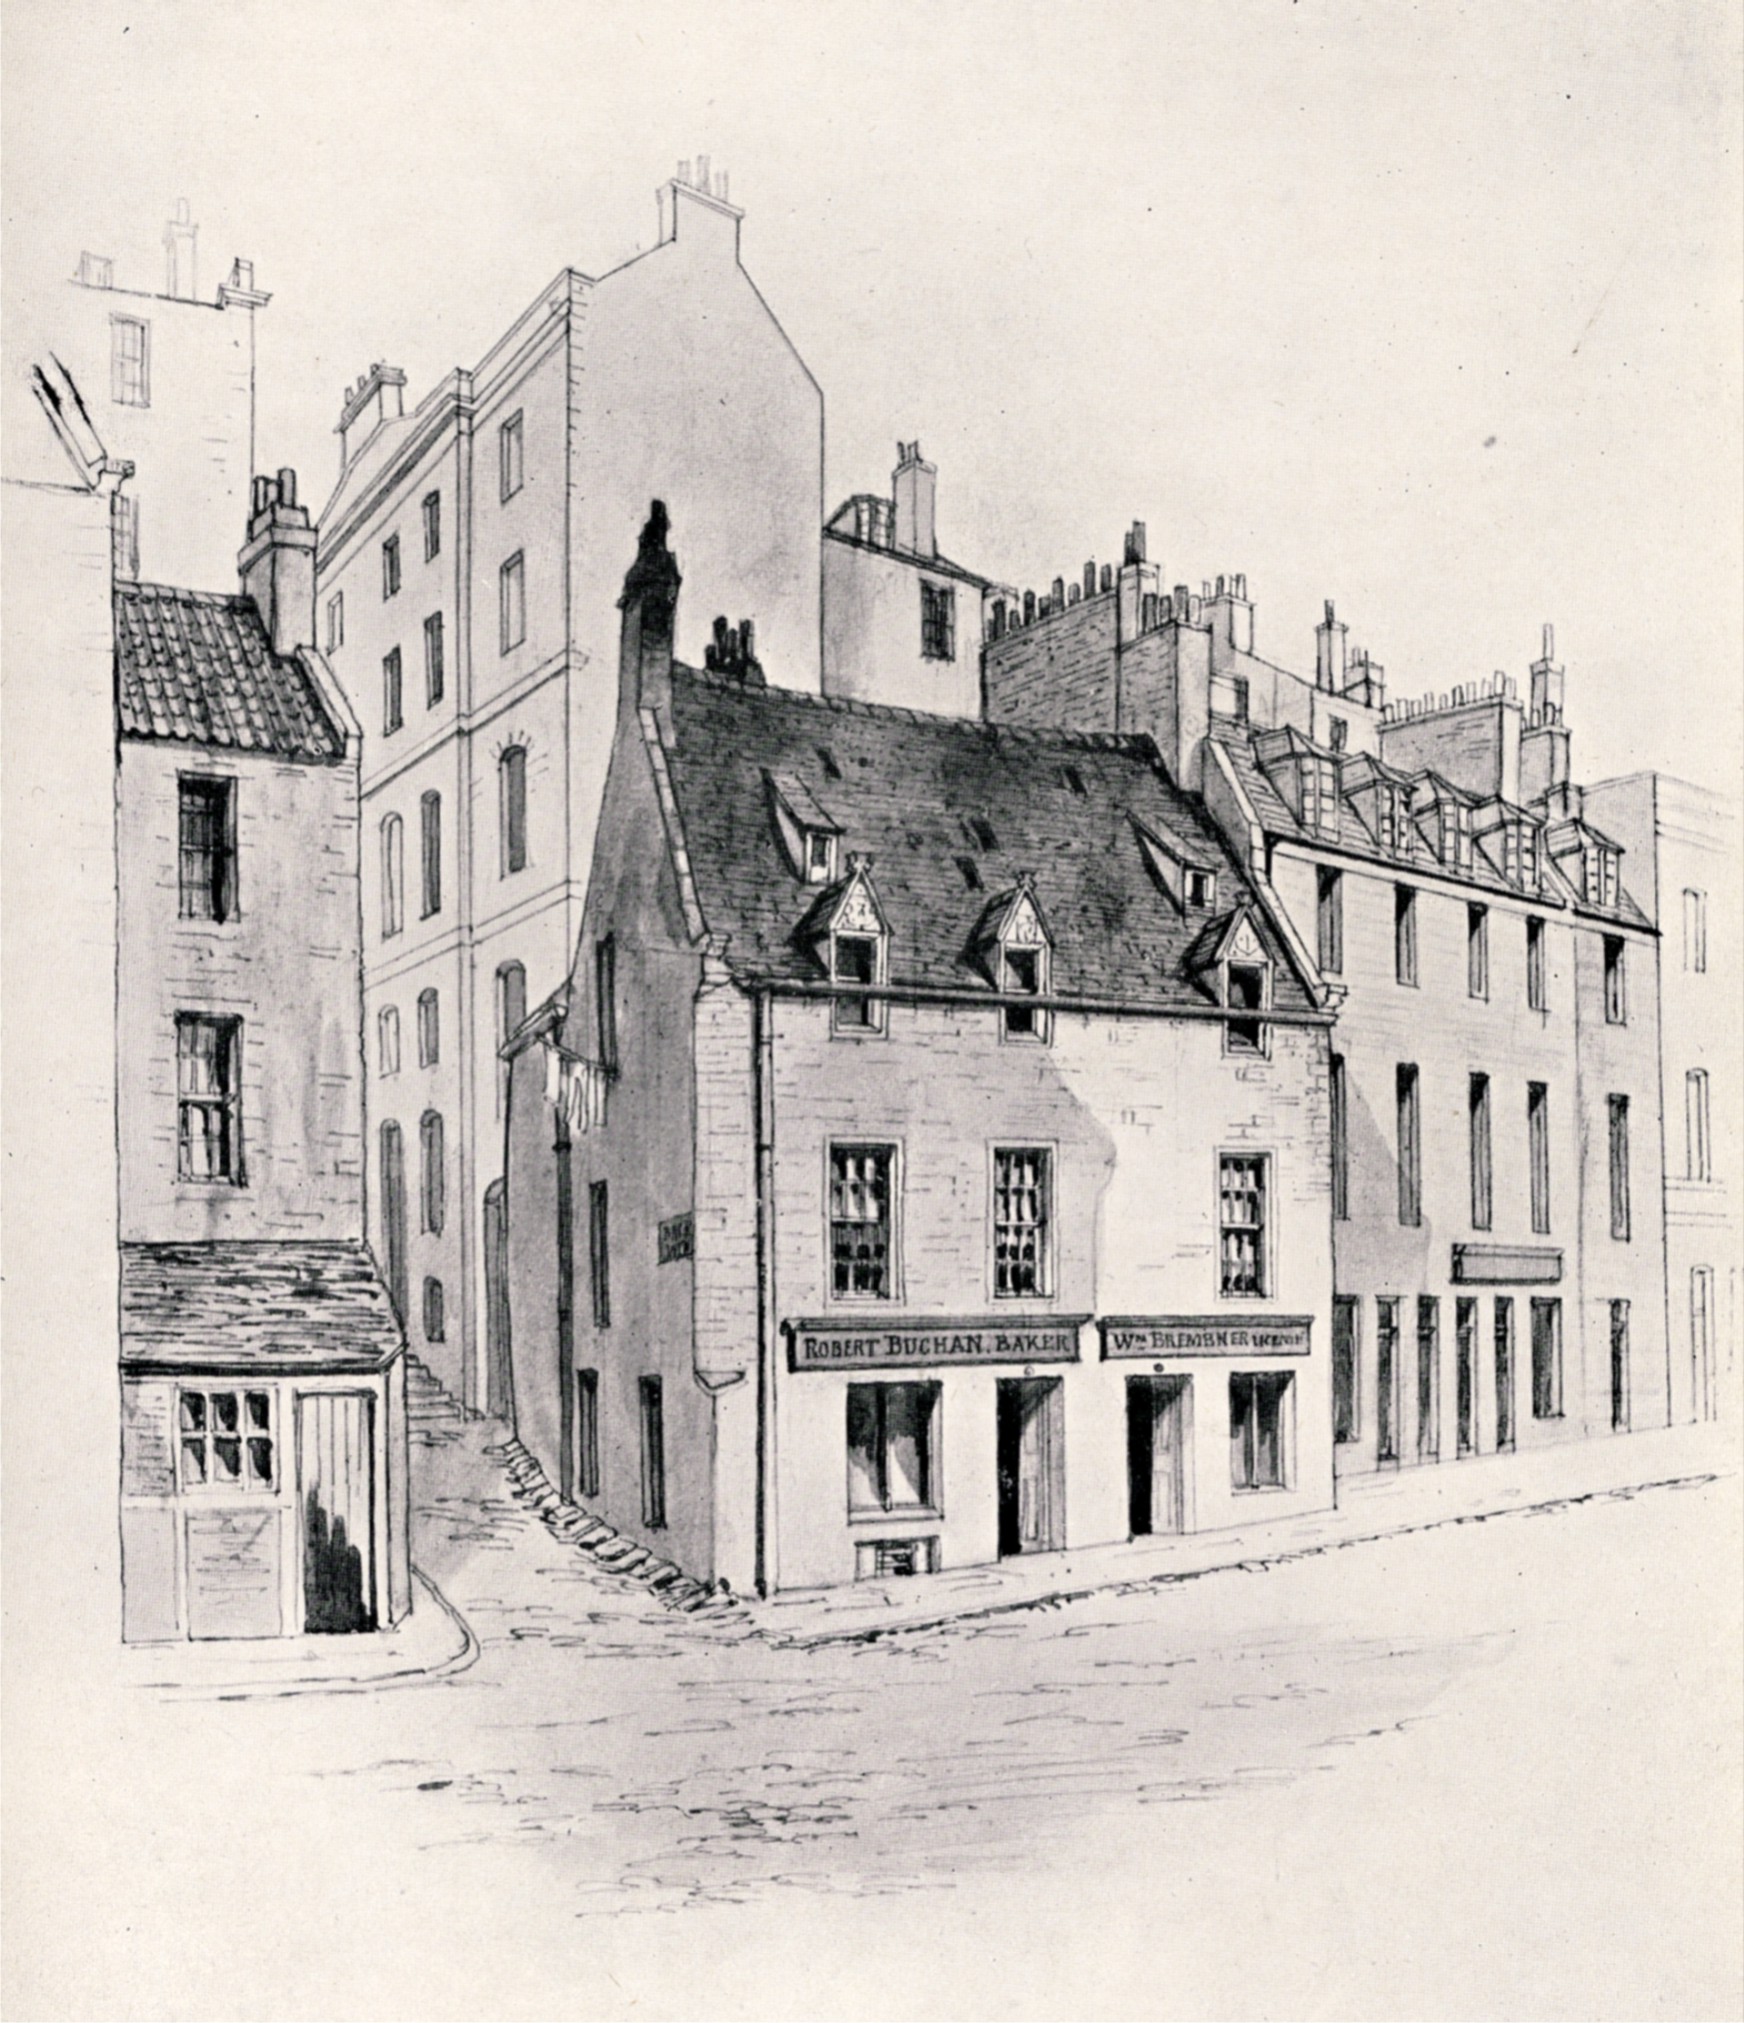
Figure 15: Aedie's House (Taken from Miscellany of the Third Spalding Club, Volume II, 1940)
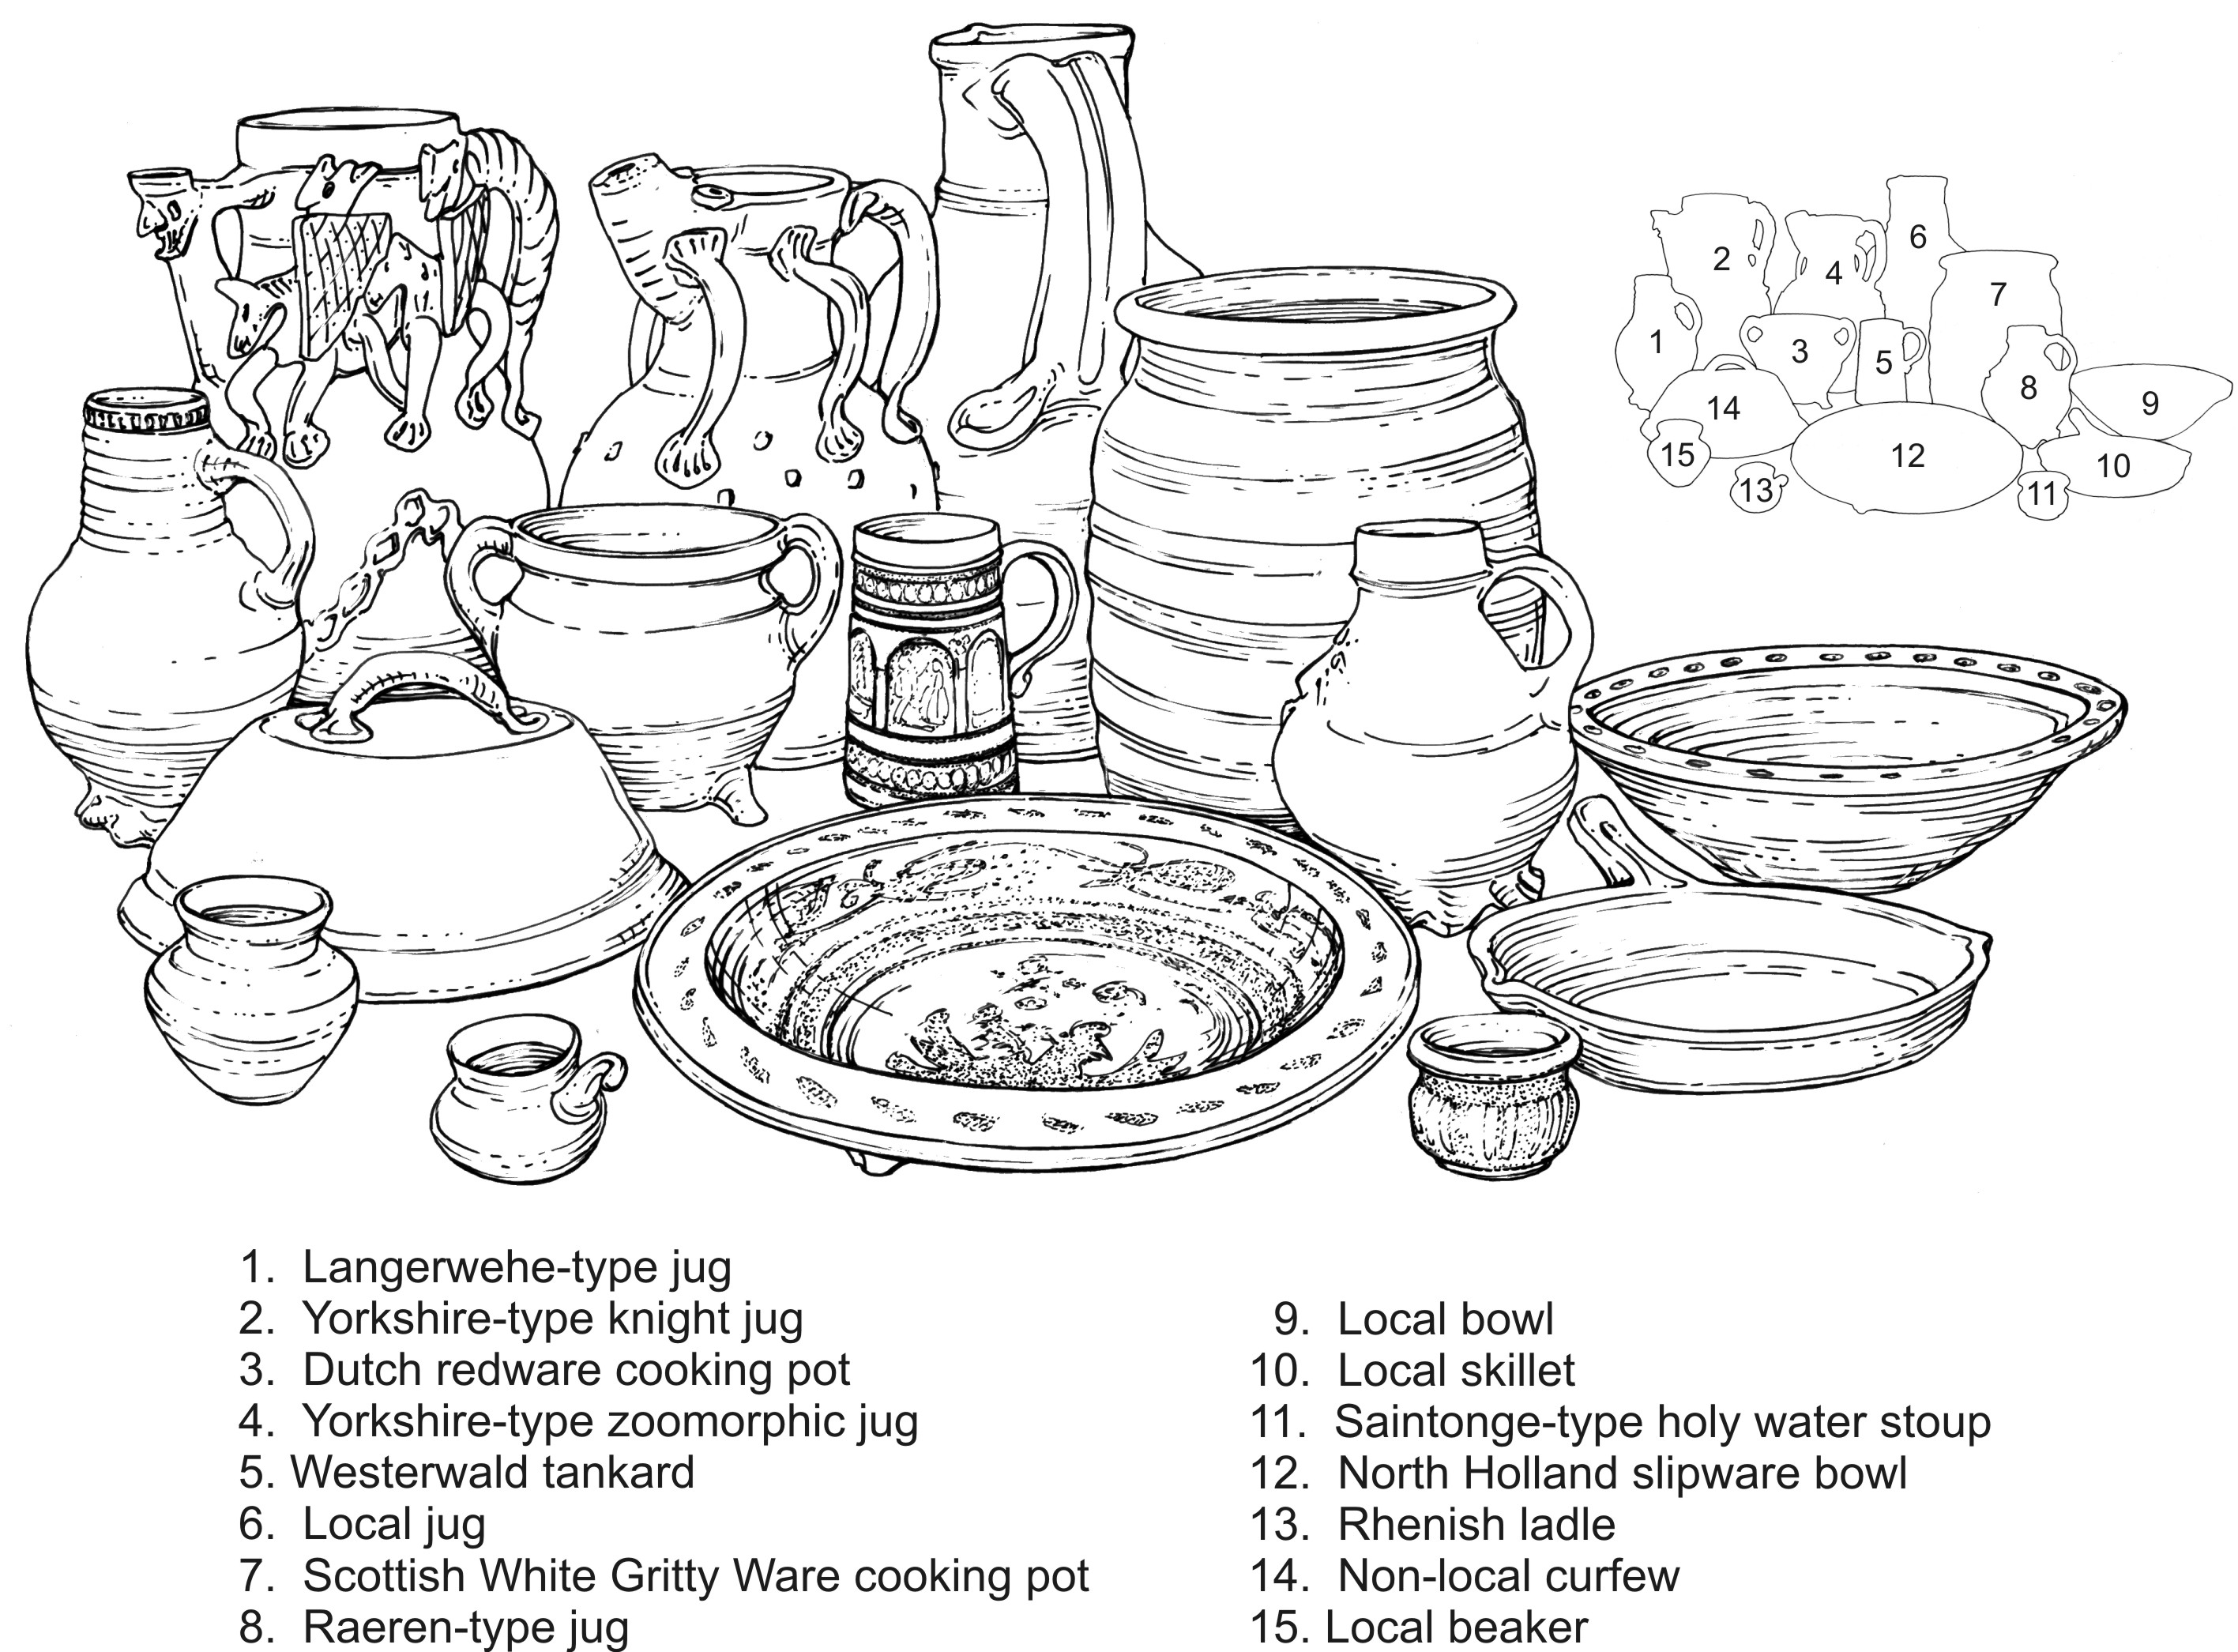
Figure 16: Pottery group. Image: Jan Dunbar
Phase 1: Phase 1
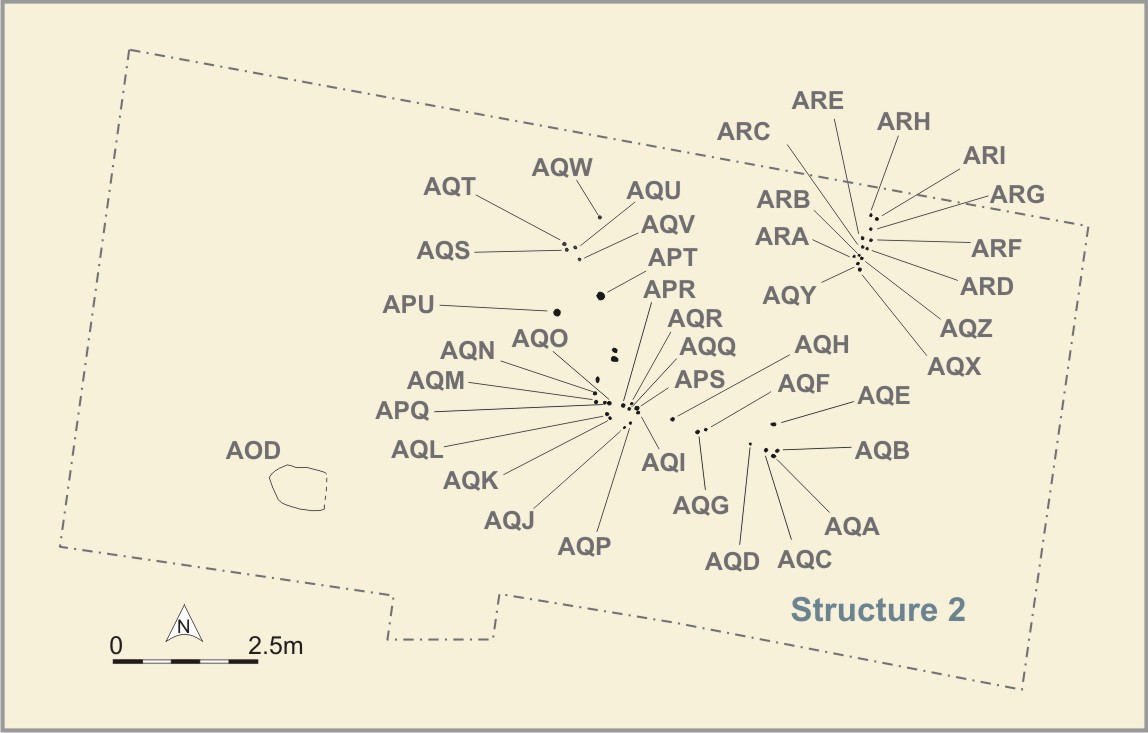
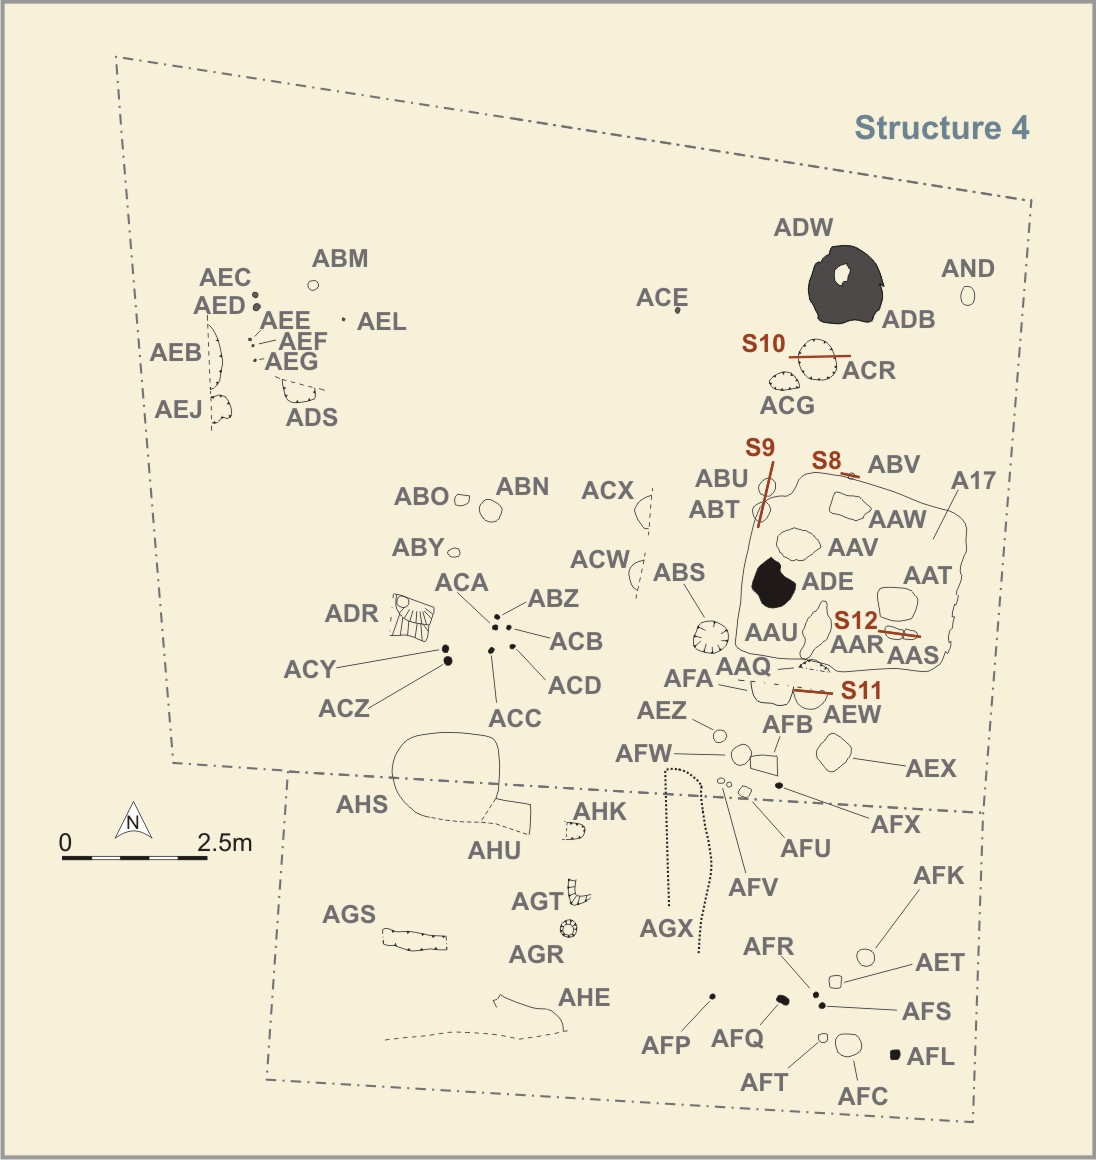
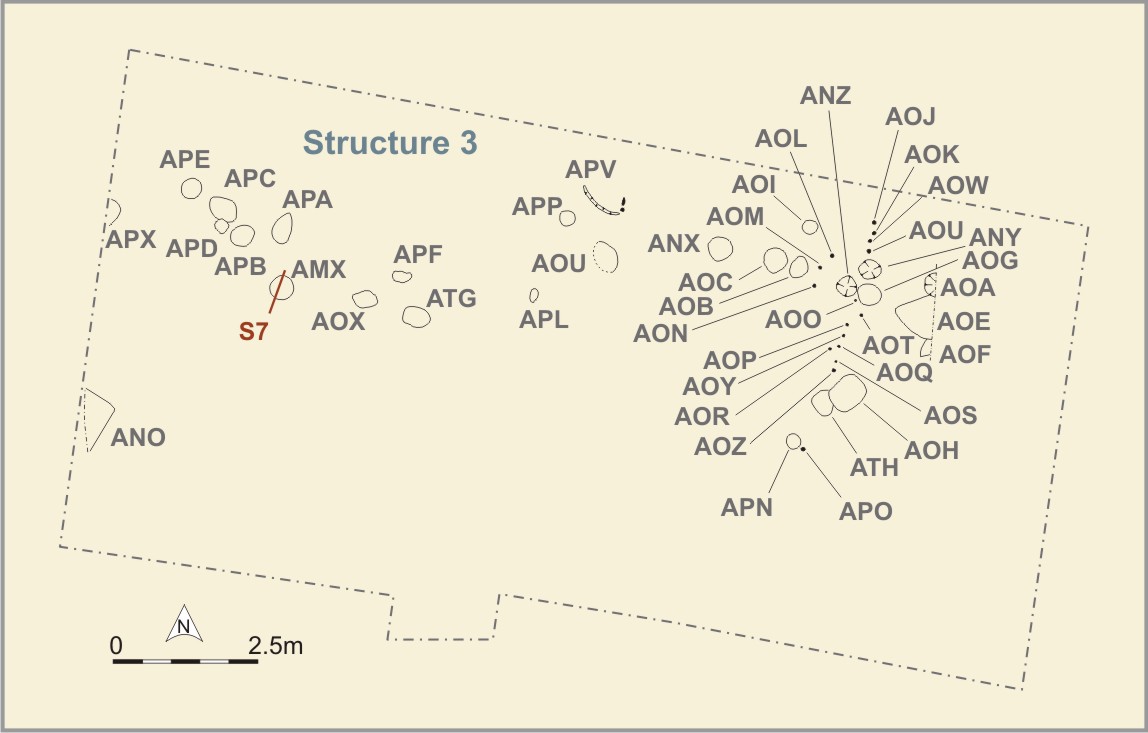
Phase 1a: Trench plan: Phase 1a, Phase 1a north, Phase 1a central
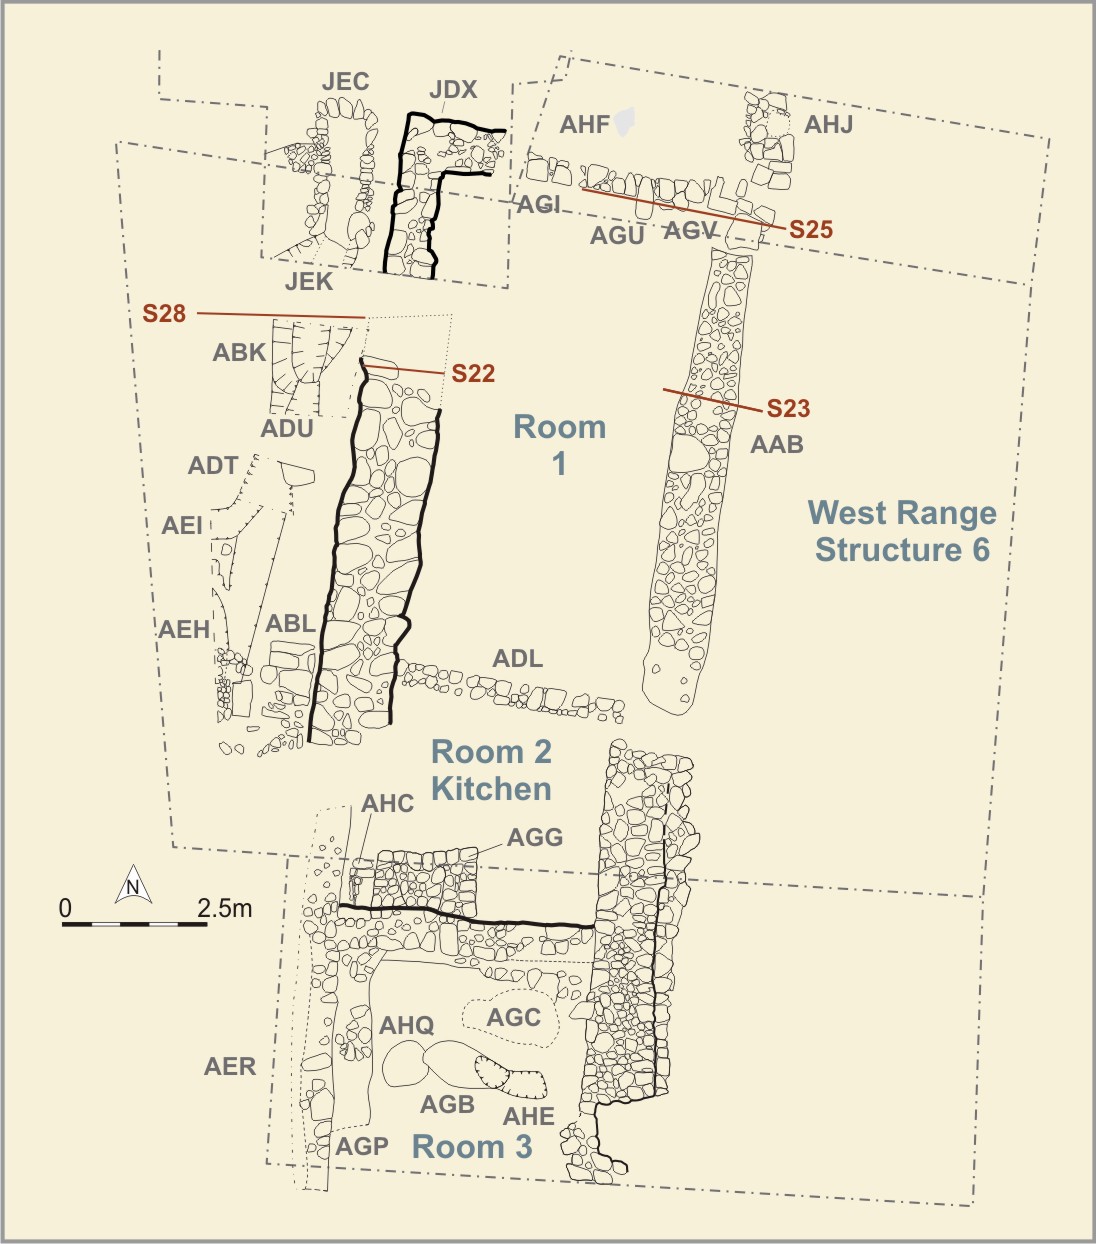
Phase 2: Trench plan: Phase 2, Phase 2 central, Phase 2 north
Phase 3: Trench plan: Phase 3, Phase 3 central, Phase 3 north
Phase 4: Trench plan: Phase 4, Phase 4
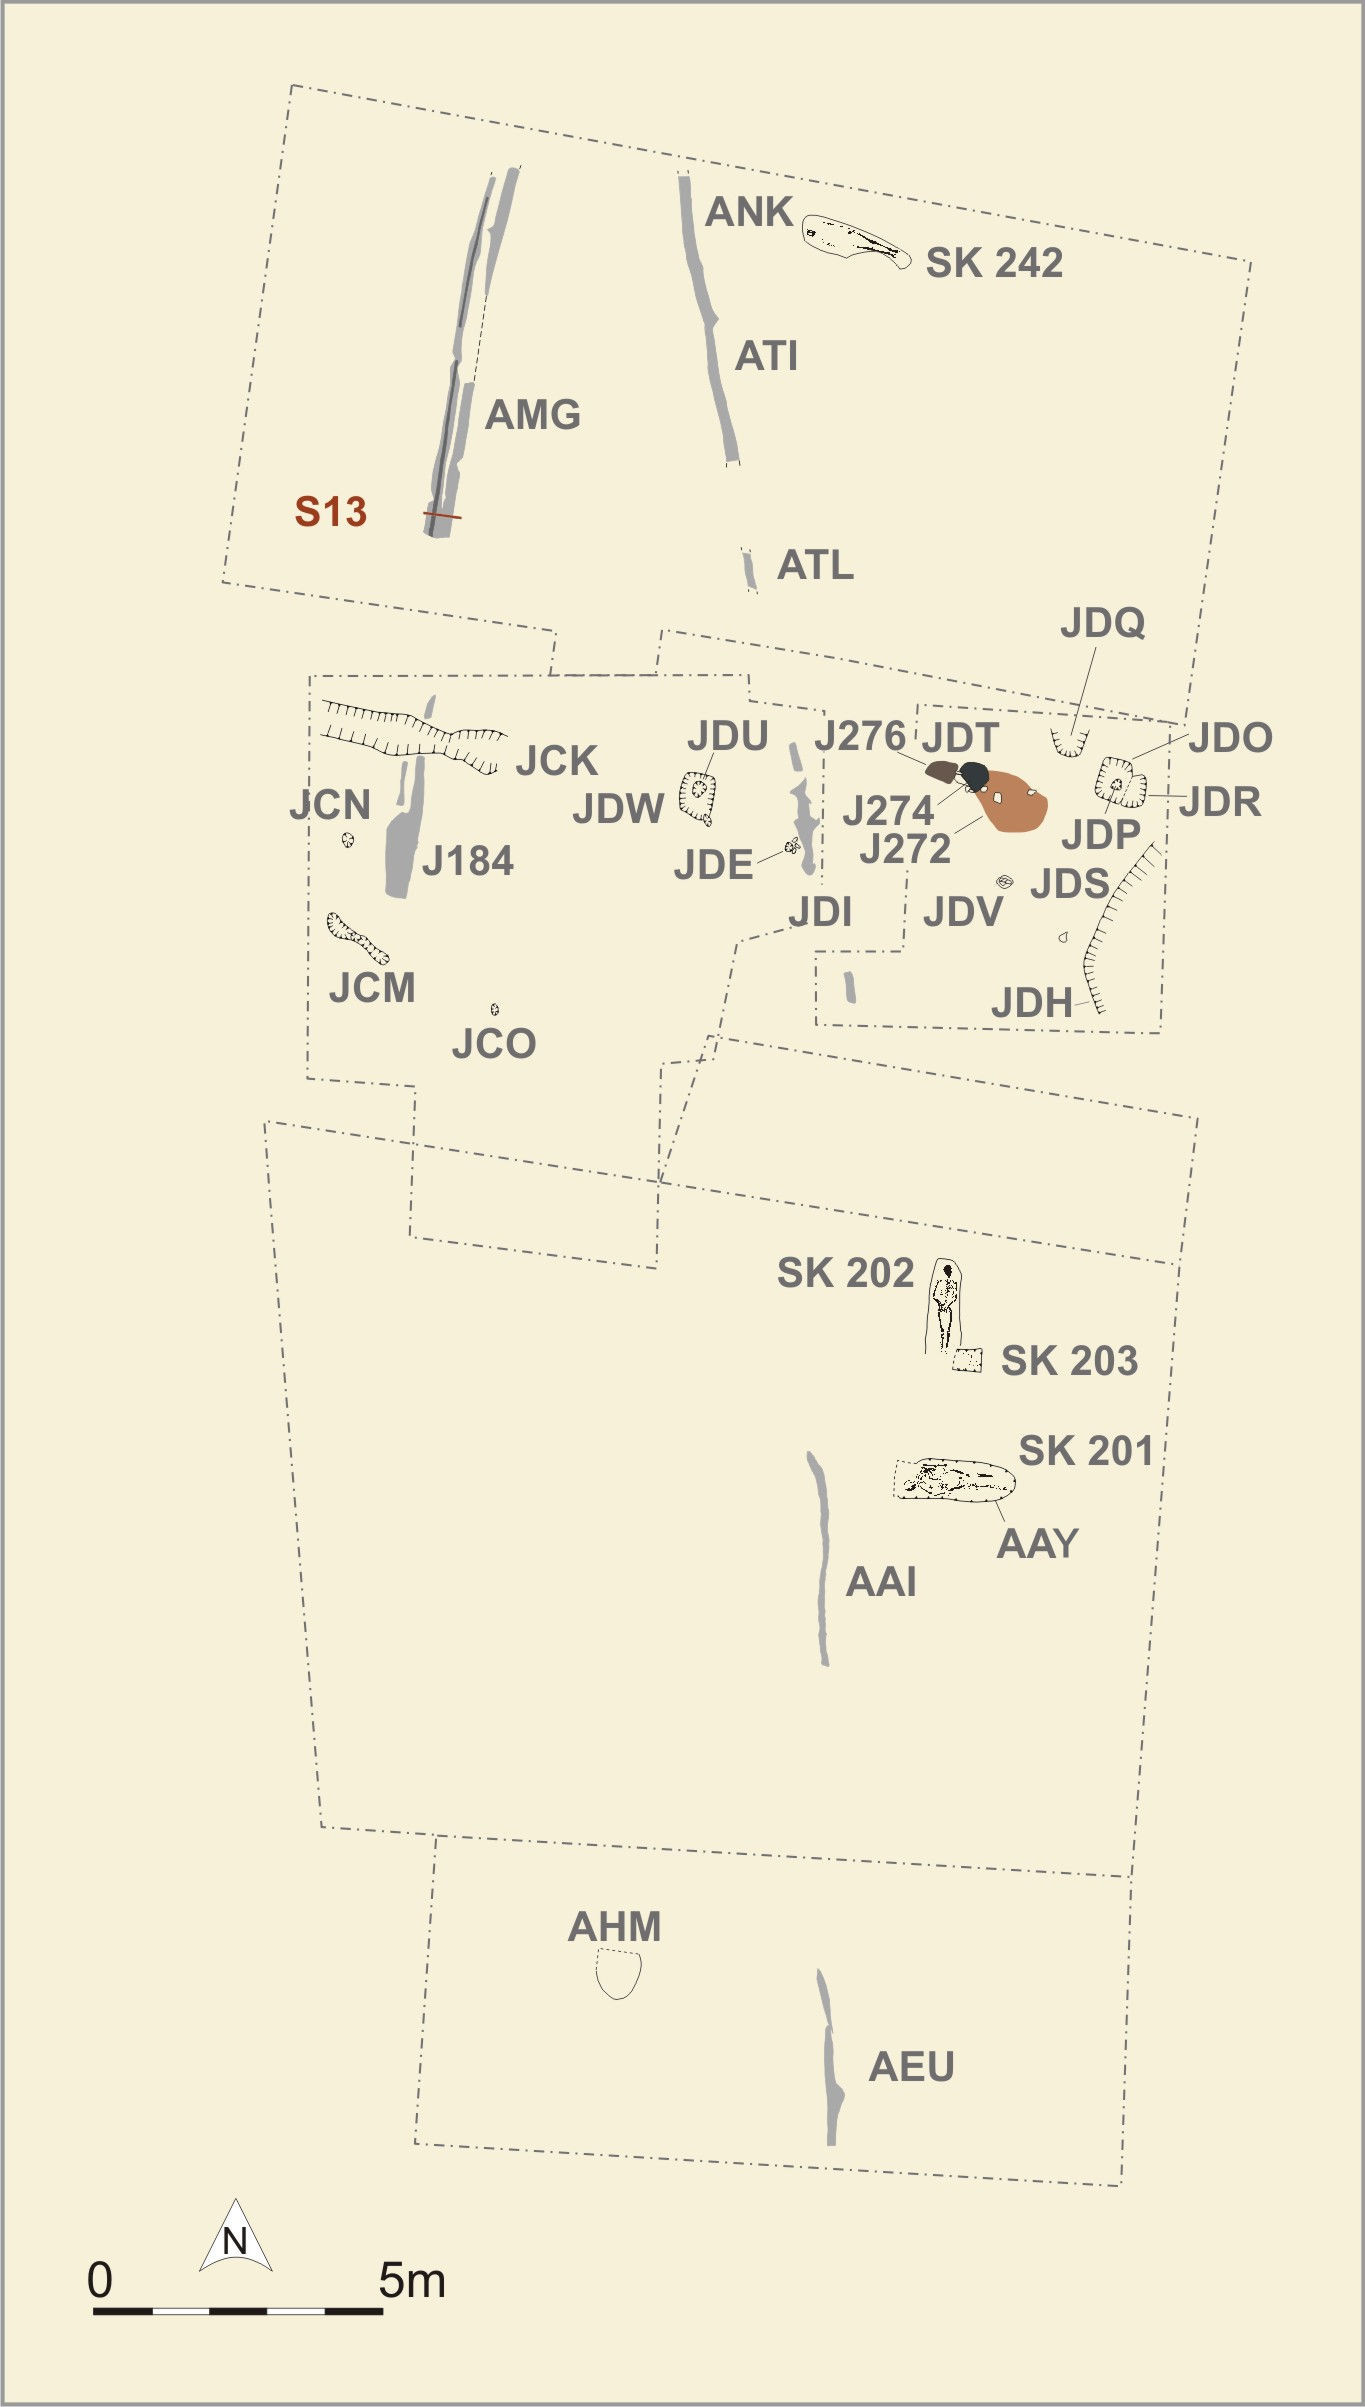
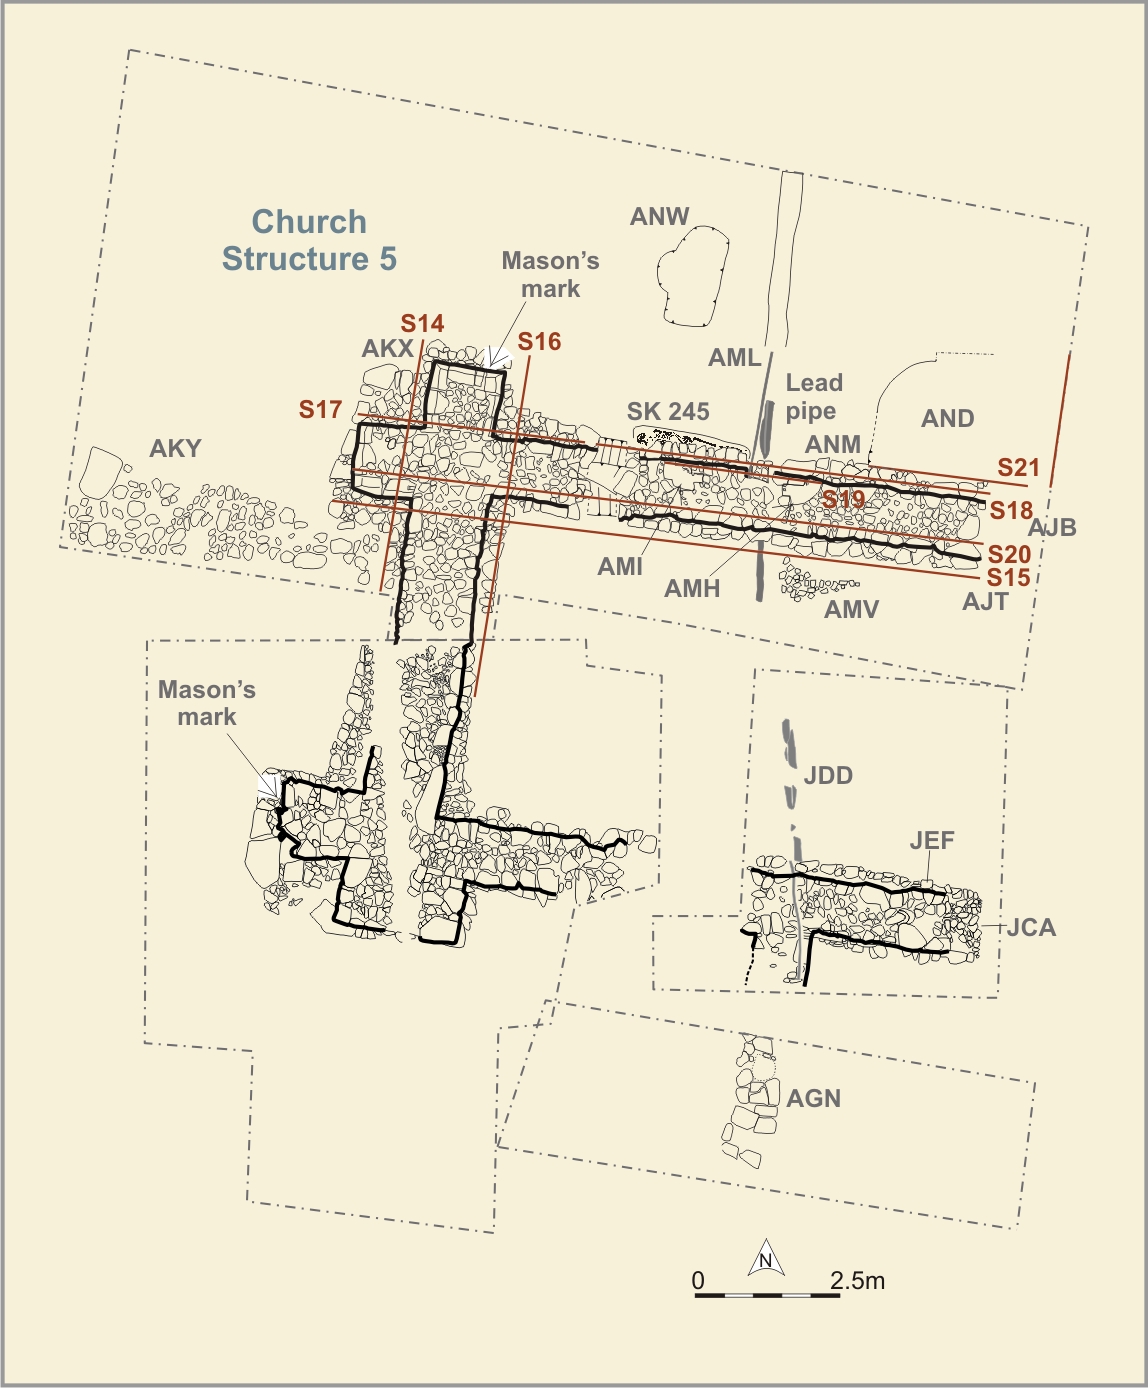
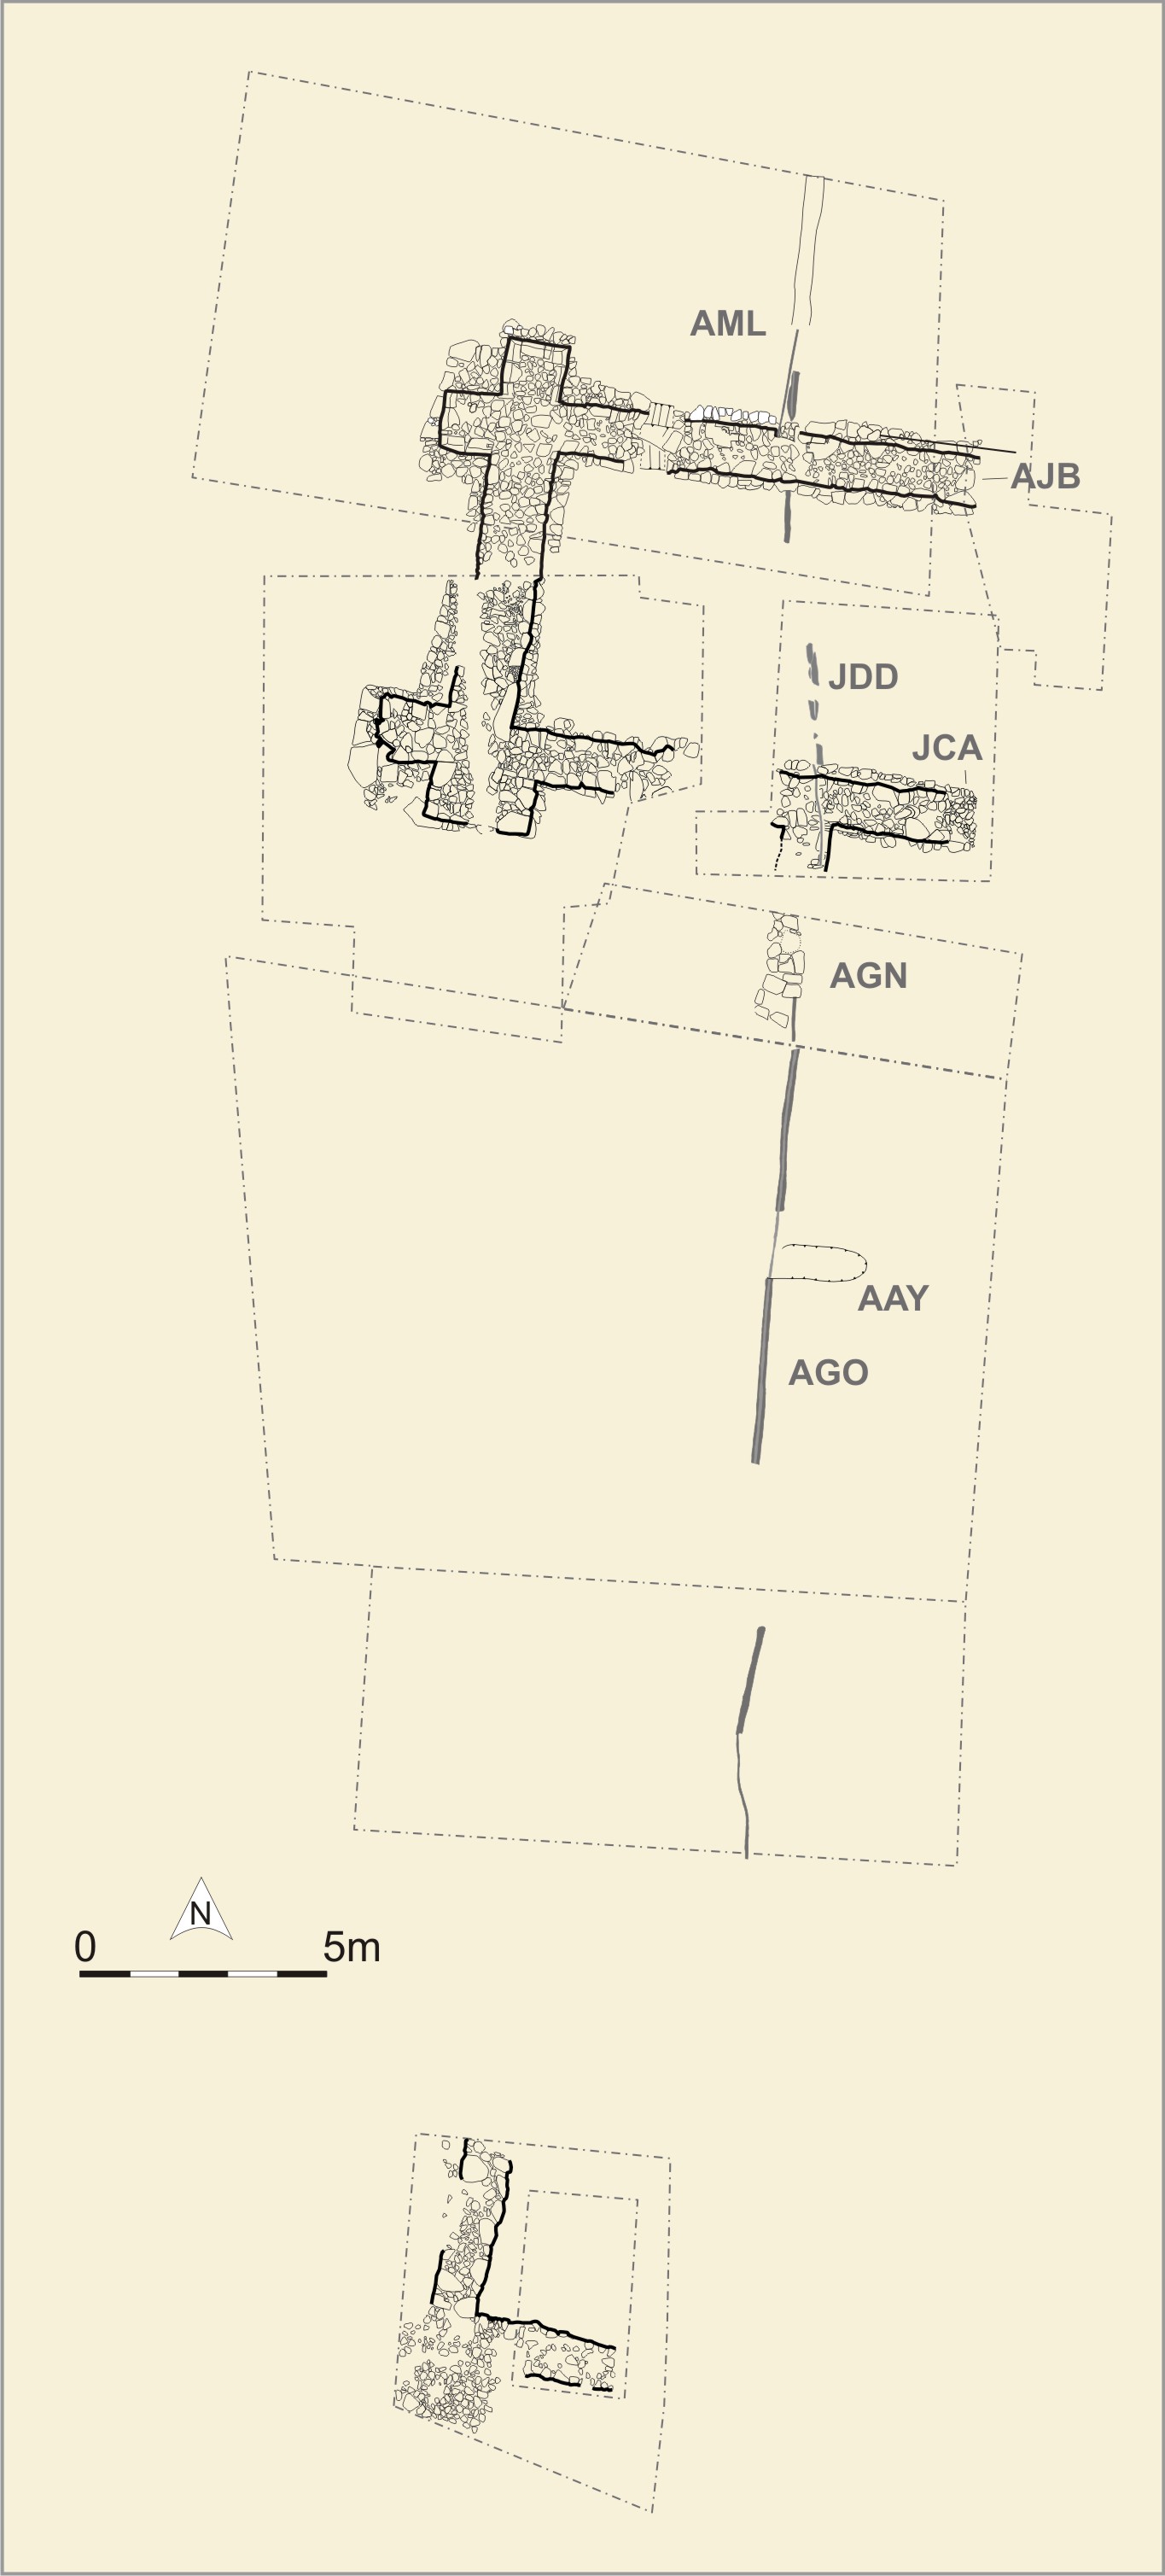
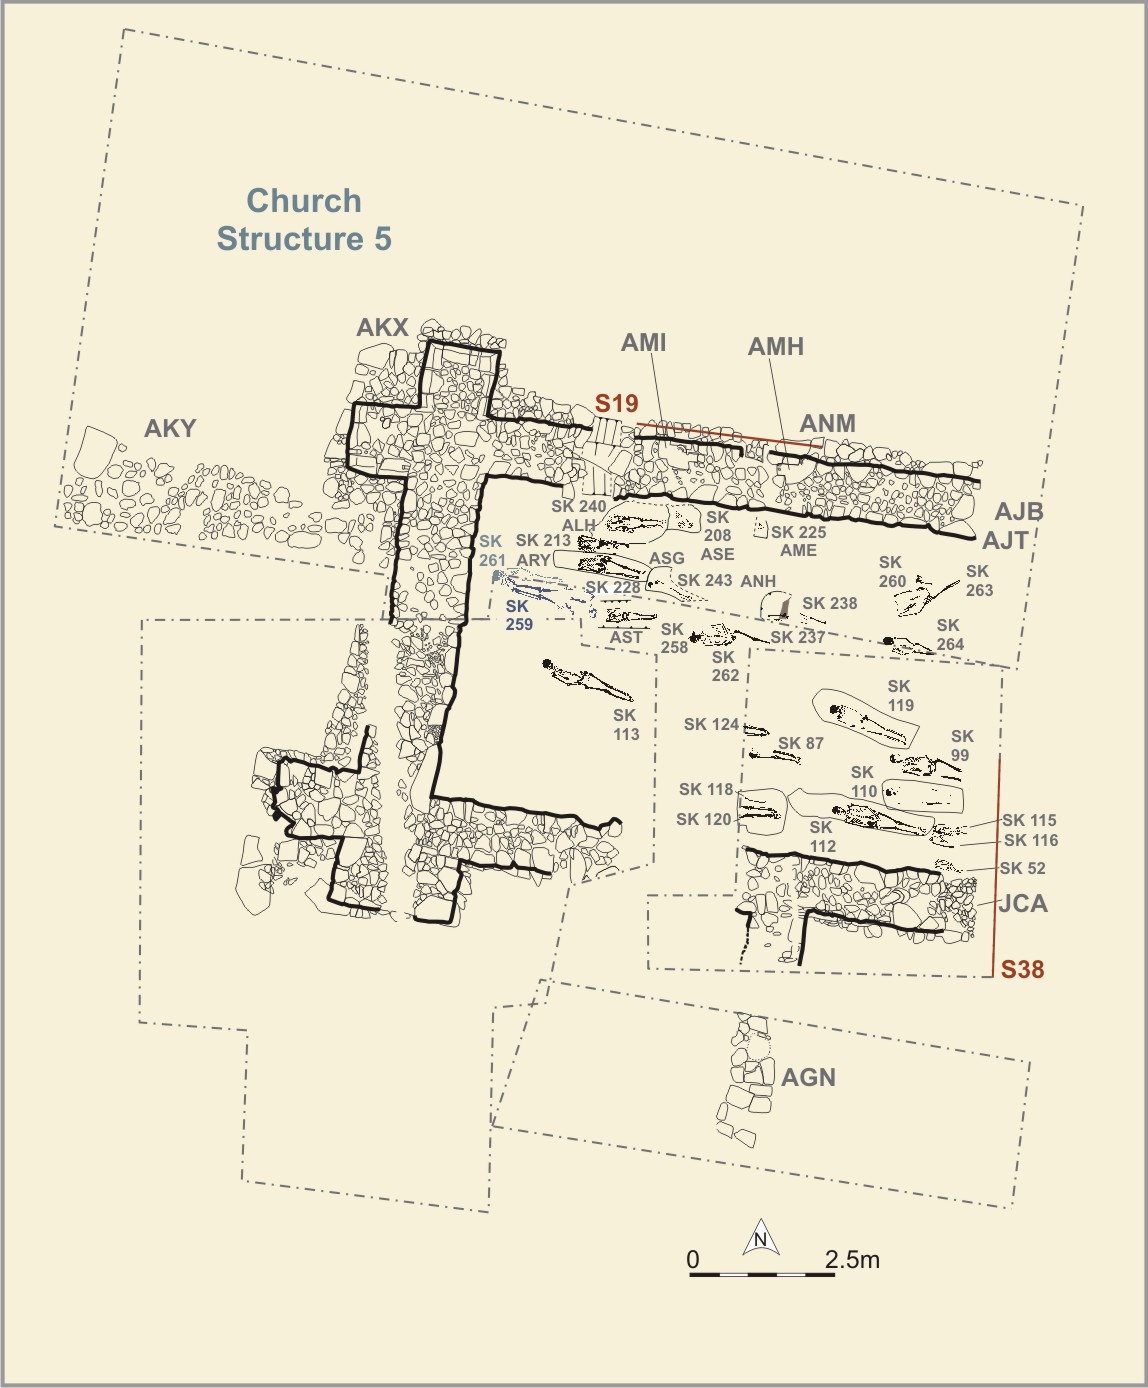
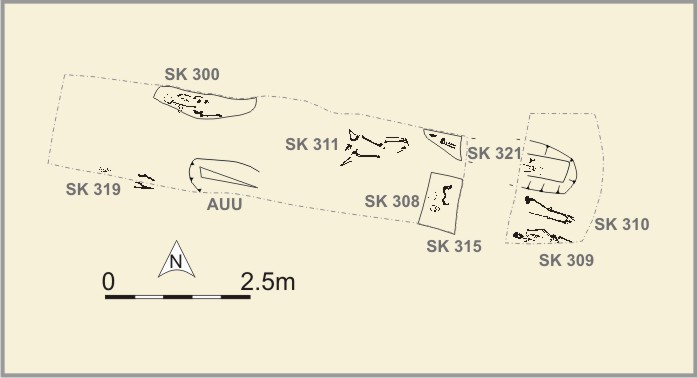
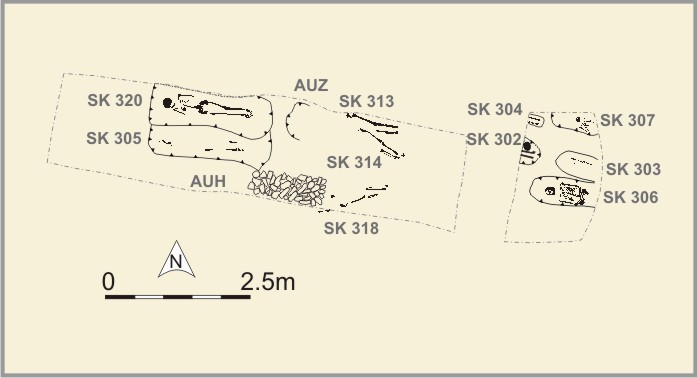
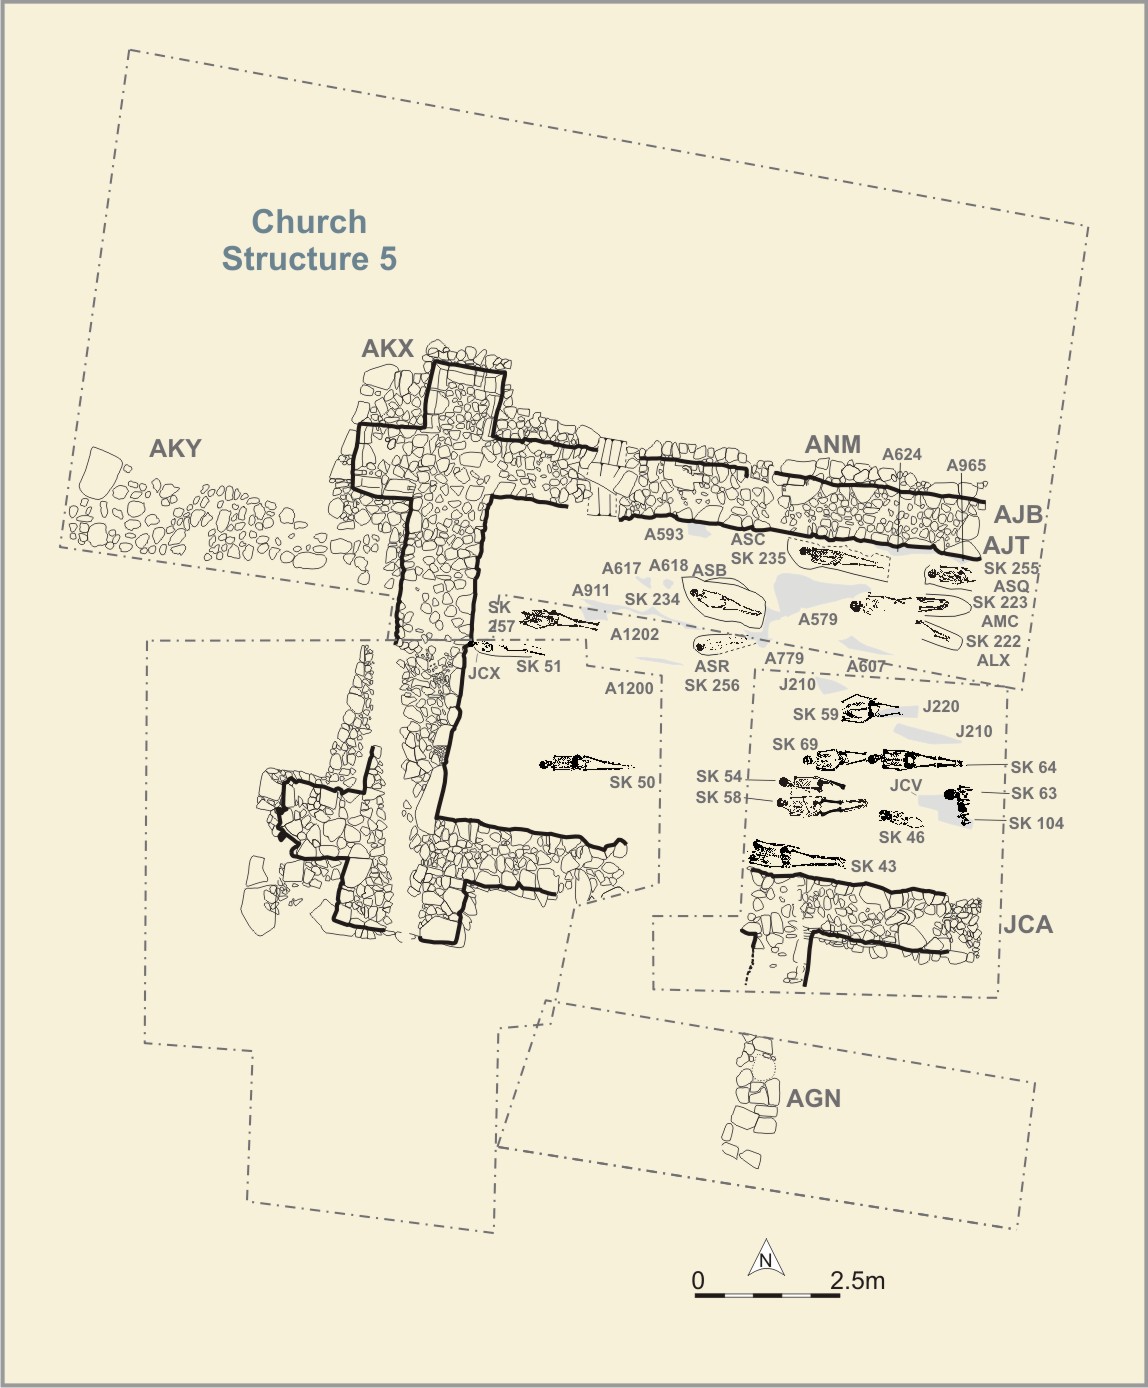
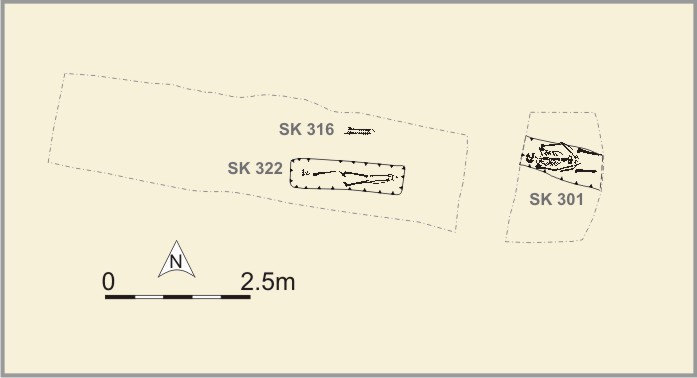
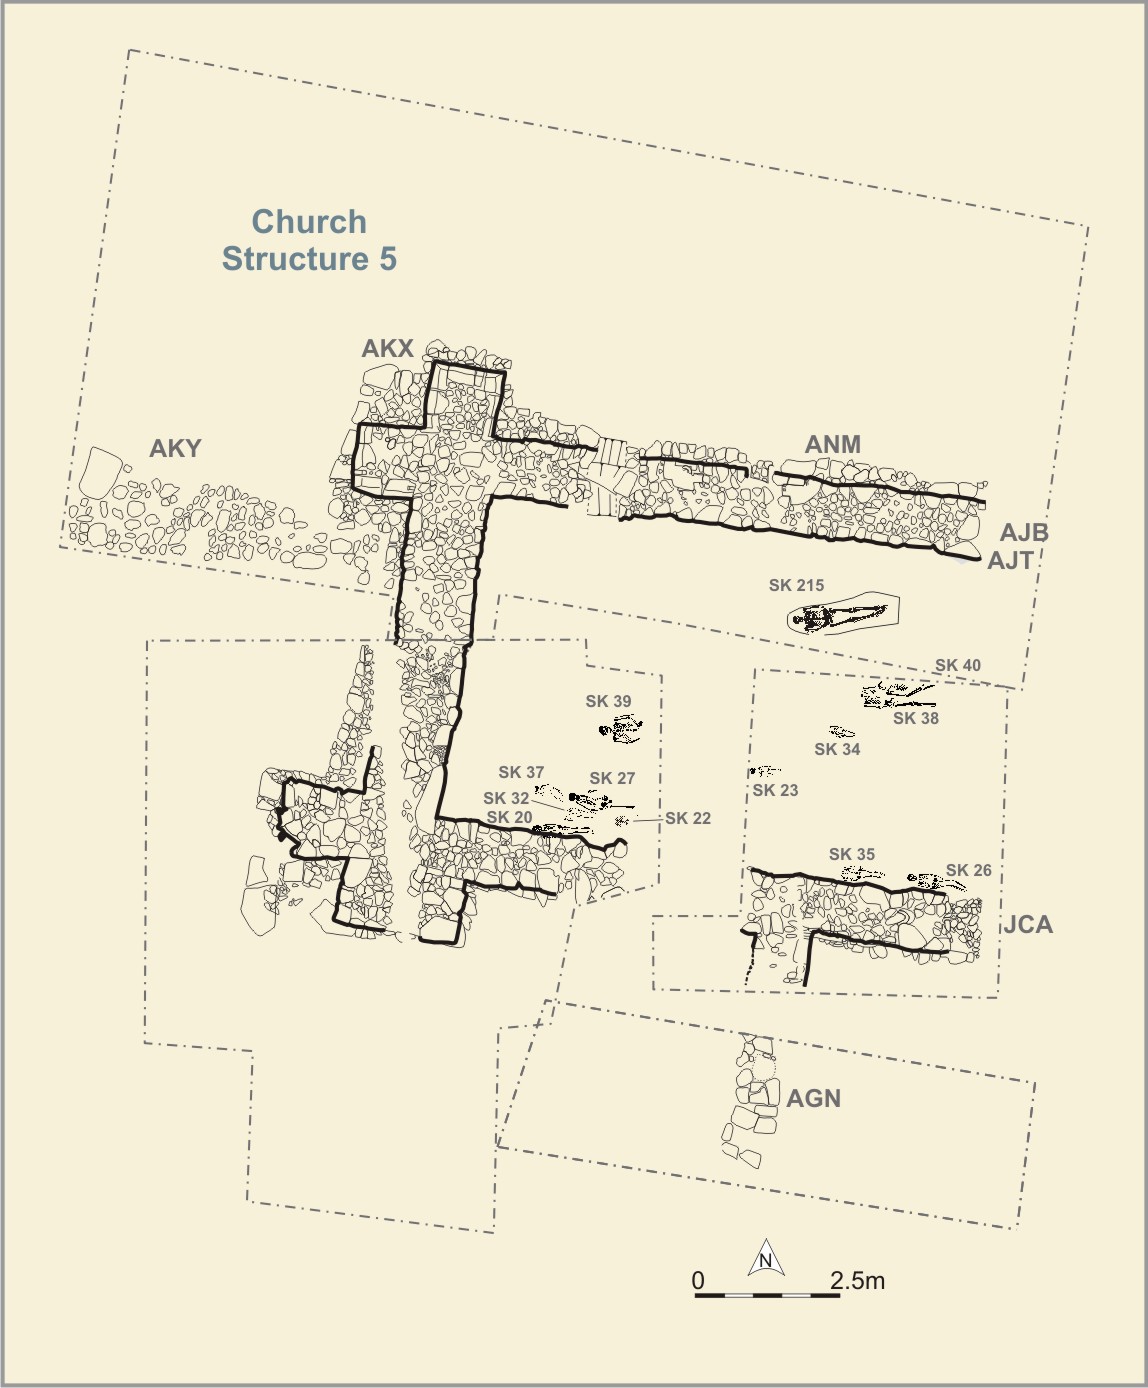
Phase 5a: Trench plan: Phase 5a, Phase 5a north, Phase 5a south, Phase 5a graveyard, Phase 5s lead pipe
Phase 5b: Trench plan: Phase 5b, Phase 5b north, Phase 5b central, Phase 5b south, Phase 5b graveyard
Phase 5c: Trench plan: Phase 5c, Phase 5c north, Phase 5c central, Phase 5c graveyard
Phase 5d: Trench plan: Phase 5d, Phase 5d north, Phase 5d graveyard
Phase 5e: Trench plan: Phase 5e, Phase 5e north
Phase 6: Trench plan: Phase 6, Phase 6 north, Phase 6 central, Phase 6 south
Phase 7: Trench plan: Phase 7, Phase 7
Phase 8: Trench plan: Phase 8, Phase 8 north, Phase 8 south
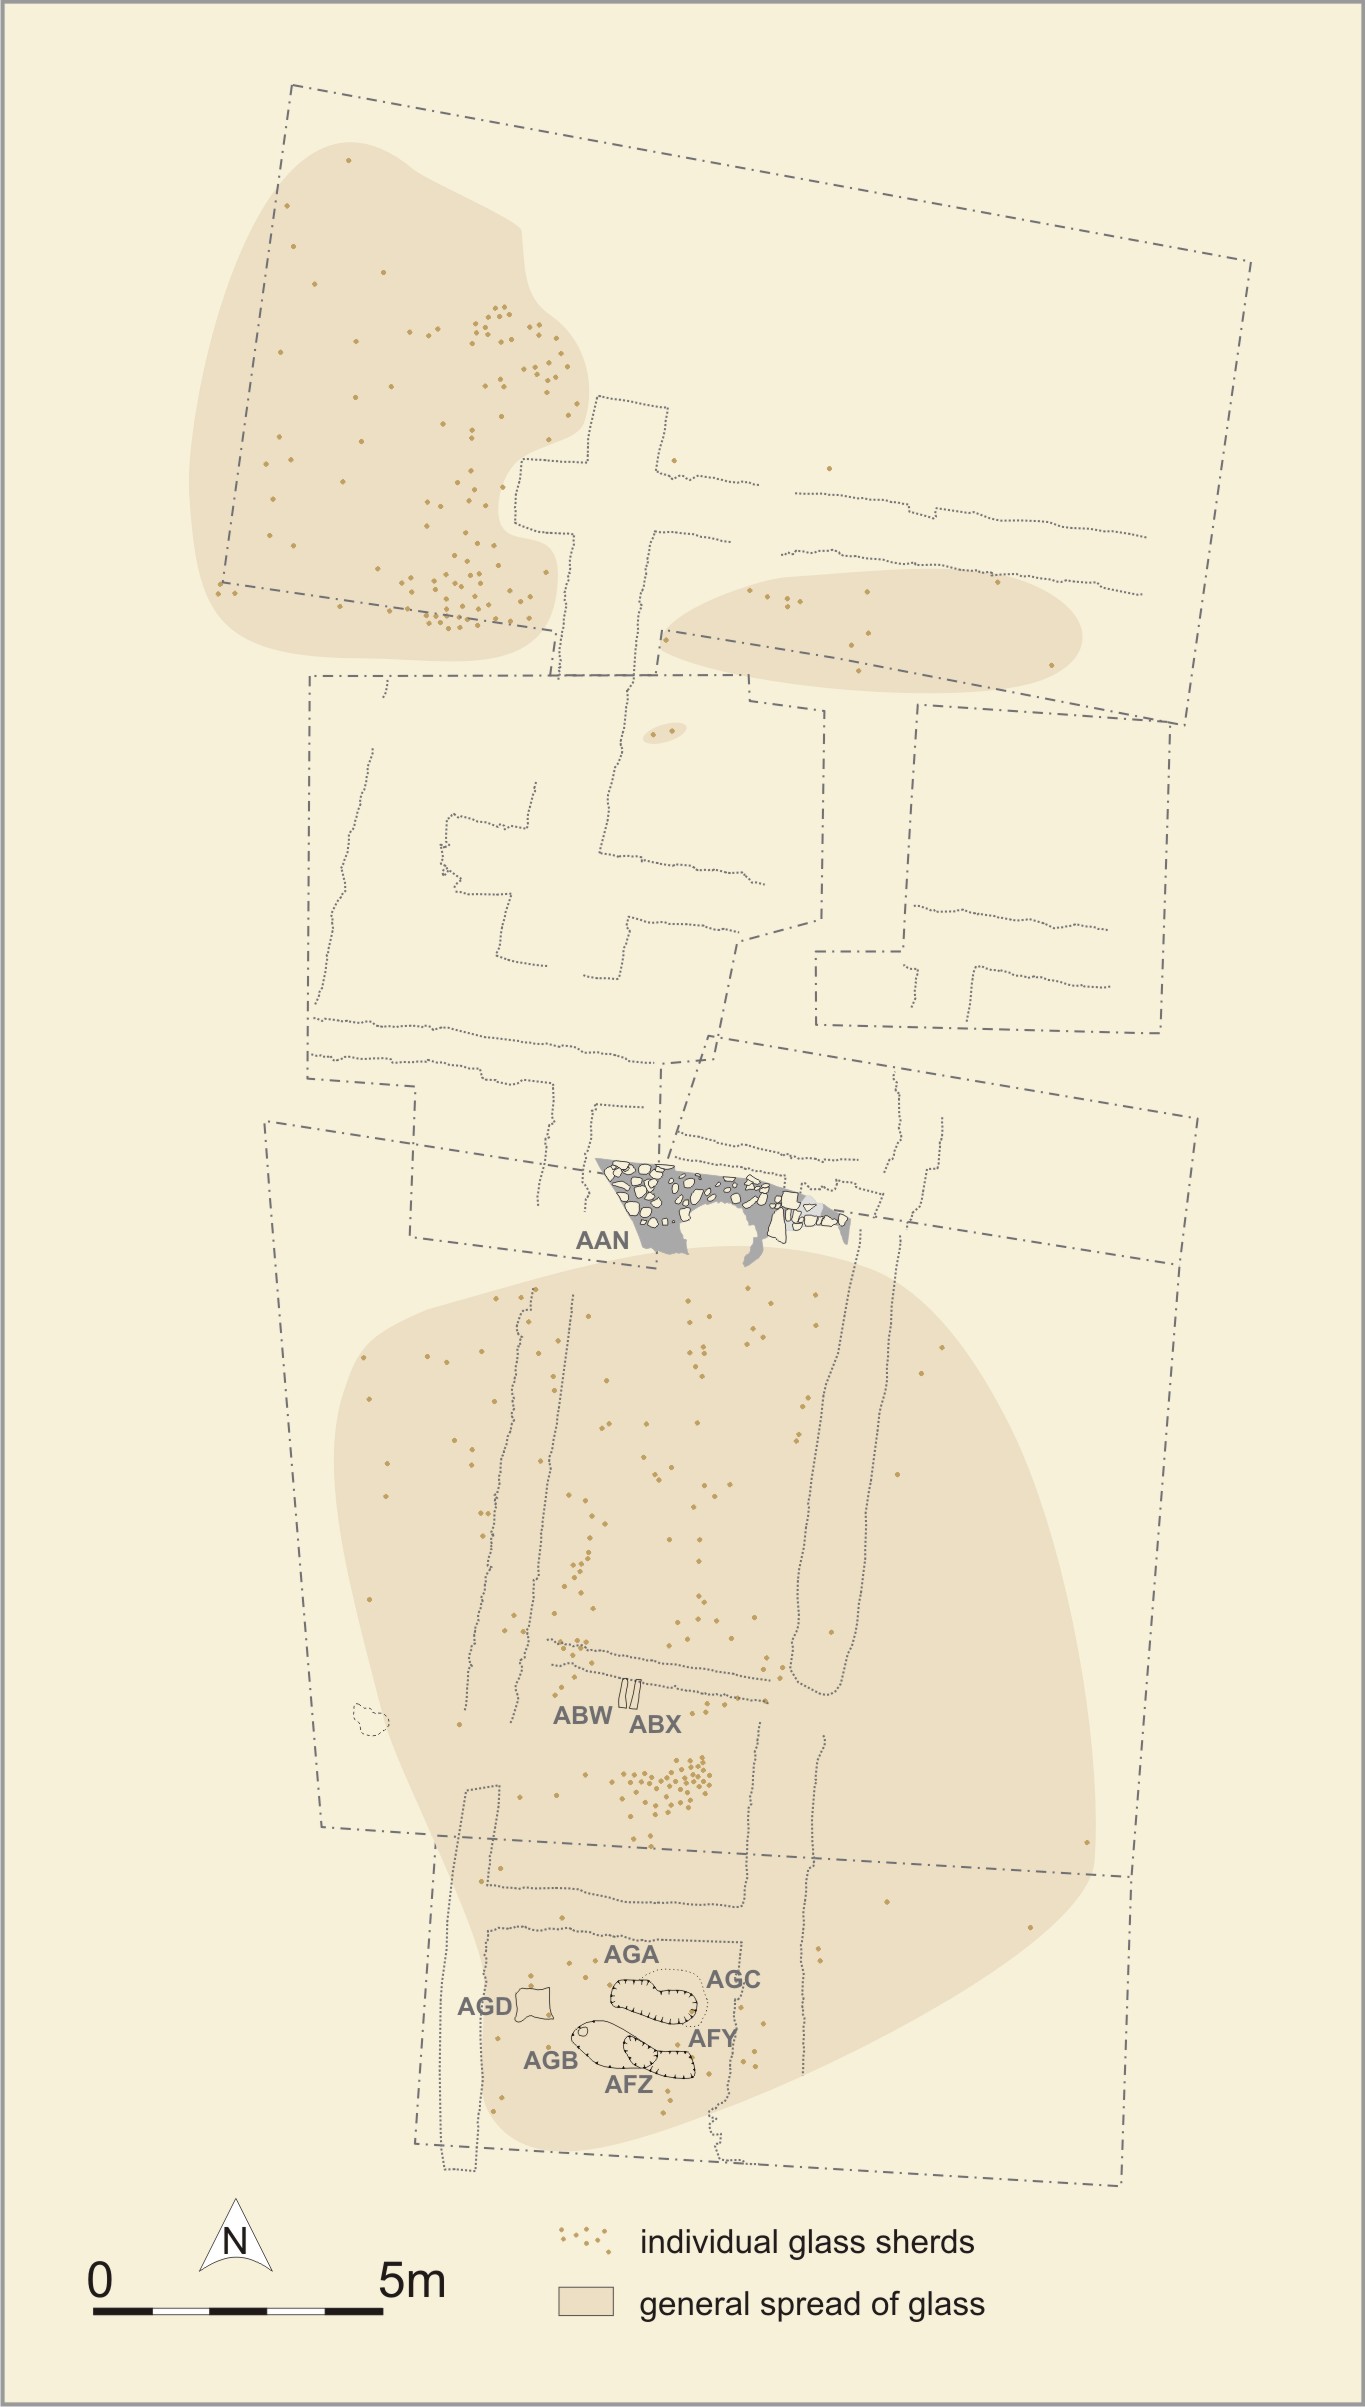
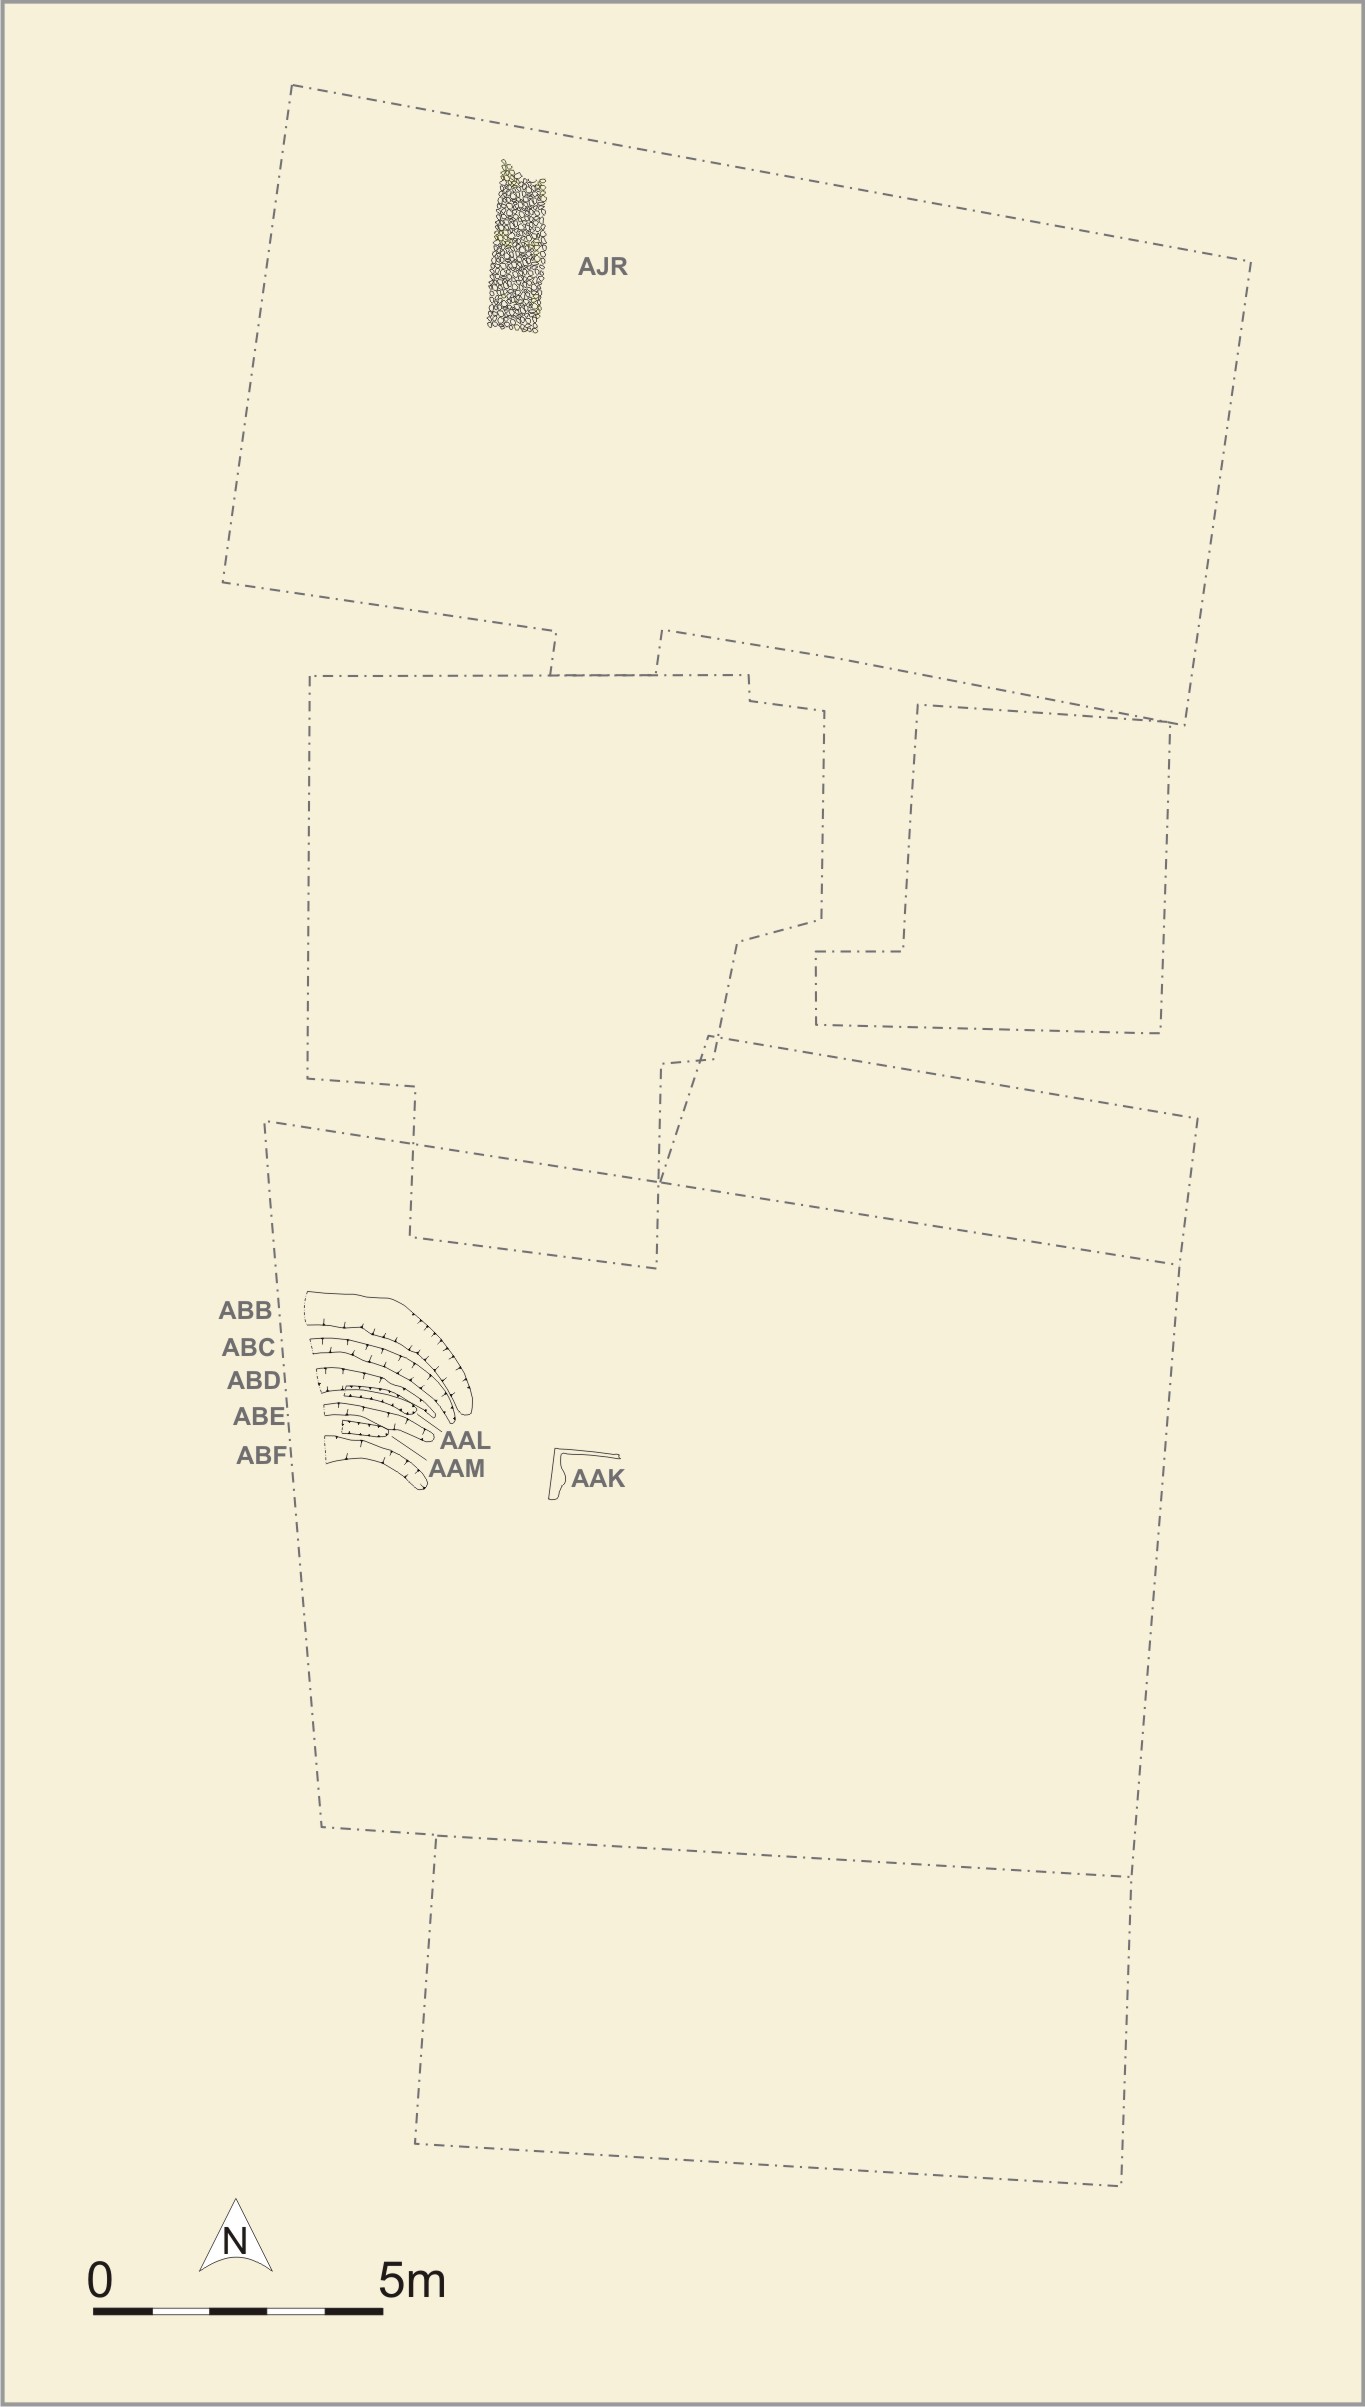
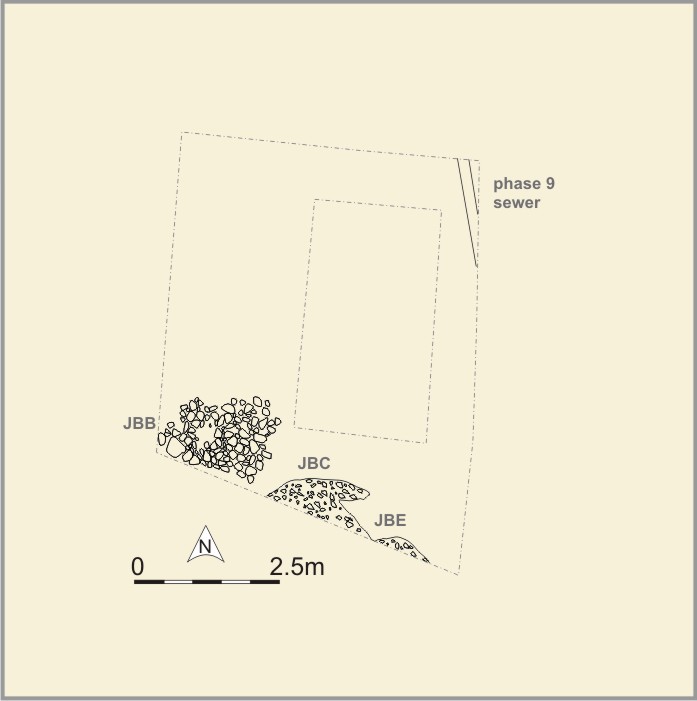
Phase 9: Trench plan: Phase 9, Phase 9 north, Phase 9 south, Phase 9 graveyard
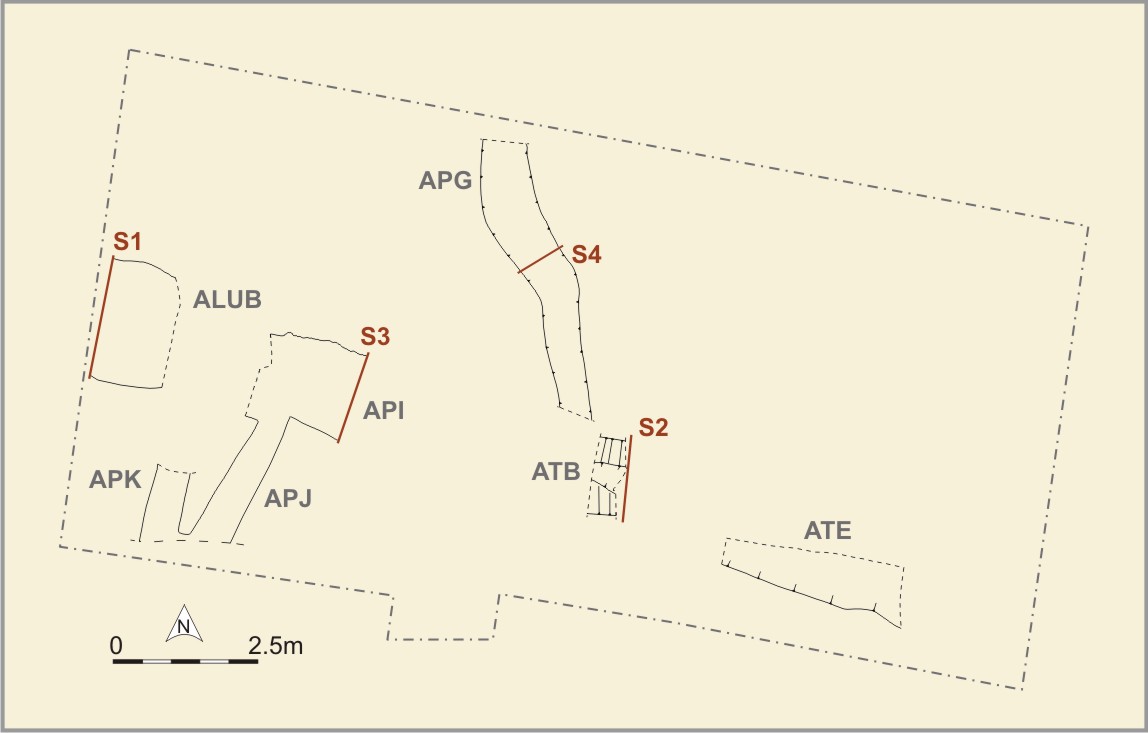
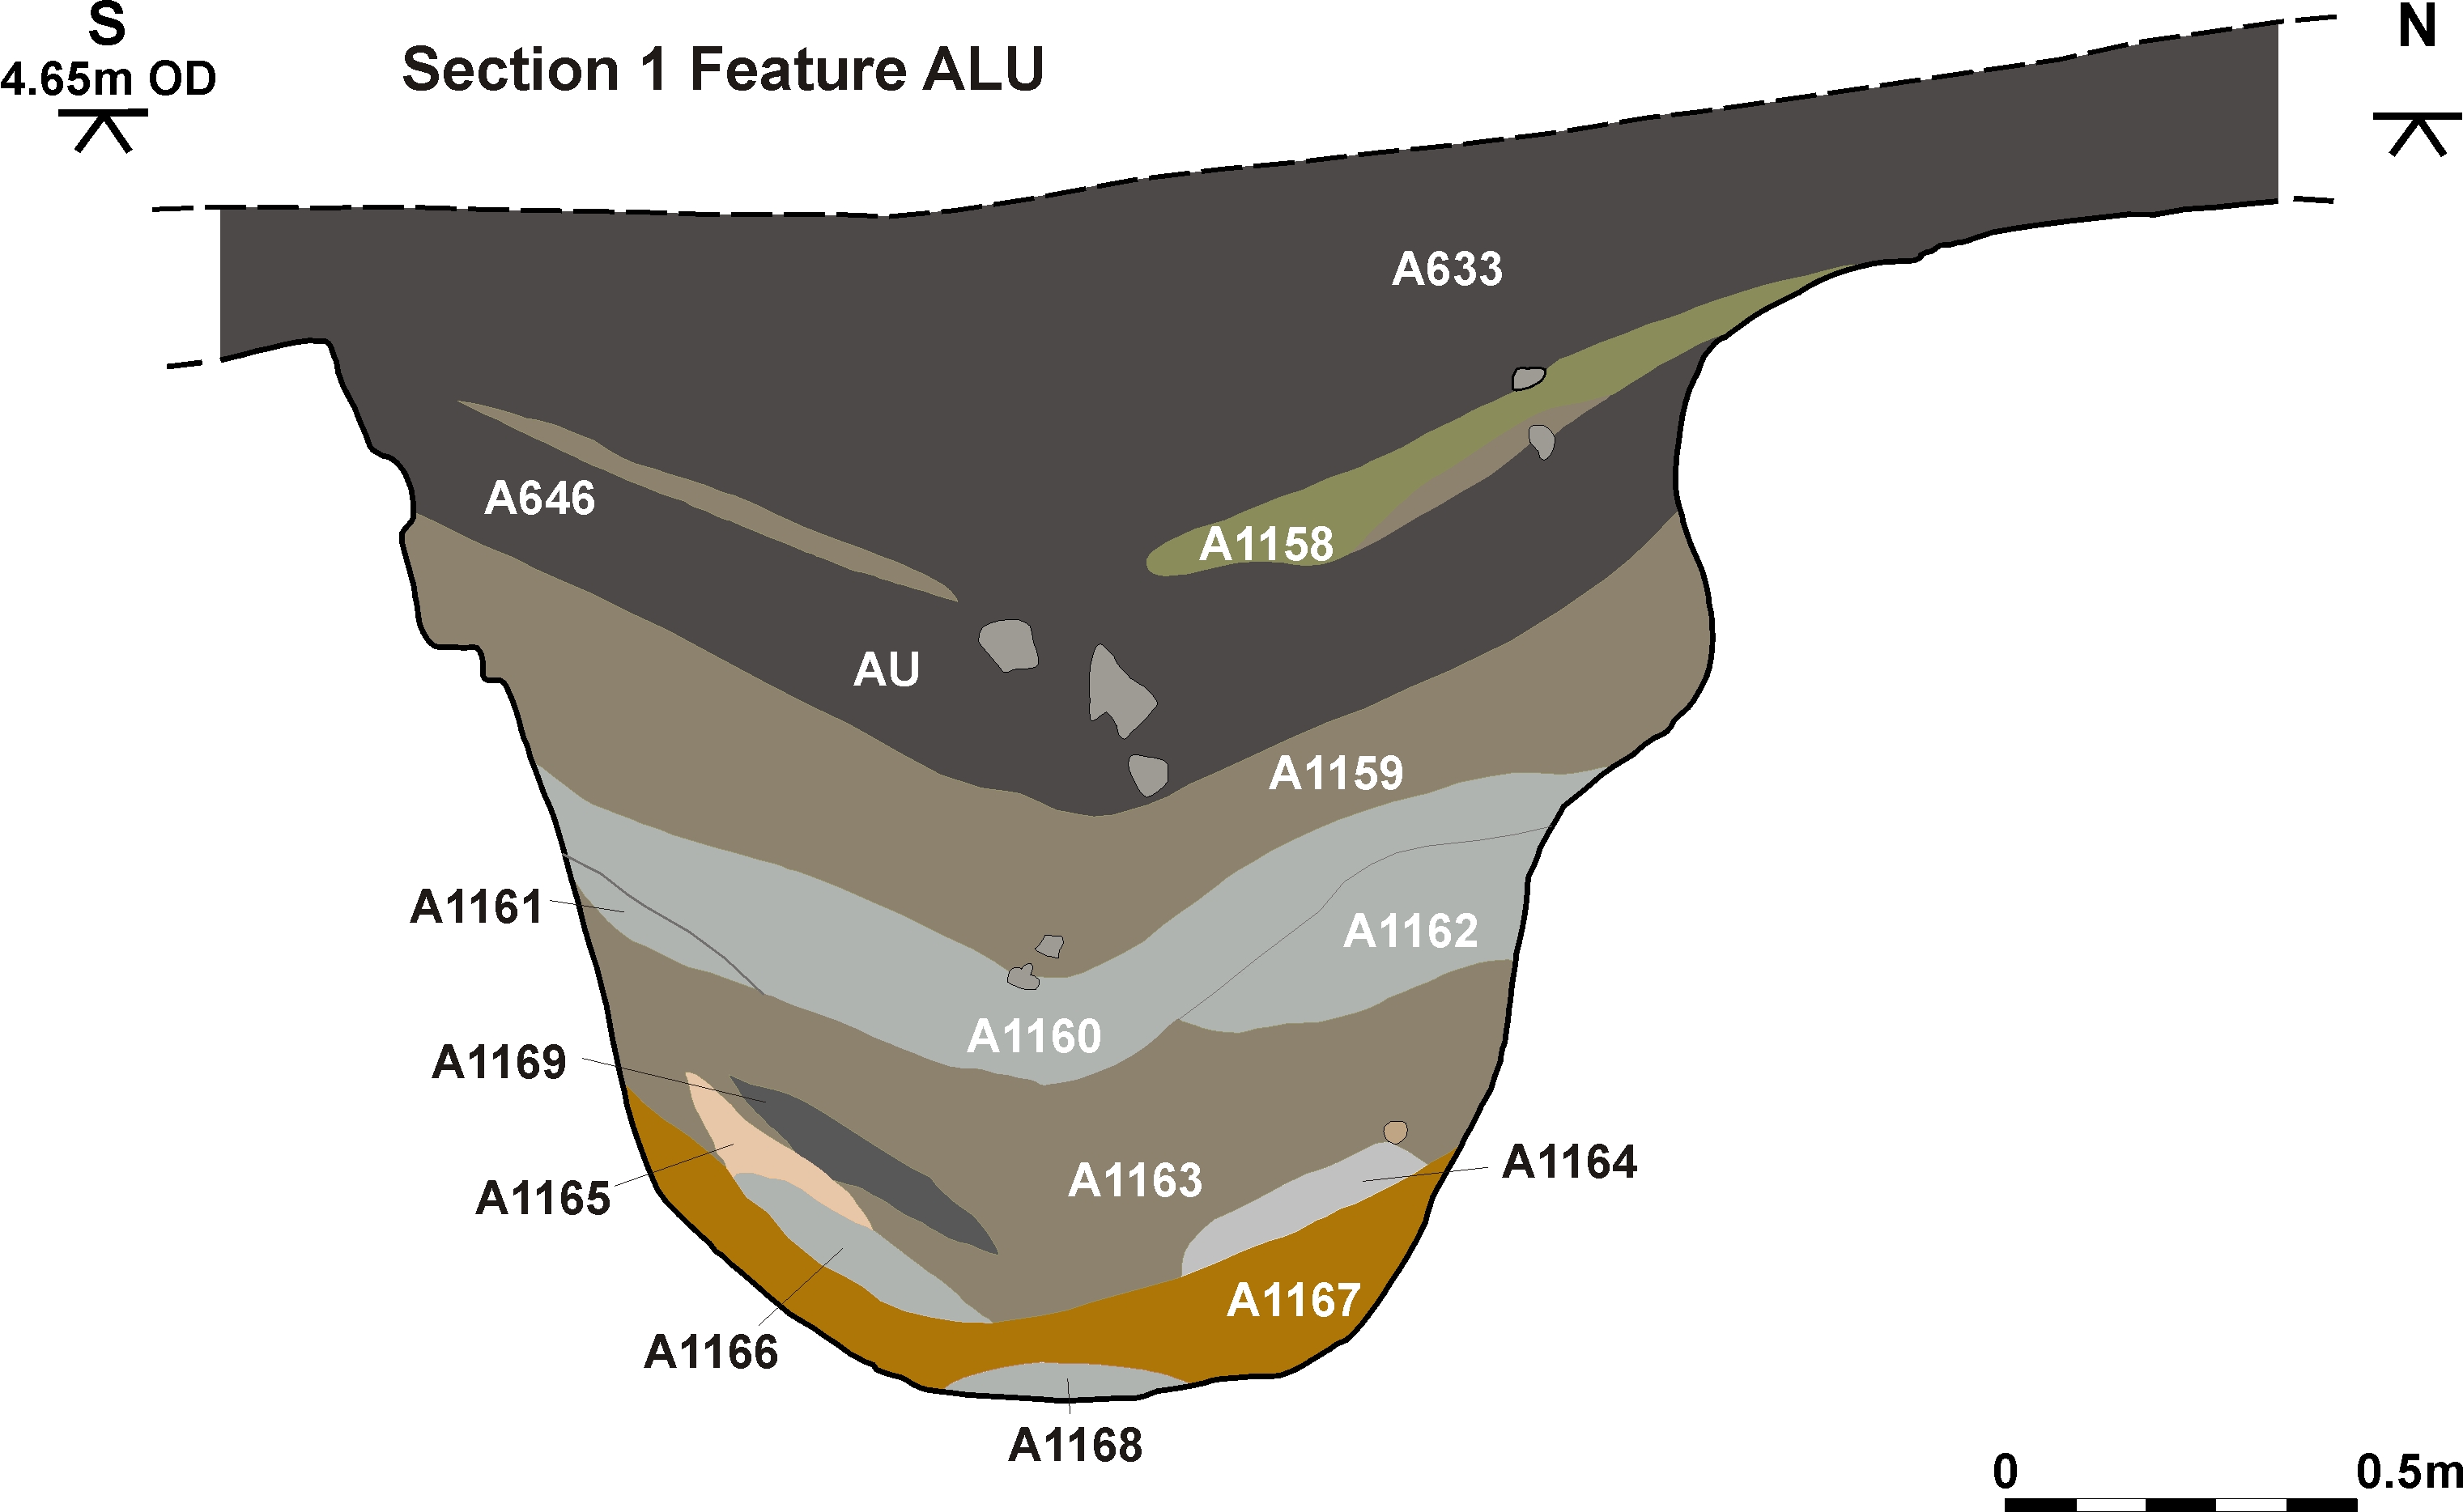
Section 1: Feature ALU
Section 2: Church wall AJB, foundation ANC and Phase 1 ditch ATB
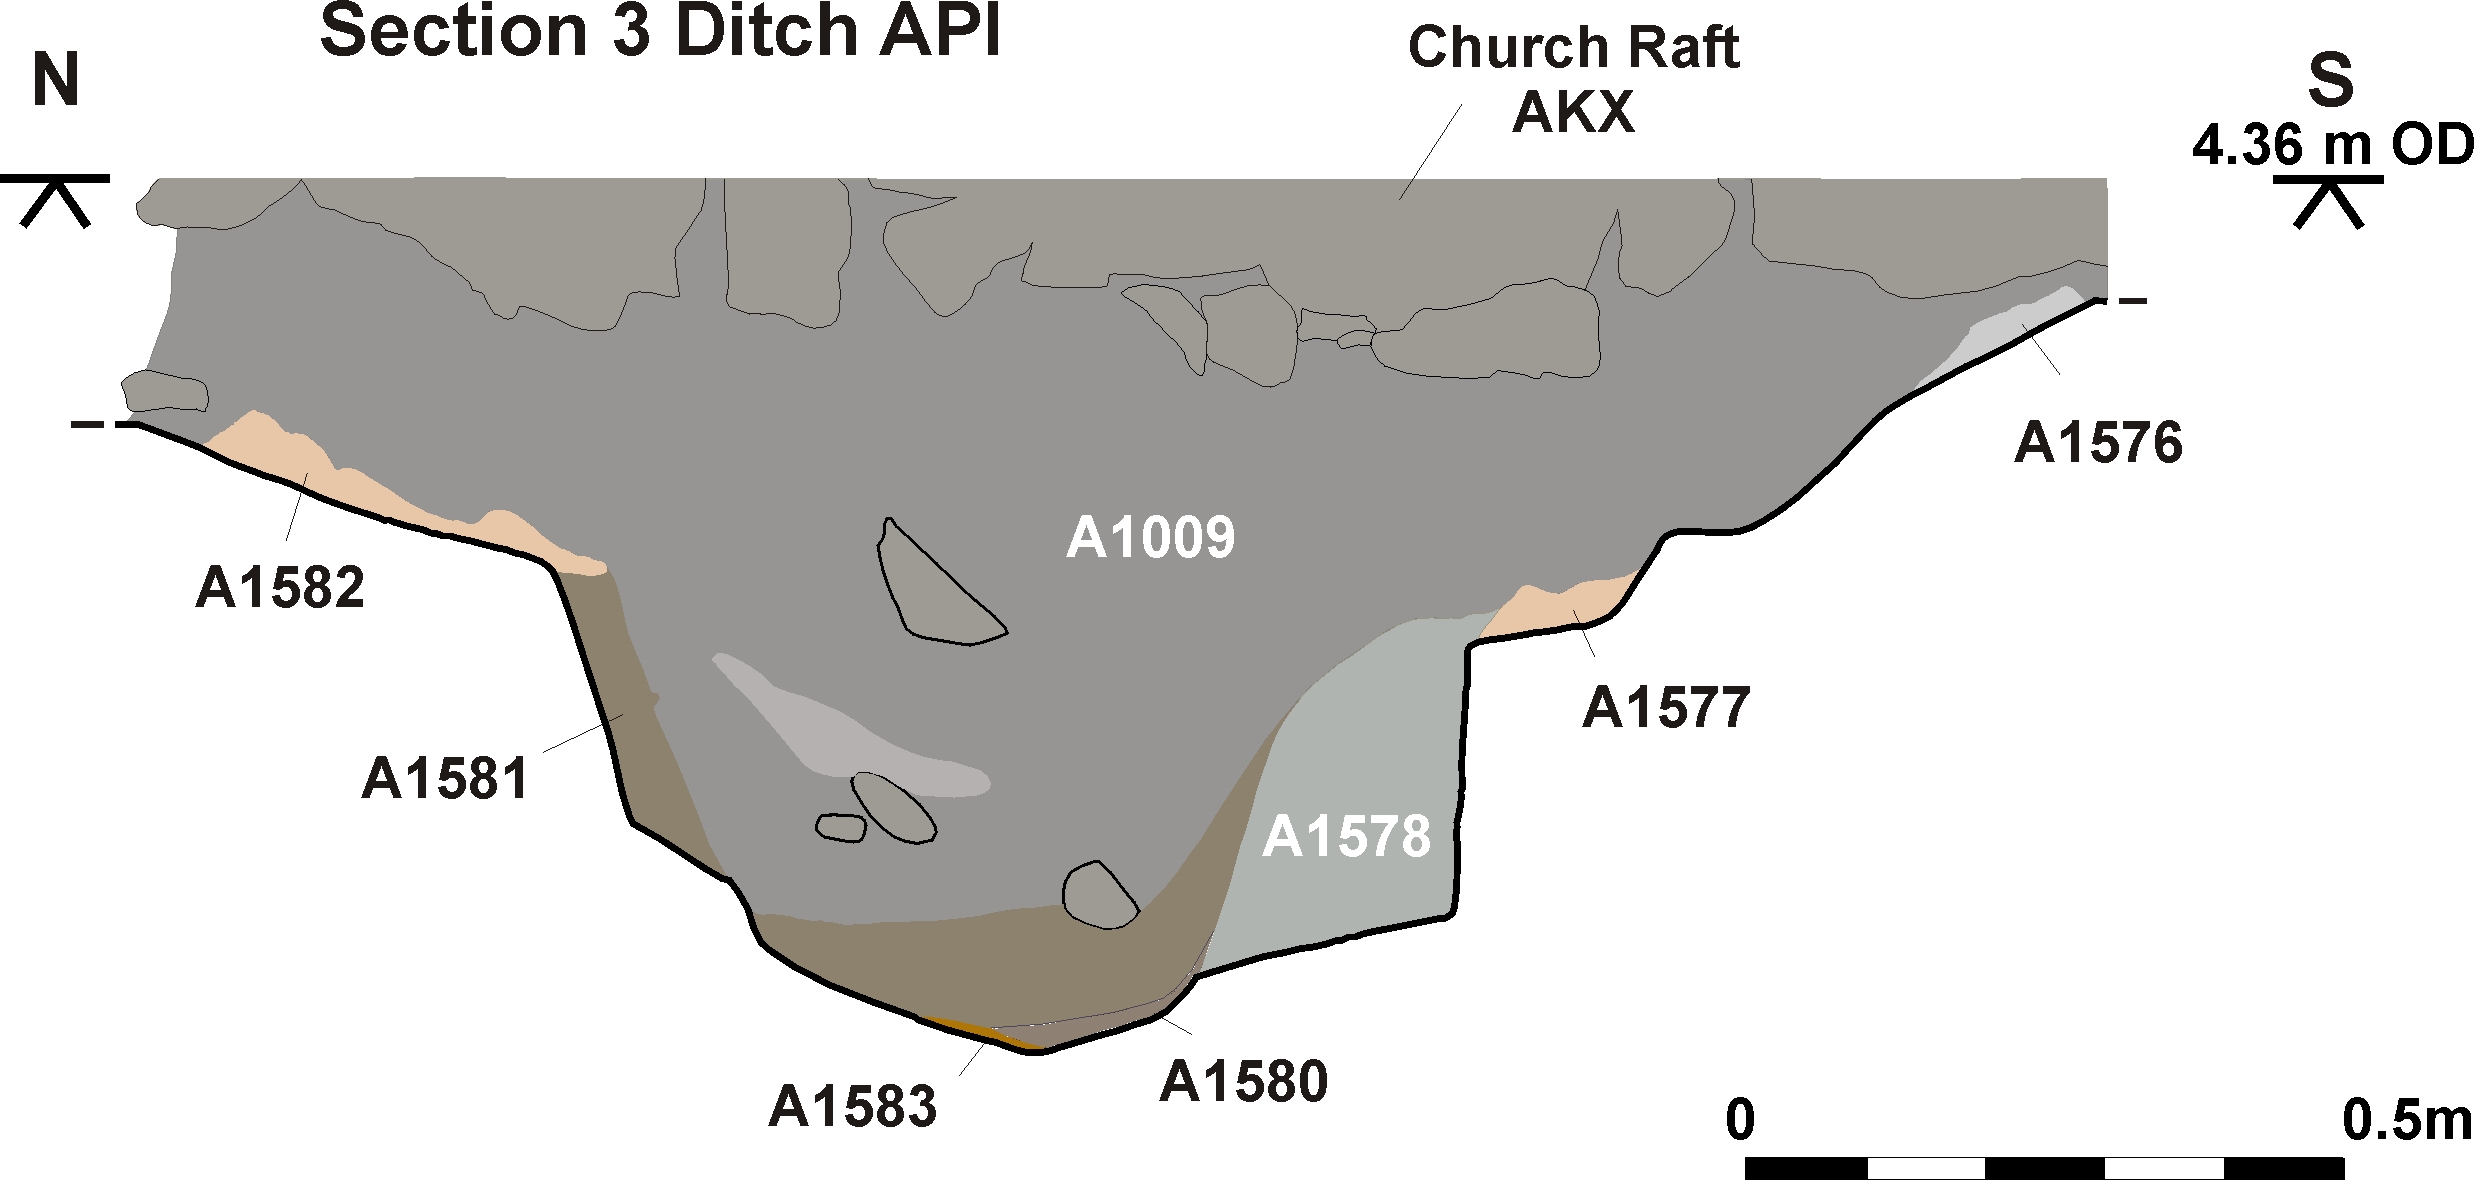
Section 3: Ditch API
Section 4: Post-hole APL and watercourse APG
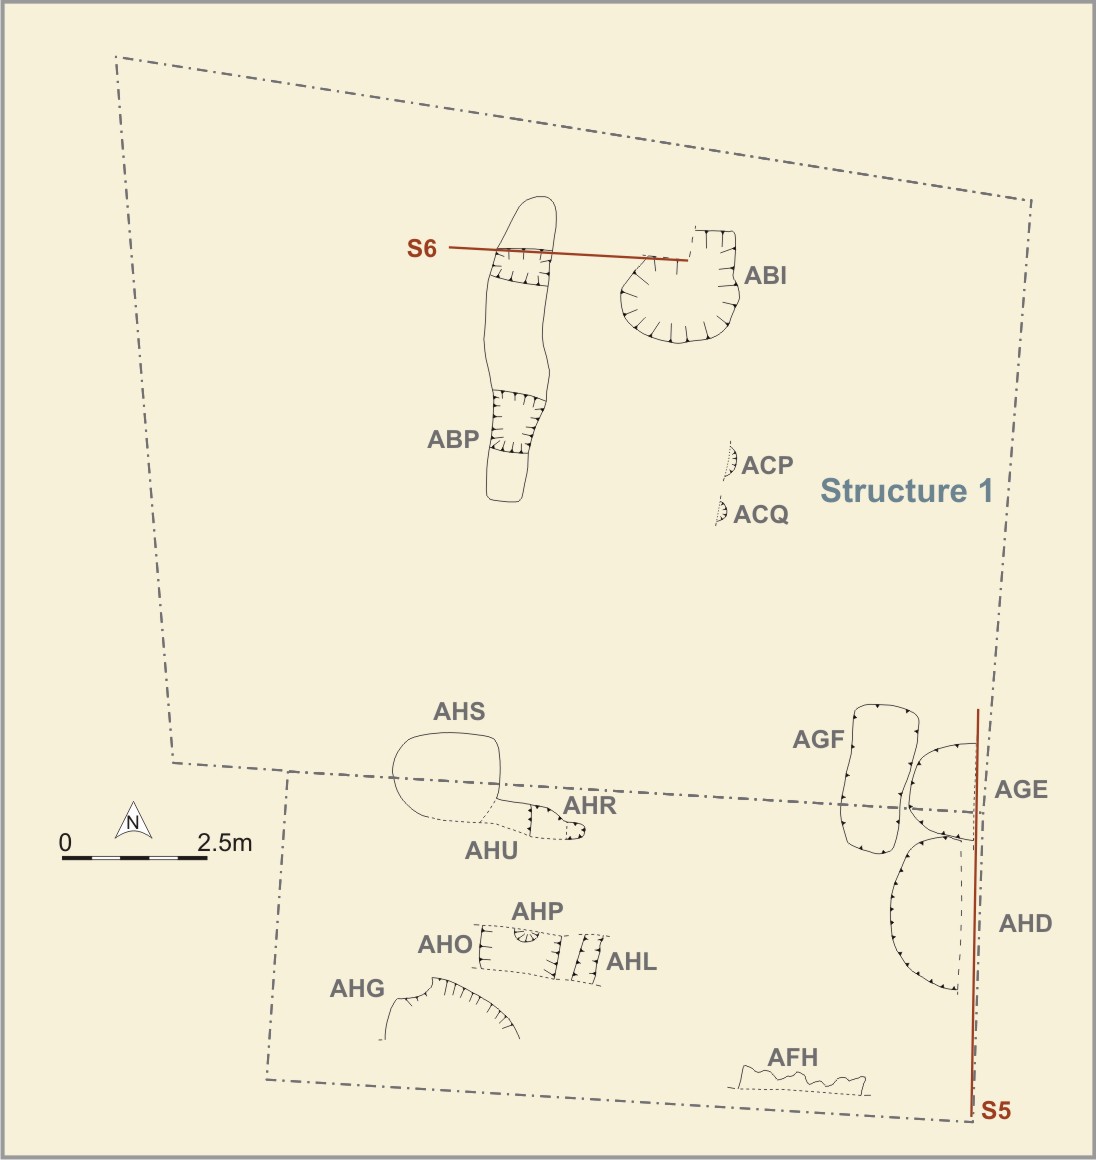
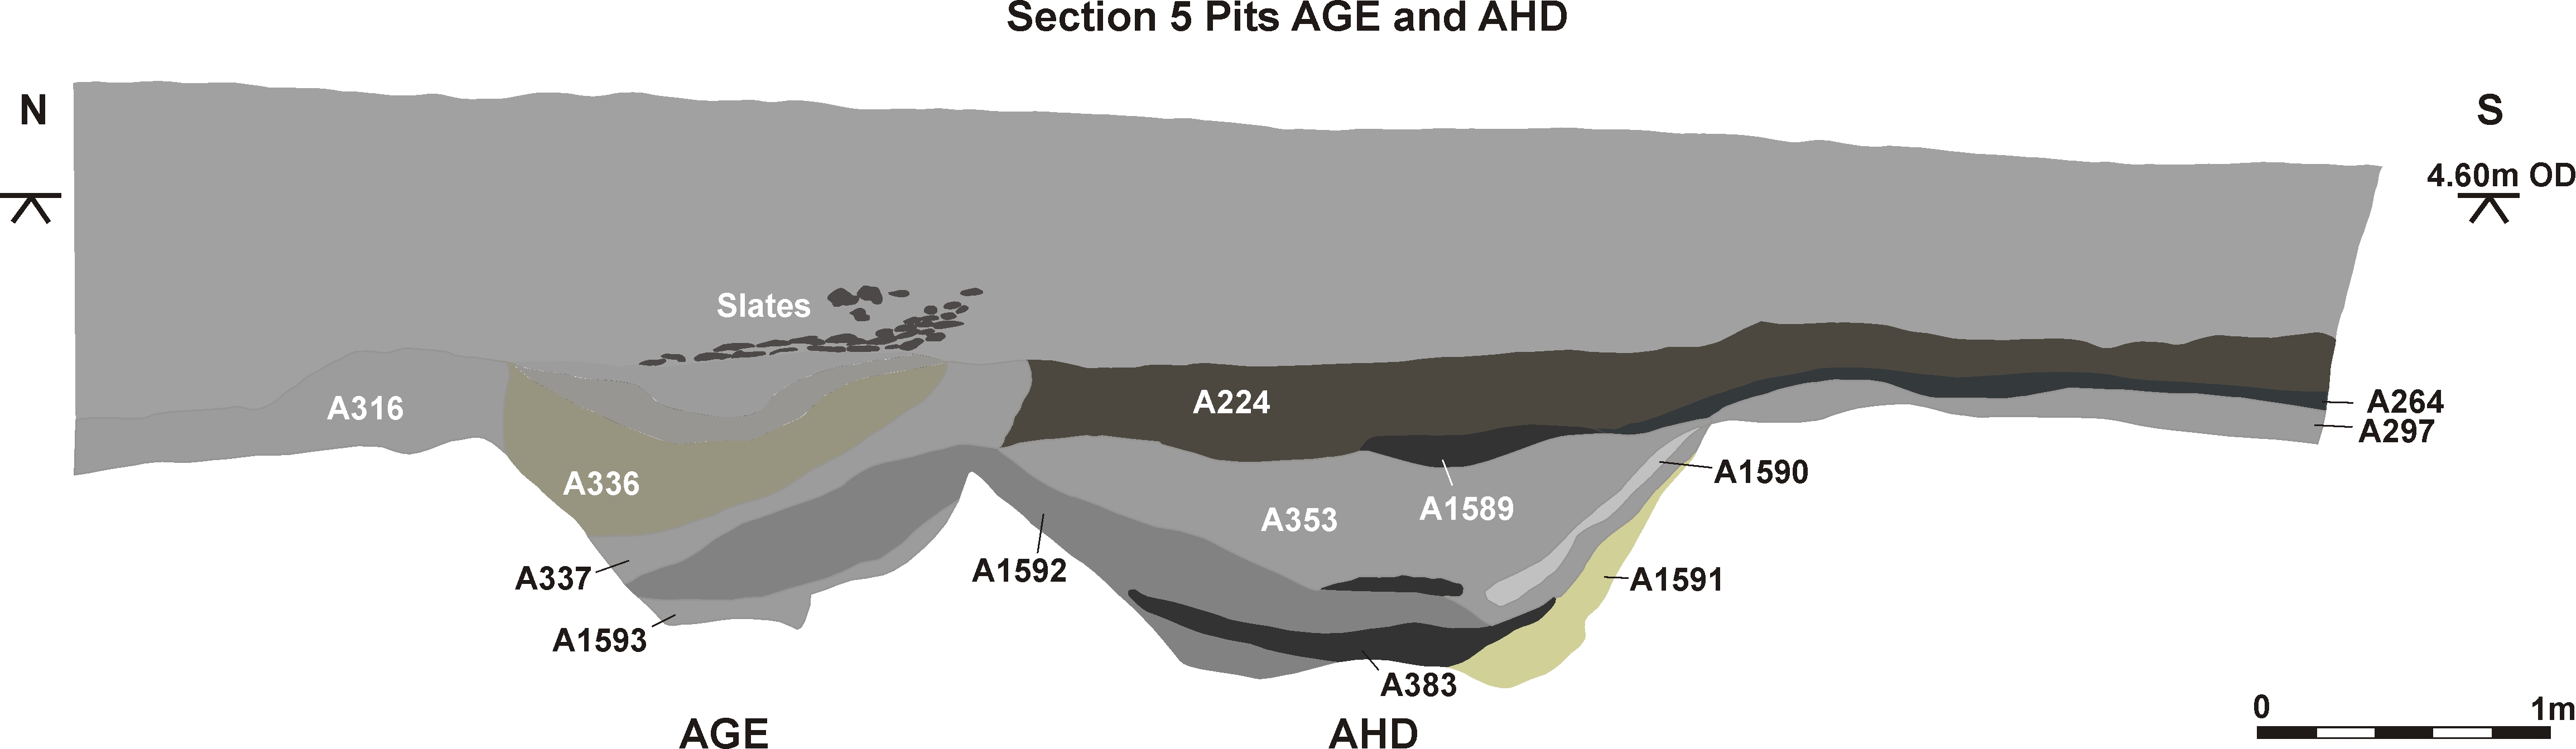
Section 5: Pits AGE and AHD
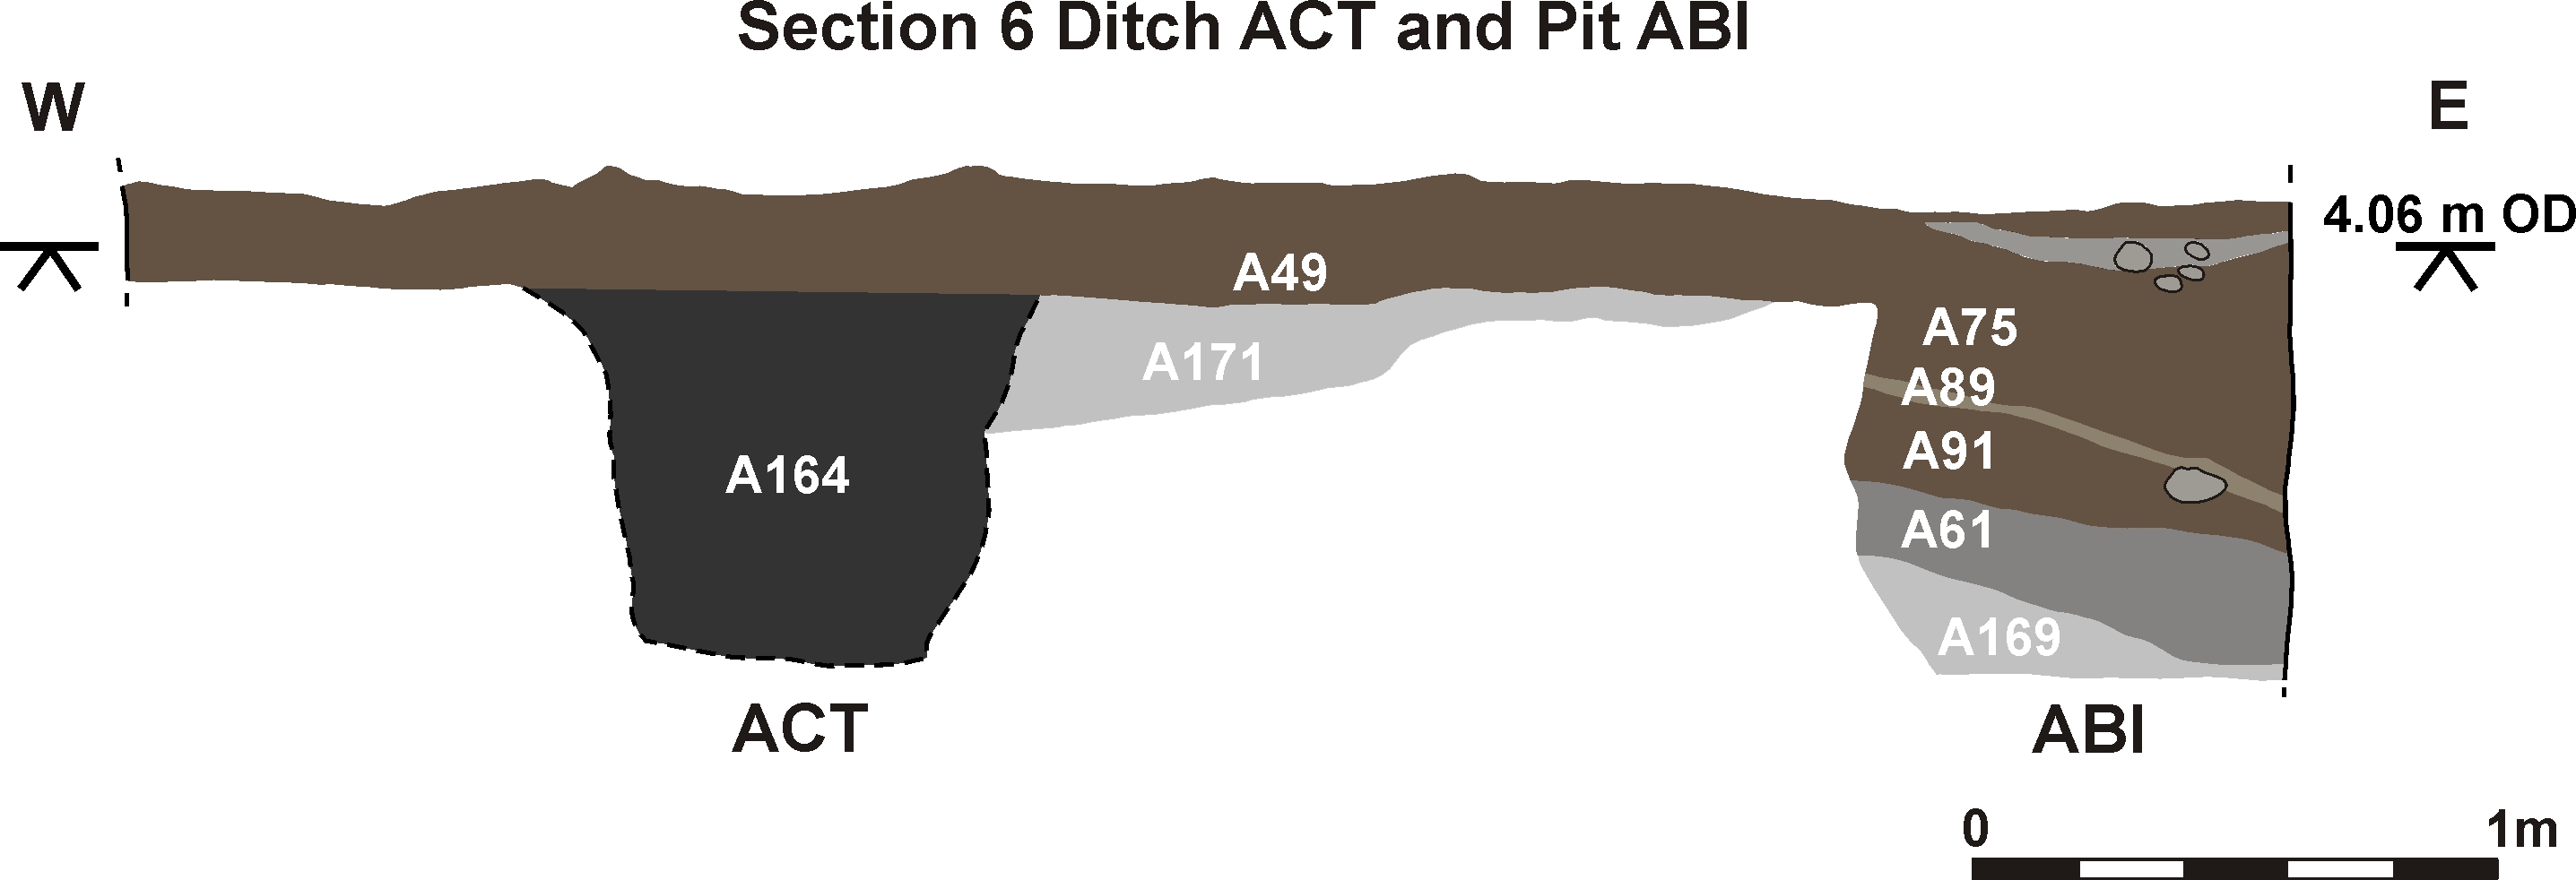
Section 6: Ditch ACT and pit ABI
Section 7: Post-hole AMX
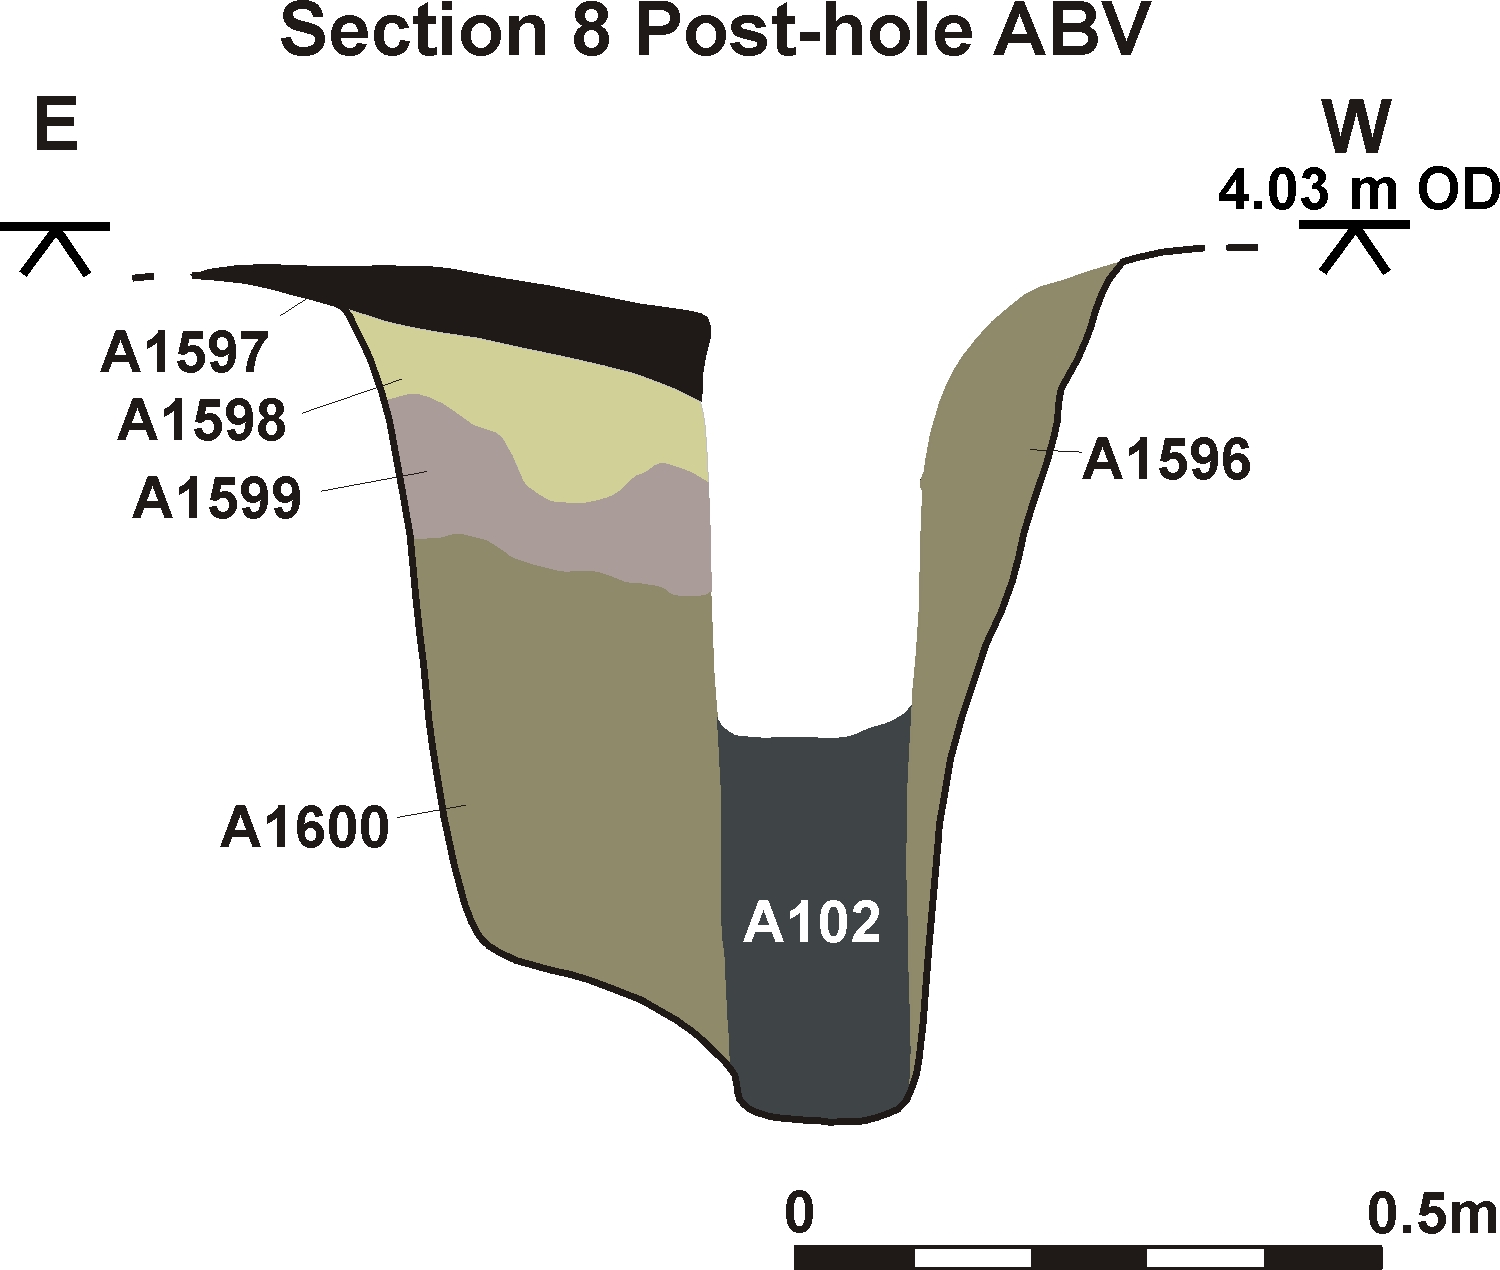
Section 8: Post-hole ABV
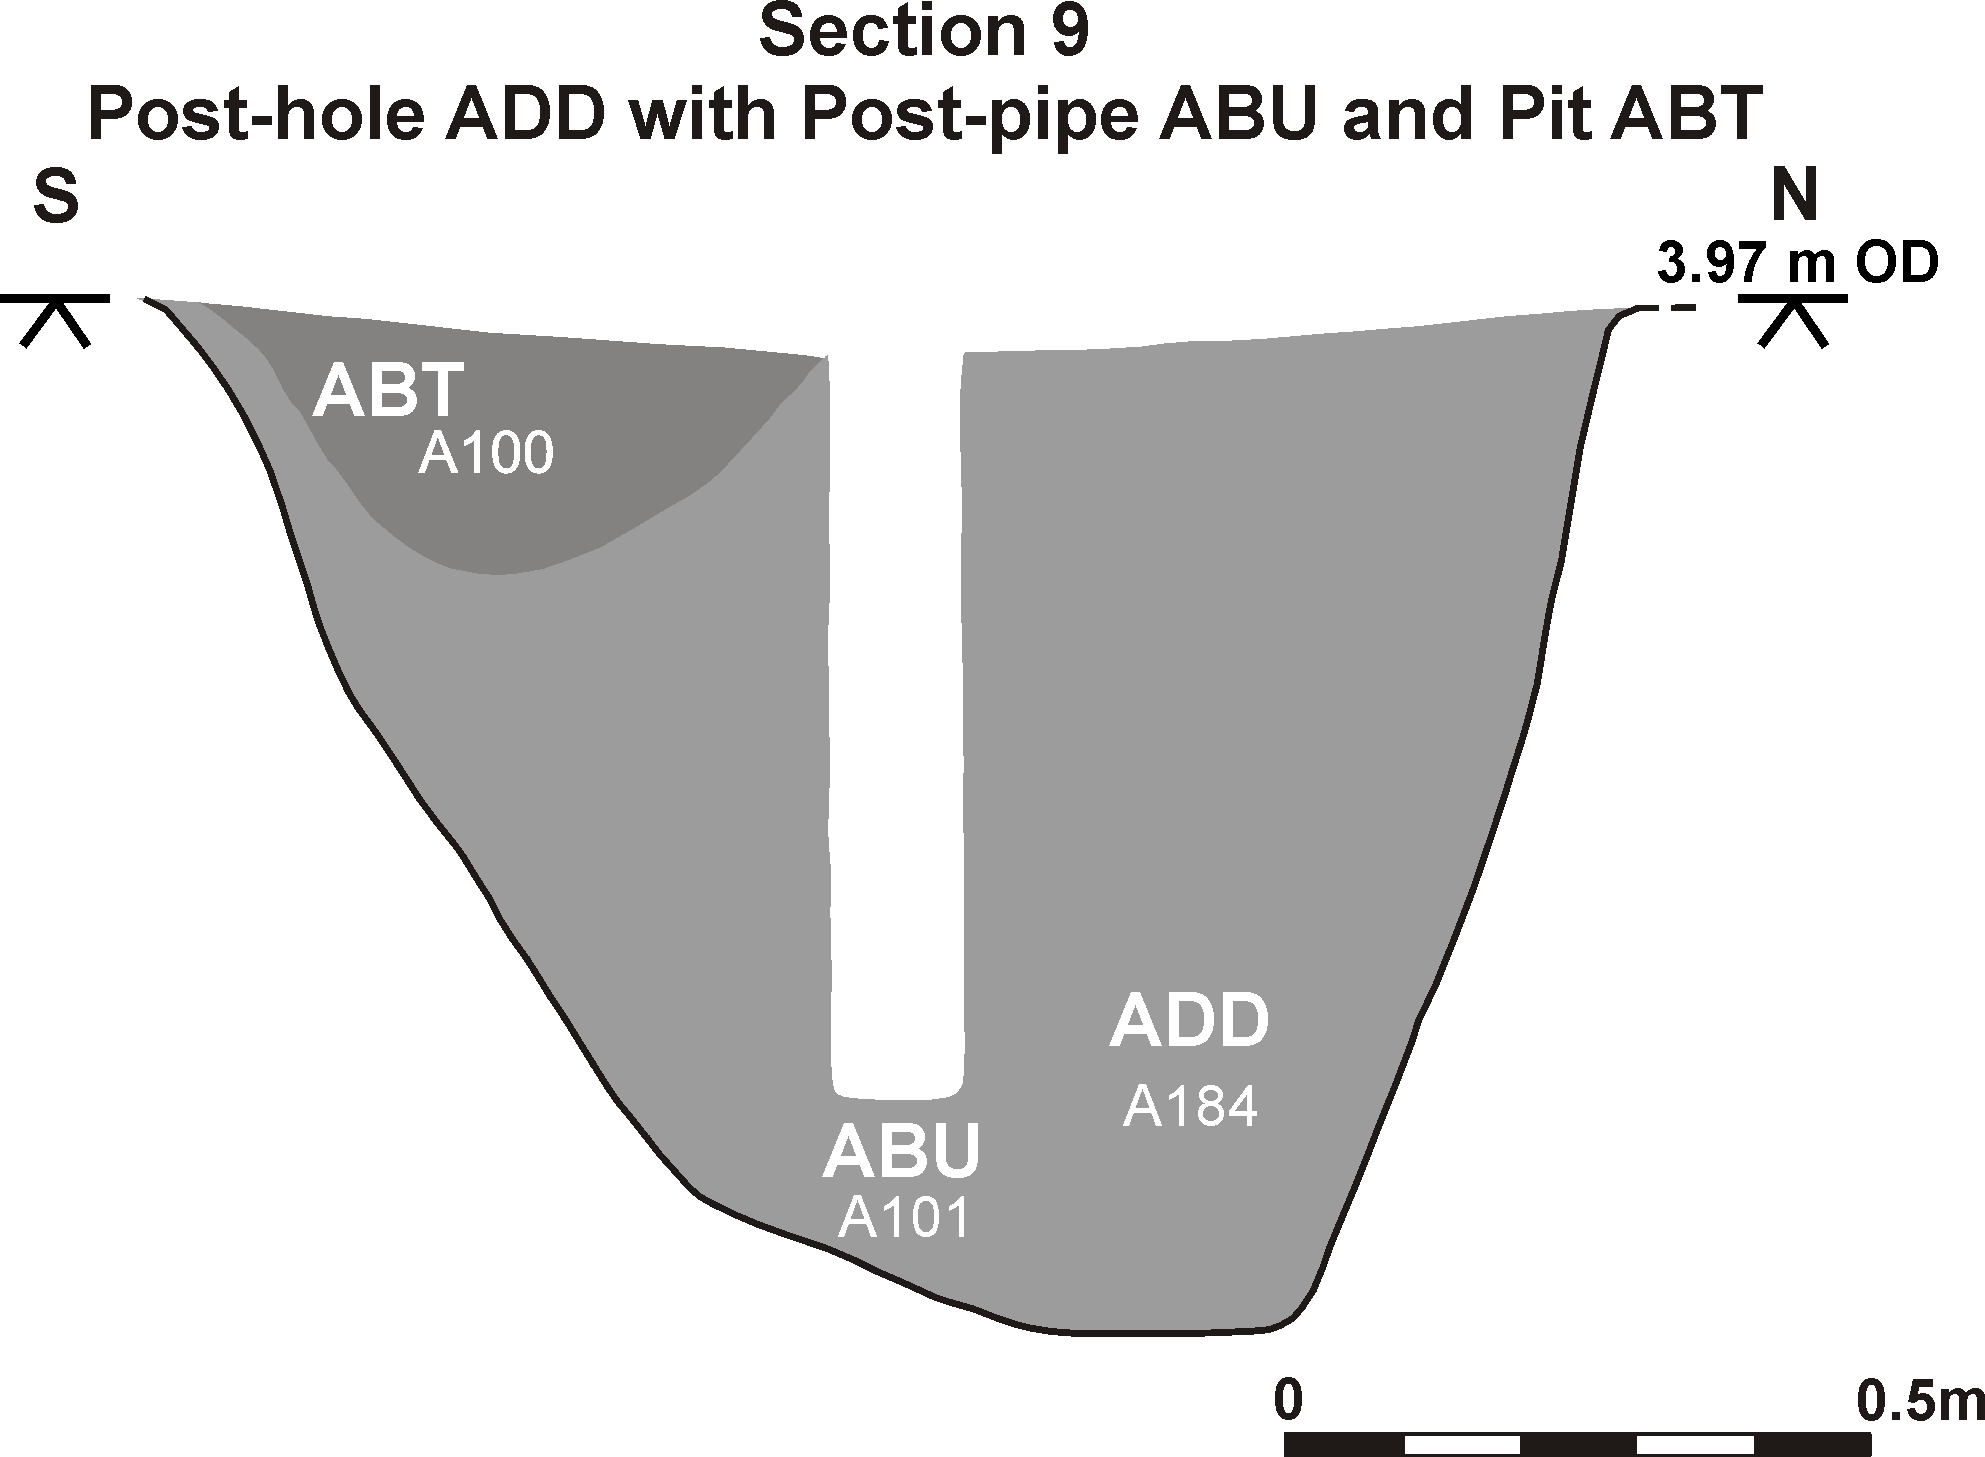
Section 9: Post-hole ADD with post-pipe ABU and pit ABT
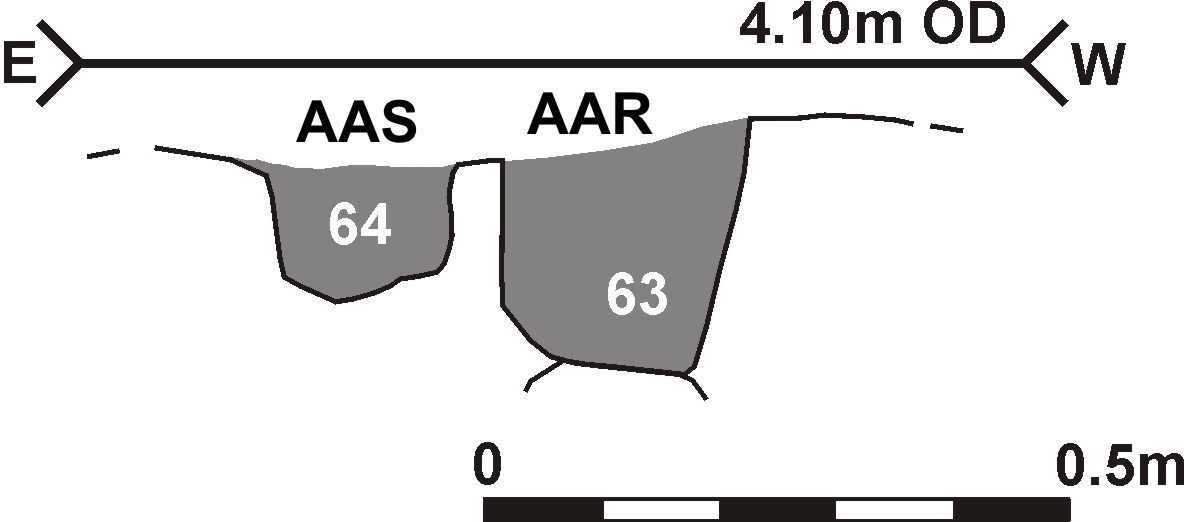
Section 9a: Post-holes AAR and AAS
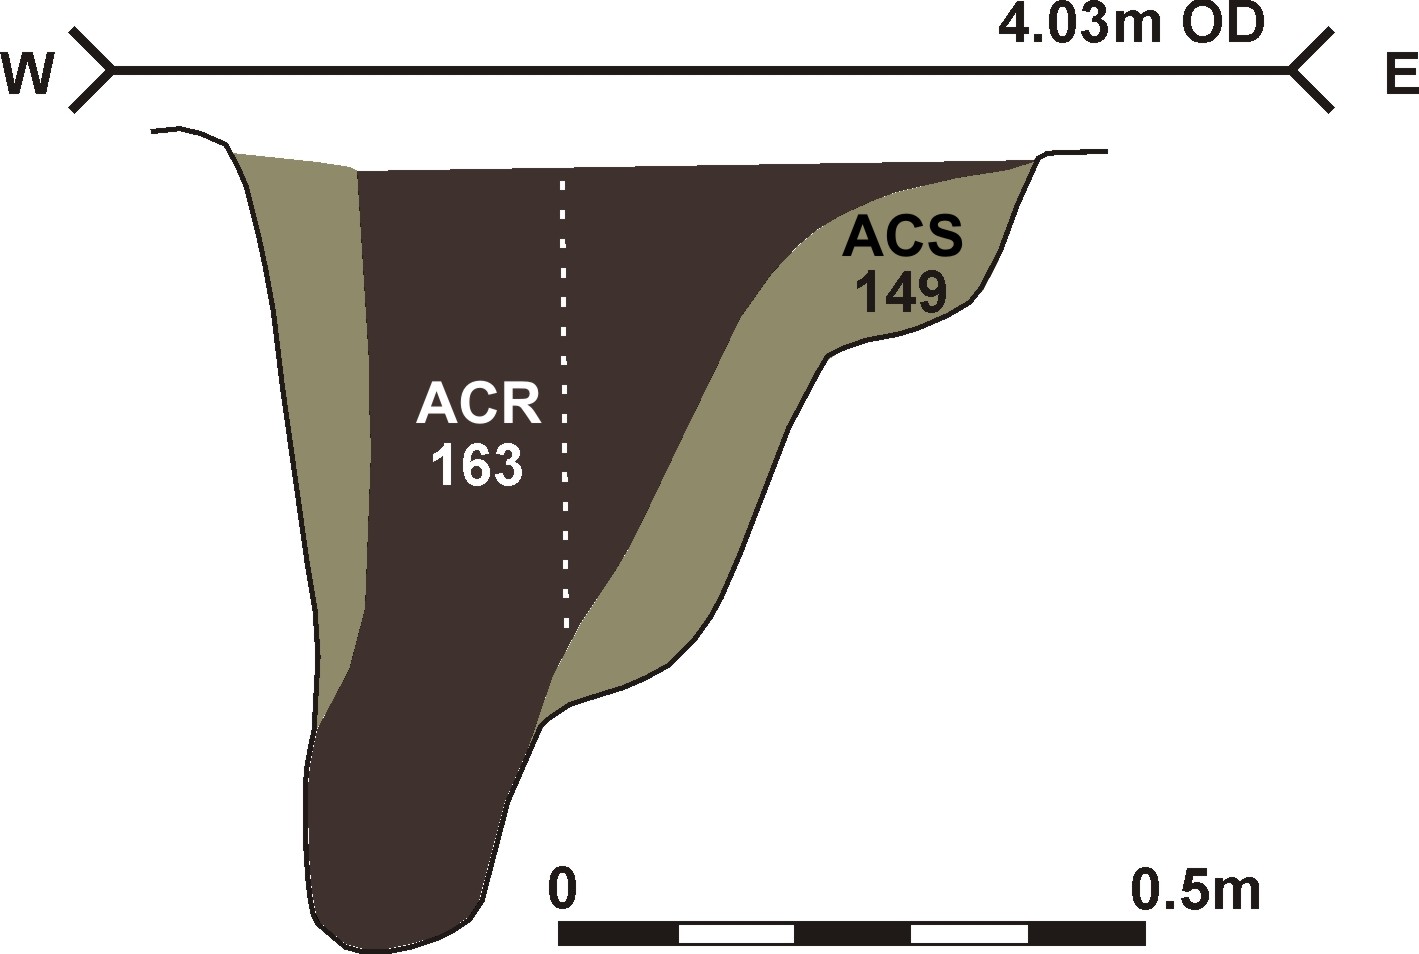
Section 9b: Post-hole ACS
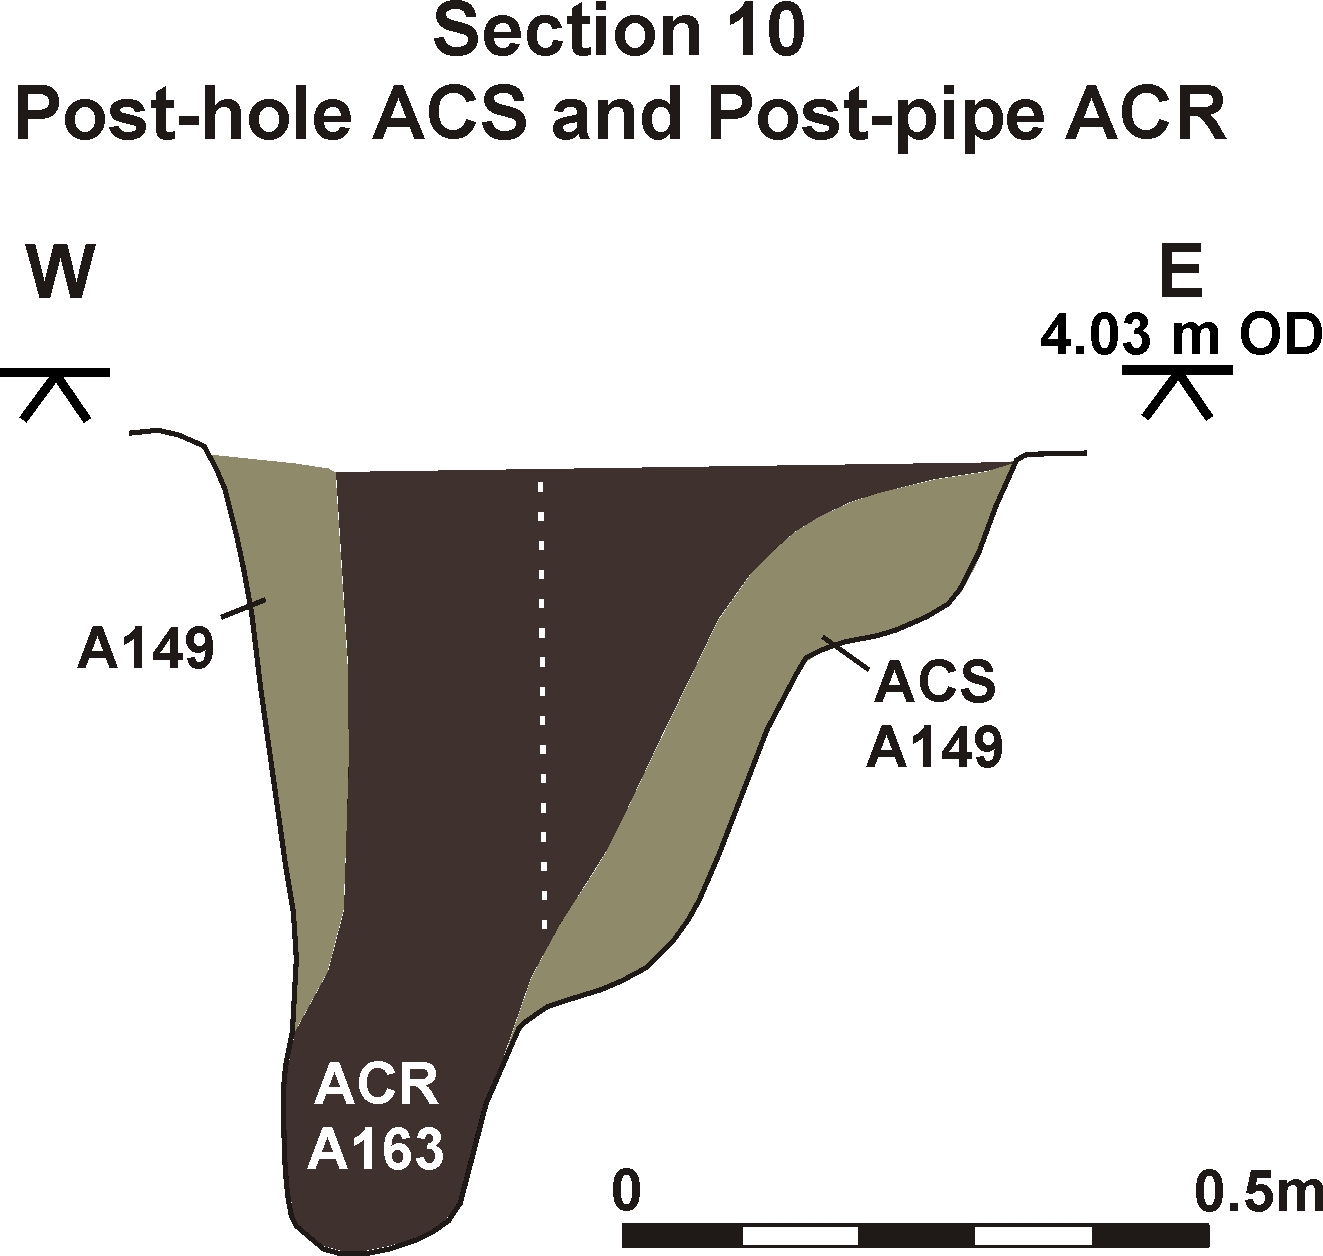
Section 10: Post-hole ACS and post-pipe ACR
Section 11: Post-hole and post-pipe AEW
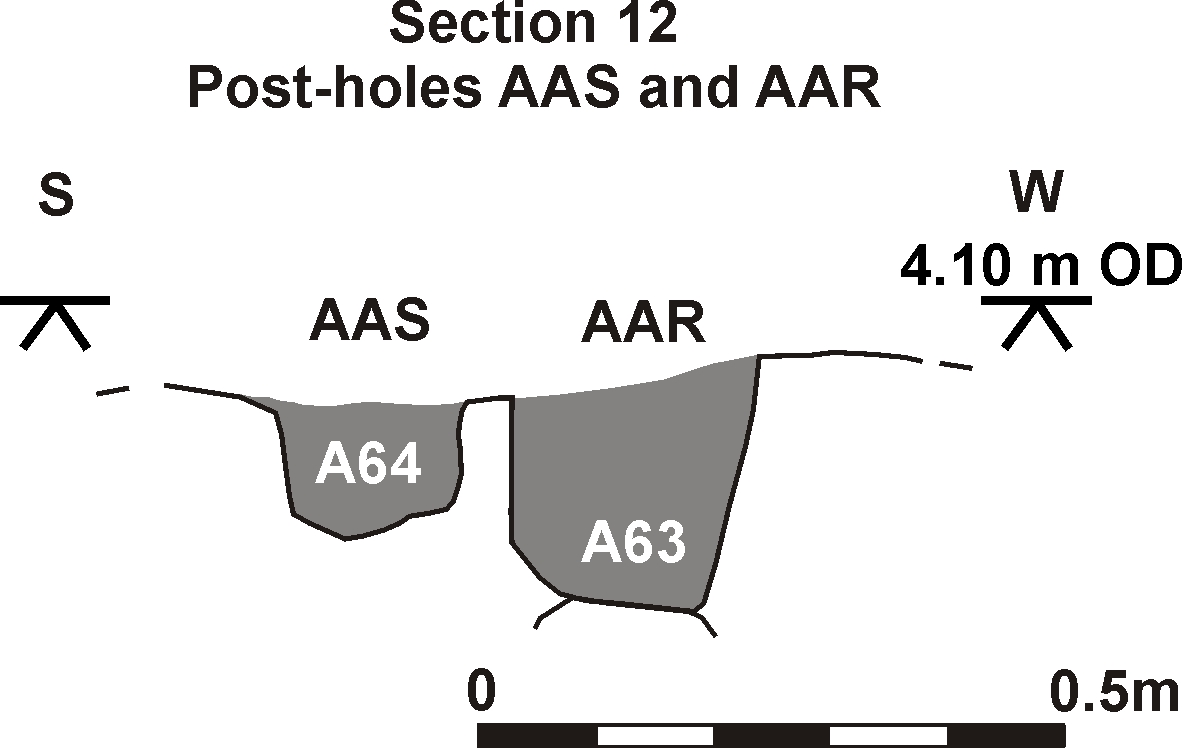
Section 12: Post-holes AAS and AAR
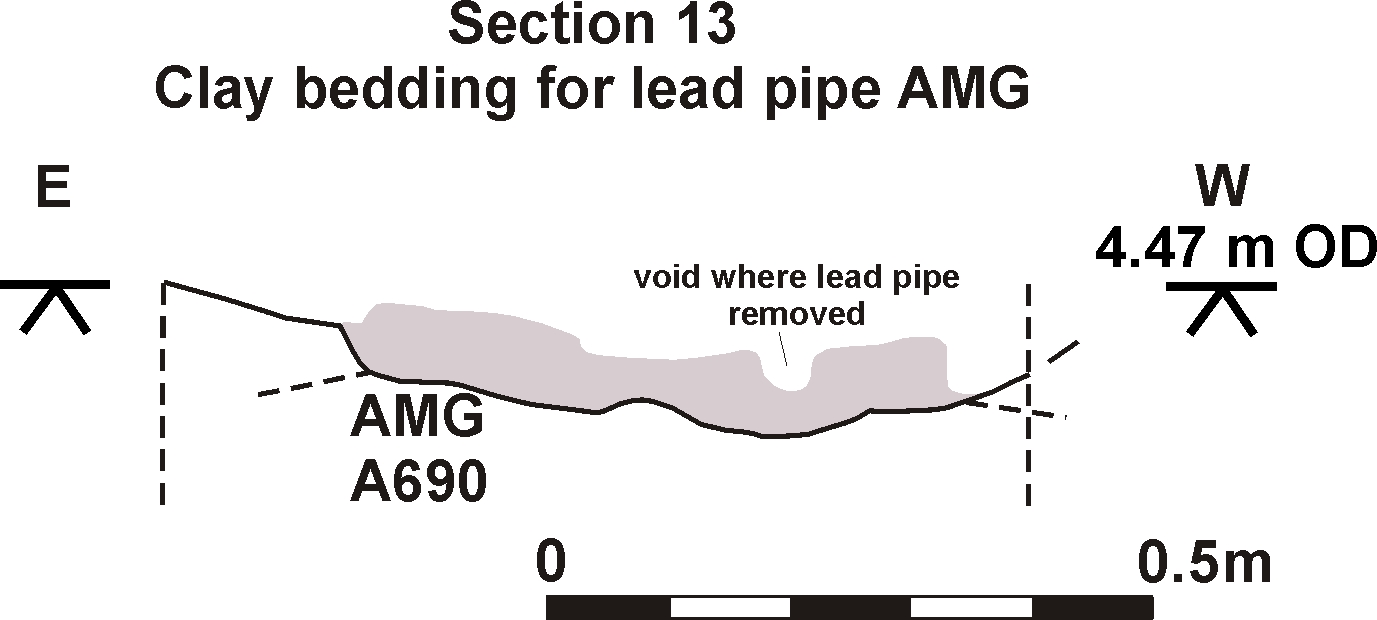
Section 13: Clay bedding for lead pipe AMG
Section 14: Elevation of north west buttresses and W wall of church
Section 15: Elevation of interior face of north church wall
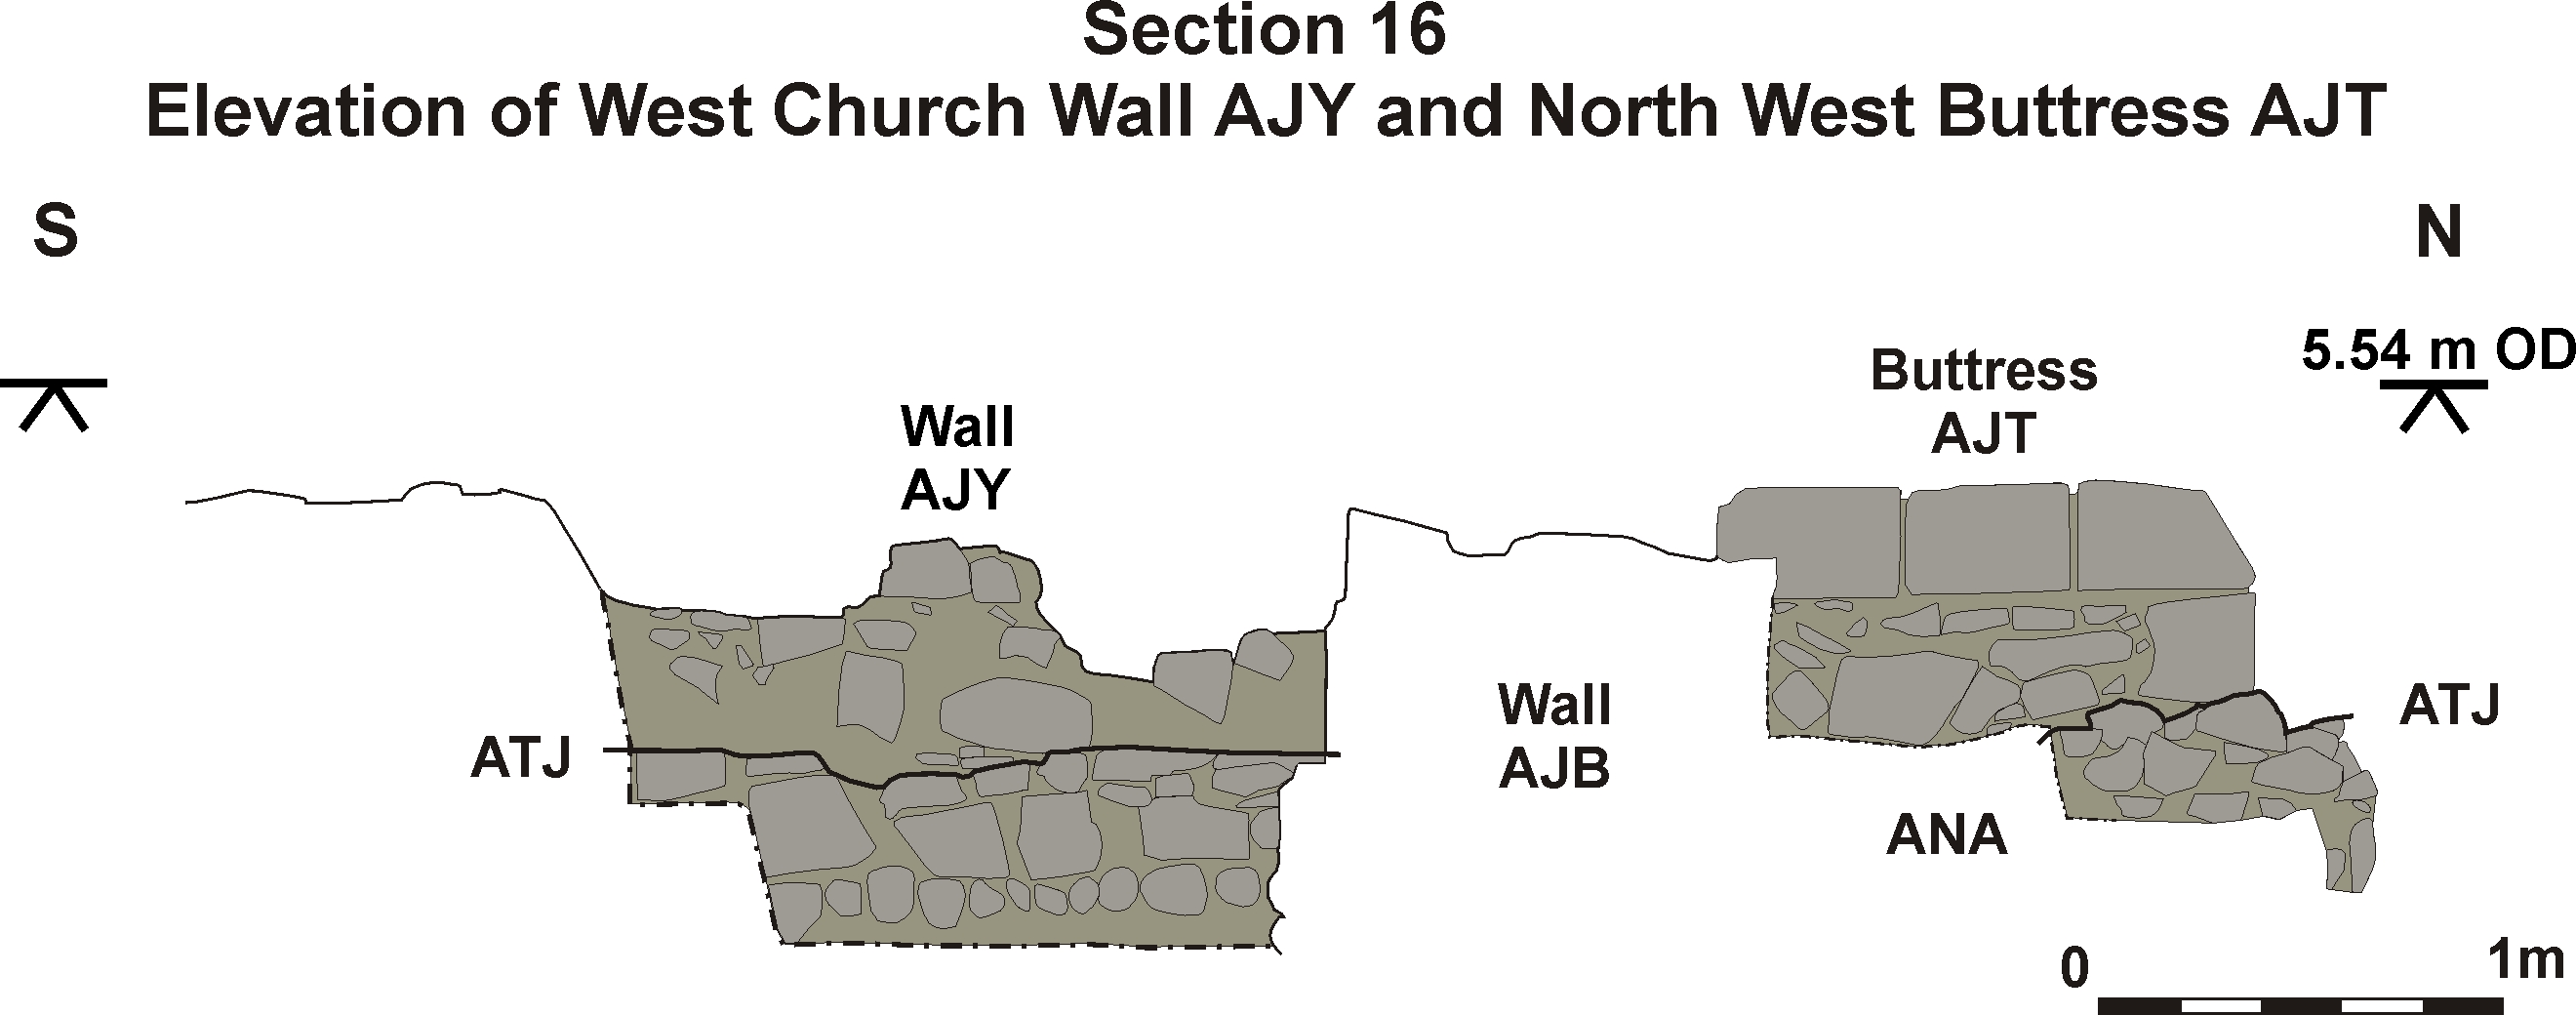
Section 16: Elevation of west church wall AJY and north west buttress AJT
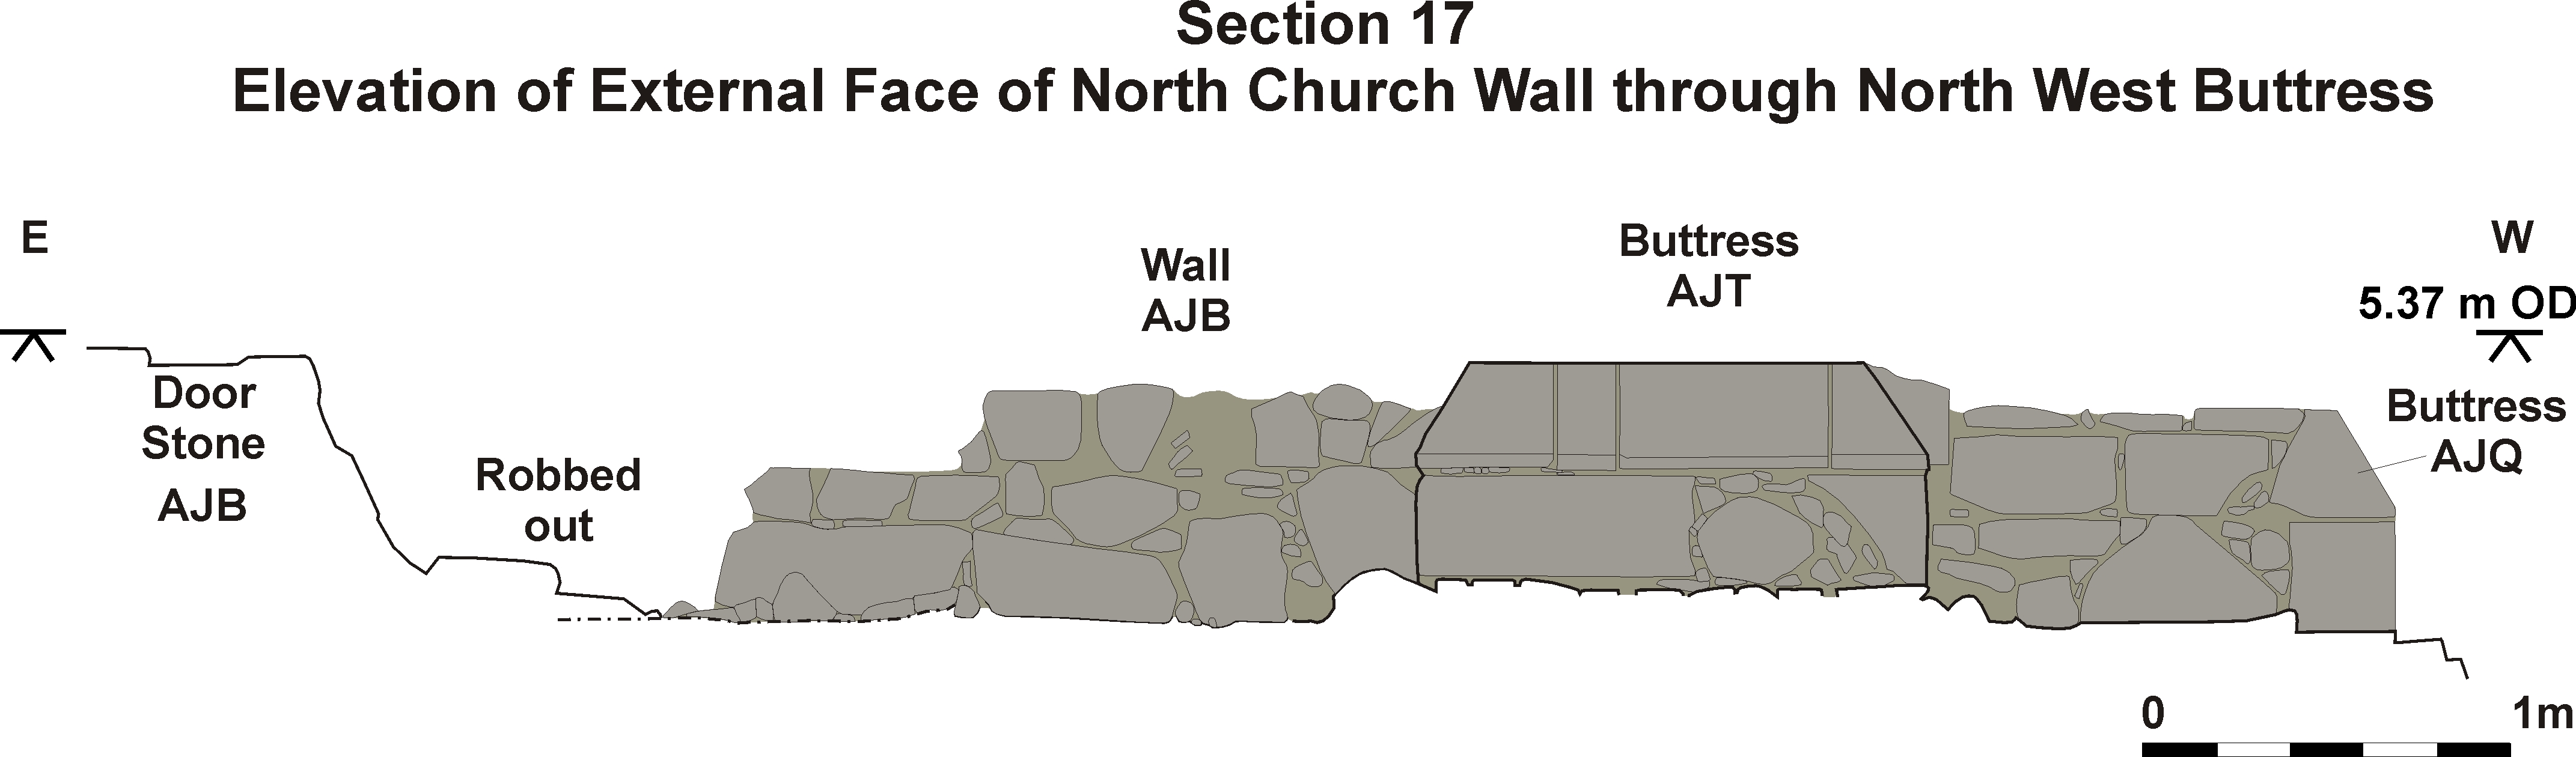
Section 17: Elevation of external face of north church wall through north west buttress
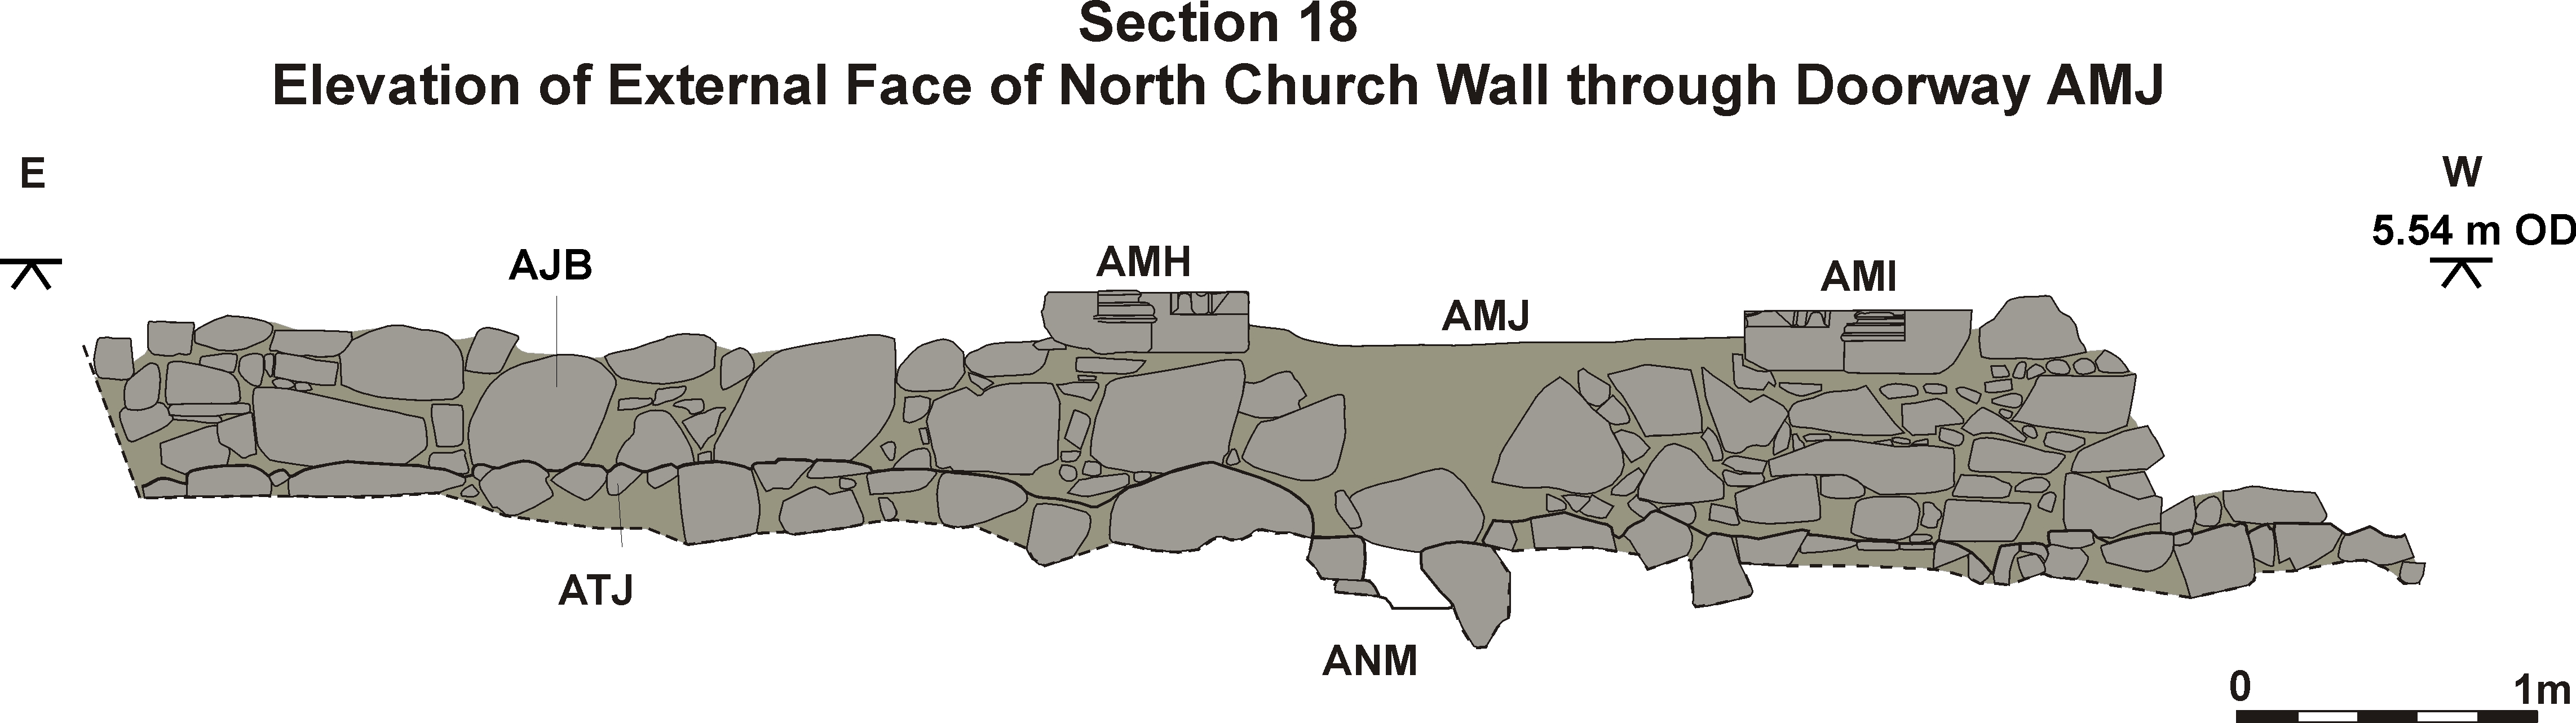
Section 18: Elevation of external face of north church wall through doorway AMJ
Section 19: Elevation of doorway AMJ showing respective heights of door stones
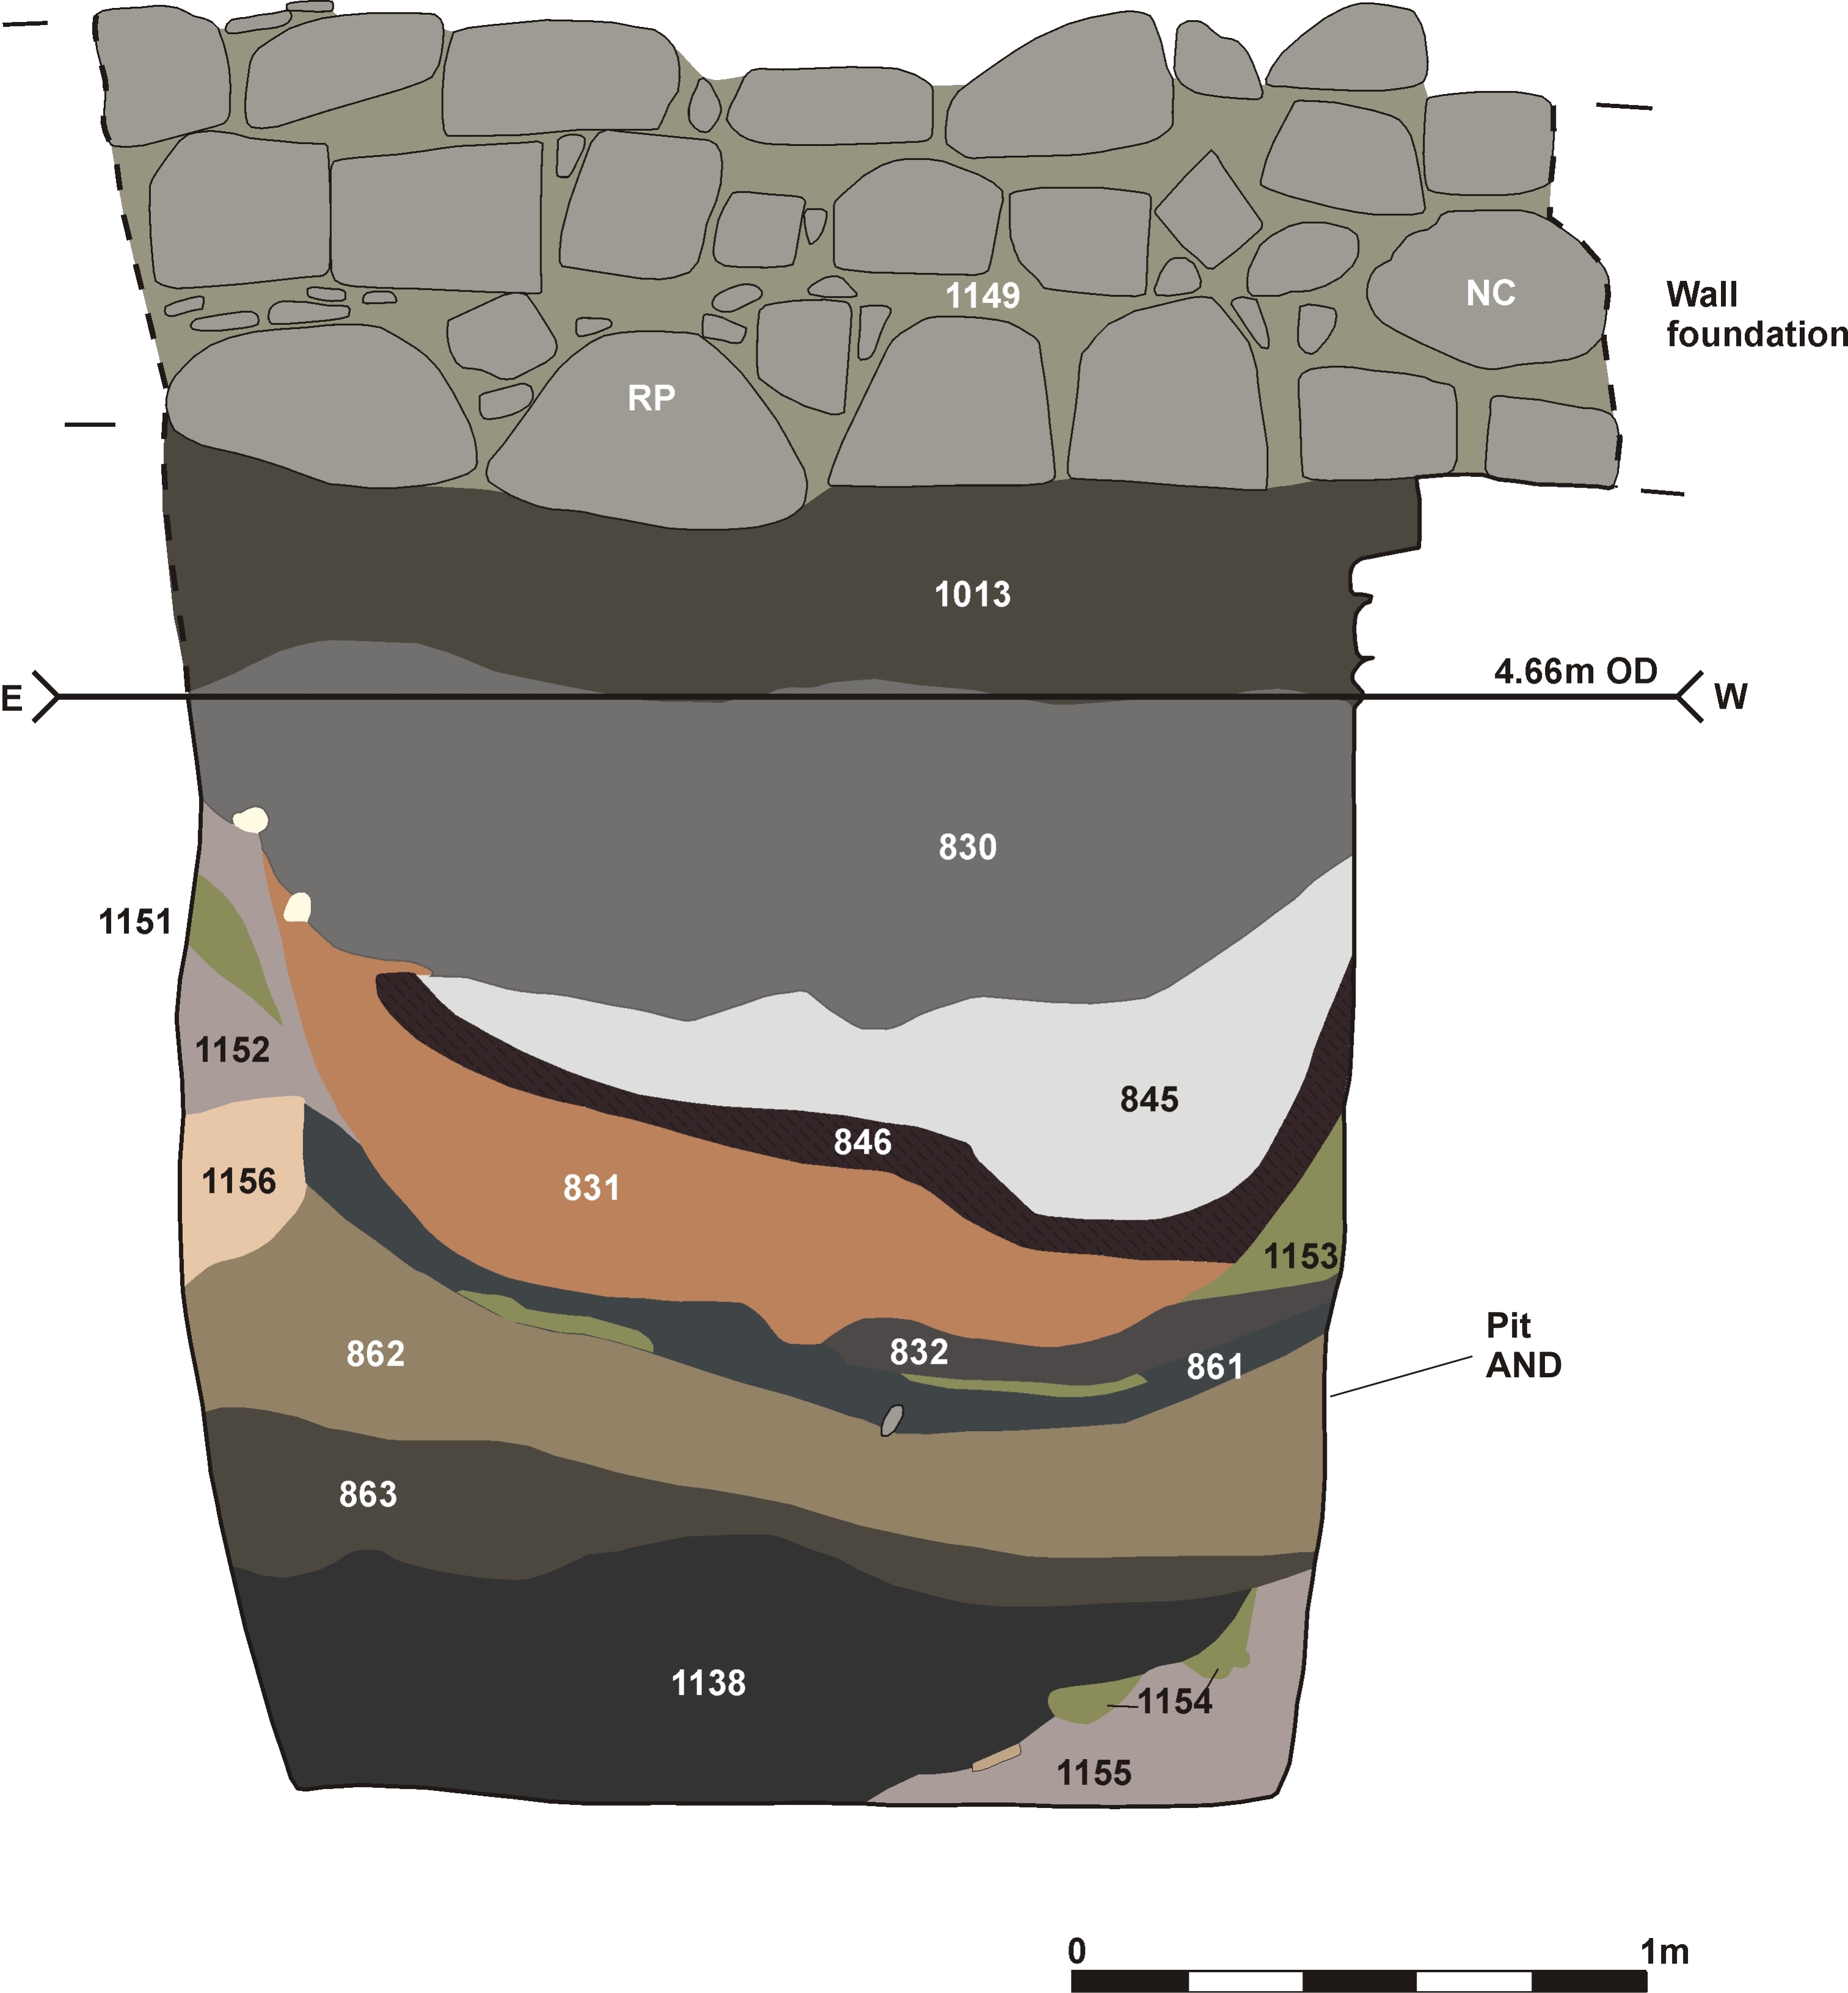
Section 20: Elevation of foundation of north church wall, pit AND and grave ANU
Section 21: Pit AND under phase 9 wall ARP
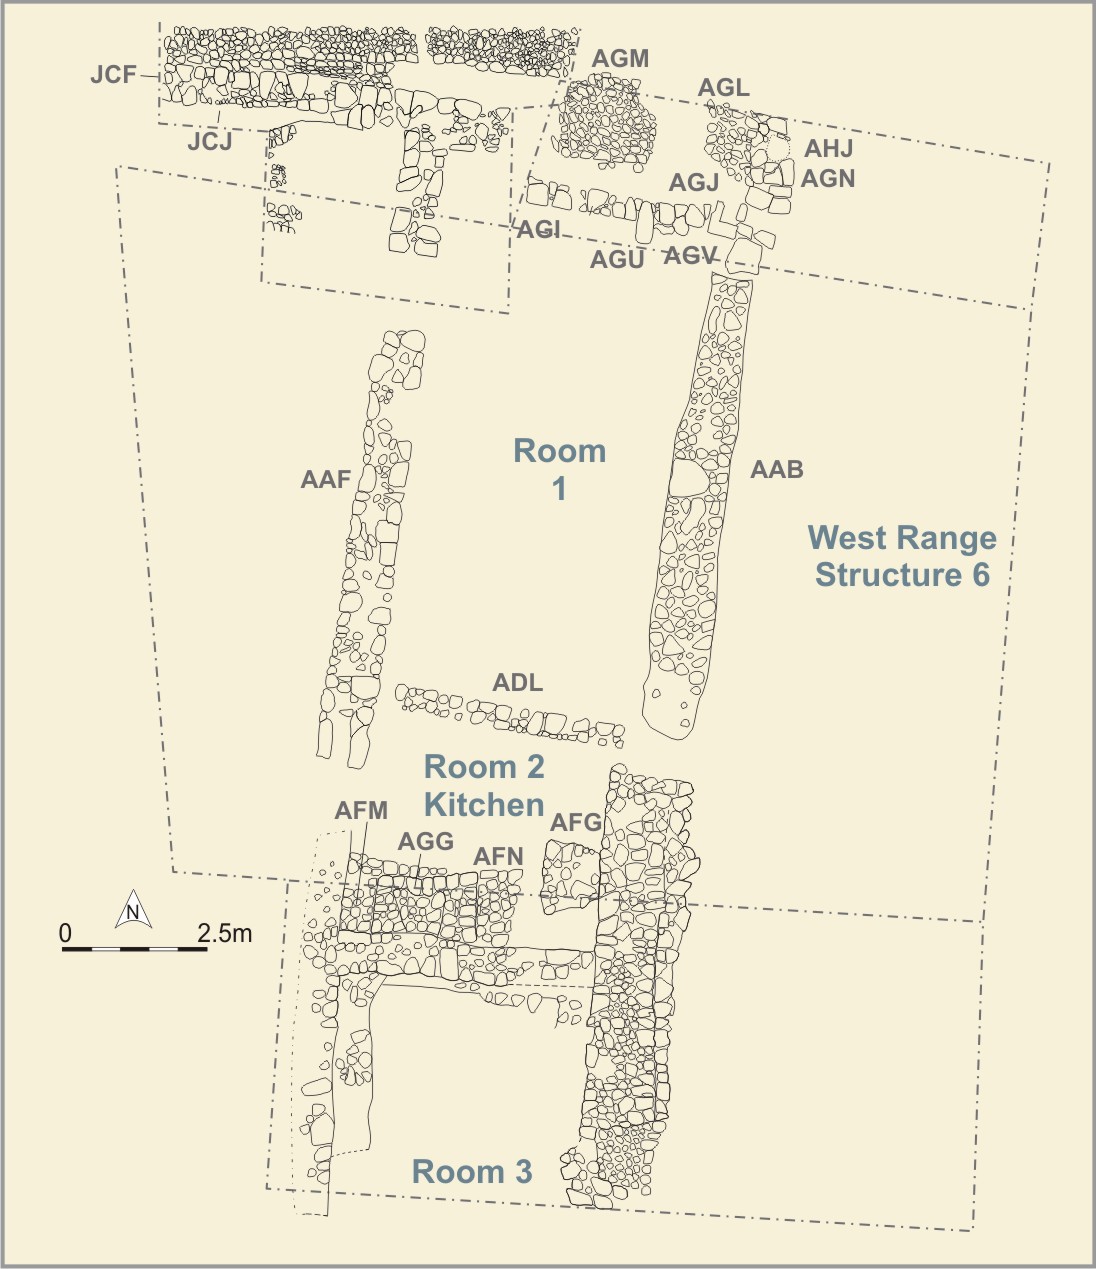
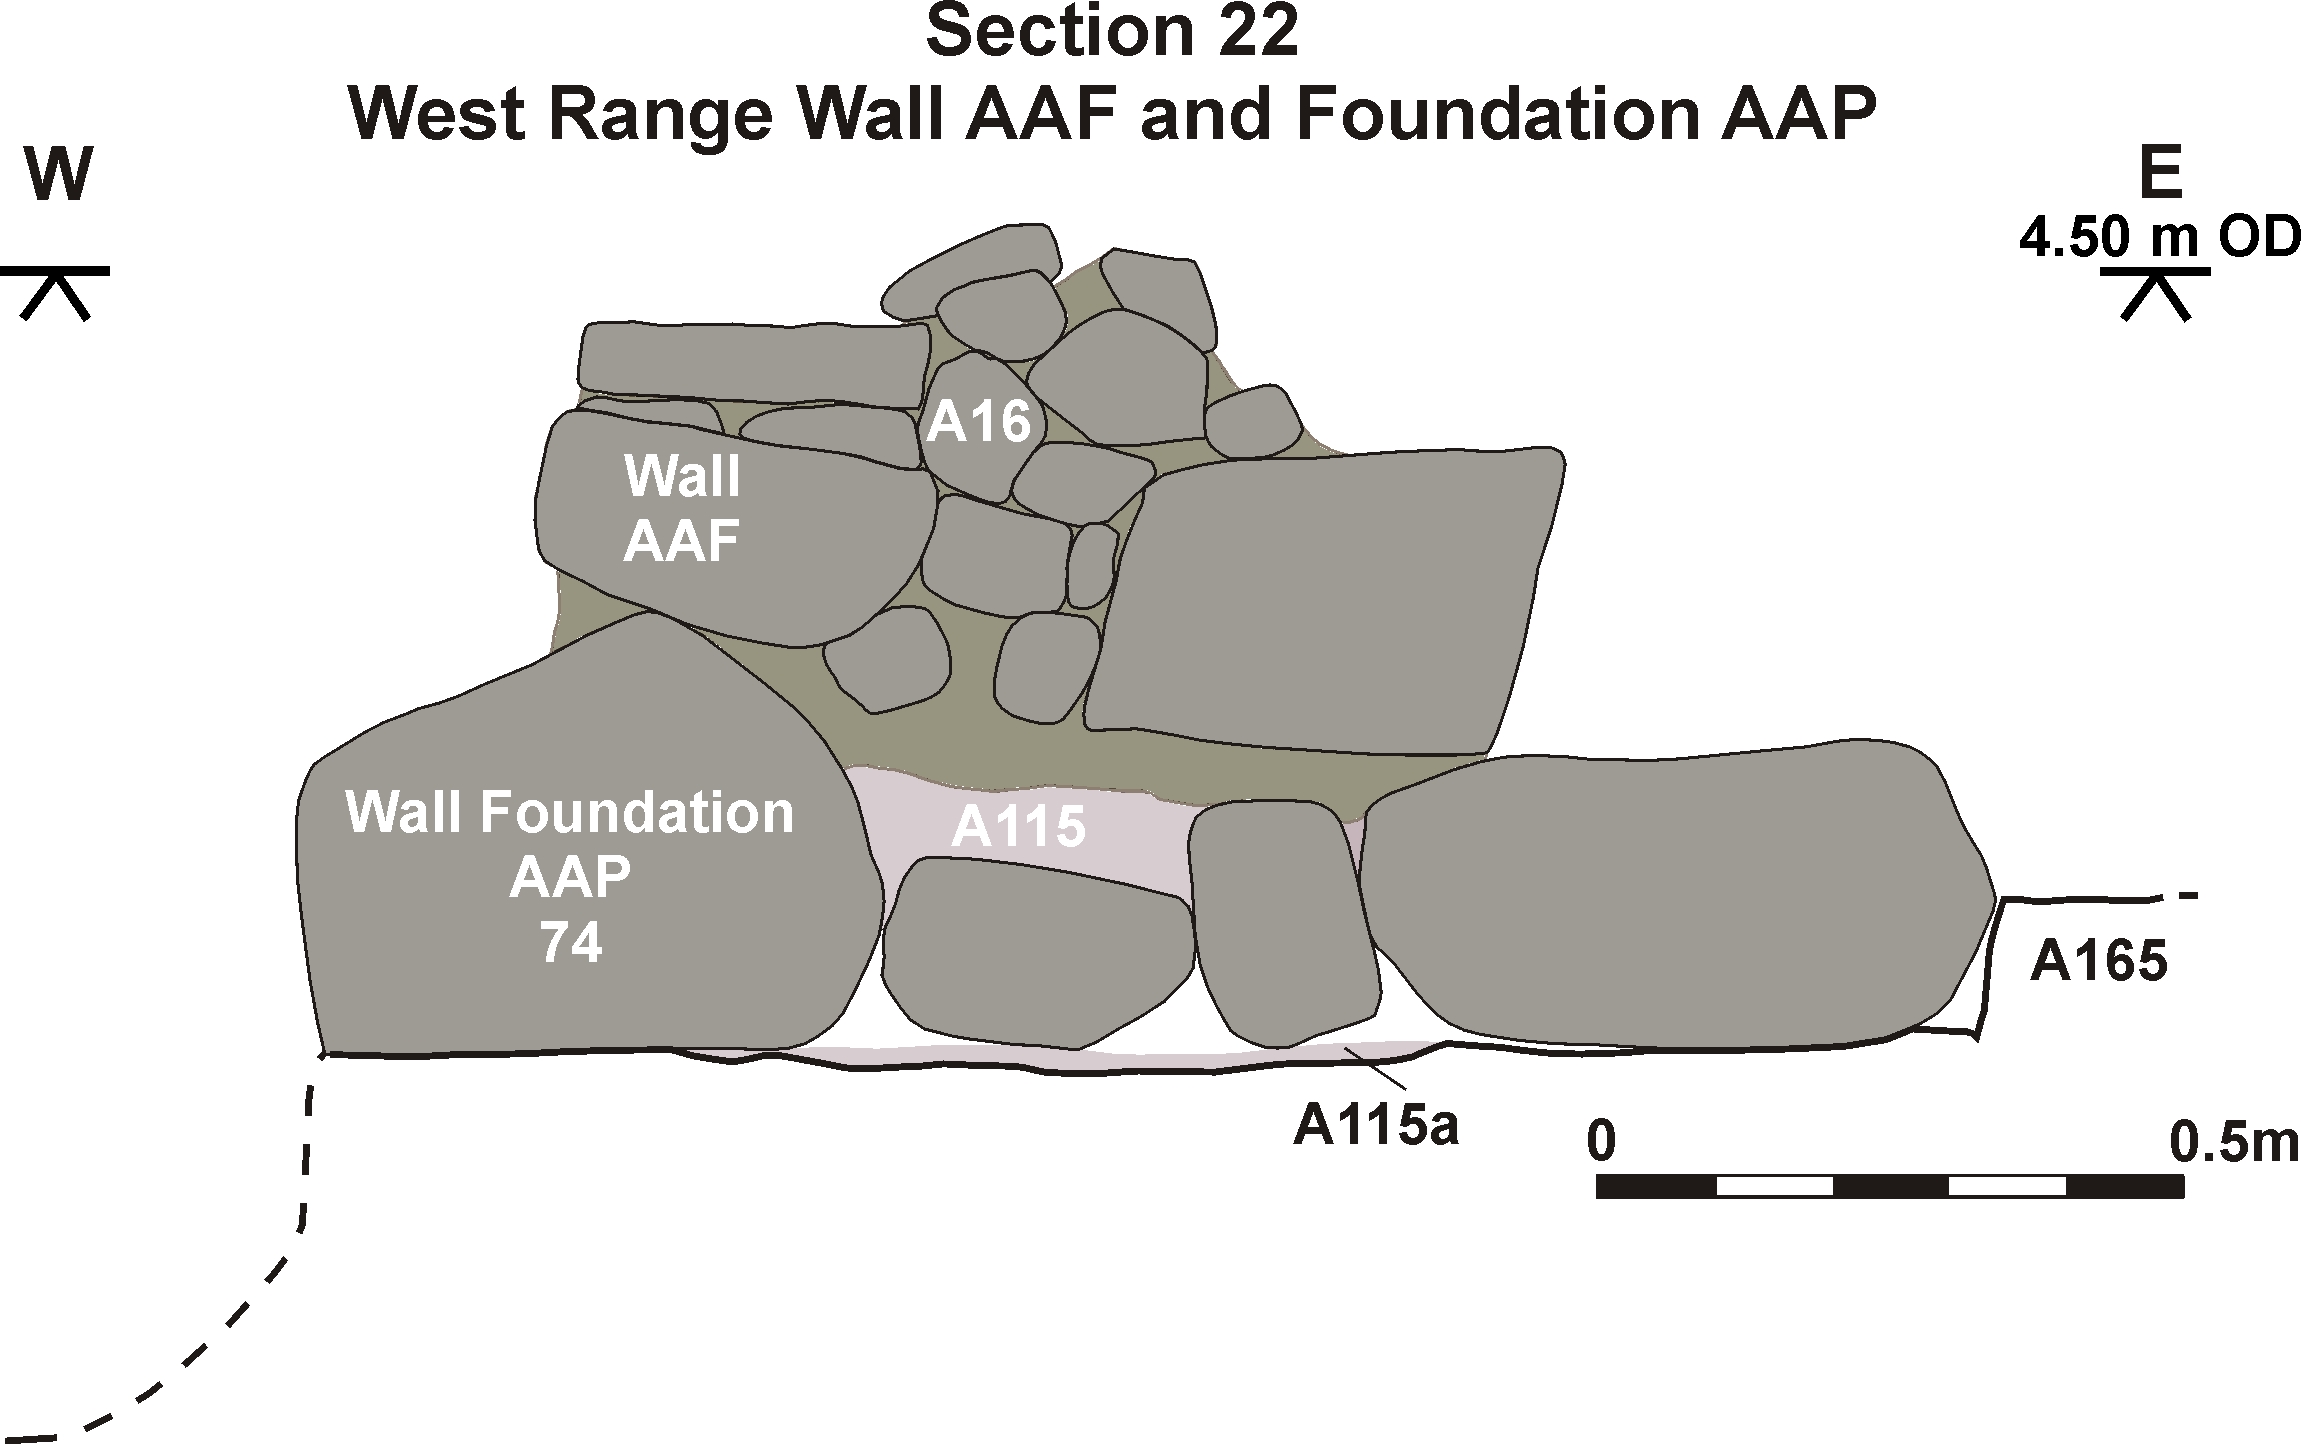
Section 22: West range wall AAF and foundation AAP
Section 23: West range wall AAP
Section 24: West range wall AES with footing/foundation AFF
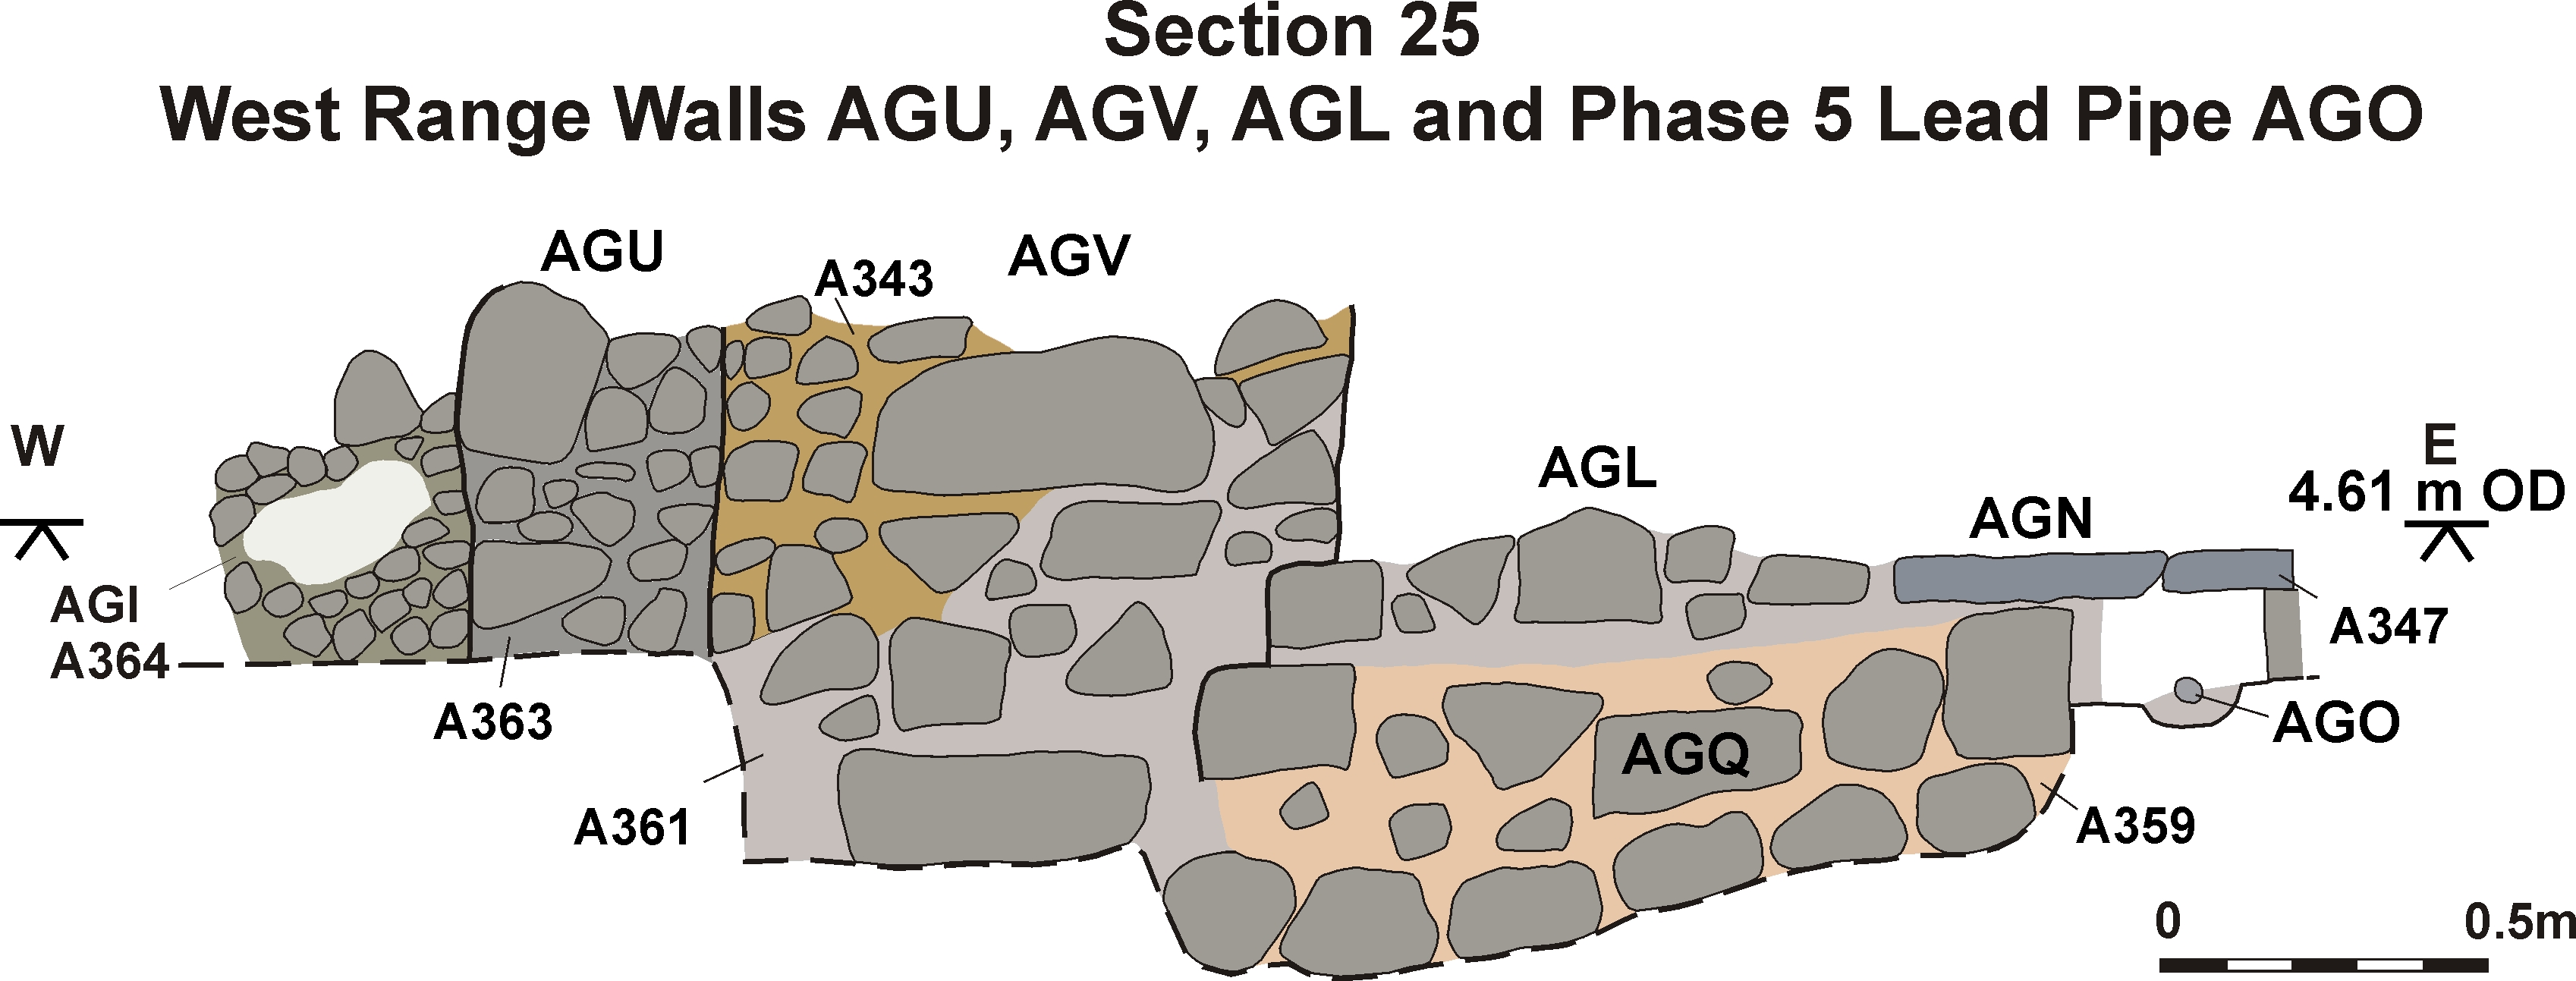
Section 25: West range walls AGU, AGV, AGL and phase 5 lead pipe AGO
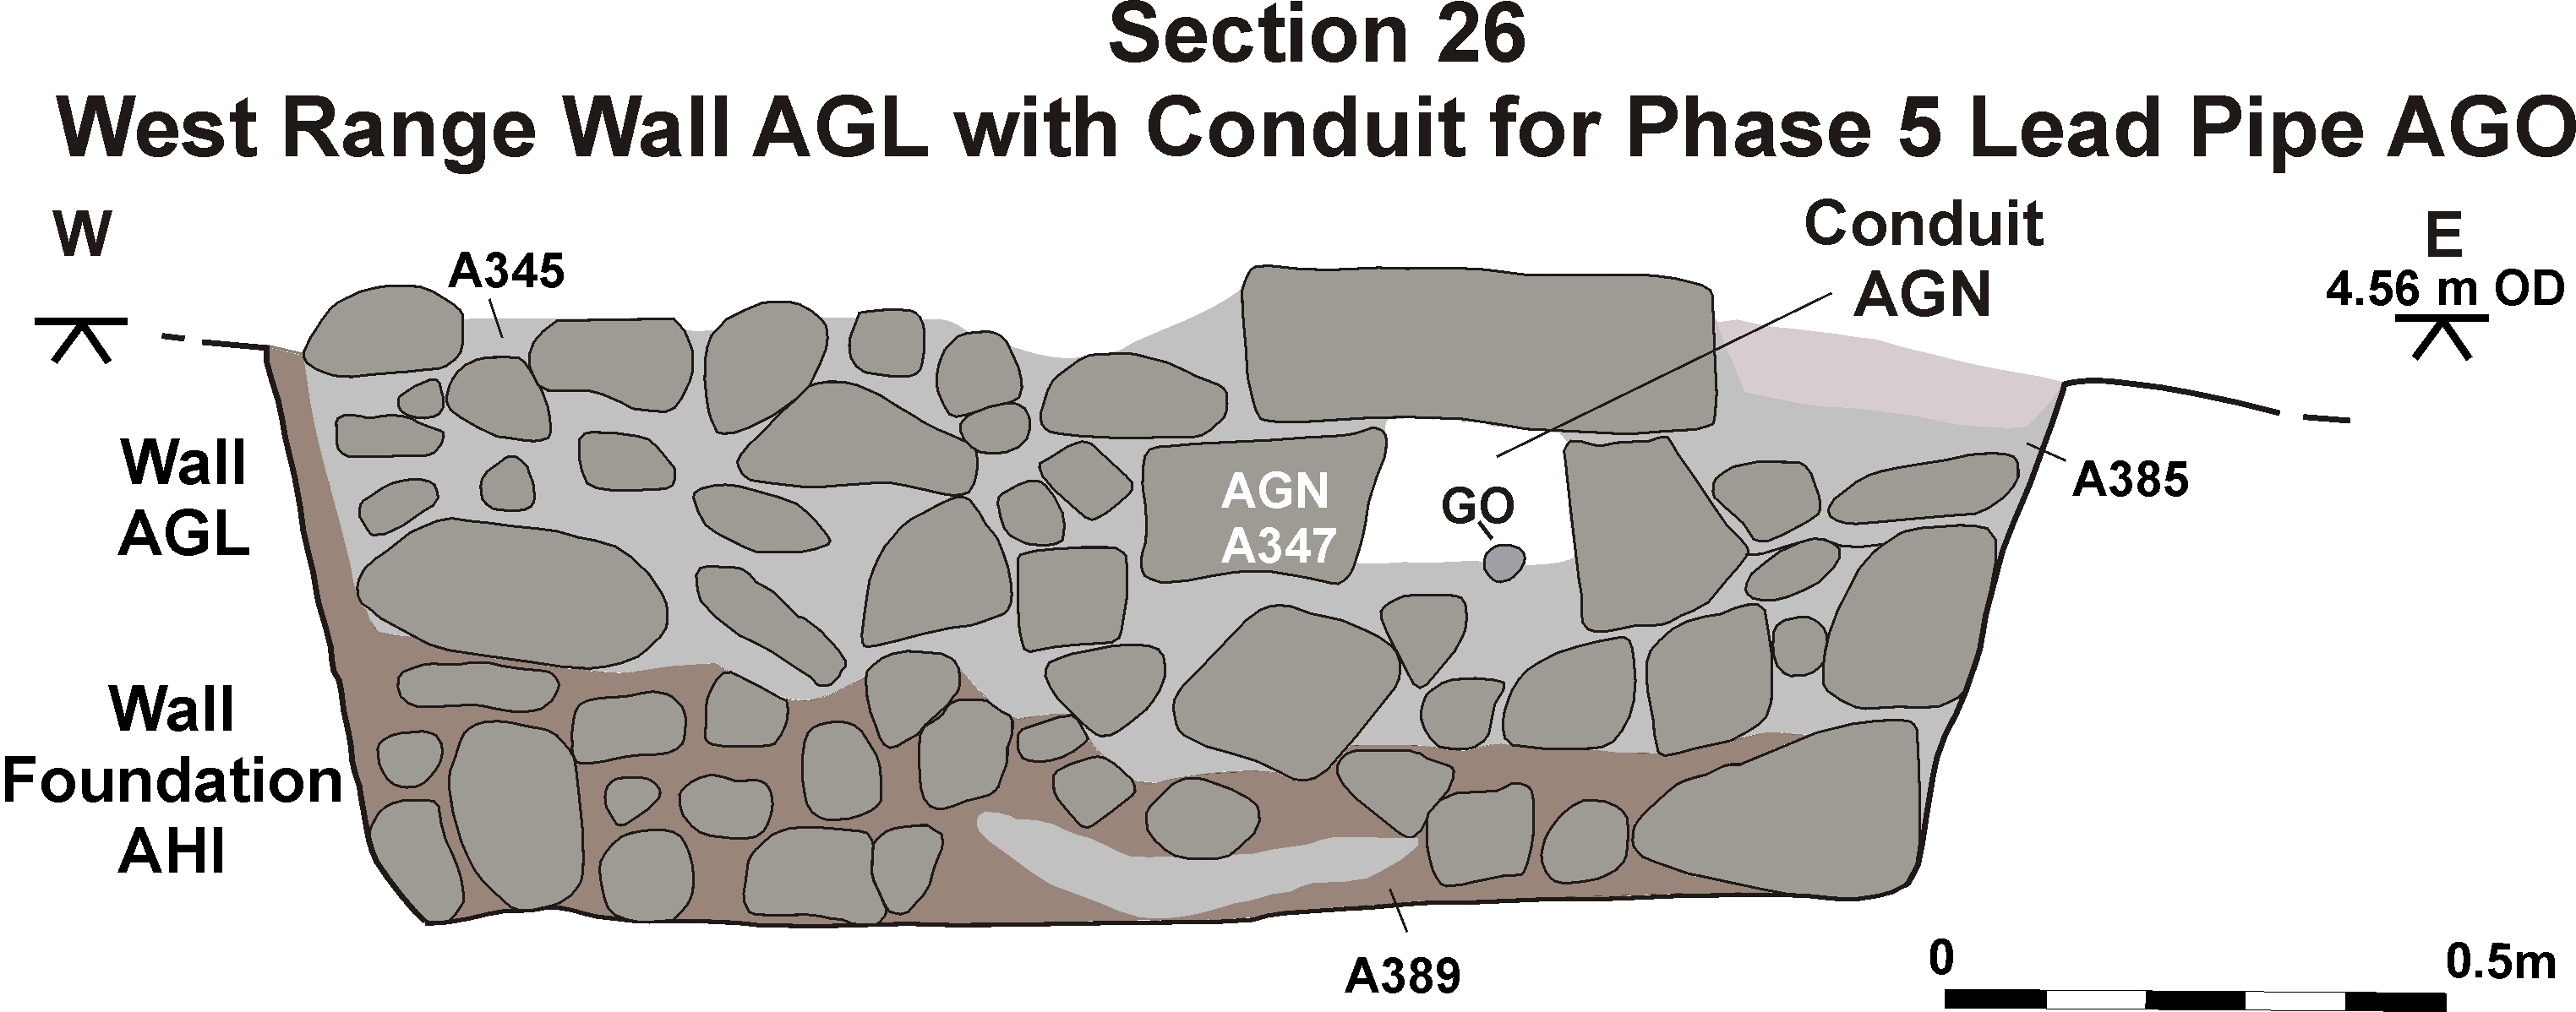
Section 26: West range wall AGL with conduit for phase 5 lead pipe AGO
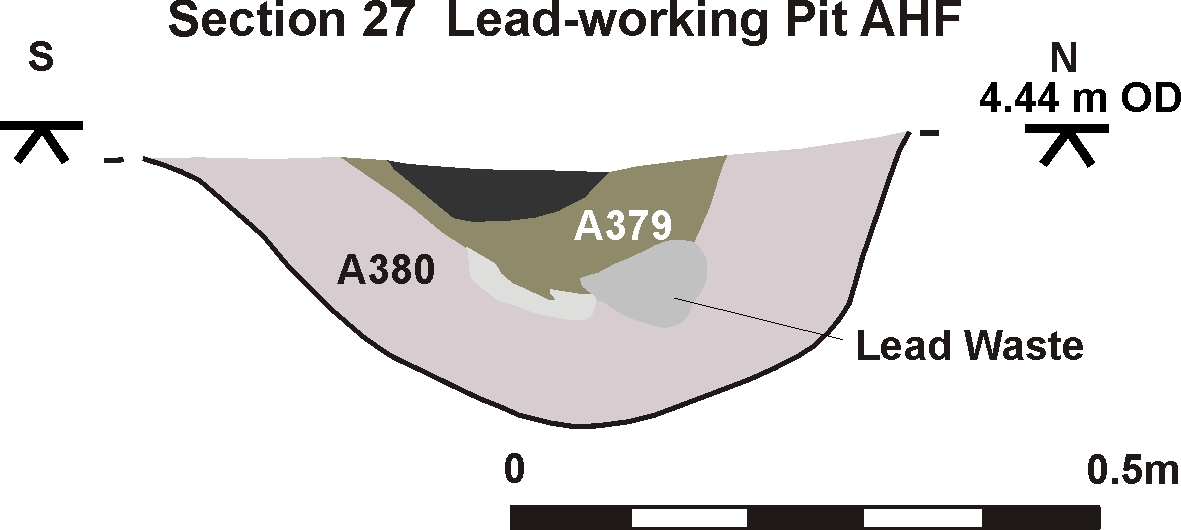
Section 27: Lead-working pit AHF
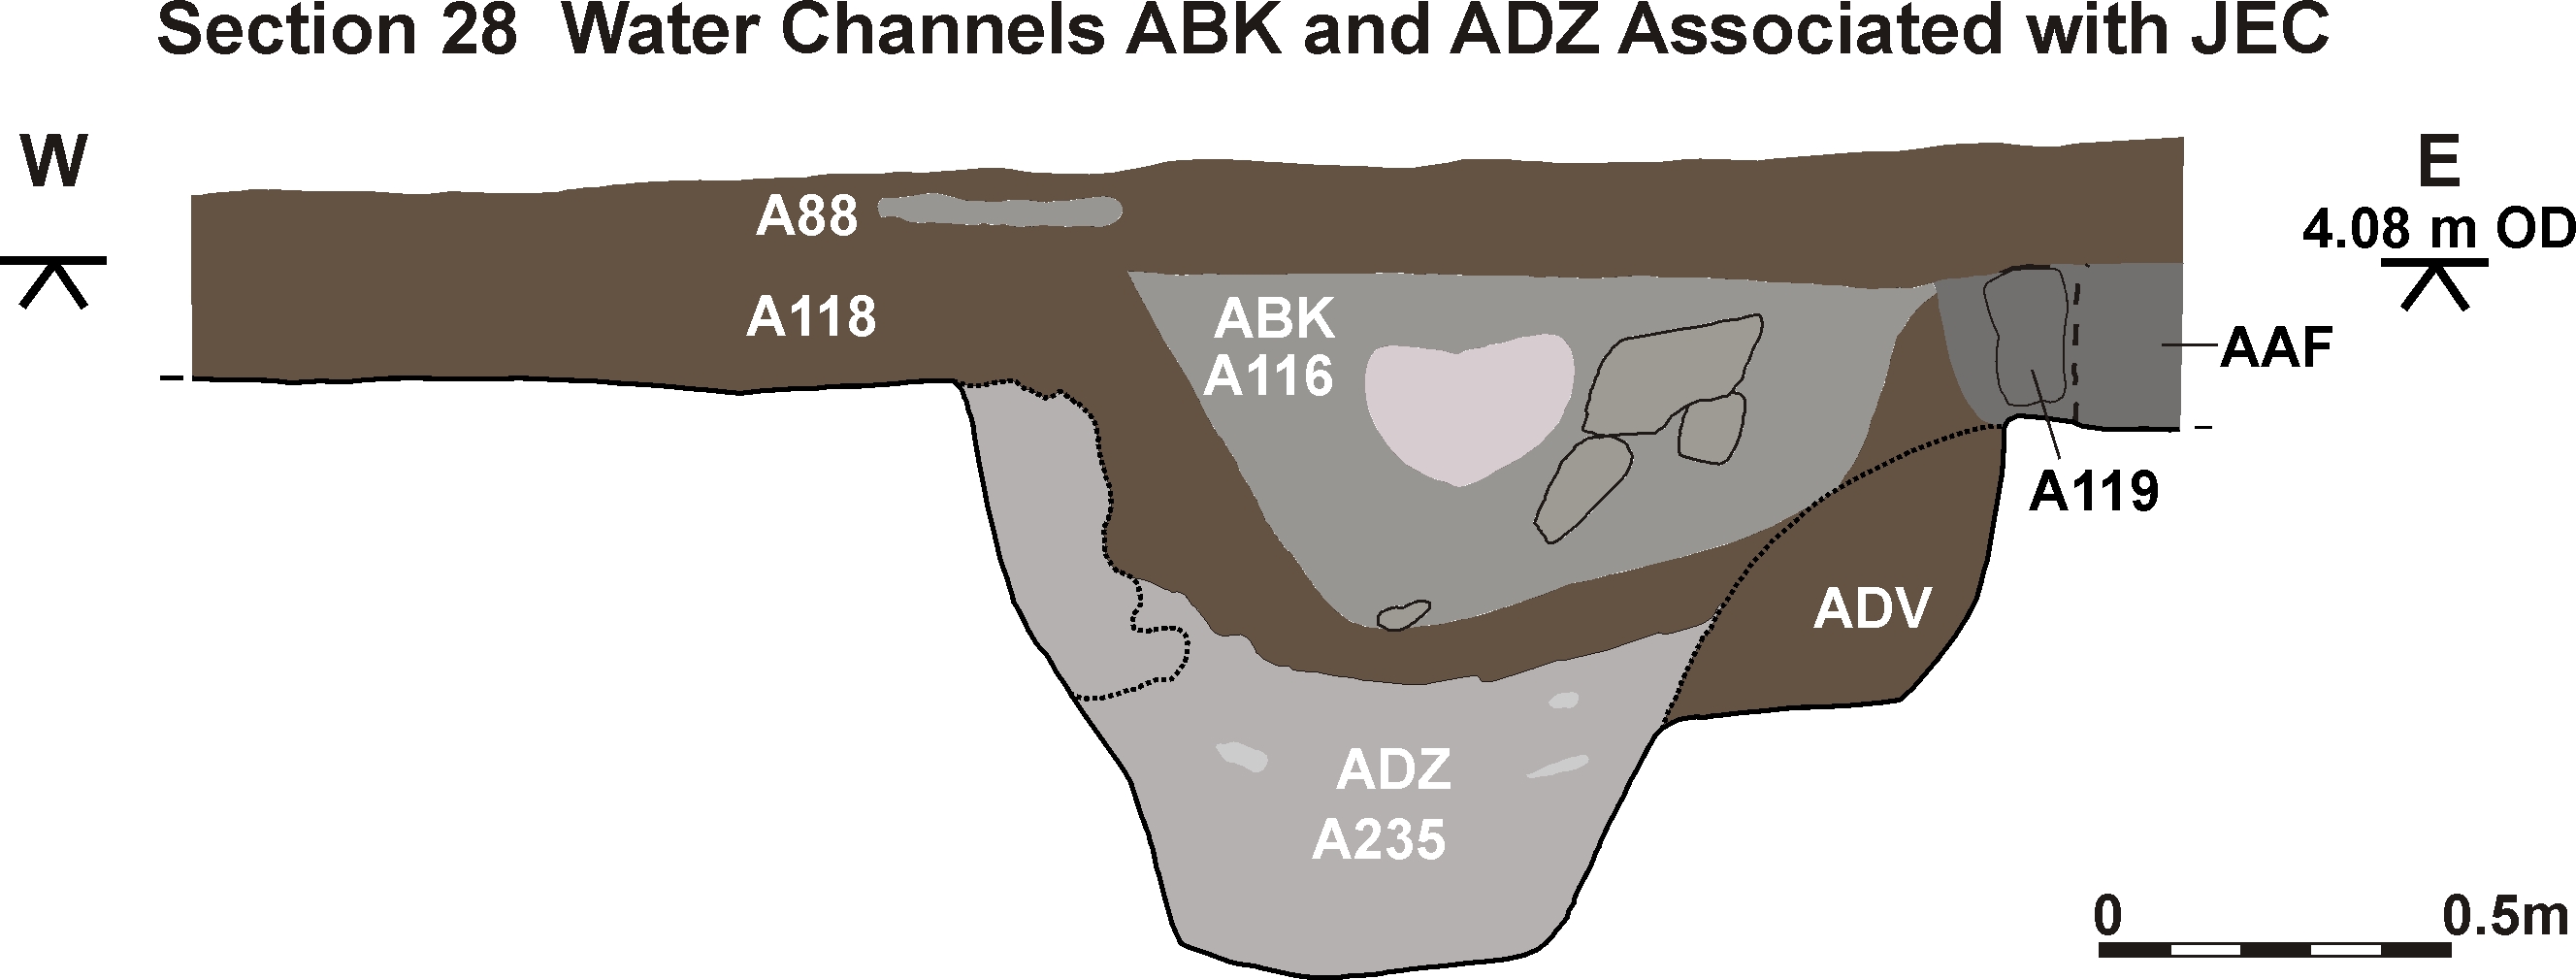
Section 28: Water channels ABK and ADZ associated with JEC
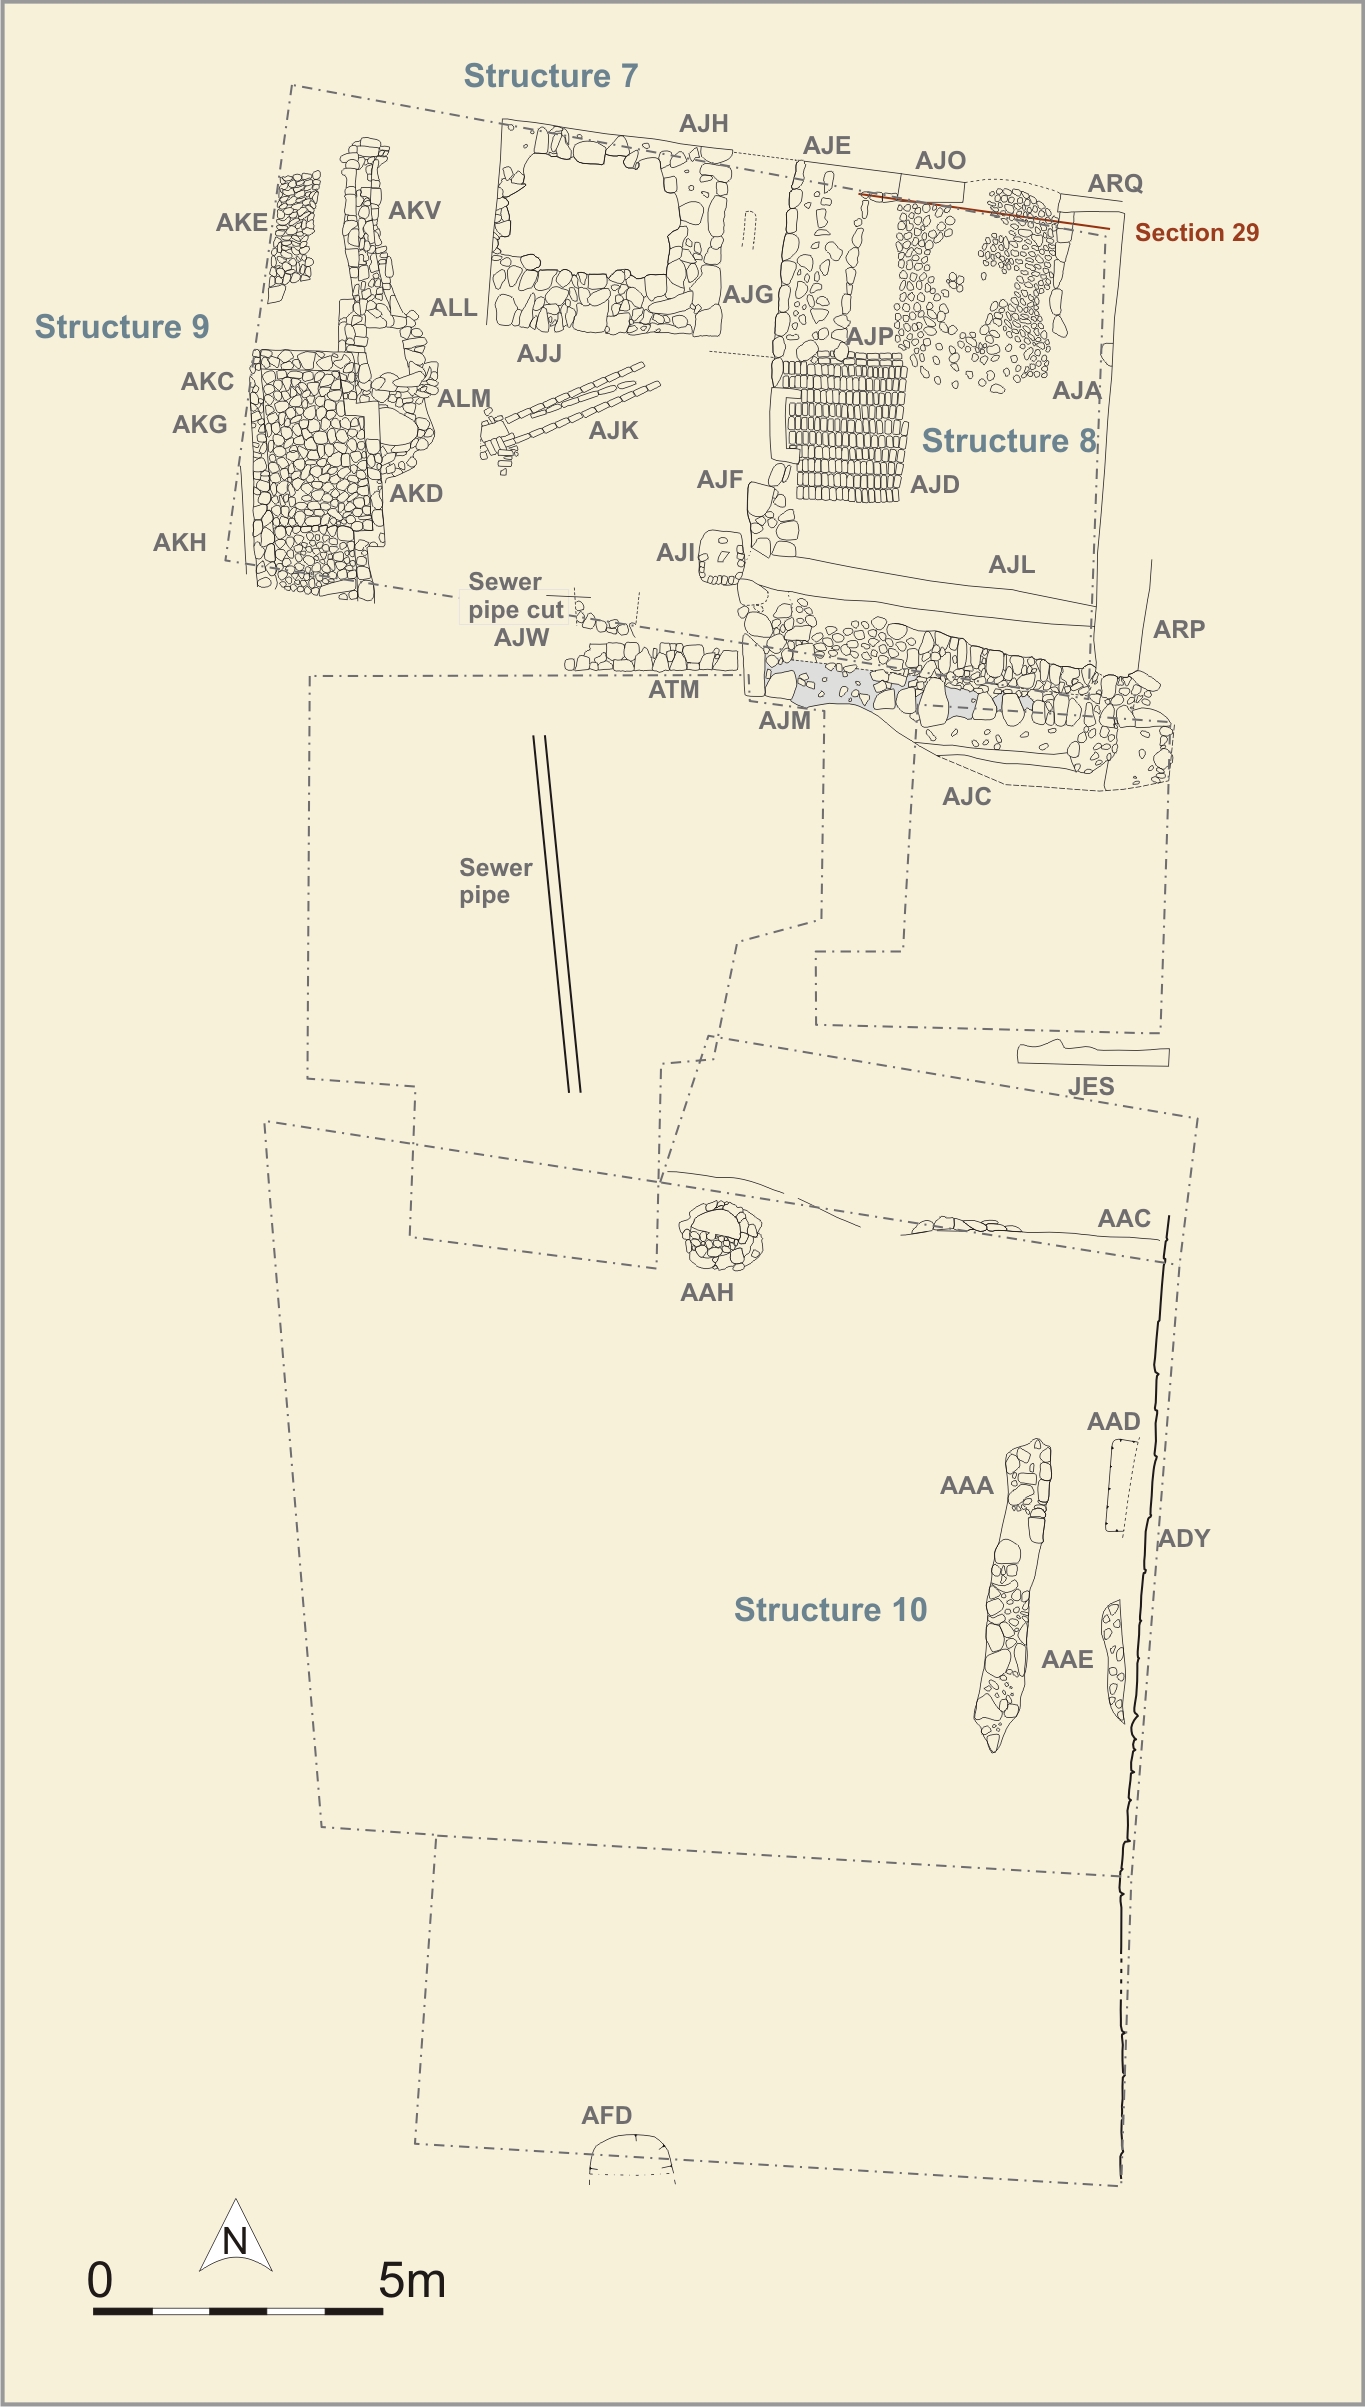
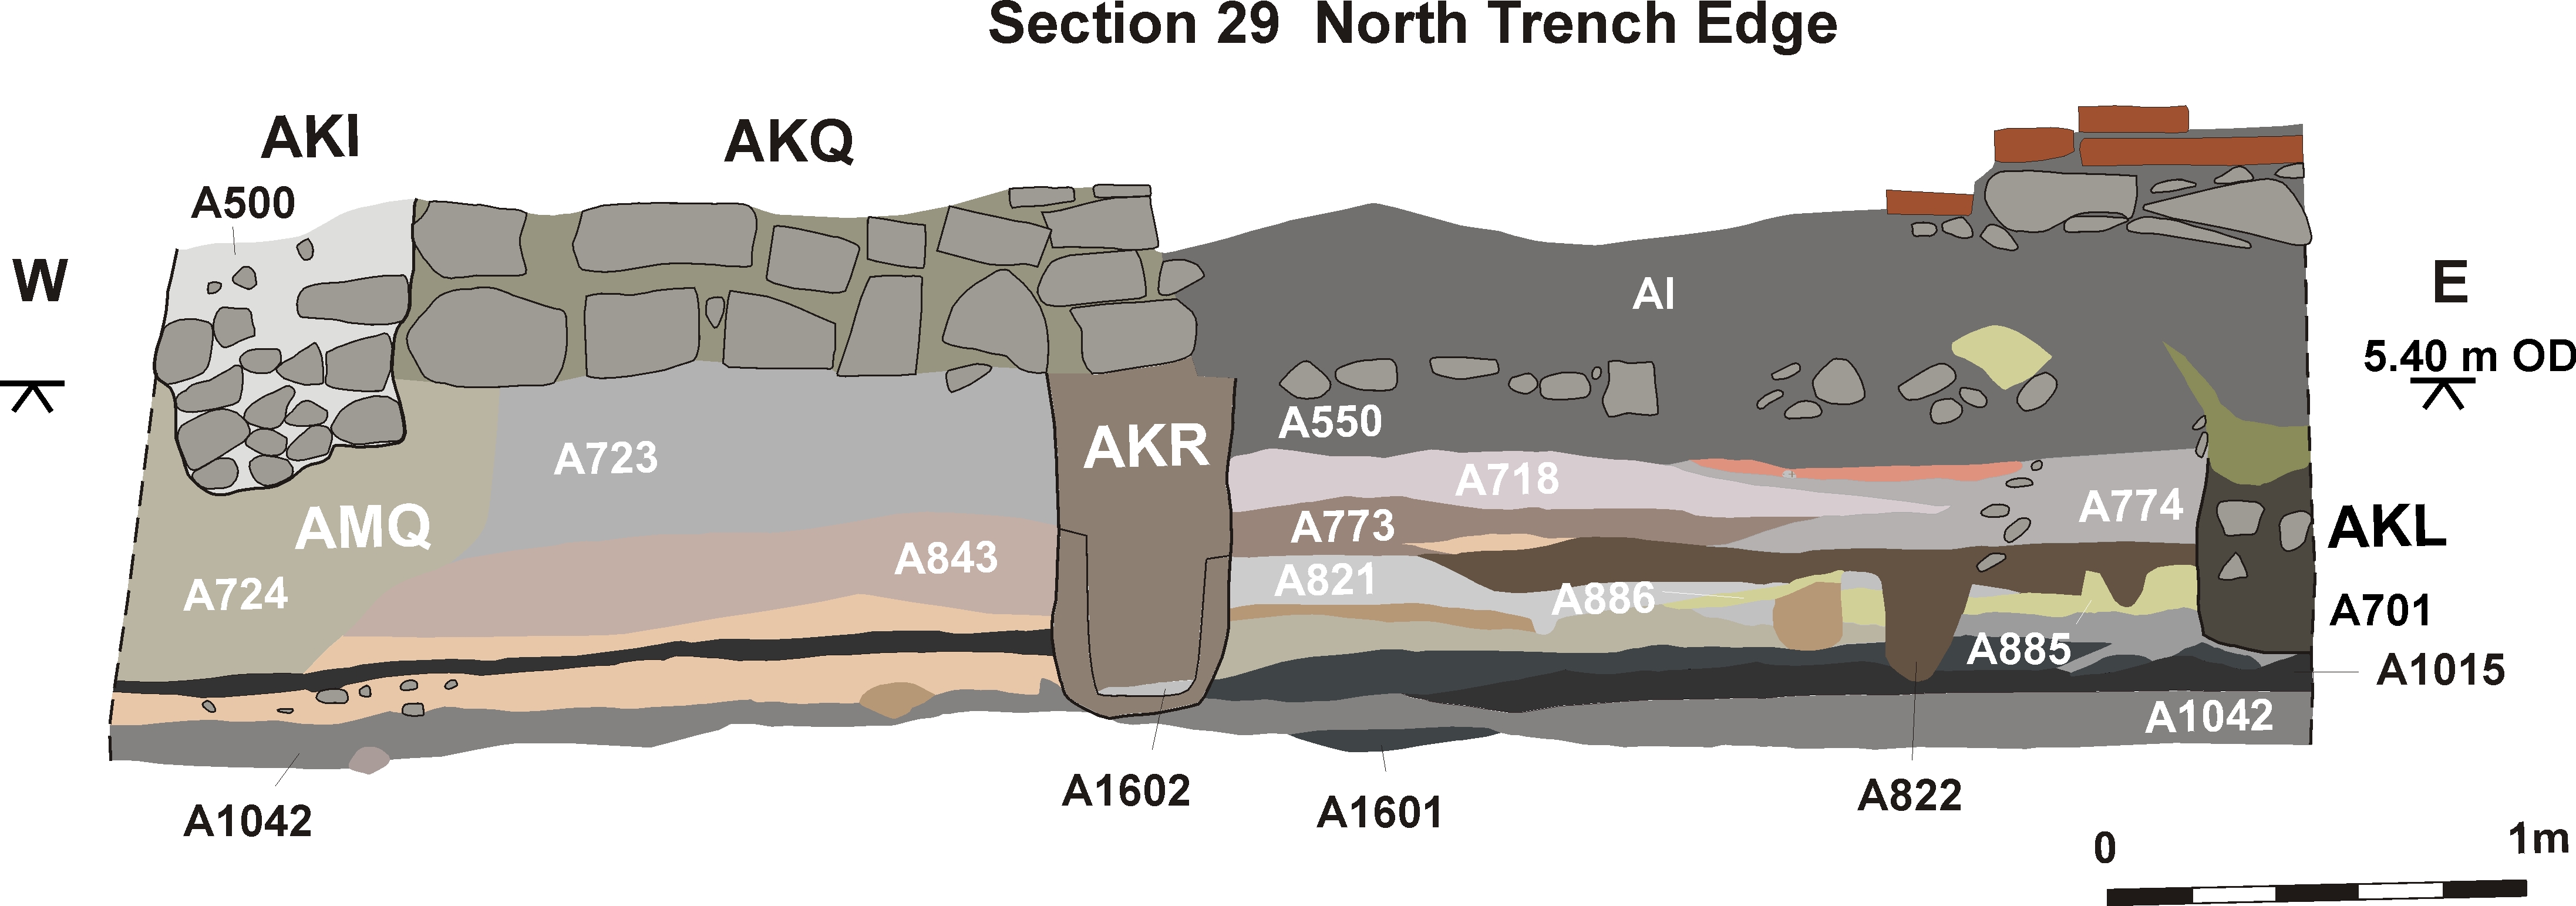
Section 29: North trench edge
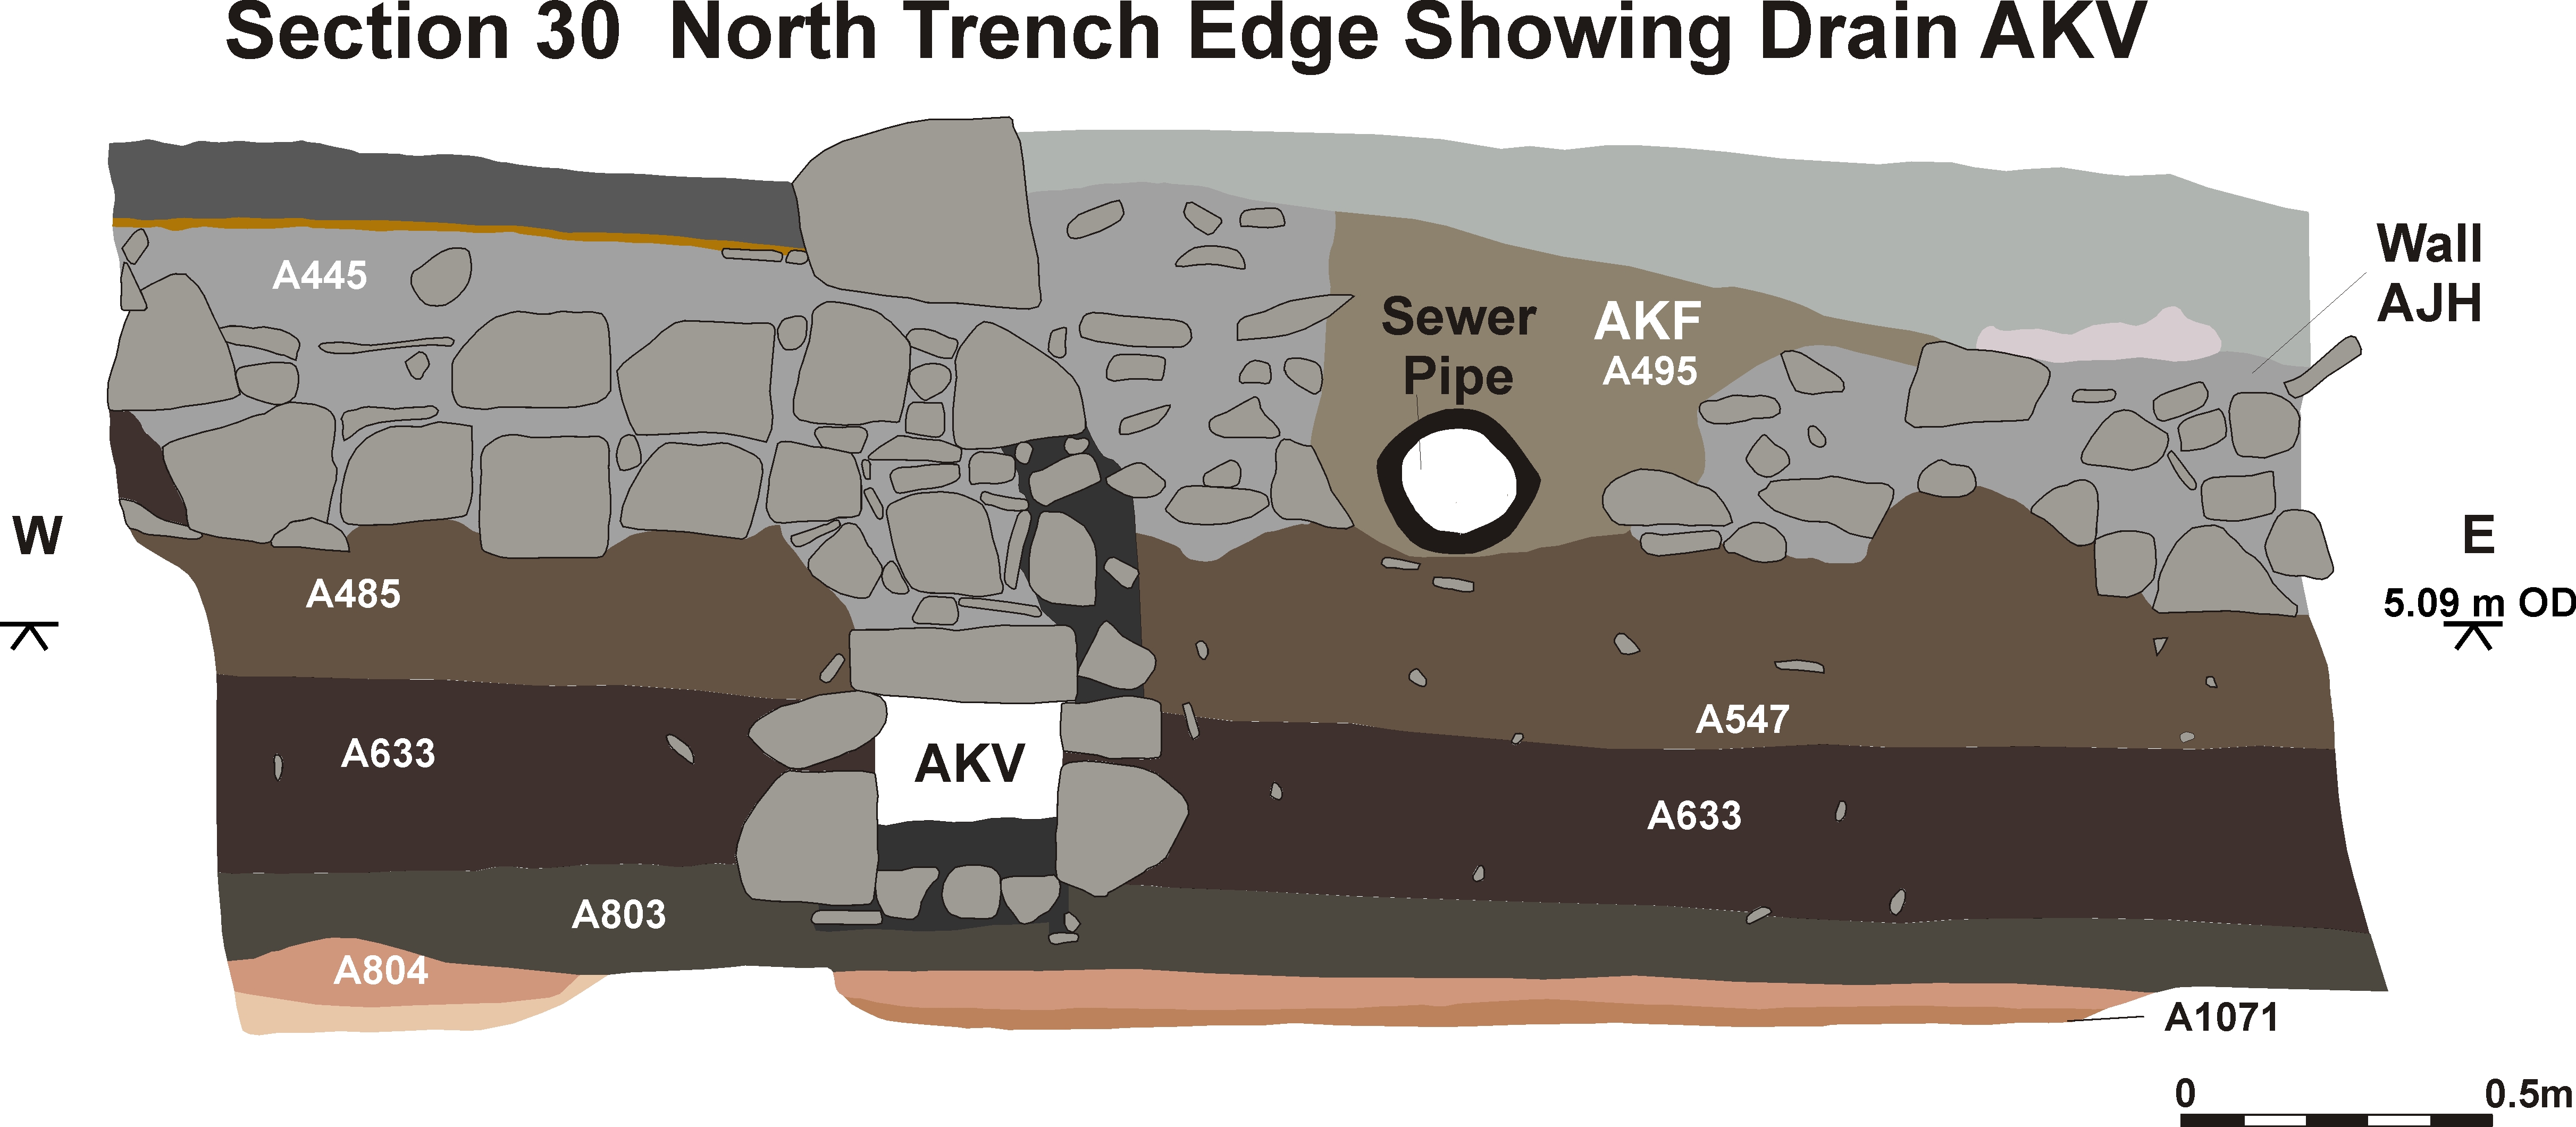
Section 30: North trench edge showing drain AKV
Section 31: JEC and JEK facing east
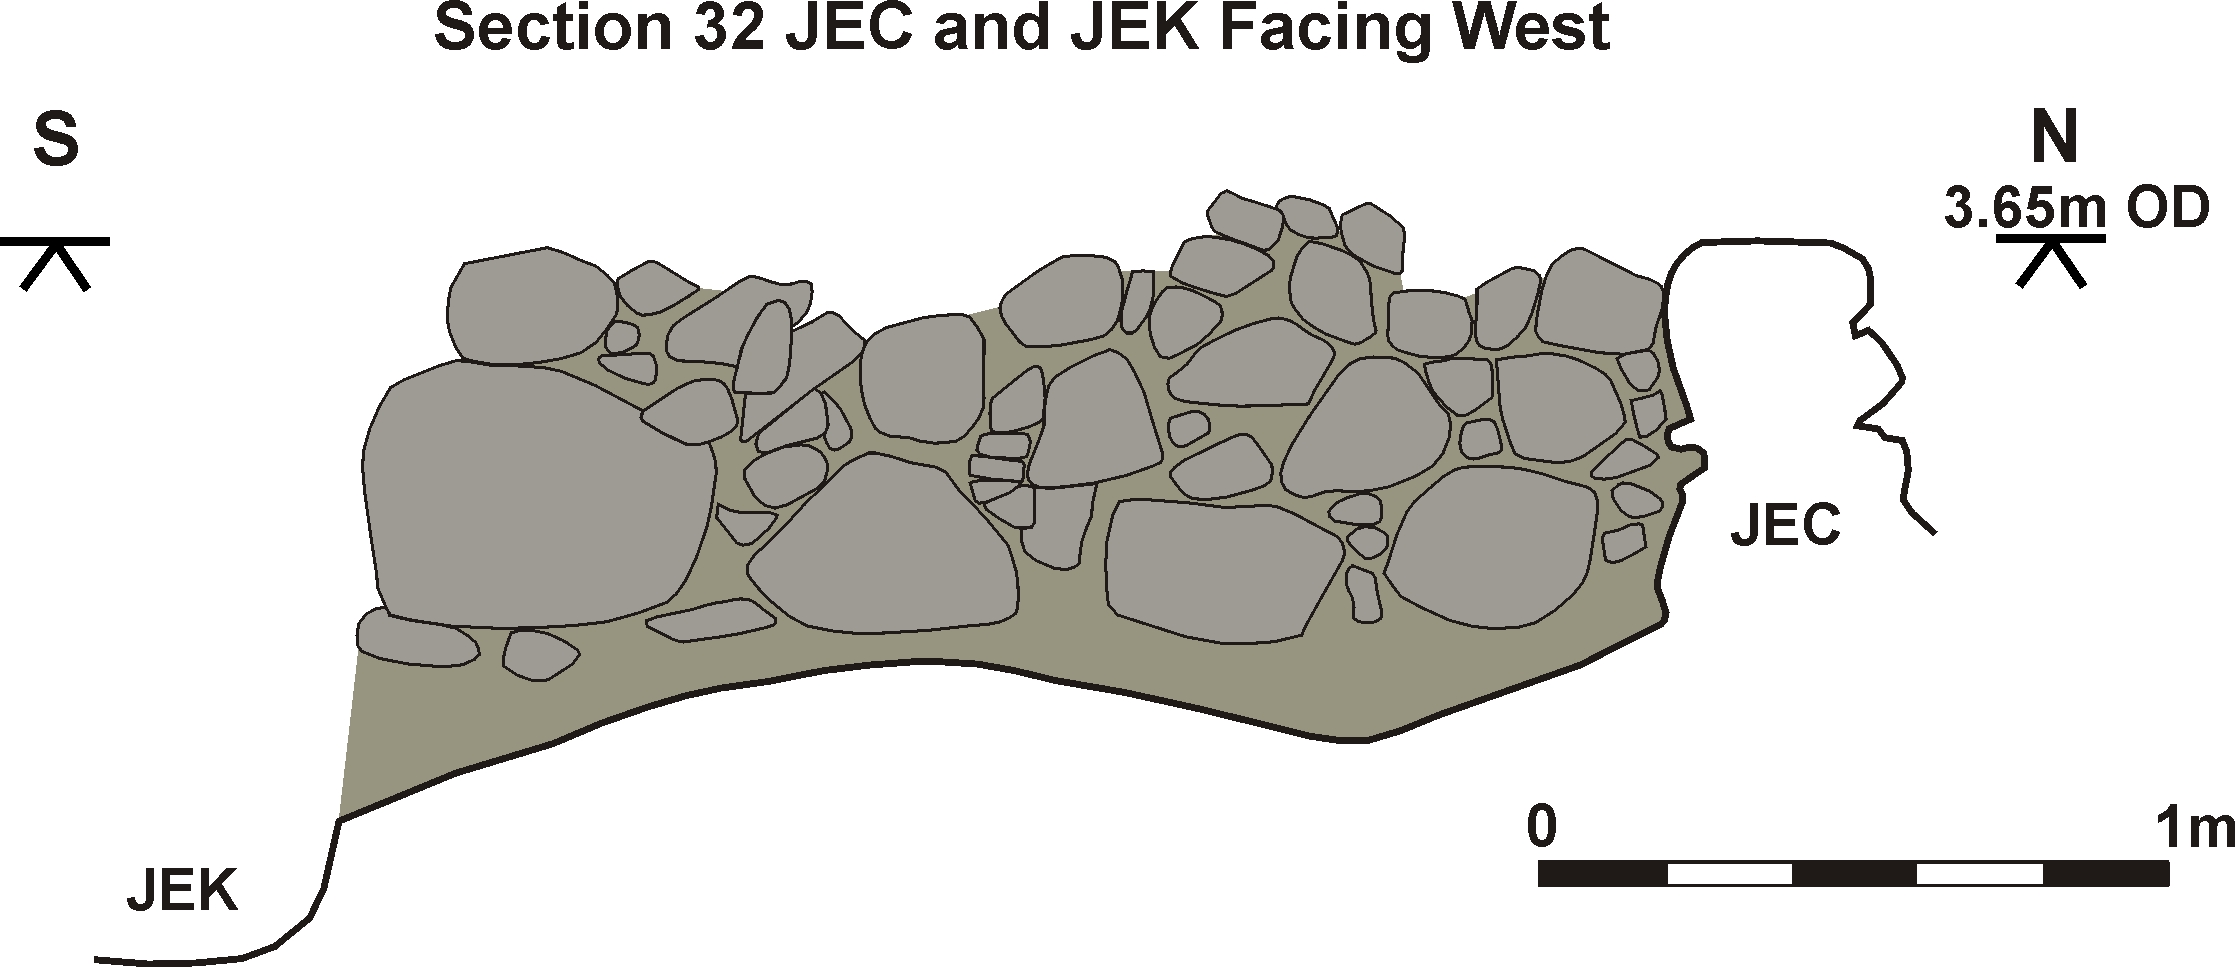
Section 32: JEC and JEK facing west
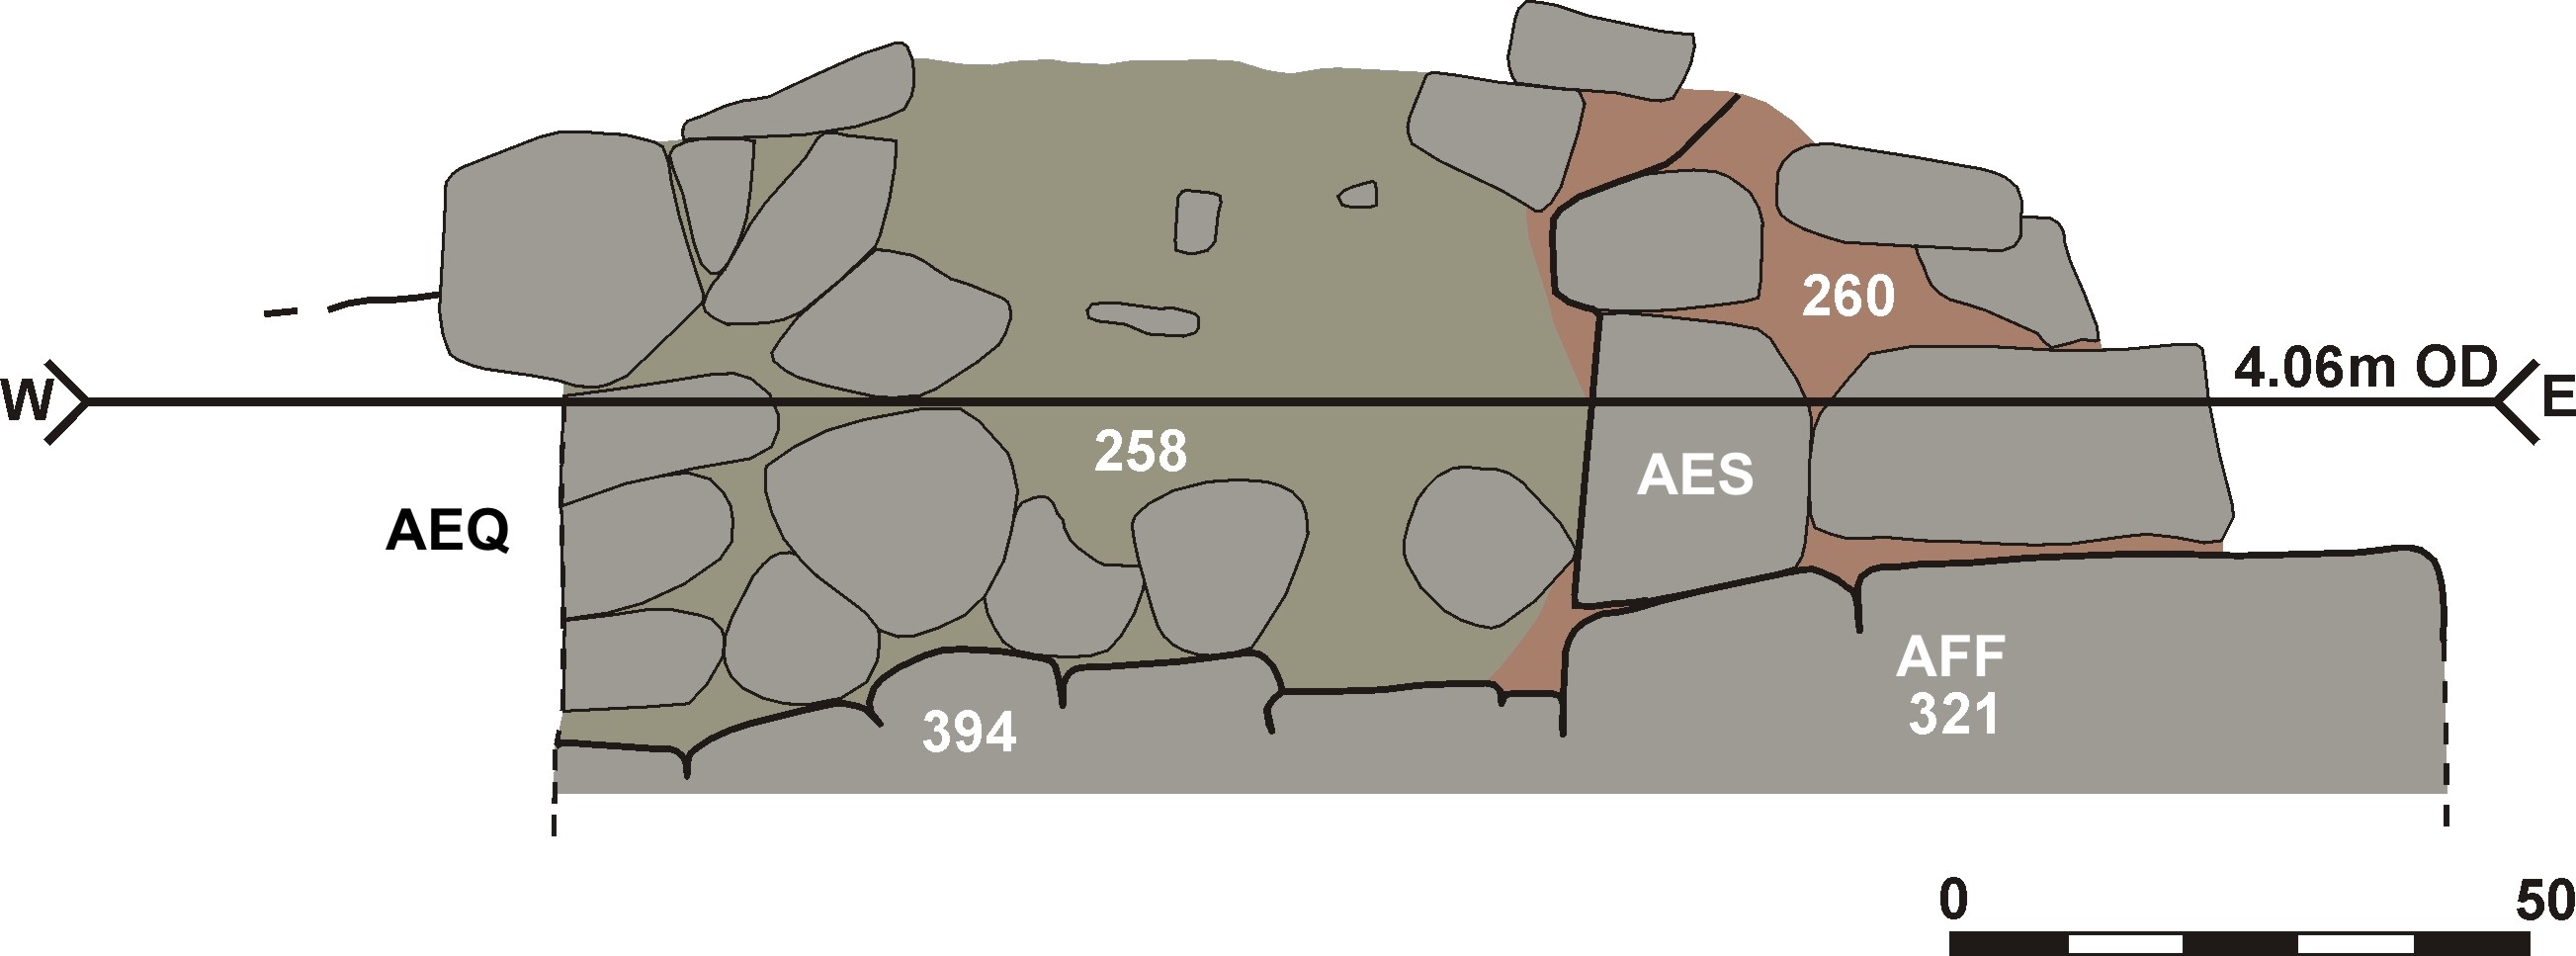
Section 33: Section of wall AES and AEQ
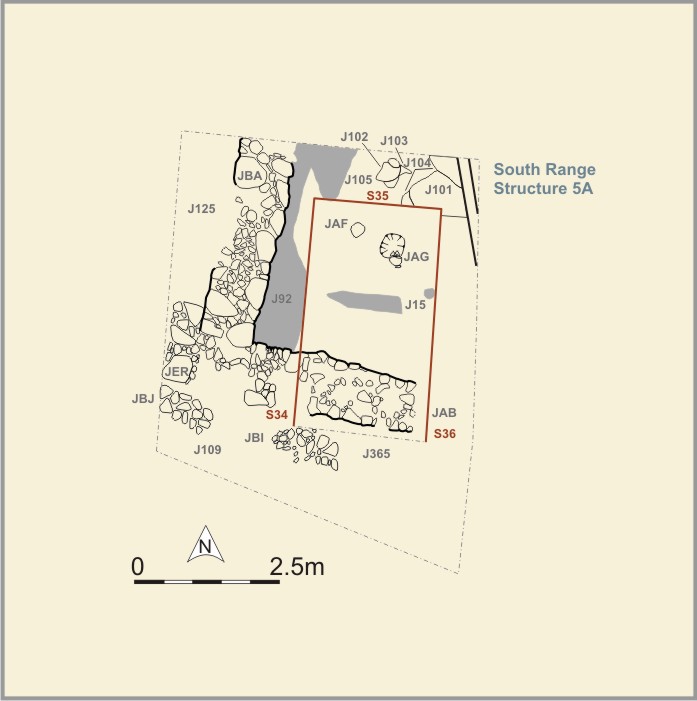
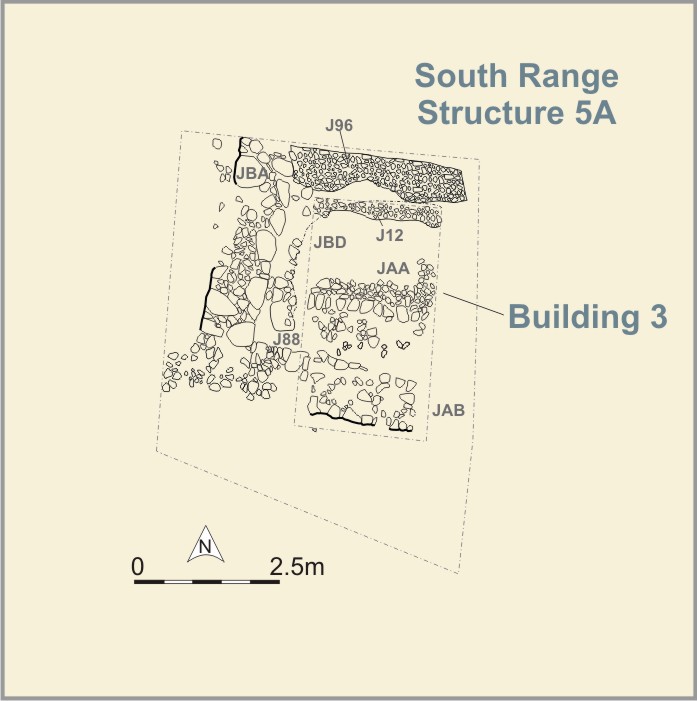
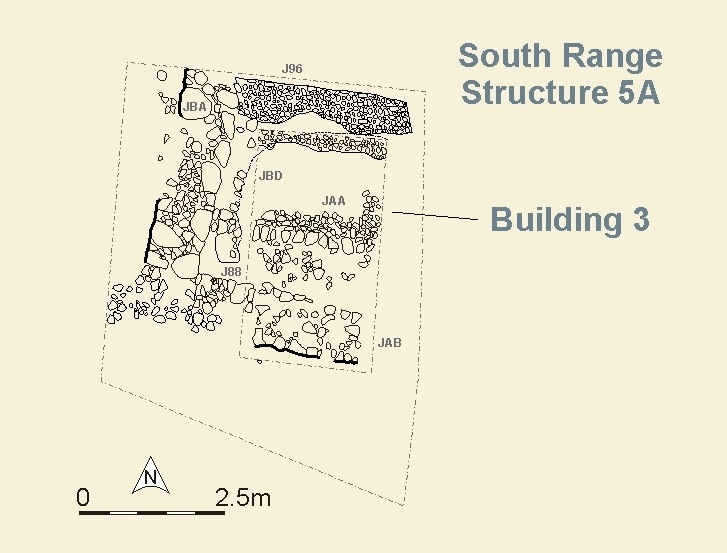
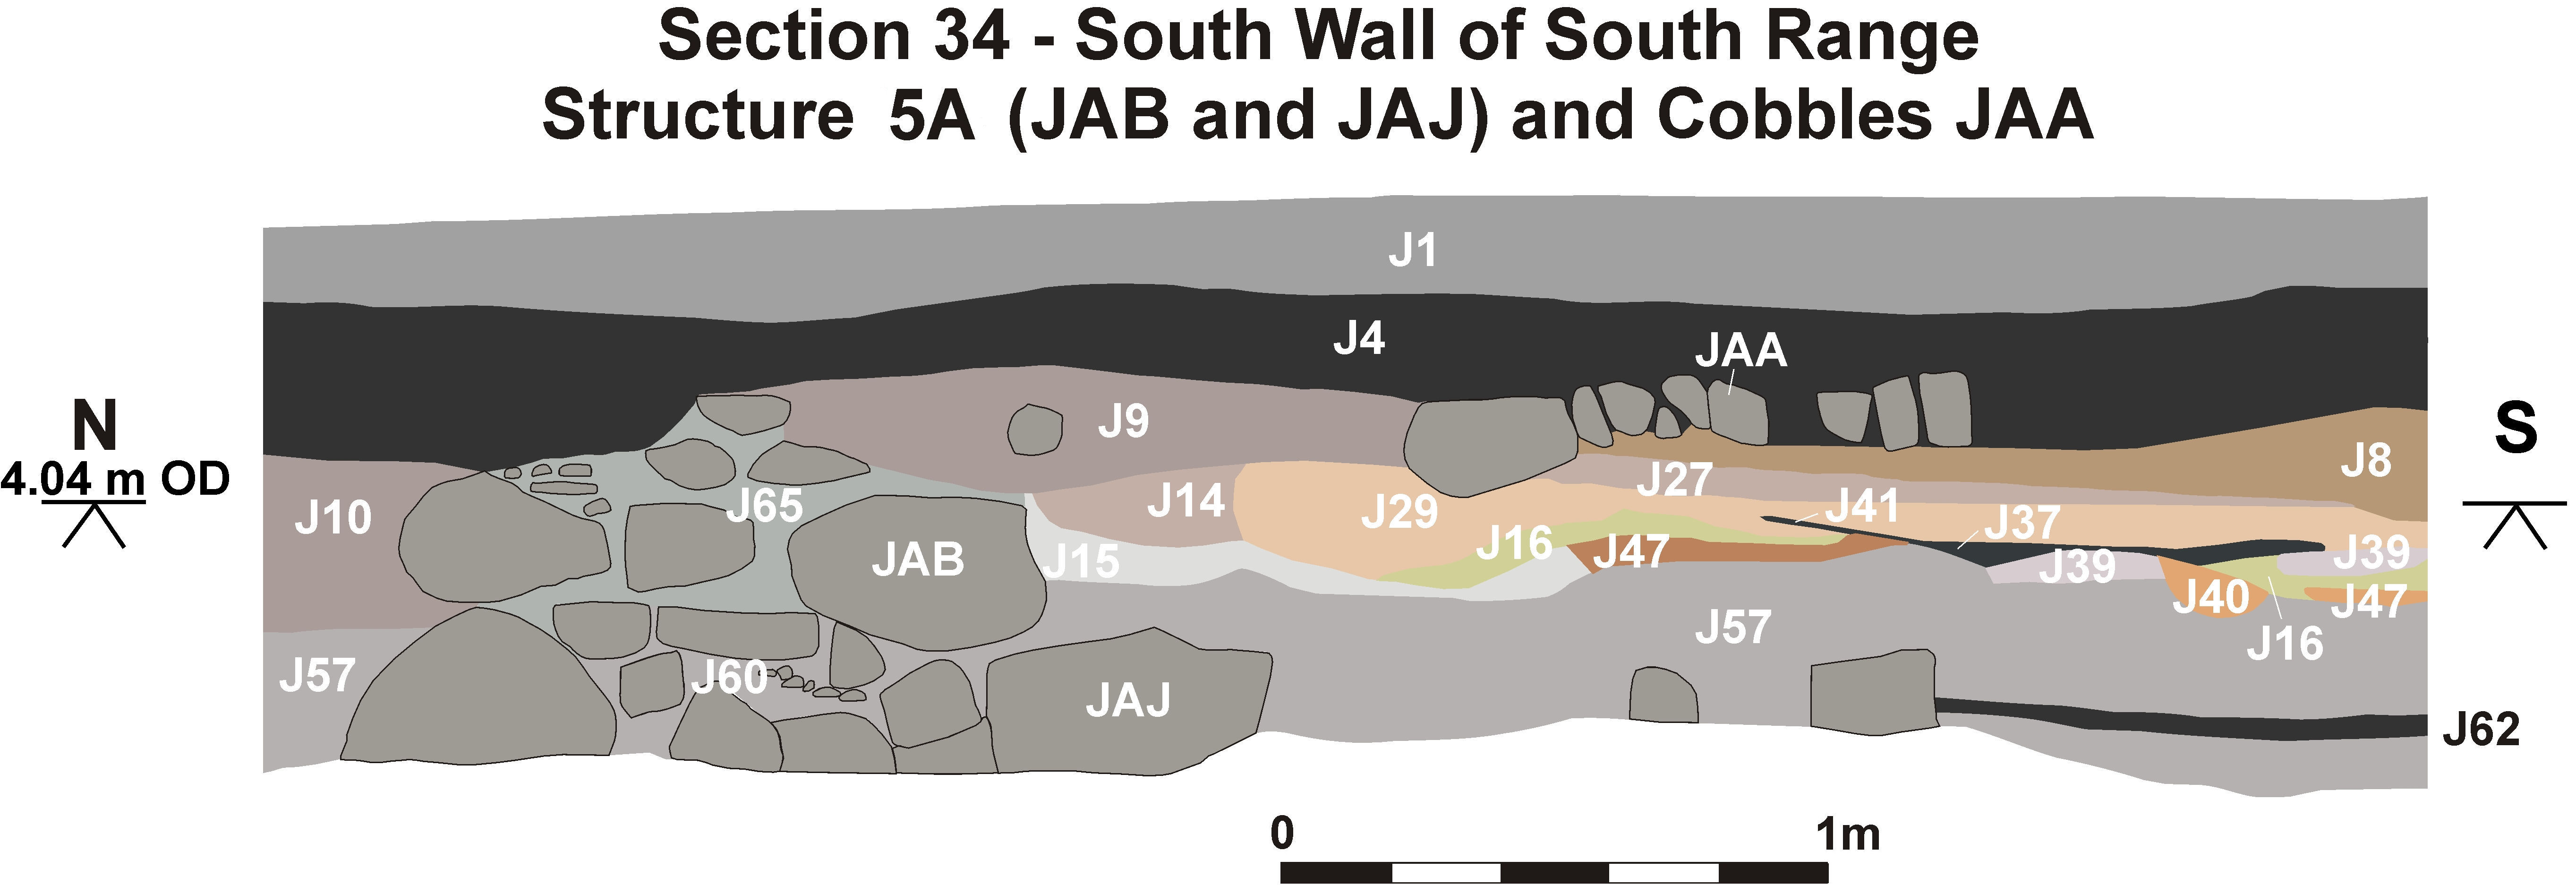
Section 34: South wall of south range structure 5A (JAB and JAJ) and cobbles JAA
Section 35: Section across portion of south range structure 5A
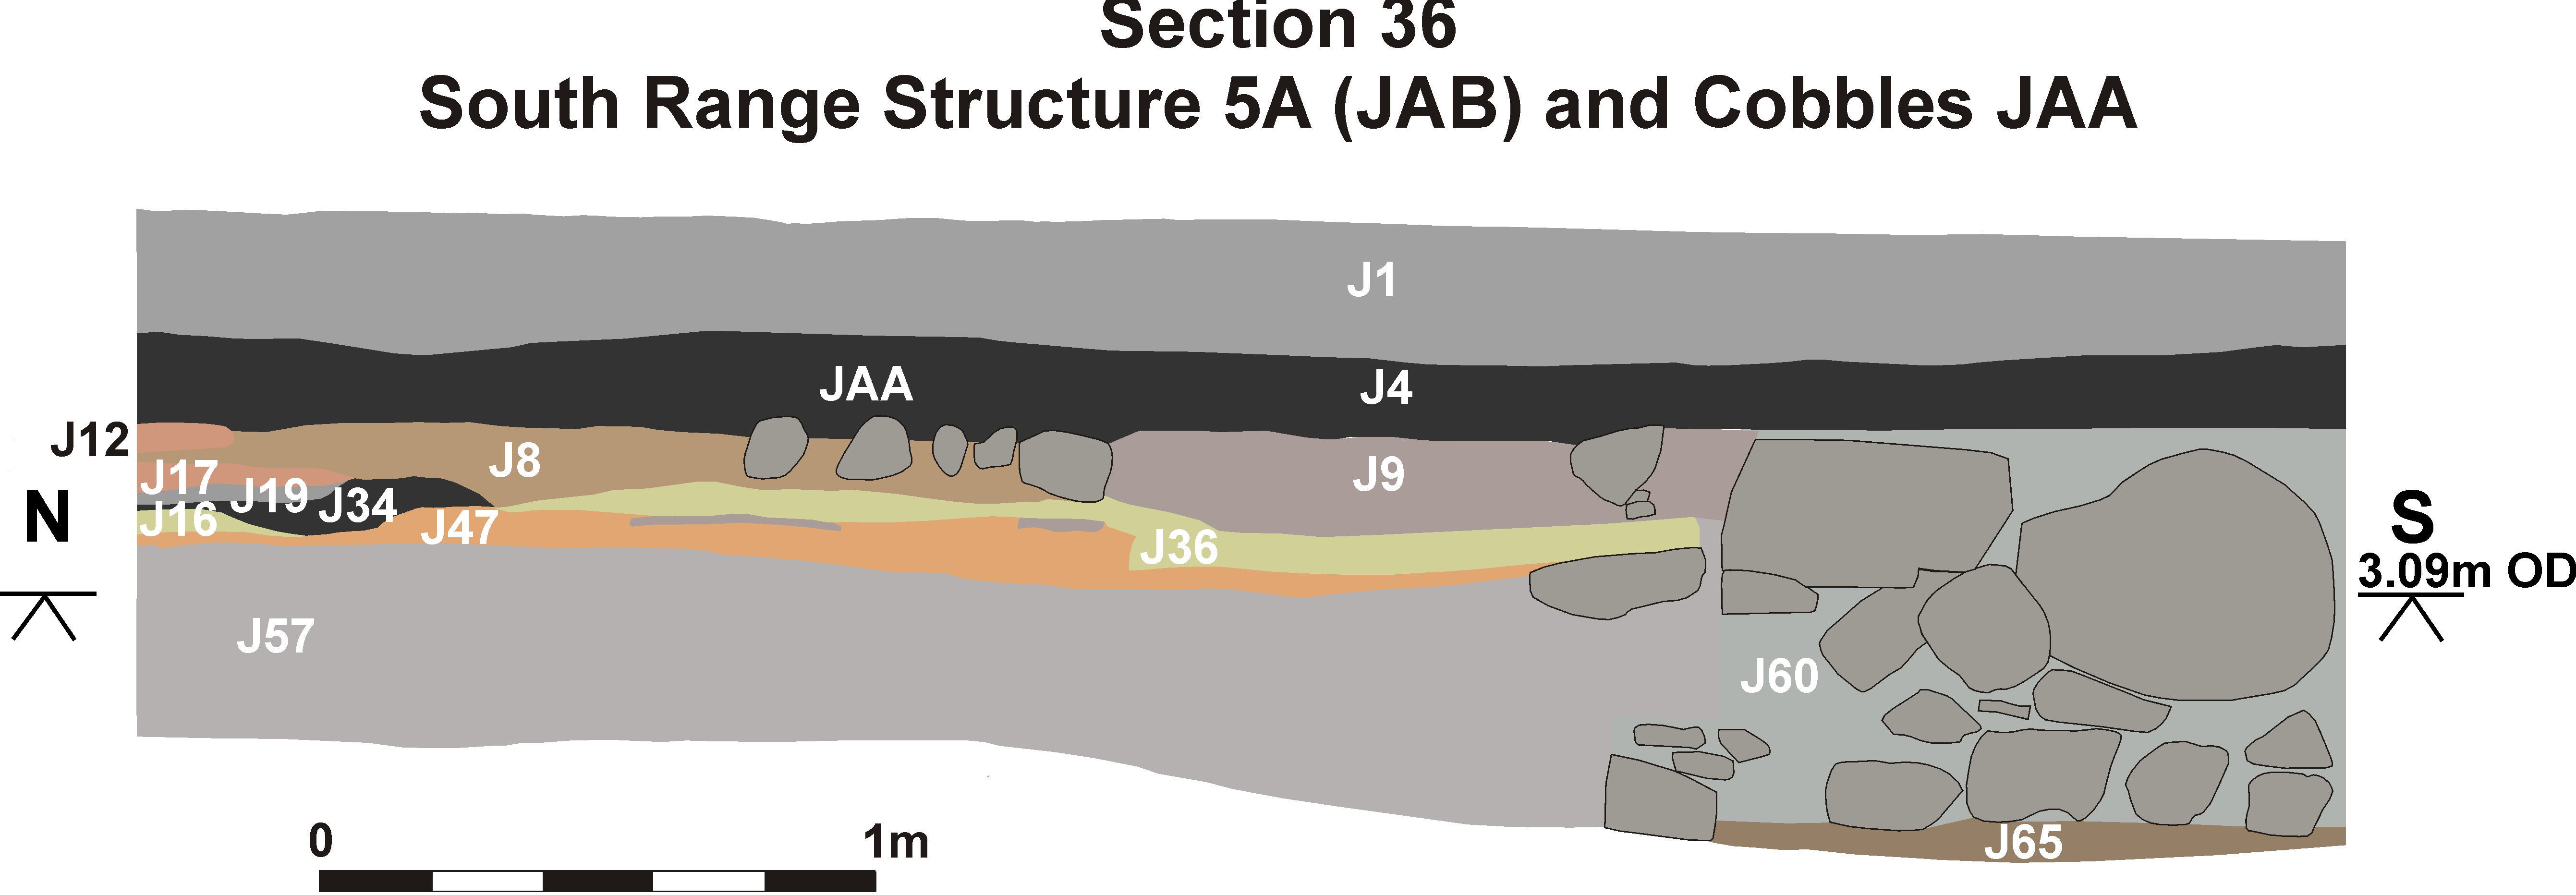
Section 36: South range structure 5A and cobbles JAA
Section 37: West wall of west range, JDX and pit JEK
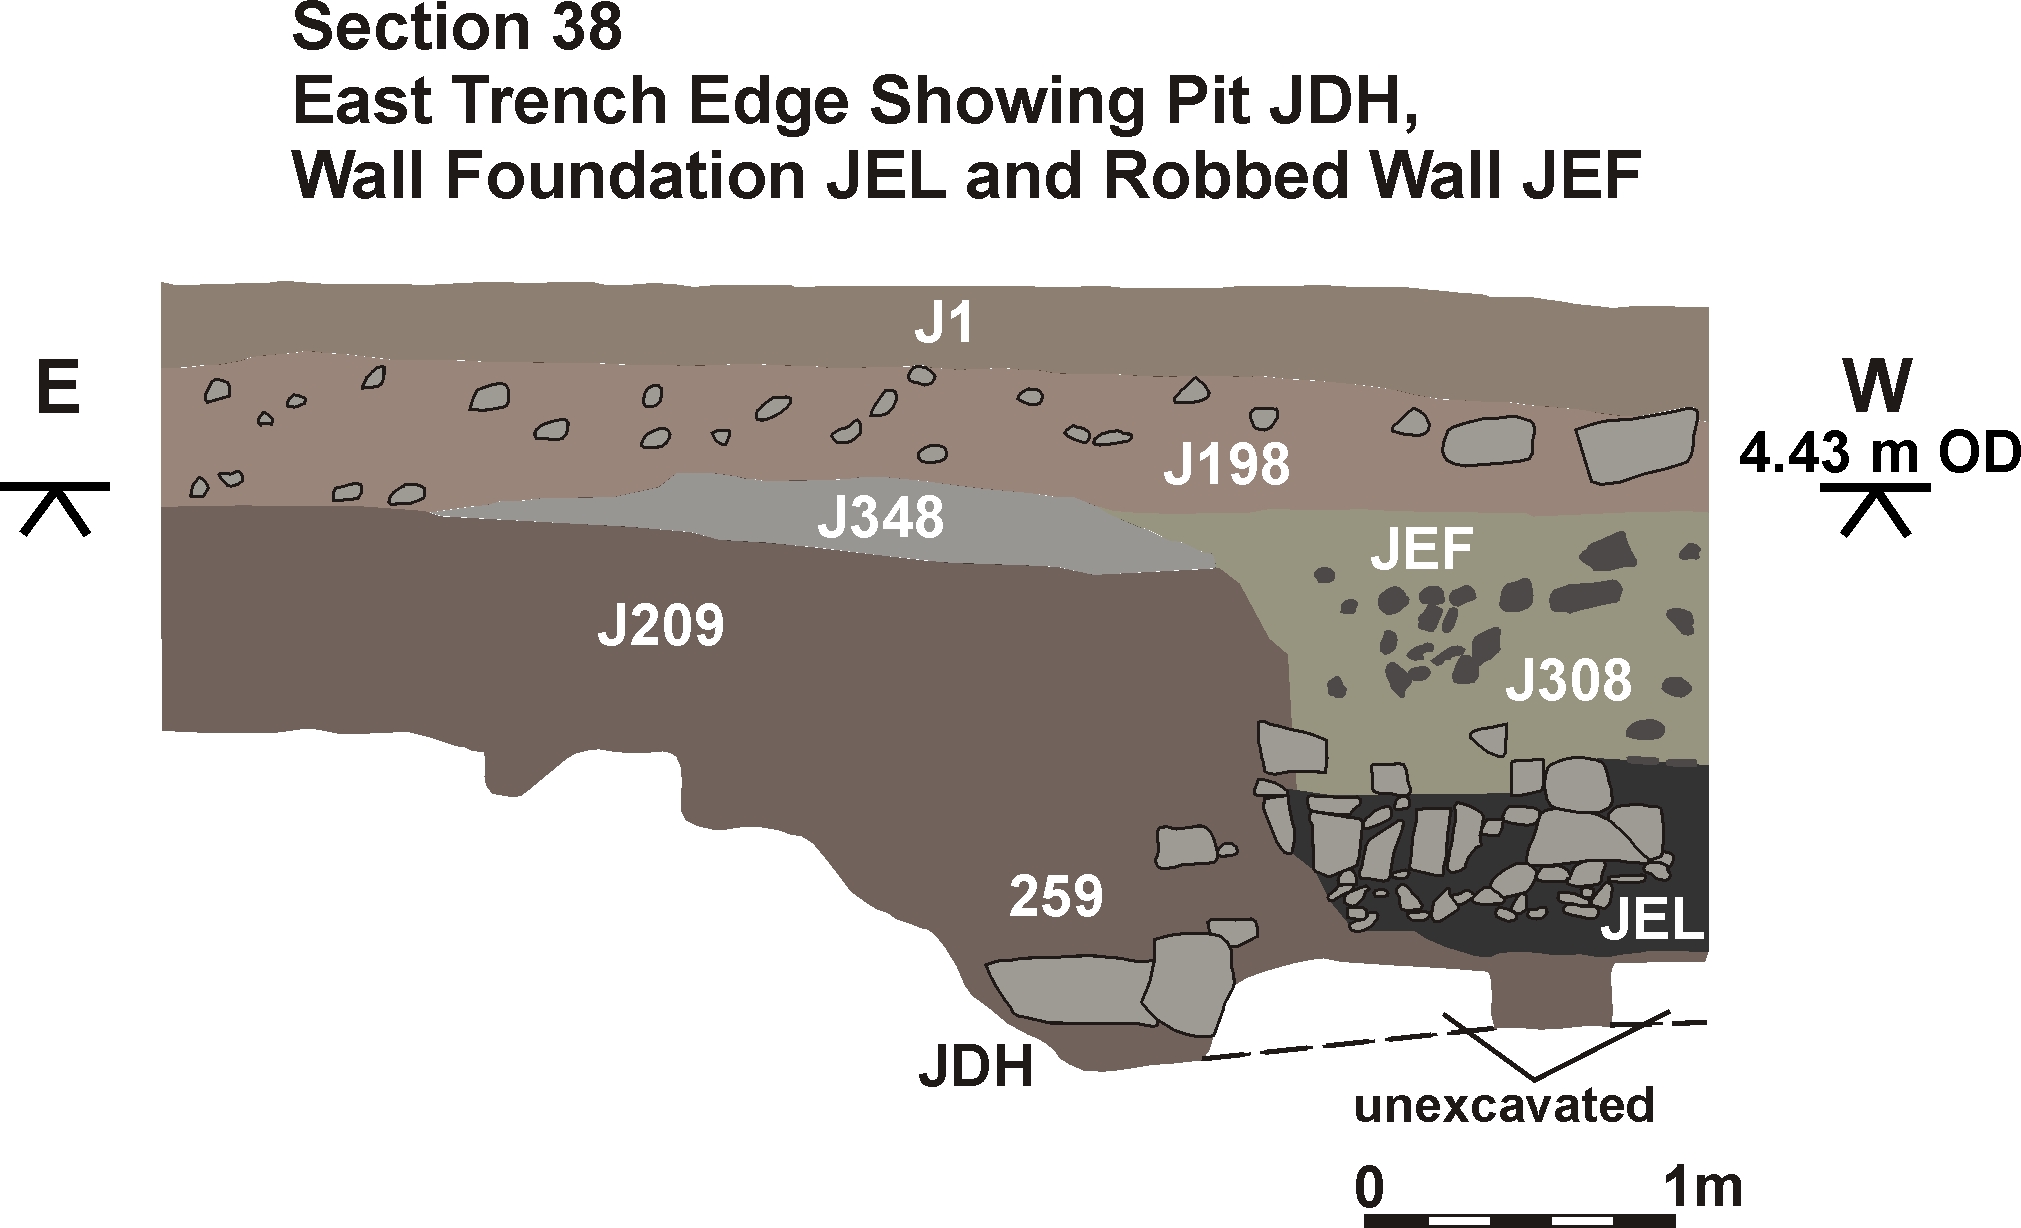
Section 38: East trench edge showing pit JDH, wall foundation JEL and robbed wall JEF
Internet Archaeology is an open access journal based in the Department of Archaeology, University of York. Except where otherwise noted, content from this work may be used under the terms of the Creative Commons Attribution 3.0 (CC BY) Unported licence, which permits unrestricted use, distribution, and reproduction in any medium, provided that attribution to the author(s), the title of the work, the Internet Archaeology journal and the relevant URL/DOI are given.
Terms and Conditions | Legal Statements | Privacy Policy | Cookies Policy | Citing Internet Archaeology
Internet Archaeology content is preserved for the long term with the Archaeology Data Service (ROR). Help sustain and support open access publication by donating to our Open Access Archaeology Fund.