Cite this as: Palmero Fernández, M. 2020 Using DSLR to 'Scan' Colour Slides: learning from the Digitising Jemdet Nasr 1988-1989 Project, Internet Archaeology 55. https://doi.org/10.11141/ia.55.10
Advancements in digital photography and other recording tools over the past ten to fifteen years have improved the visual recording of archaeological excavations and artefacts exponentially. Today, it is possible to produce large photographic records of excavations at a fraction of the price it cost before the advent of digital photography. Other techniques such as photogrammetry now enable three-dimensional recording and exploration of archaeological sites and objects on an unprecedented scale. By contrast, analogical methods of recording have almost become obsolete. However, every archaeological unit and every archaeology department houses vast archives of analogue photographic materials – film and prints – that are slowly decaying and will eventually be lost unless digitised for the future. Like artefacts and organic samples, these photographs constitute archaeological data that can be crucial in restudying old archaeological excavations employing updated methodologies.
Unfortunately, the digitisation of photographic archives is a time-consuming process. Furthermore, scanning hardware and software are expensive and many archaeological units and archaeological departments may not be able to support the necessary costs, both human and monetary. While home scanners offer the average consumer an affordable option to digitise analogue film and prints with limited image quality, higher range film and slide scanners are a considerable investment, require specialist software to maximise their output, and are slower to operate. Fortunately, the rapid development of digital photography (both hardware and software) may offer a new and affordable method to digitise photographic film without sacrificing quality.
In 2019, a small grant from the British Institute for the Study of Iraq allowed an experiment with the digitisation of Kodachrome slides using a DSLR camera and a macro lens as a way to meet the time and funding constraints faced by many archaeologists wishing to digitise their analogue film and slide collections. This article documents this process in detail, including a step-by-step guide that may be employed and adapted by other teams to meet their needs 1.
Jemdet Nasr is a key site in the chronological sequence of Early Mesopotamia. Located in the Babylon province of Iraq, today it lies in an area where the earliest forms of centralised administrative practices and secular structures of power appear to have emerged towards the end of the 4th millennium BCE and the onset of the 3rd millennium BCE. Early excavations conducted by Prof S. Langdon and L. Watelin at the site in the 1920s revealed a substantial mudbrick building in which large quantities of proto-cuneiform tablets and sealings (impressions of cylinder or stamp seals on clay tablets as well as clay 'seals' applied to objects such as jars and doors) were found (Langdon 1927; Field 1953, 78–83, 173–9; Mackay 1931). These objects suggested a high level of complex administration and networks of exchange expanding the southern regions of modern Iraq, one which appeared to supersede the preceding political organisation of temple households associated with the 4th millennium BCE with an incipient secular organisation in the form of palace-style complexes (Steinkeller 1993, 2002a and 2002b; Matthews 1993; Matthews and Matthews 2017; Matthews and Richardson 2019). Together with these finds, the highly characteristic polychromatic pottery for which the site is known helped coined a specific chronological period in the history of Early Mesopotamia that is known as the 'Jemdet Nasr Period' (ca. 3200/3100–2900 BCE), characterised by this style of pottery and the suggested emergence of centralised administrations in the shape of palaces (Matthews 1992a, 1992b). This period is currently understood as a 'bridge' between the preceding Late Uruk period (ca. 3370–3200/3100 BCE) and the subsequent formation of city-states in the region in the Early Dynastic period (ca. 2900–2330 BCE), although its definition as a period or a regional style remains debated (Finkbeiner and Röllig 1986; Matthews 1992b).
The limitations of the 1920s excavations at the site, coupled with poor publication of the archaeological contexts in which the mentioned objects of key historical importance associated with the site were found, led then Director of the British School of Archaeology in Iraq (BSAI) Roger Matthews to undertake a new exploration of the site in the winters of 1988 and 1989. These excavations were financially supported with grants from the BSAI and the British Academy. The aim was to revisit Langdon's and Watelin's excavations to try to recontextualise some of the important finds associated with the large mudbrick building that was uncovered. Unfortunately, the unfolding political events leading to the First Gulf War in the country cut this expedition short and the excavation archive from 1988–1989 remains in Baghdad. Matthews published extensive preliminary reports of the excavations (Matthews 1989, 1990). Following the enforced cessation of work at the site, Matthews conducted an analysis and full publication of the earlier excavations at Jemdet Nasr in 1926 and 1928, as published in his BSAI-supported 2002 book Secrets of the Dark Mound: Jemdet Nasr 1926-1928 (Matthews 2002). A planned return to Jemdet Nasr has not happened due to political circumstances beyond the control of archaeologists.
The Digitising Jemdet Nasr 1988-1989 project aimed to bring into the academic and public domain the surviving visual record of excavations at Jemdet Nasr, Iraq, conducted under the direction of Roger Matthews. This project represents a renewed effort to reassess the results of the excavation. As a first measure, the digitised photographs will offer a previously unseen record of the excavation, tying in with Matthews' preliminary reports and publications. As the political situation in Iraq stabilises, it is hoped that the results of this digitisation project will constitute the first step towards a full reassessment of the excavations conducted at Jemdet Nasr in the 1920s as well as in the 1980s. Legacy projects, such as the one described here, have received renewed interest in recent years, both due to the accumulation of unpublished archaeological fieldwork data since 1990 and the recent reopening of legacy excavations in Iraq at important sites such as Nippur, al-Hiba, Girsu, Ur, and Uruk (University of Chicago 2020; University of Cambridge 2020; Rey et al. 2019; Stone and Zimansky 2016; van Ess 2019). Thus, this project, the DSLR digitisation method here presented, and the resulting archive that will be published online constitute an important step forward in the process of reassessing and opening up archaeological research in Iraq to future generations. This is both timely and necessary in light of recent extensive and systematic destruction of the country's outstanding archaeological record at the hands of looters and terrorist organisations.
When confronted with the task of handling, storing, and digitising a photographic collection, there are several elements to take into consideration. The concept of preservation is not easily defined, and the introduction of 'digital preservation' into the mix has only complicated matters (Owens 2018, 12–15). Preservation often takes an artefactual approach, referring to the action of "protecting materials by minimizing chemical and physical deterioration and damage to minimize the loss of information and to extend the life of cultural property" (Society of American Archivists 1997–2020, 'preservation'). Generally speaking, 35mm film has a life span of roughly 70 years, if kept in adequate conditions. This may appear a long time, yet the ability to store negative film in the right conditions and adequately care for it may not be available to many. The British Library's guide to preservation of photographic material, for example, discourages digitisation as a "permanent cheap alternative to the care of the originals" and offers extensive guidance on conservation parameters (Clark 2009, 16). Despite its increasing use, digitising is widely considered as an access tool for analogue photographic archives, but it is often not considered a preservation tool for archival materials. Some instances in which use of digitisation for preservation may be justified include cases of deteriorating originals that are at risk (Capell 2010). While this approach may work in the context of large and or well-funded collections (a rare find in archaeology) where control over parameters like space, humidity, or temperature may not be an issue, the reality faced by many in the field of archaeology demands a different, more flexible approach.
Owens (2018, 12–33) eloquently describes the approaches to preservation that take an 'artefactual' or an 'informational' approach, putting forward a third, 'folklorist' approach in which "variability and hybridity of information play a key role in how stories and sequences of information preserve but also change and adapt to new circumstances" (Owens 2018, 33). This statement resonates quite elegantly with archaeological work, where an amalgam of ephemeral, changing, as well as more permanent data are produced in the process of archaeological excavation, documentation, interpretation, and subsequent presentation through publications, museum collections, etc. Therefore, these are critical points to consider when deciding to digitise some elements, or the entirety, of an archaeological project. What is the aim of creating a digital archive and how will it be used, and be useful?
Concerning the digitisation of photographic material in archaeology specifically, two motivations may be identified, each requiring different methodological approaches. On the one hand, there is a genuine need (and wish) to enhance and extend the life of the main visual, documental source of excavation data; data that are otherwise destroyed through the very process of doing archaeology. High quality digital copies not only preserve data but can also enhance access and use of these resources for research purposes, enabling their manipulation and analysis without damaging the originals i.e. preserving information. On the other hand, the growing move towards producing transparent, openly accessible data underpins our professional commitment towards opening up our archives and disseminating data that would otherwise remain in the dark corners of offices and storage rooms. This move is framed within ethical debates in archaeological practice and digital preservation (Wilson and Edwards 2015; Moore and Richards 2015), as well as becoming a strategic shift in countries where policies to make publicly funded research open to the public are being championed, such as the United Kingdom. Furthermore, where there is a systematic threat to cultural heritage, digital preservation can become a unique tool in social cohesion or to promote cultural healing in post-conflict situations (UN Human Rights Council 2018; Matthews et al. 2019). In the context of Near Eastern archaeology, for example, this process has been catalysed by the systematic destruction of cultural heritage perpetrated by Daesh at important sites such as Palmyra, Nimrud, or the city of Mosul (Nováček et al. 2017; Pütt 2018). However, such digital practices are not without ethical concerns themselves, especially around issues of ownership and control, and enjoyment by and benefit to the affected communities (Colley 2015; Thompson 2017).
This digitisation project was limited to a set of photographic records that are part of a larger archaeological project which, for reasons beyond the control of the archaeologists, had to be terminated before completion with the majority of information and materials were left behind. The main concern was with the creation of a digital collection of the original slides for preservation and research purposes, as well as creating a website for dissemination, presenting lower resolution copies with educational content about the site and its excavation. Furthermore, the goal was to produce a digital archive which, given the right circumstances, could fit within a larger project to re-visit the archaeological project should the rest of the data, and access to the site itself, become available in the future.
When approaching digitisation as a means to preserve original material beyond its life span, the method and tools employed are critical. Just as with artefact preservation, the objective of archival digitisation of primary analogue photographic sources is to preserve the original objects 'as they are', including any damage incurred since their original creation. This is because the condition of the object itself must be part of the digitisation process for the archive in order to preserve its authenticity. As a result, the digital objects created should faithfully reproduce the originals and capture any damage or alterations sustained by the object up until the moment it was digitised, with the exception of intrusions that may be removed manually prior to digitisation, such as dust. As we shall see, post-processing techniques help enhance the original photographic material by employing digital techniques which can to some extent correct lighting conditions to show details in the film not easily visible to the naked eye. Post-processing is a very useful tool when producing images for publication, either for research or dissemination purposes. However, such processing should take place separately from the production of the archival records, which should consist of consistently produced scans employing a workflow tailored to the characteristics of the dataset; in this case, Kodachrome colour reversal film. With this objective in mind, the use of digitisation for preservation purposes offers a powerful tool to enhance archaeological resources for research and outreach while preserving their authenticity.
Some online guides from public institutions cover archival standards and, in some cases, best practices in digitisation for long-term preservation and wider access. For a UK-based environment, the British Library's Endangered Archives Programme has produced their Guidelines for photographing and scanning archival material (British Library 2017). For a US-based environment, the Federal Agencies Digital Guidelines Initiative have released detailed technical guidelines, which include specifics on digitising photographic transparencies (Rieger 2016, 36–37). These guidelines provide some general information and image specifications for archival purposes, but do not offer specific workflows. Tate Britain's Archives and Access project, which concluded in September 2017, published a series of recommendations based on the experience gained, which includes a suitable digitisation workflow for negative film (Tate Britain 2020). The workflow does assume certain knowledge of digital photography with a DSLR camera and image post-processing, but nevertheless, it provides an overview of the whole process of designing a digitisation project, including aspects such as cataloguing, selecting material for digitisation, as well as legal and copyright issues that are not comprehensively covered in this article. Other complementary resources that may be useful in designing a digitisation project are available through the Digital Pathways website (Culture24 2020).
Though not the main focus of this contribution, an essential aspect of any digitisation project aimed at digitally preserving analogue media must take a holistic approach to how best to preserve the digital media produced as a result, or risk failing in the medium or long term. Thus, digital preservation is the second element in ensuring adequate design and implementation of a digitisation-based preservation project. In archaeology, a first point of call are the Archaeology Data Service/Digital Antiquity's Guides to Good Practice (Archaeology Data Service and Digital Antiquity 2020), and especially their guide covering the creation and archiving of raster images (Niven 2020). The Digital Preservation Coalition's Digital Preservation Handbook also covers the requirements and issues concerning the production and maintenance of digital archives (Digital Preservation Coalition 2020).
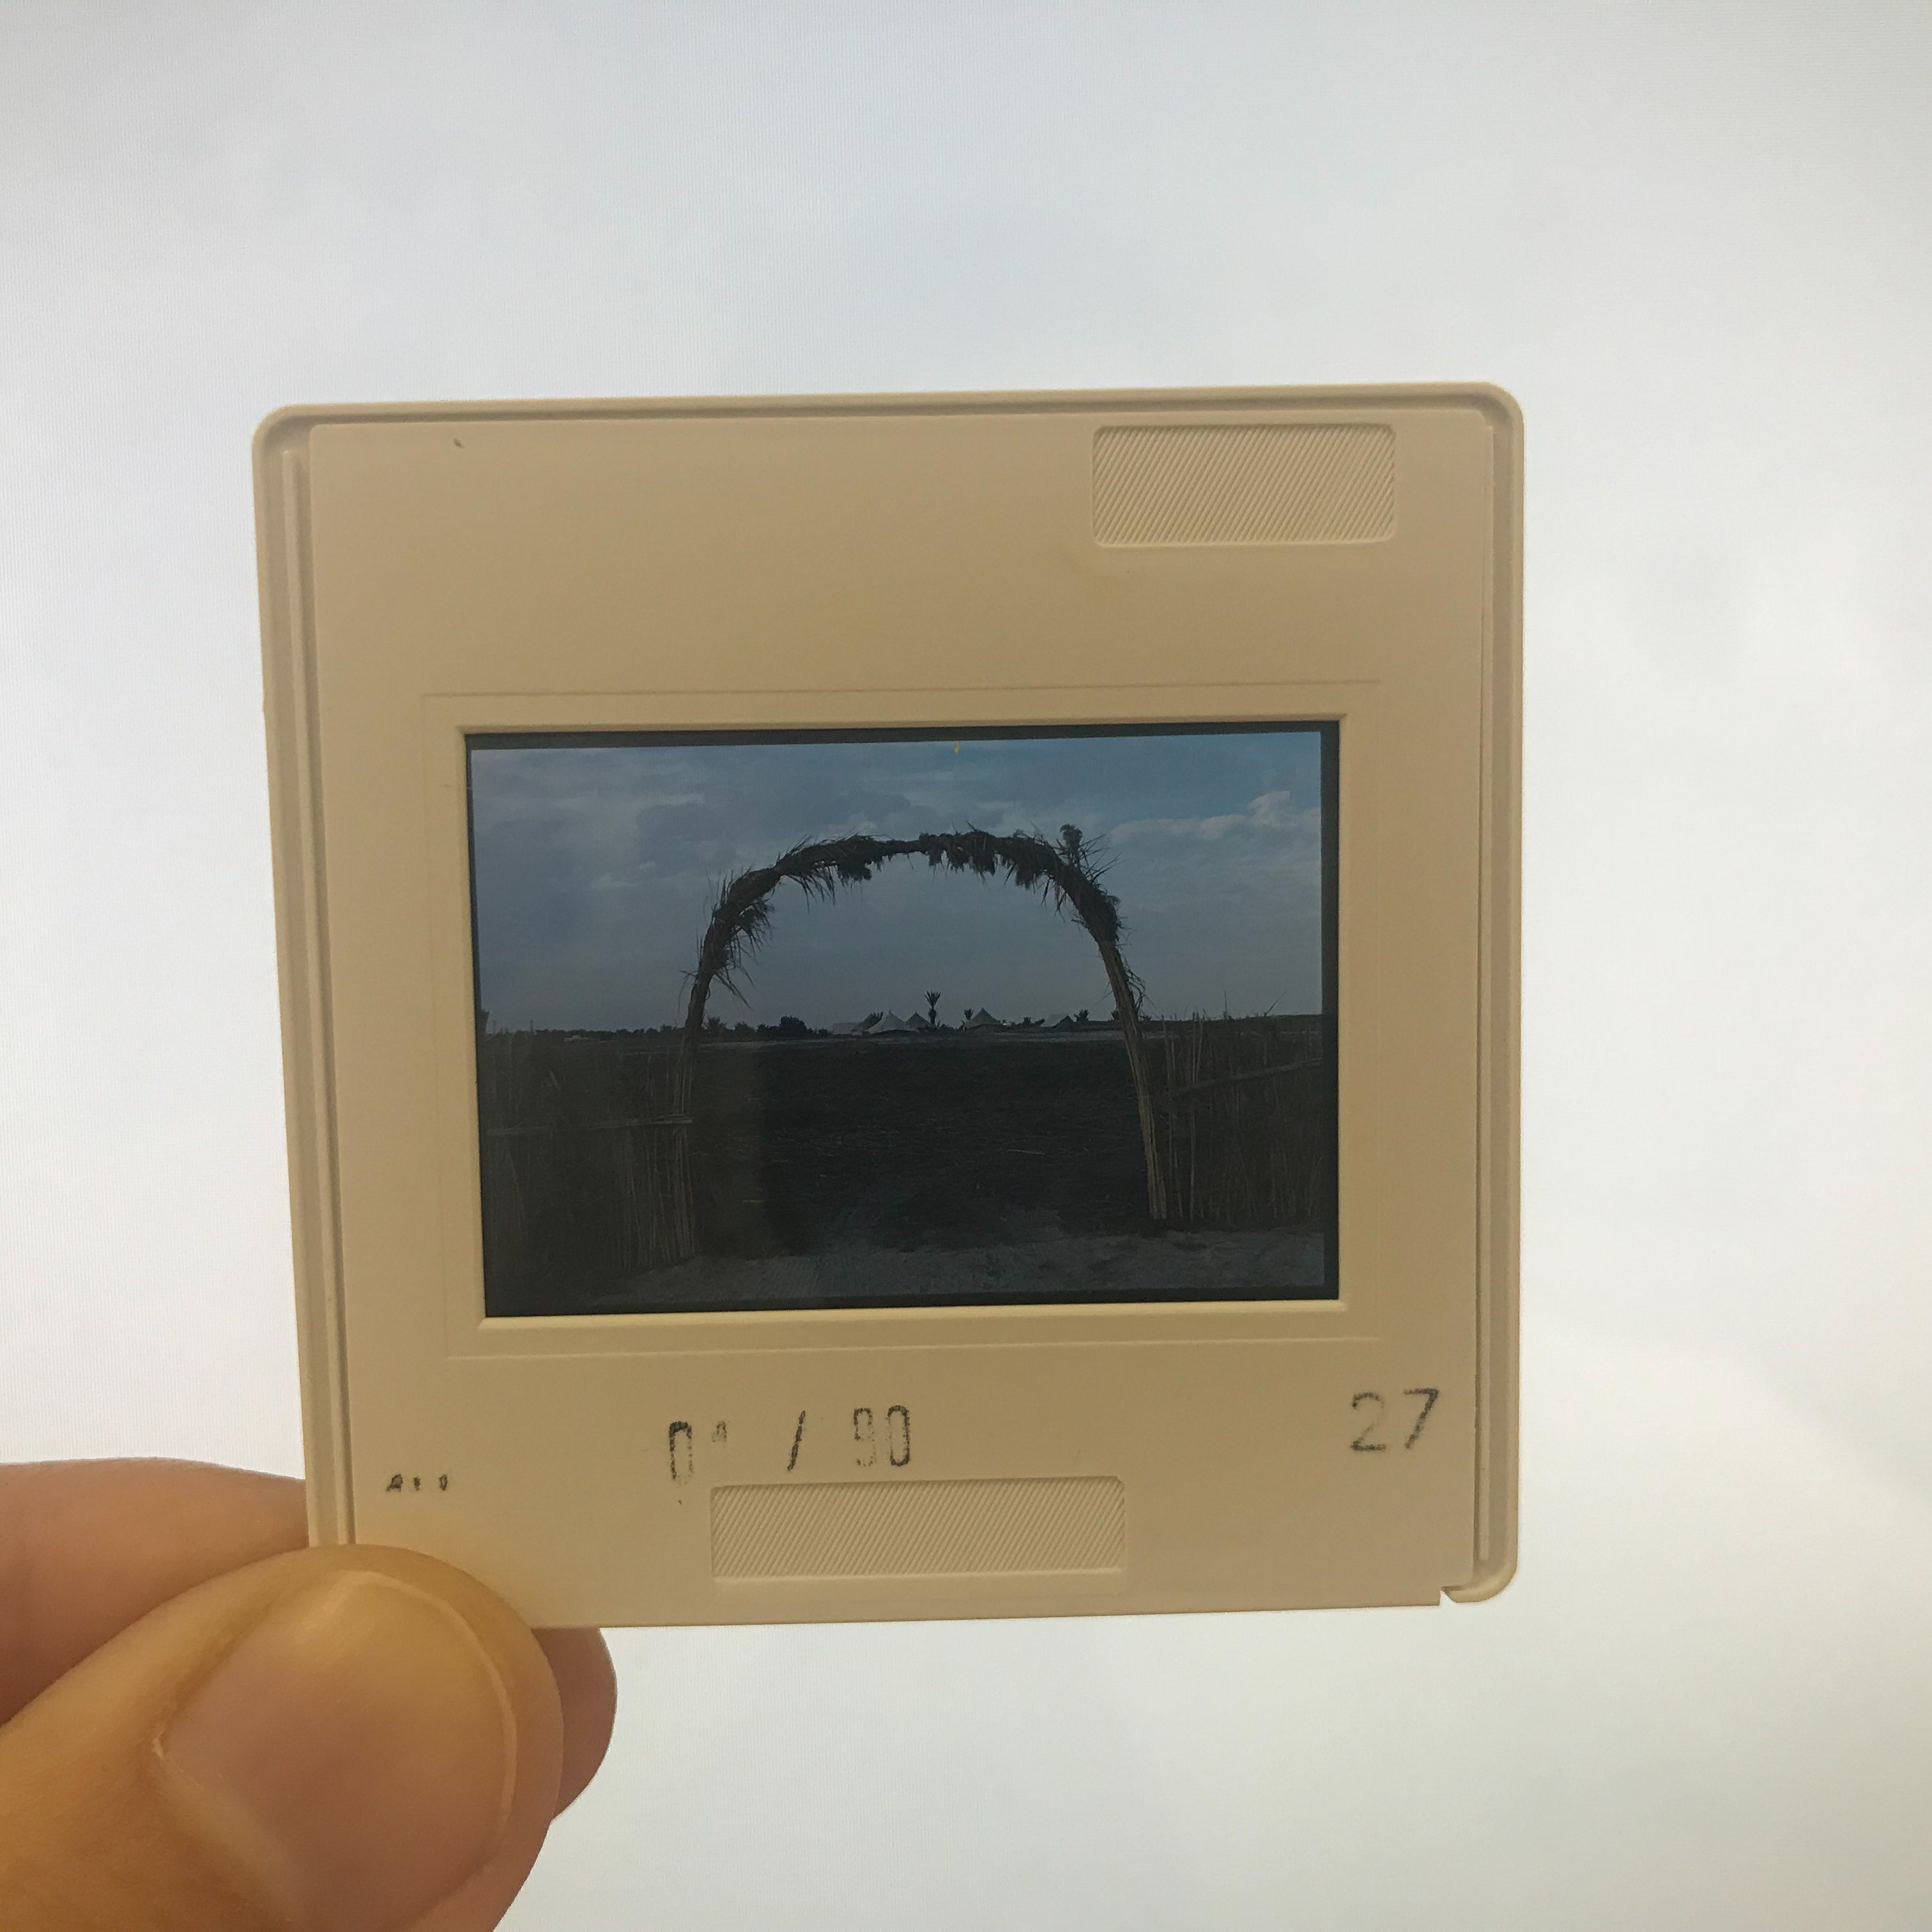
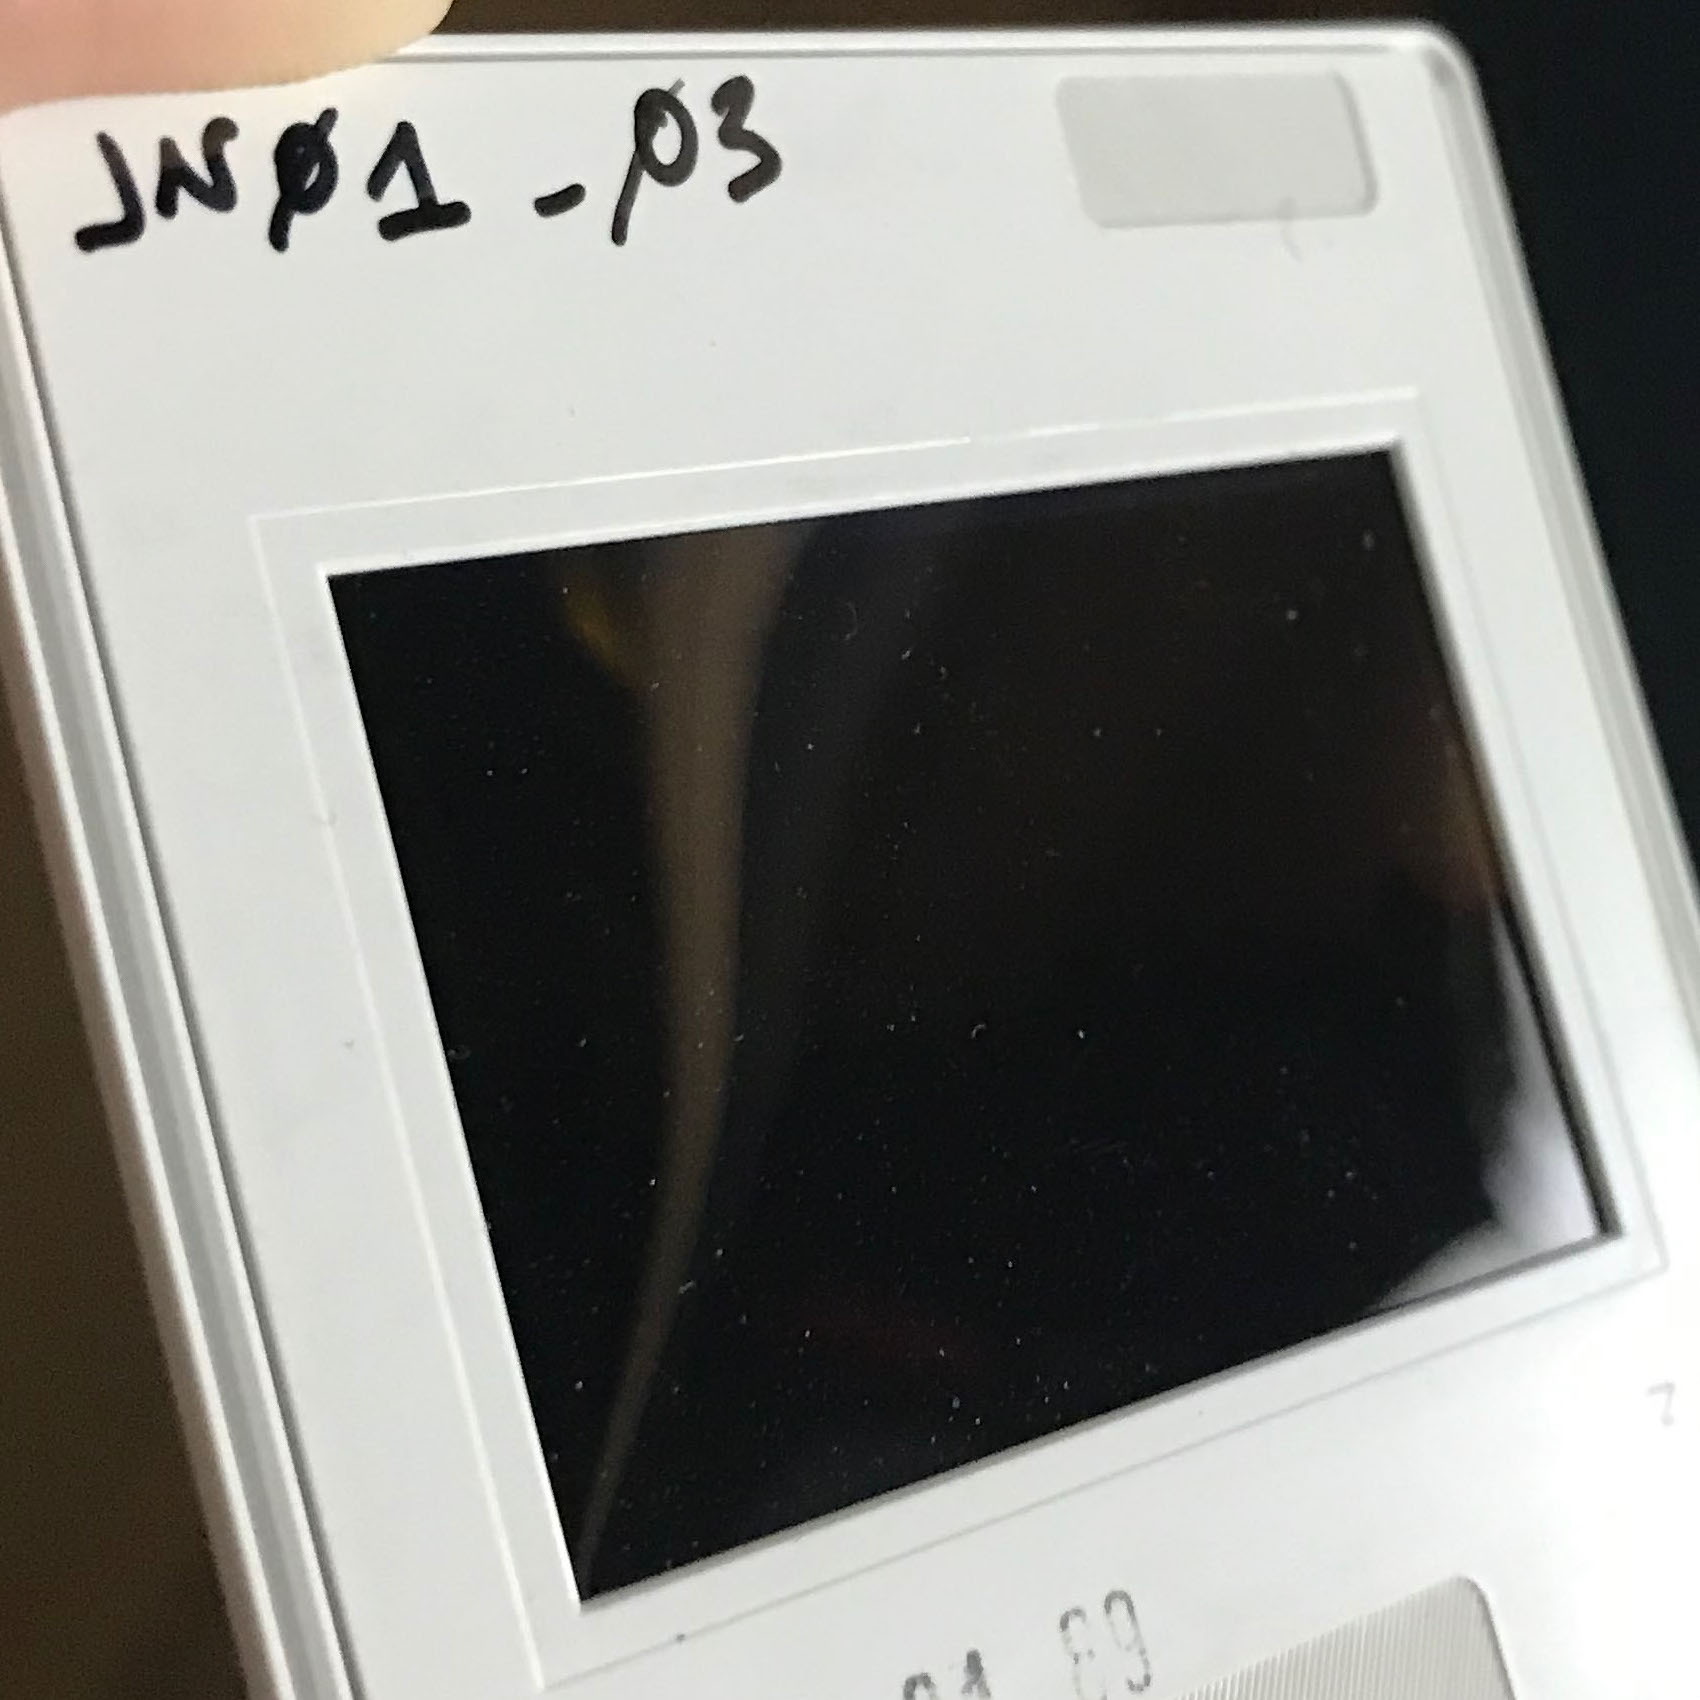
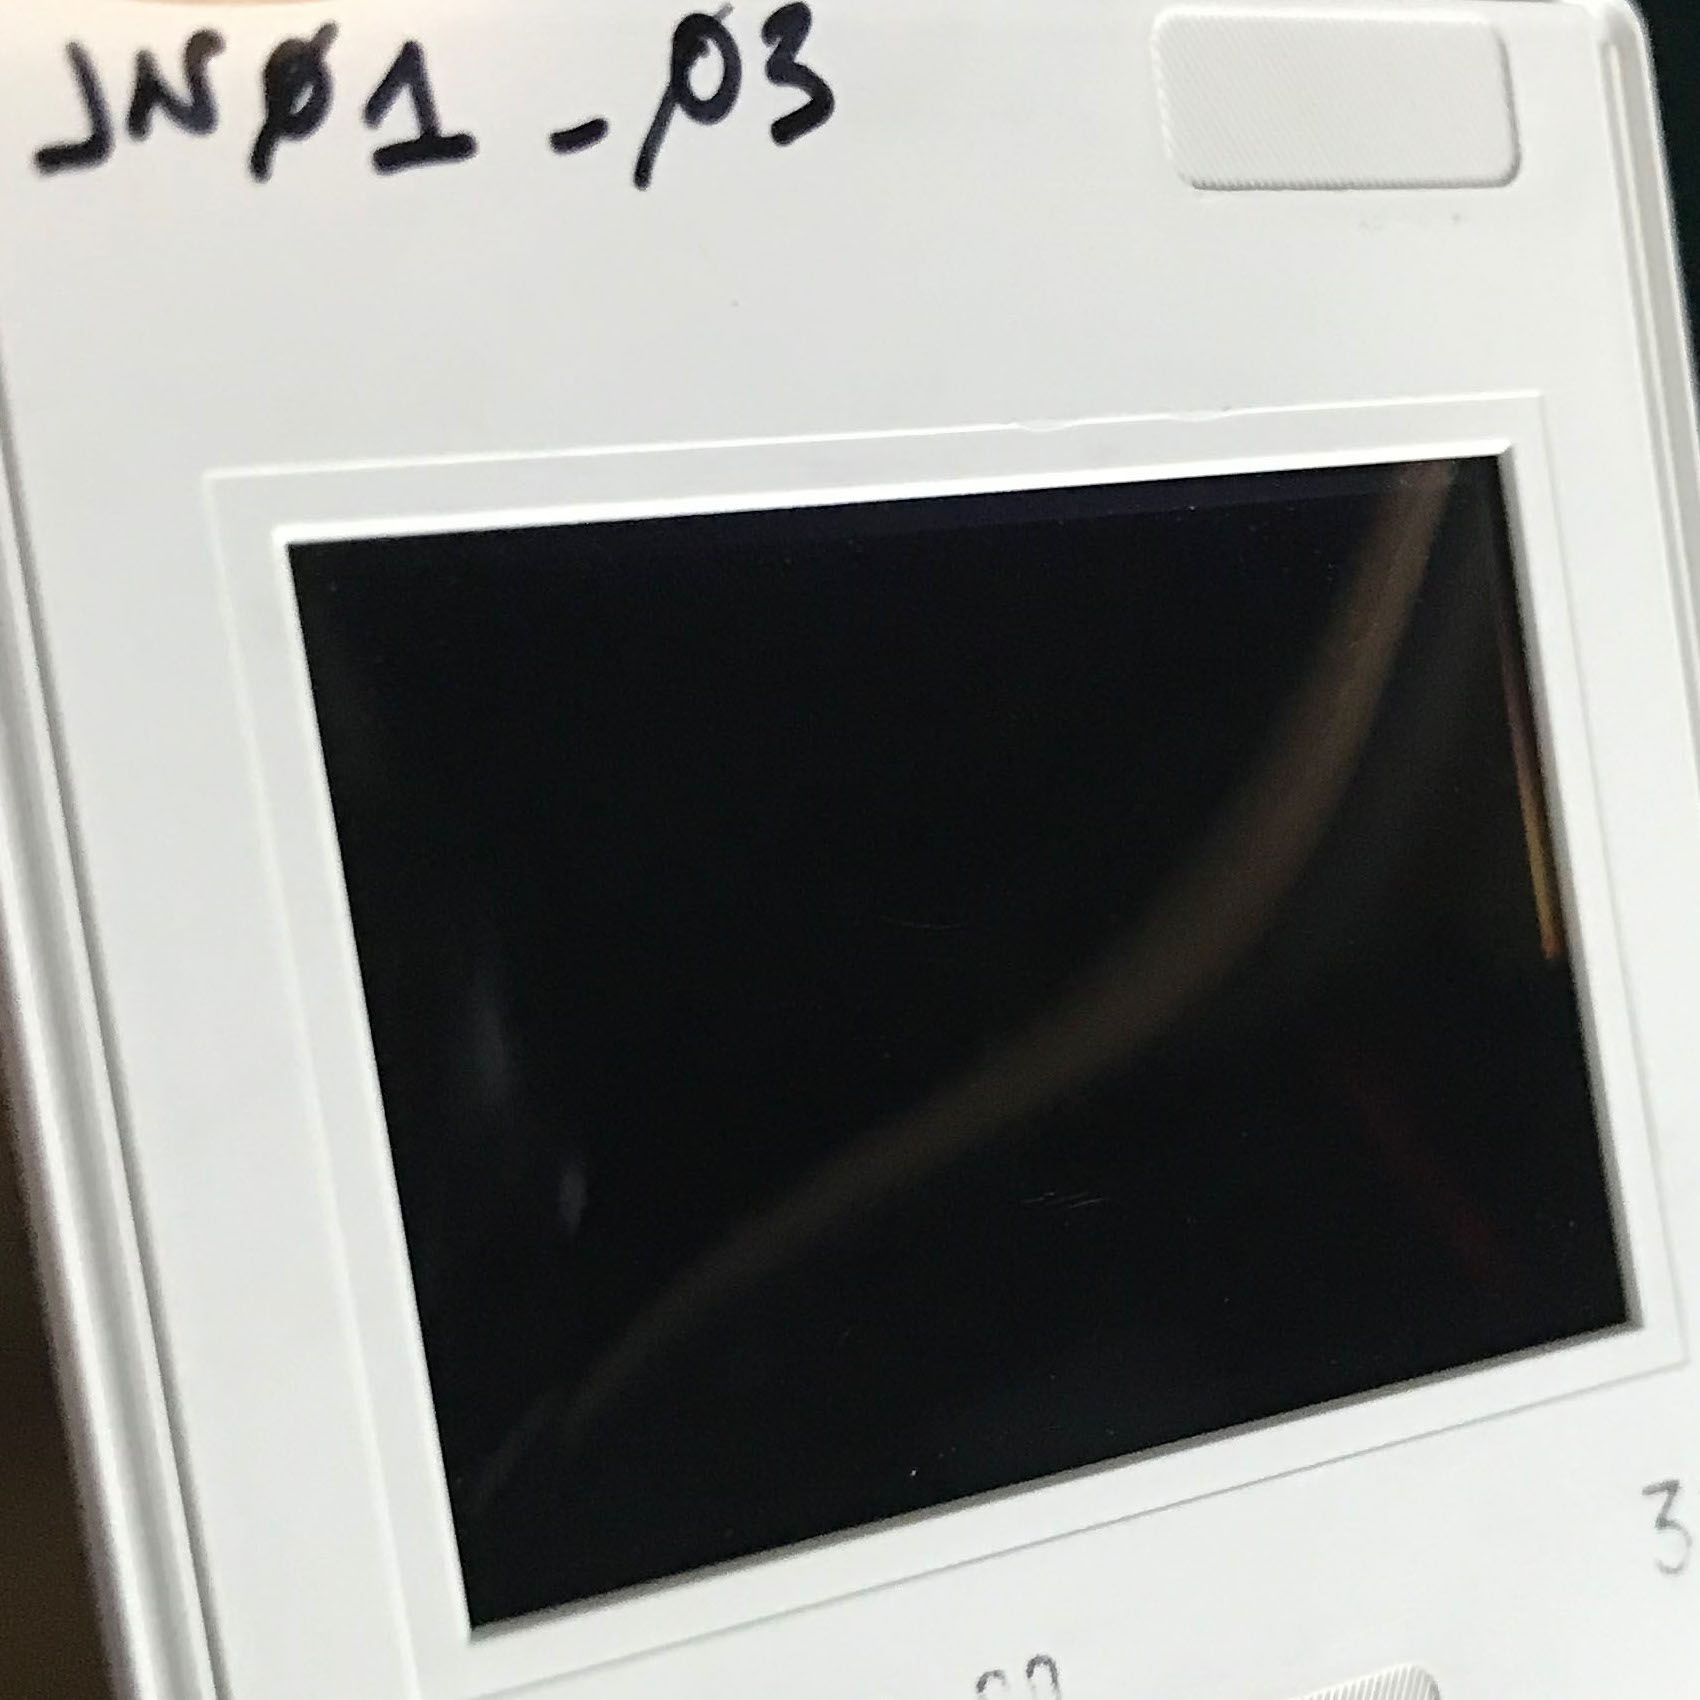
During the 1988-1989 field seasons, Roger Matthews took 35mm Kodachrome colour slides. The slides constitute an invaluable and detailed record of the excavations at Jemdet Nasr, all fully labelled, with in-field views of surface work and excavations, including individual contexts, and of a full range of finds including ceramics (including the famous painted Jemdet Nasr wares), seals, sealings, and clay and stone objects. They have been securely stored since then and without interference by Matthews at the University of Reading (Figure 1a). They are still of very high quality and have had minimal handling (Figure 1b). The collection comprises 787 slides.

The digitisation of the slides was carried out using a DSLR camera, employing a method based on my research into archival best practices for photographic material while taking into account the time and resource limitations of the project. The method here described was developed by Palmero Fernández and followed a process of testing prior to adopting the final data acquisition and processing method.
The 787 Kodachrome slides were taken in 1988-1989 in Iraq. Kodachrome is a professional colour reversal film produced by Eastman Kodak from 1935 until 2009. Kodachrome was used for professional photography due to its ability to record images with greater sharpness than substantive film. Indeed, Kodachrome's sharpness and dynamic range remains difficult to capture in a scanned or digitised copy, so attaining this level of detail remained the biggest challenge in this project, especially for high contrast scenes in which Kodachrome displayed a far superior light and colour balance than the digitally produced copies (due to Kodachrome's relative high contrast, which tended to wash out details in the scans). Kodachrome's unique colour was highly regarded among professional photographers but when digitally scanned, it has a tendency to scan with a blue colour cast.
The sharpness of the Kodachrome transparency film means that it contains an equivalent of approximately 140 megapixels of data in the 24mm x 36mm image. It also has superior long-term stability compared to other types of colour film when stored in darkness, making it a particularly good choice for archives (Wilhelm 2013). Kodachrome 64 offered unparalleled depth of colour for a slow film and offered high contrast details. The fine grain of the film offered exceptional detail. Therefore, the successful digitisation of Kodachrome transparency film requires a fine balance to achieve the colour, sharpness, and resolution to preserve the unique qualities of the film and the data it contains.
Fortunately, Kodachrome's unique profile also means that specific scanning workflows have been developed as part of software suites. The most reliable tool to achieve the accurate colour reproduction when scanning Kodachrome requires the use of IT8 calibration with a special Kodachrome calibration target. These were produced mainly by LaserSoft, the parent company of scanning software SilverFast and who had developed a specific workflow for scanning transparency film. Unfortunately, due to Kodak's discontinuation of the film in 2009, no new targets have been produced and those already in circulation are in high demand (LaserSoft Imaging Incorporated 1986–2019).
Due to the high cost of professional film/slide scanners and the rapid improvement of digital photography and its relative economization, new film scanning techniques have been developed which utilise a DSLR camera and macro lens as a 'scanner' for negative film. While some tutorials and post-processing presets are available for negative film using this technique, the digitisation of Kodachrome transparency film using this technique remains underexplored 2.
Between April and June 2019, Palmero Fernández researched the most cost-effective and time-efficient data acquisition method for the purpose of the project, designing a tailored approach to digitisation that balanced the need to produce high-quality, archival digital copies of the physical objects with the time and funding constraints imposed by the nature of the project.
The first step was to determine whether employing equipment already available within the Department of Archaeology at the University of Reading would meet archival standards and not become excessively time-consuming. Sarah Lambert-Gates, Graphics Technician and Lecturer in Archaeological Illustration at the University of Reading, was consulted about best practices for digitising photographic material.
The method currently producing the highest quality scanning of photographic film employs a drum scanner and is only available through specialised laboratories. This method was not considered because it fell beyond the means of the project and the quality achieved would not have justified the cost incurred. After researching best archival practices, the following options where then compared for digitisation:
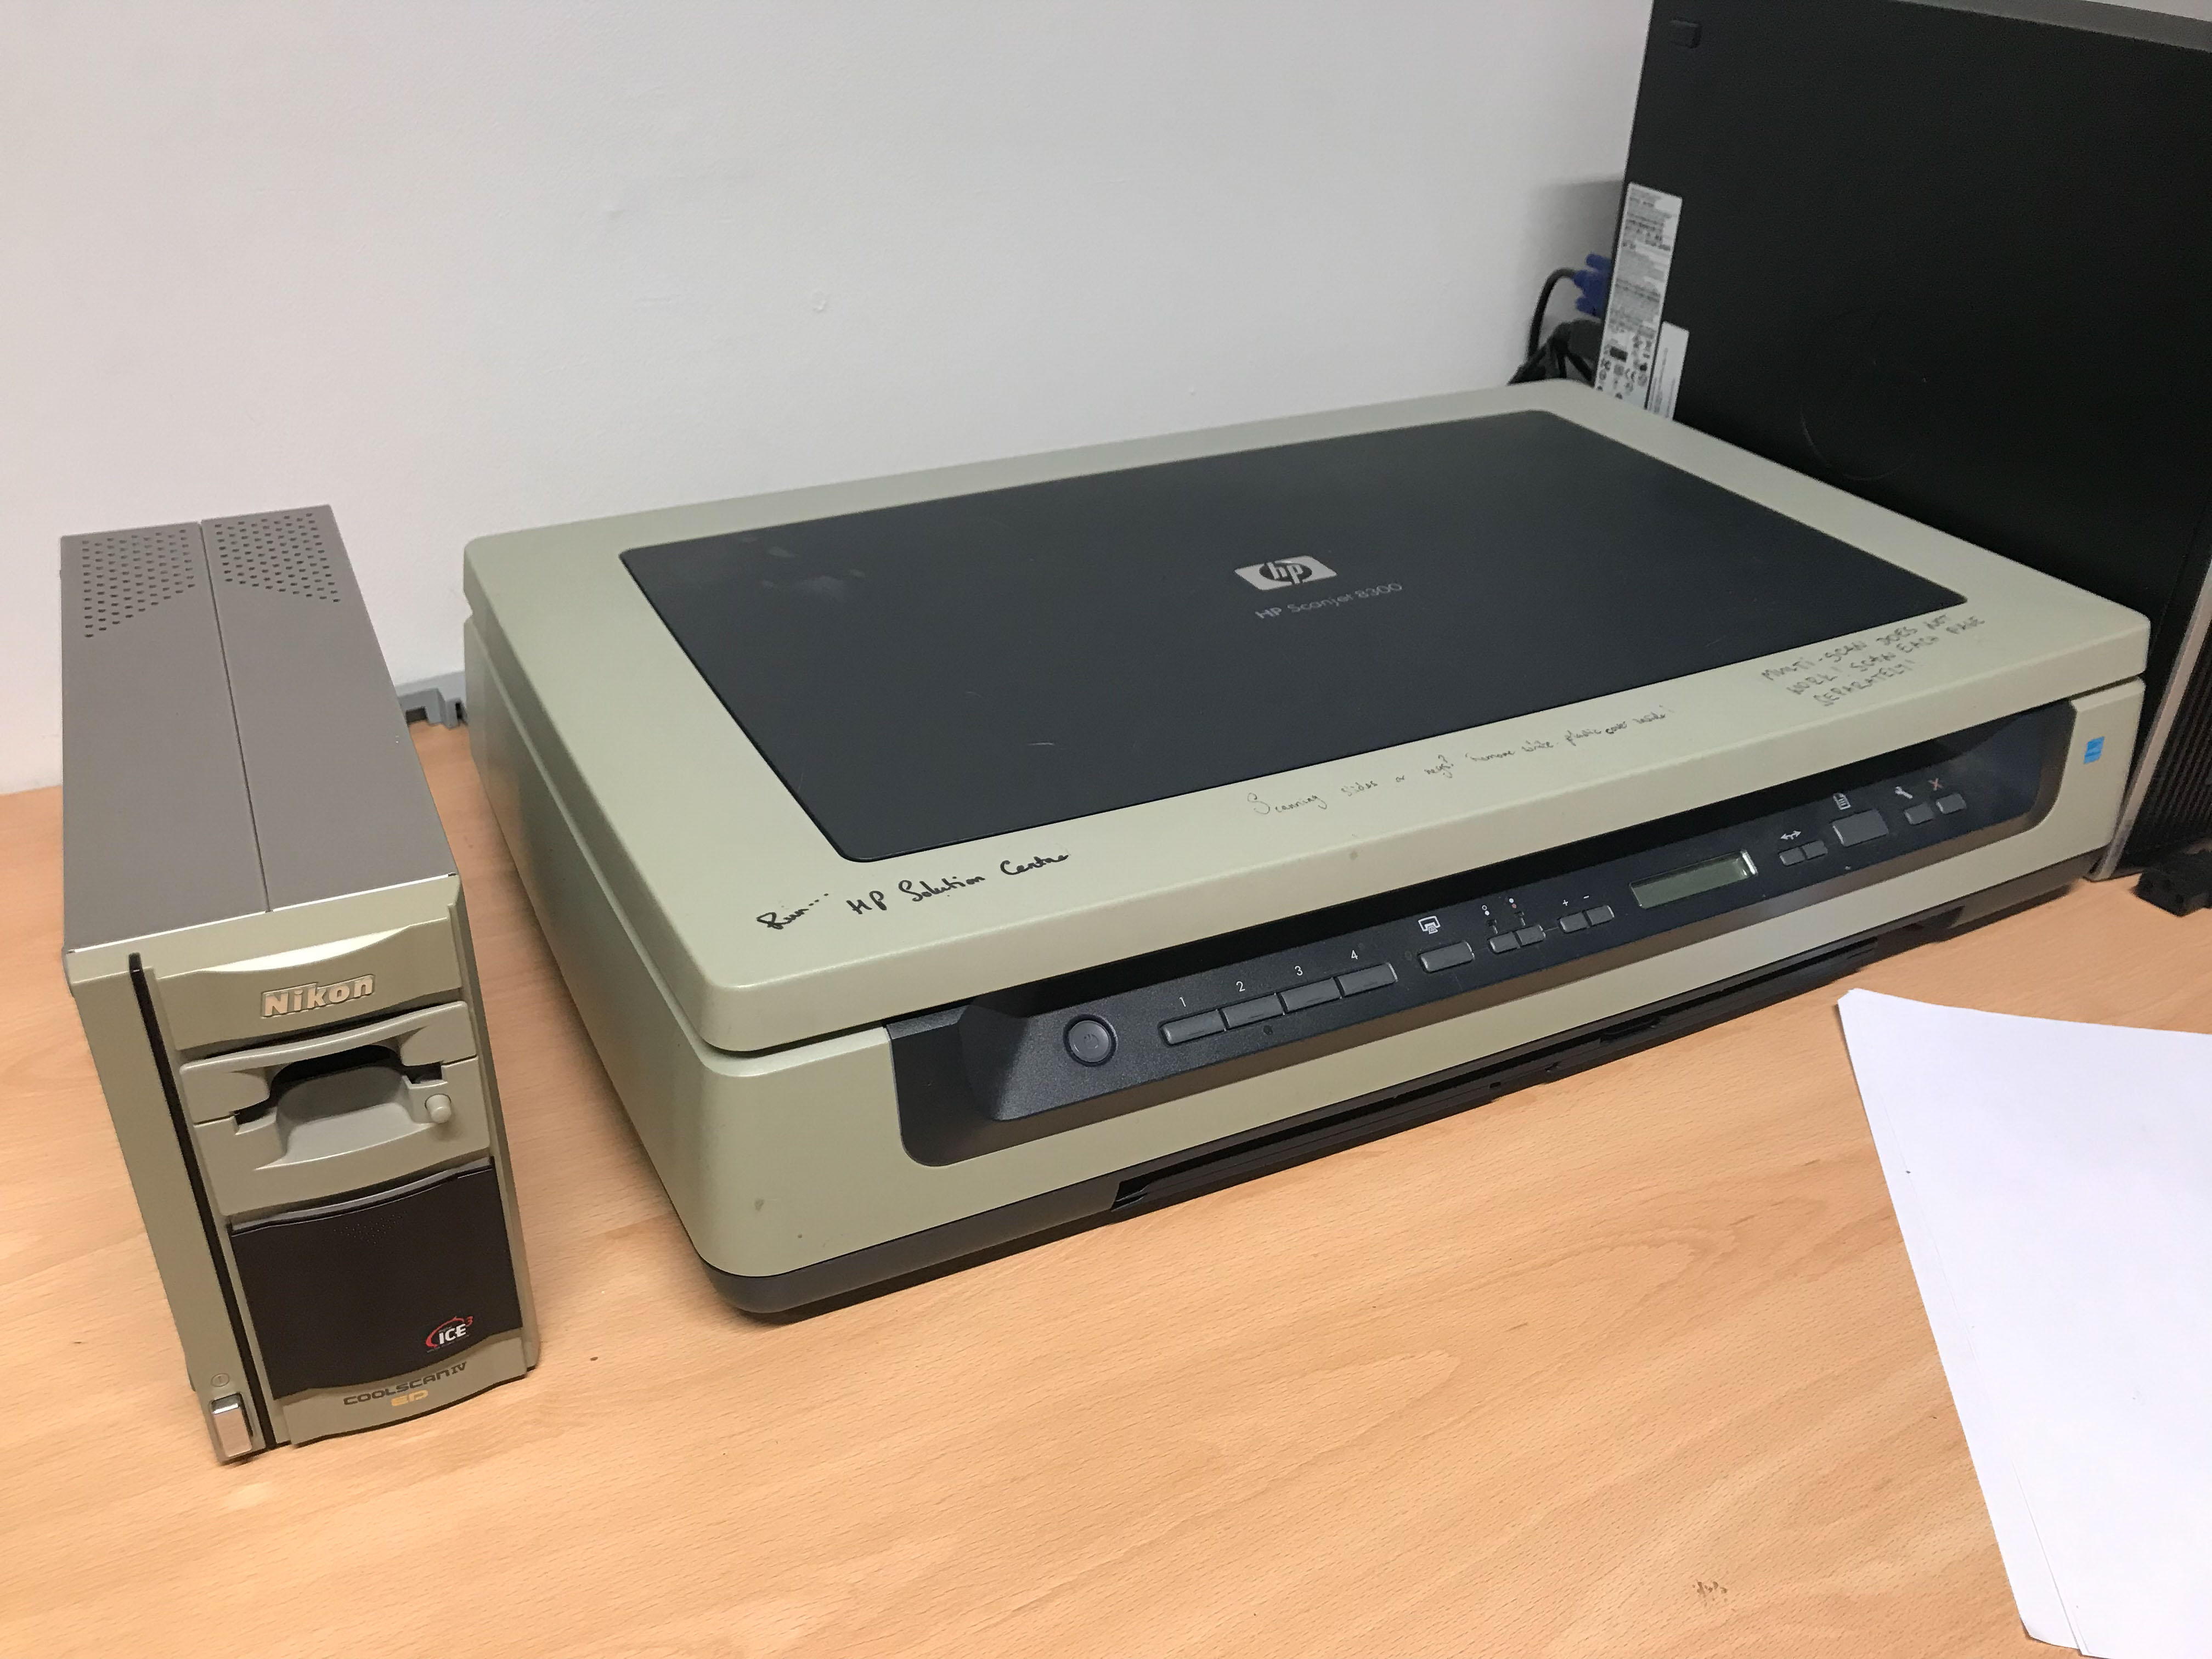
Although still boasting a decent scanning resolution of 2900 dpi, the Nikon Coolscan IV ED's software is no longer supported by Nikon and is therefore incompatible with all current operating systems (only compatible with Windows XP and MacOS 10.1.x, Puma). The only way around this issue is to purchase third-party software developed for compatibility with a range of scanners. There are two main options in the market:
The versions tested of each software were:
Trial versions of each software were employed to test the scanner before committing funds towards purchasing full versions. While VueScan appeared affordable, investing in SilverFast software would require significantly higher quality results to offset its price tag. In all cases throughout testing, dust was removed using an air blower and non-abrasive wipes before scanning or digitising the slides (see Section 2.3).
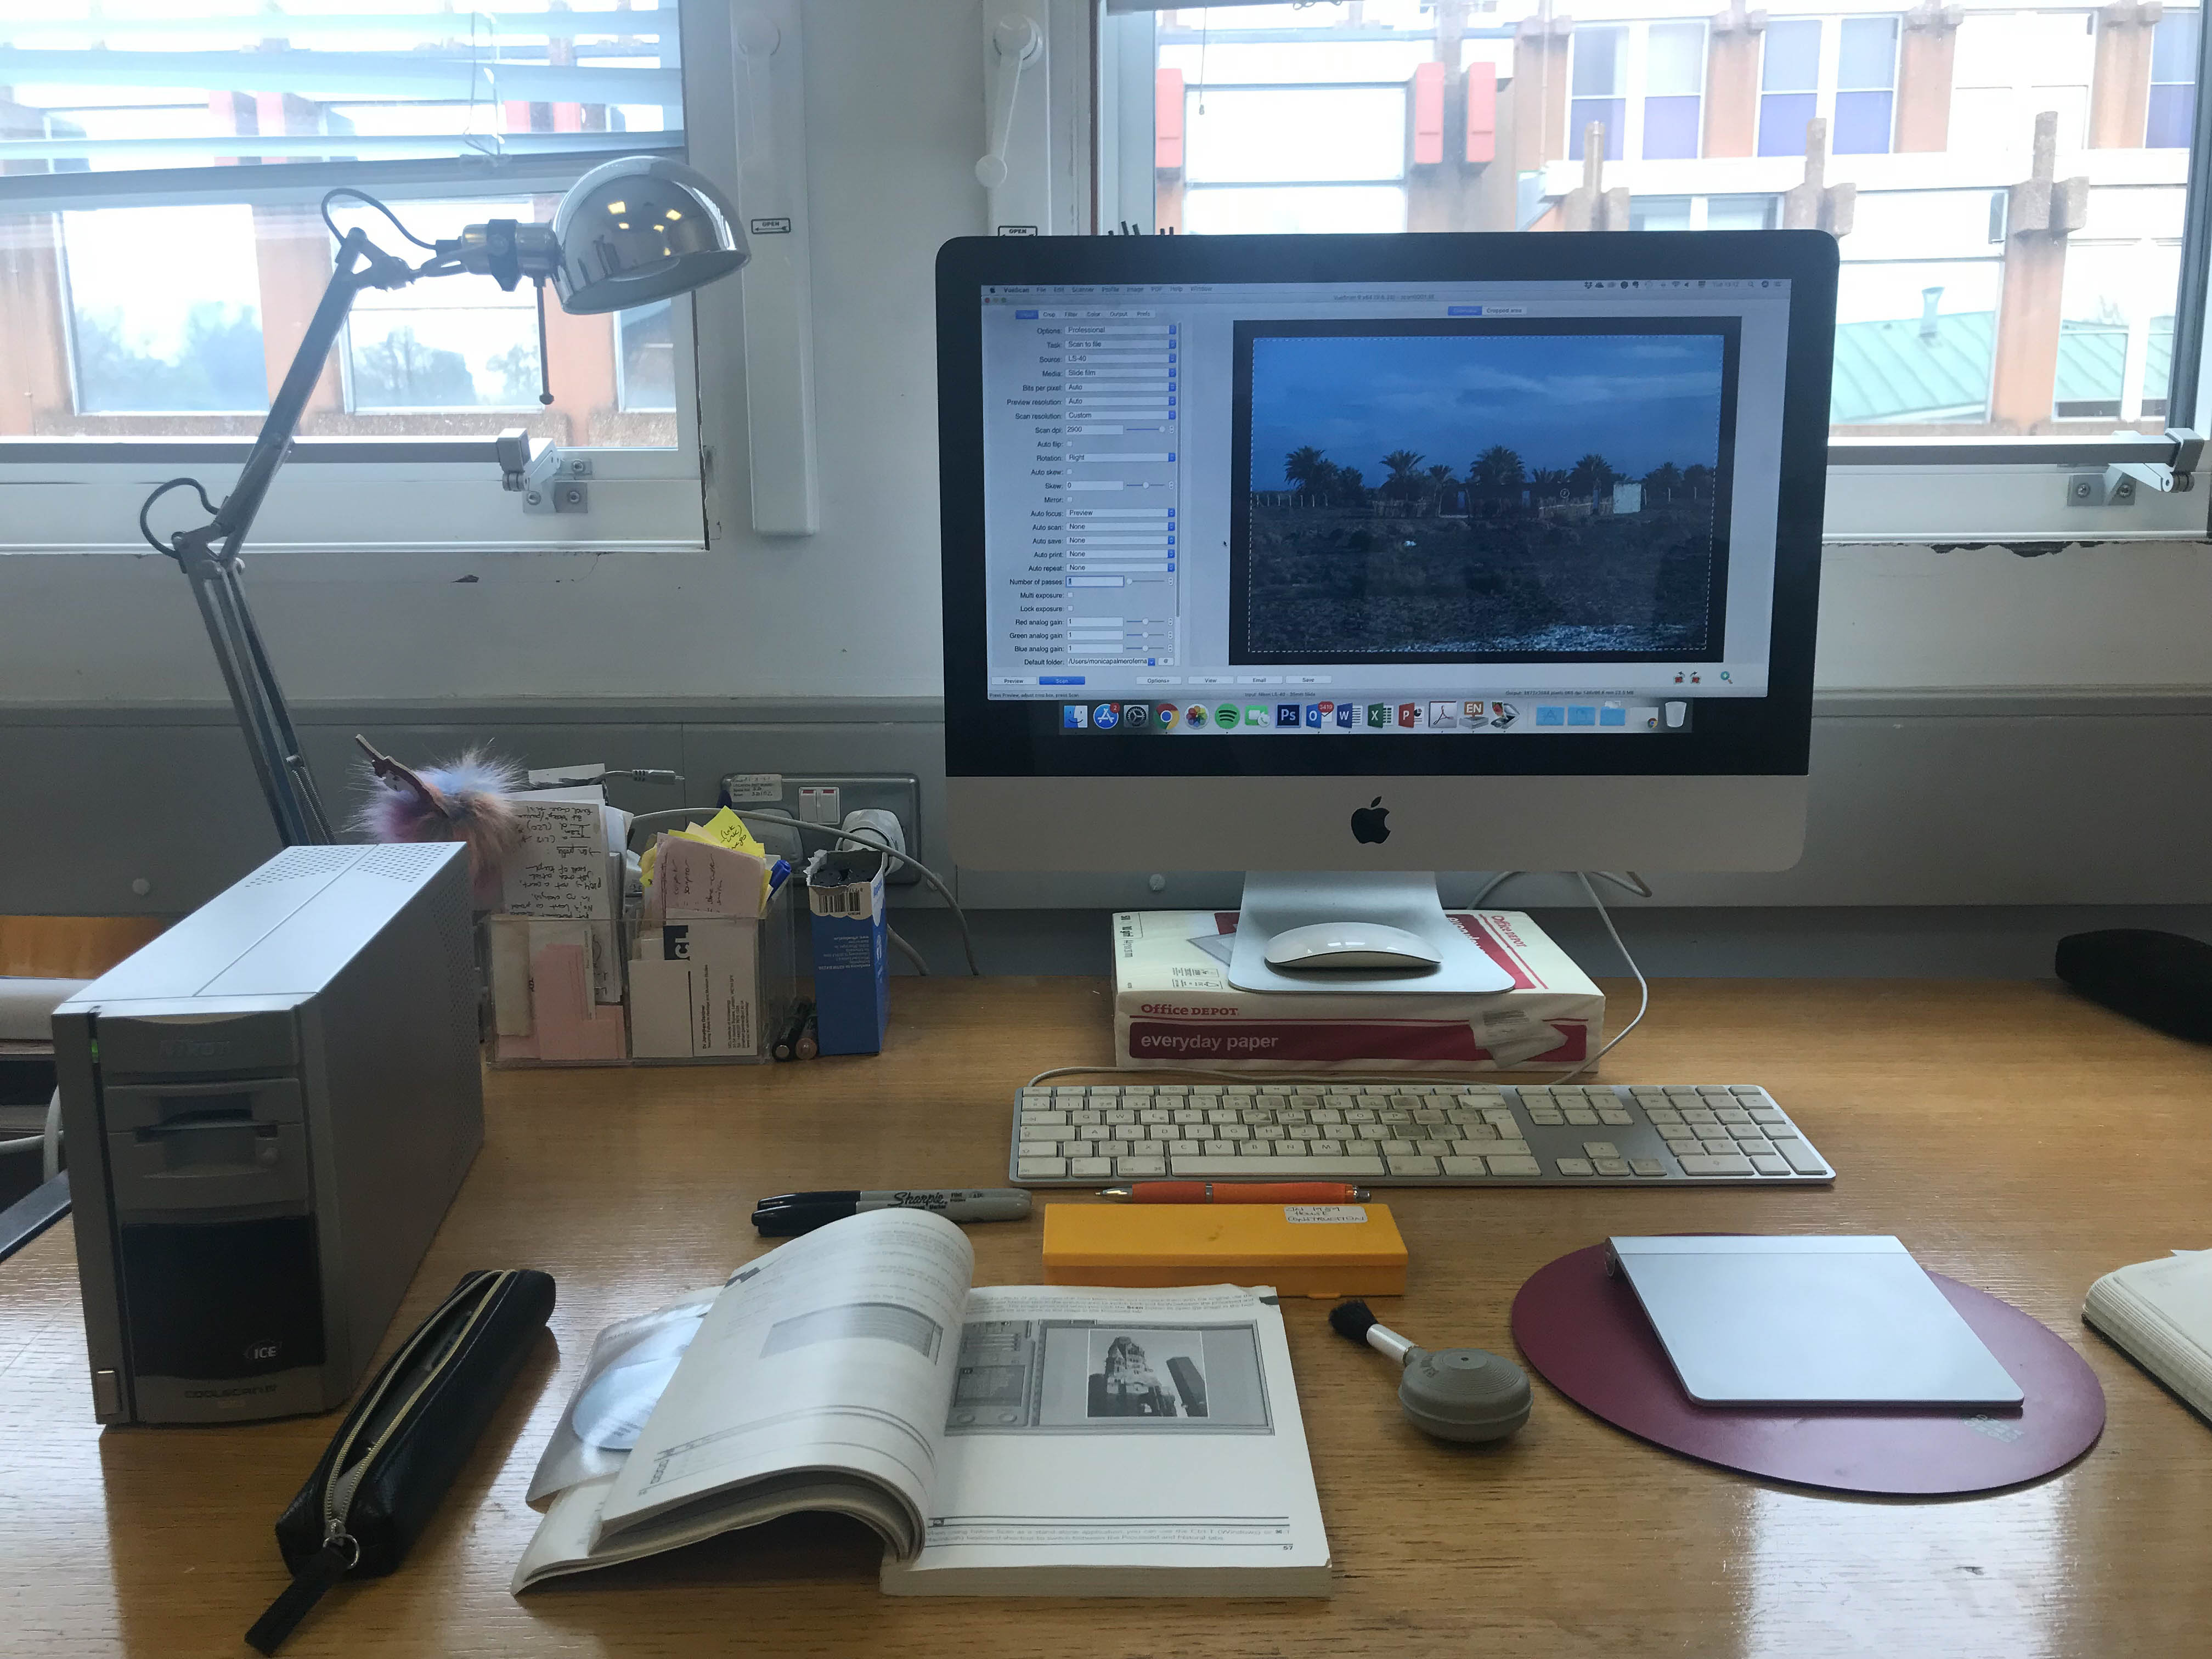
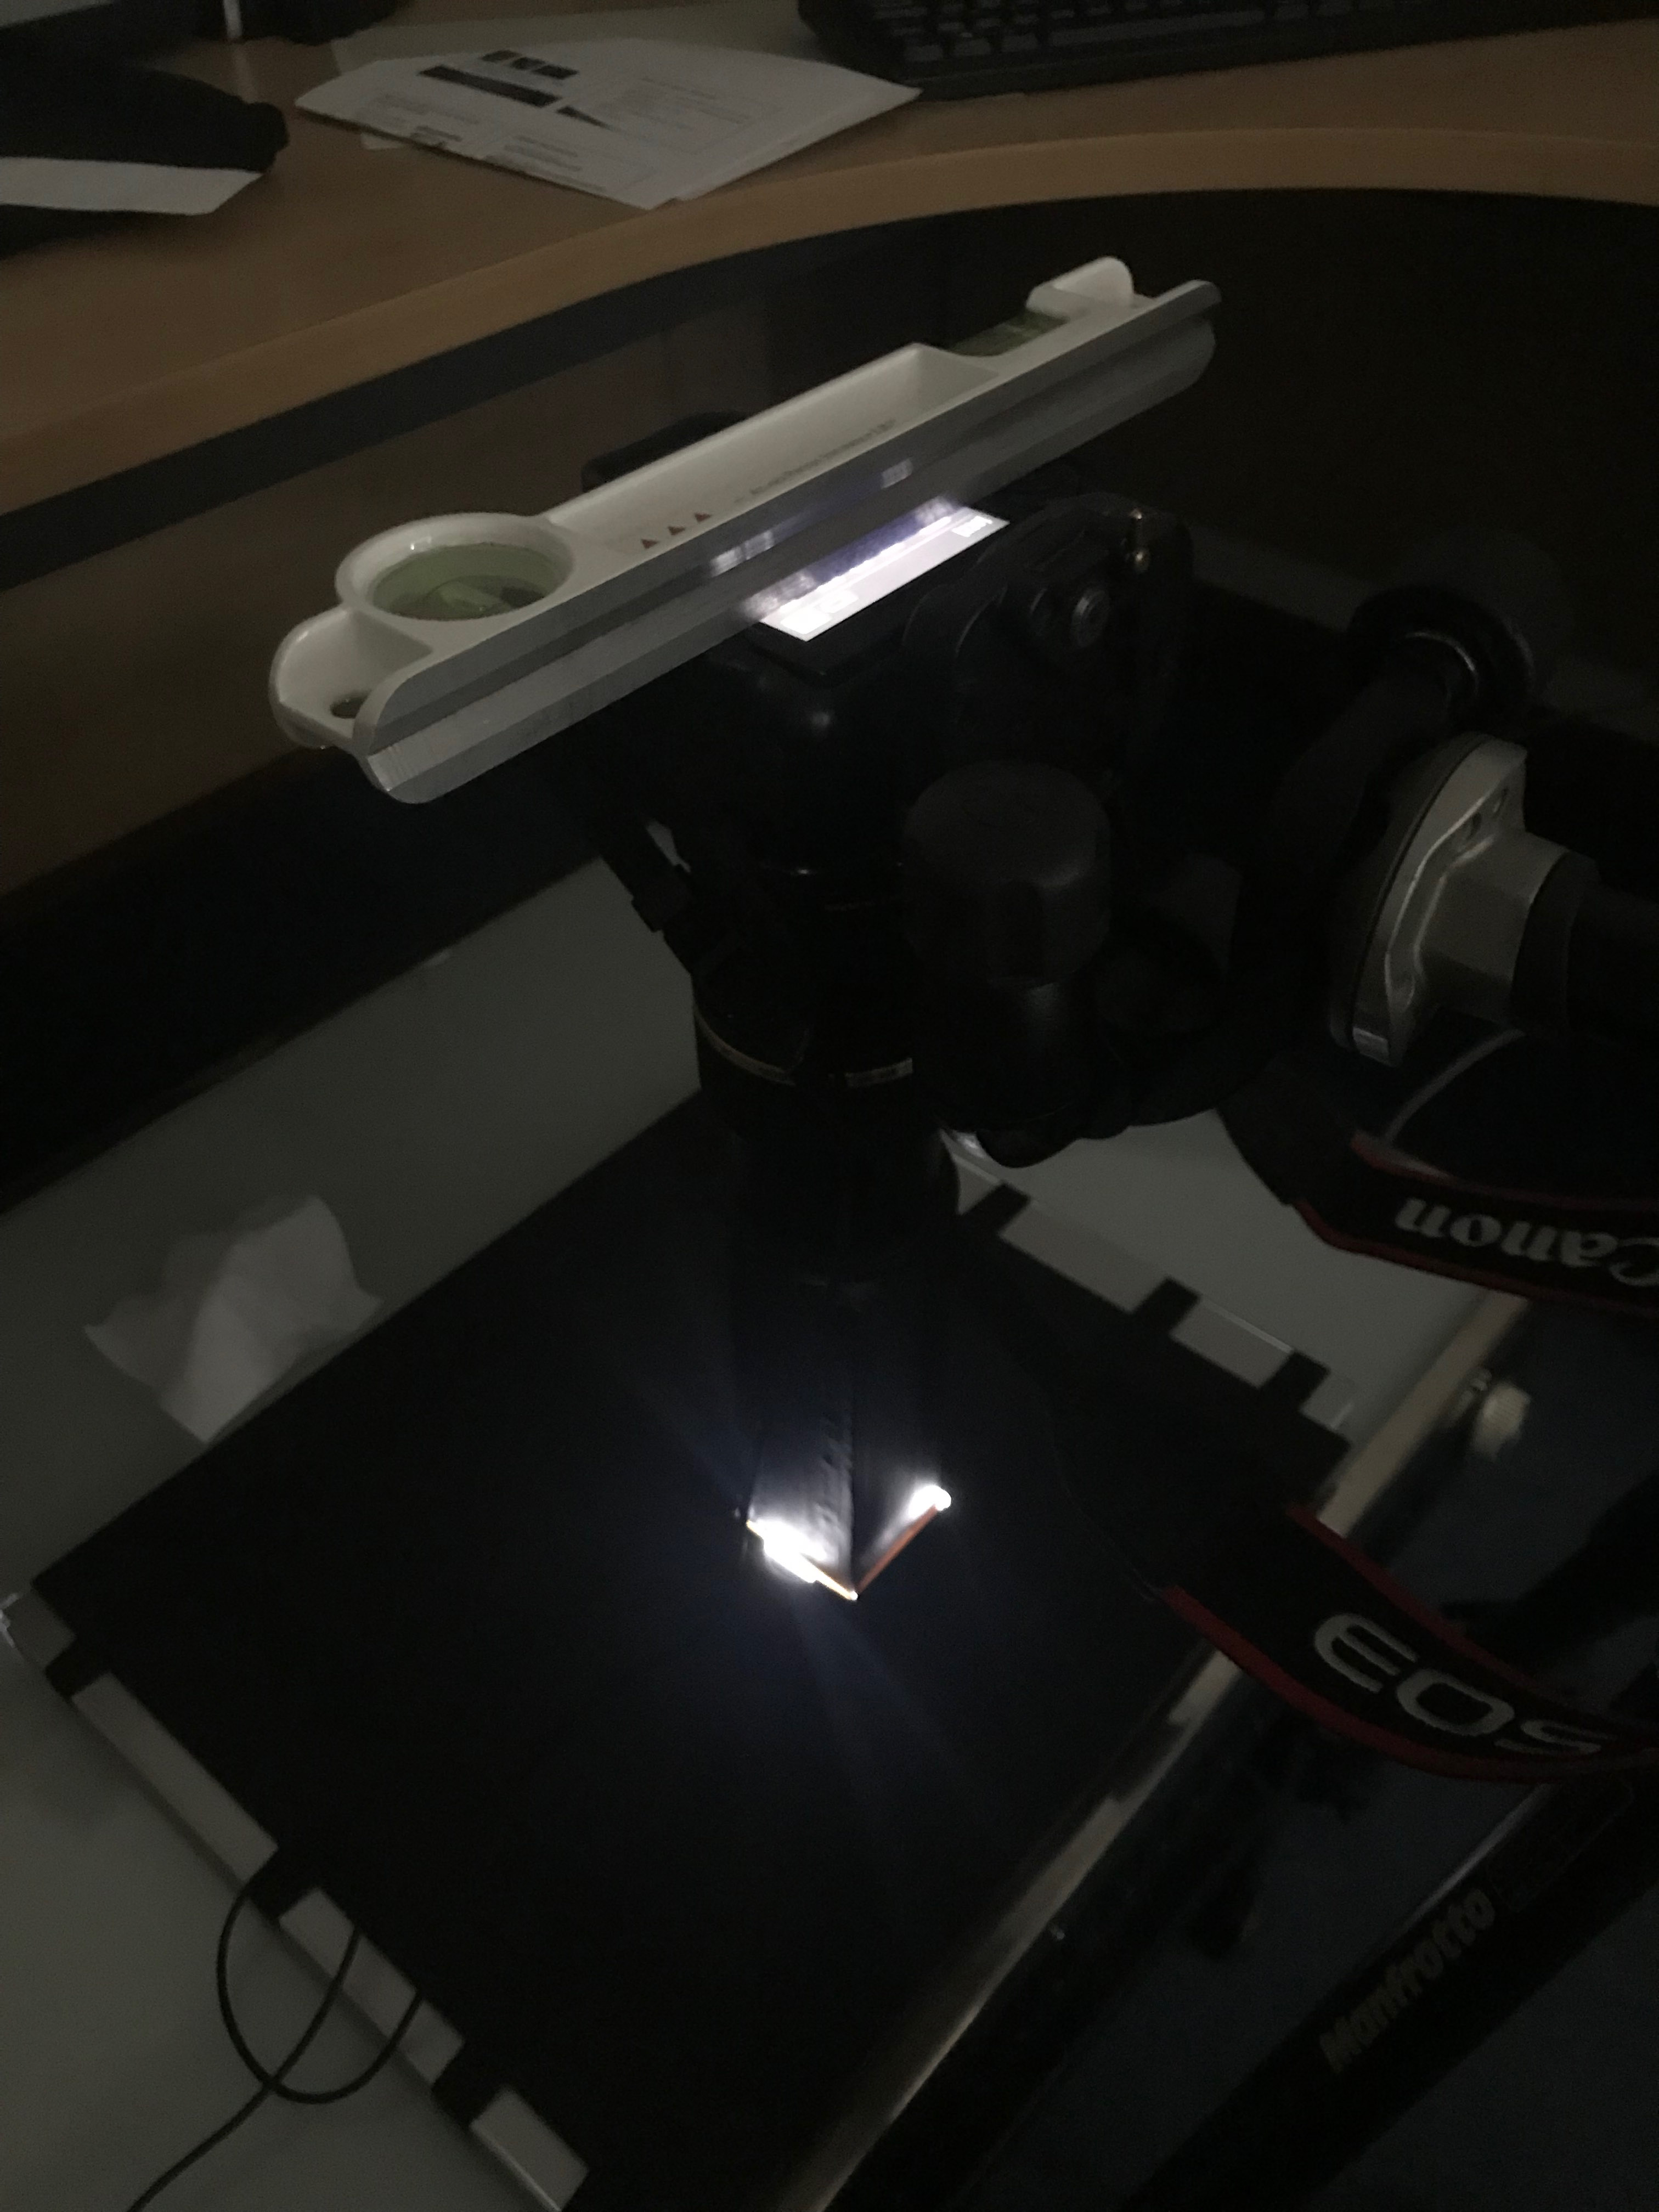
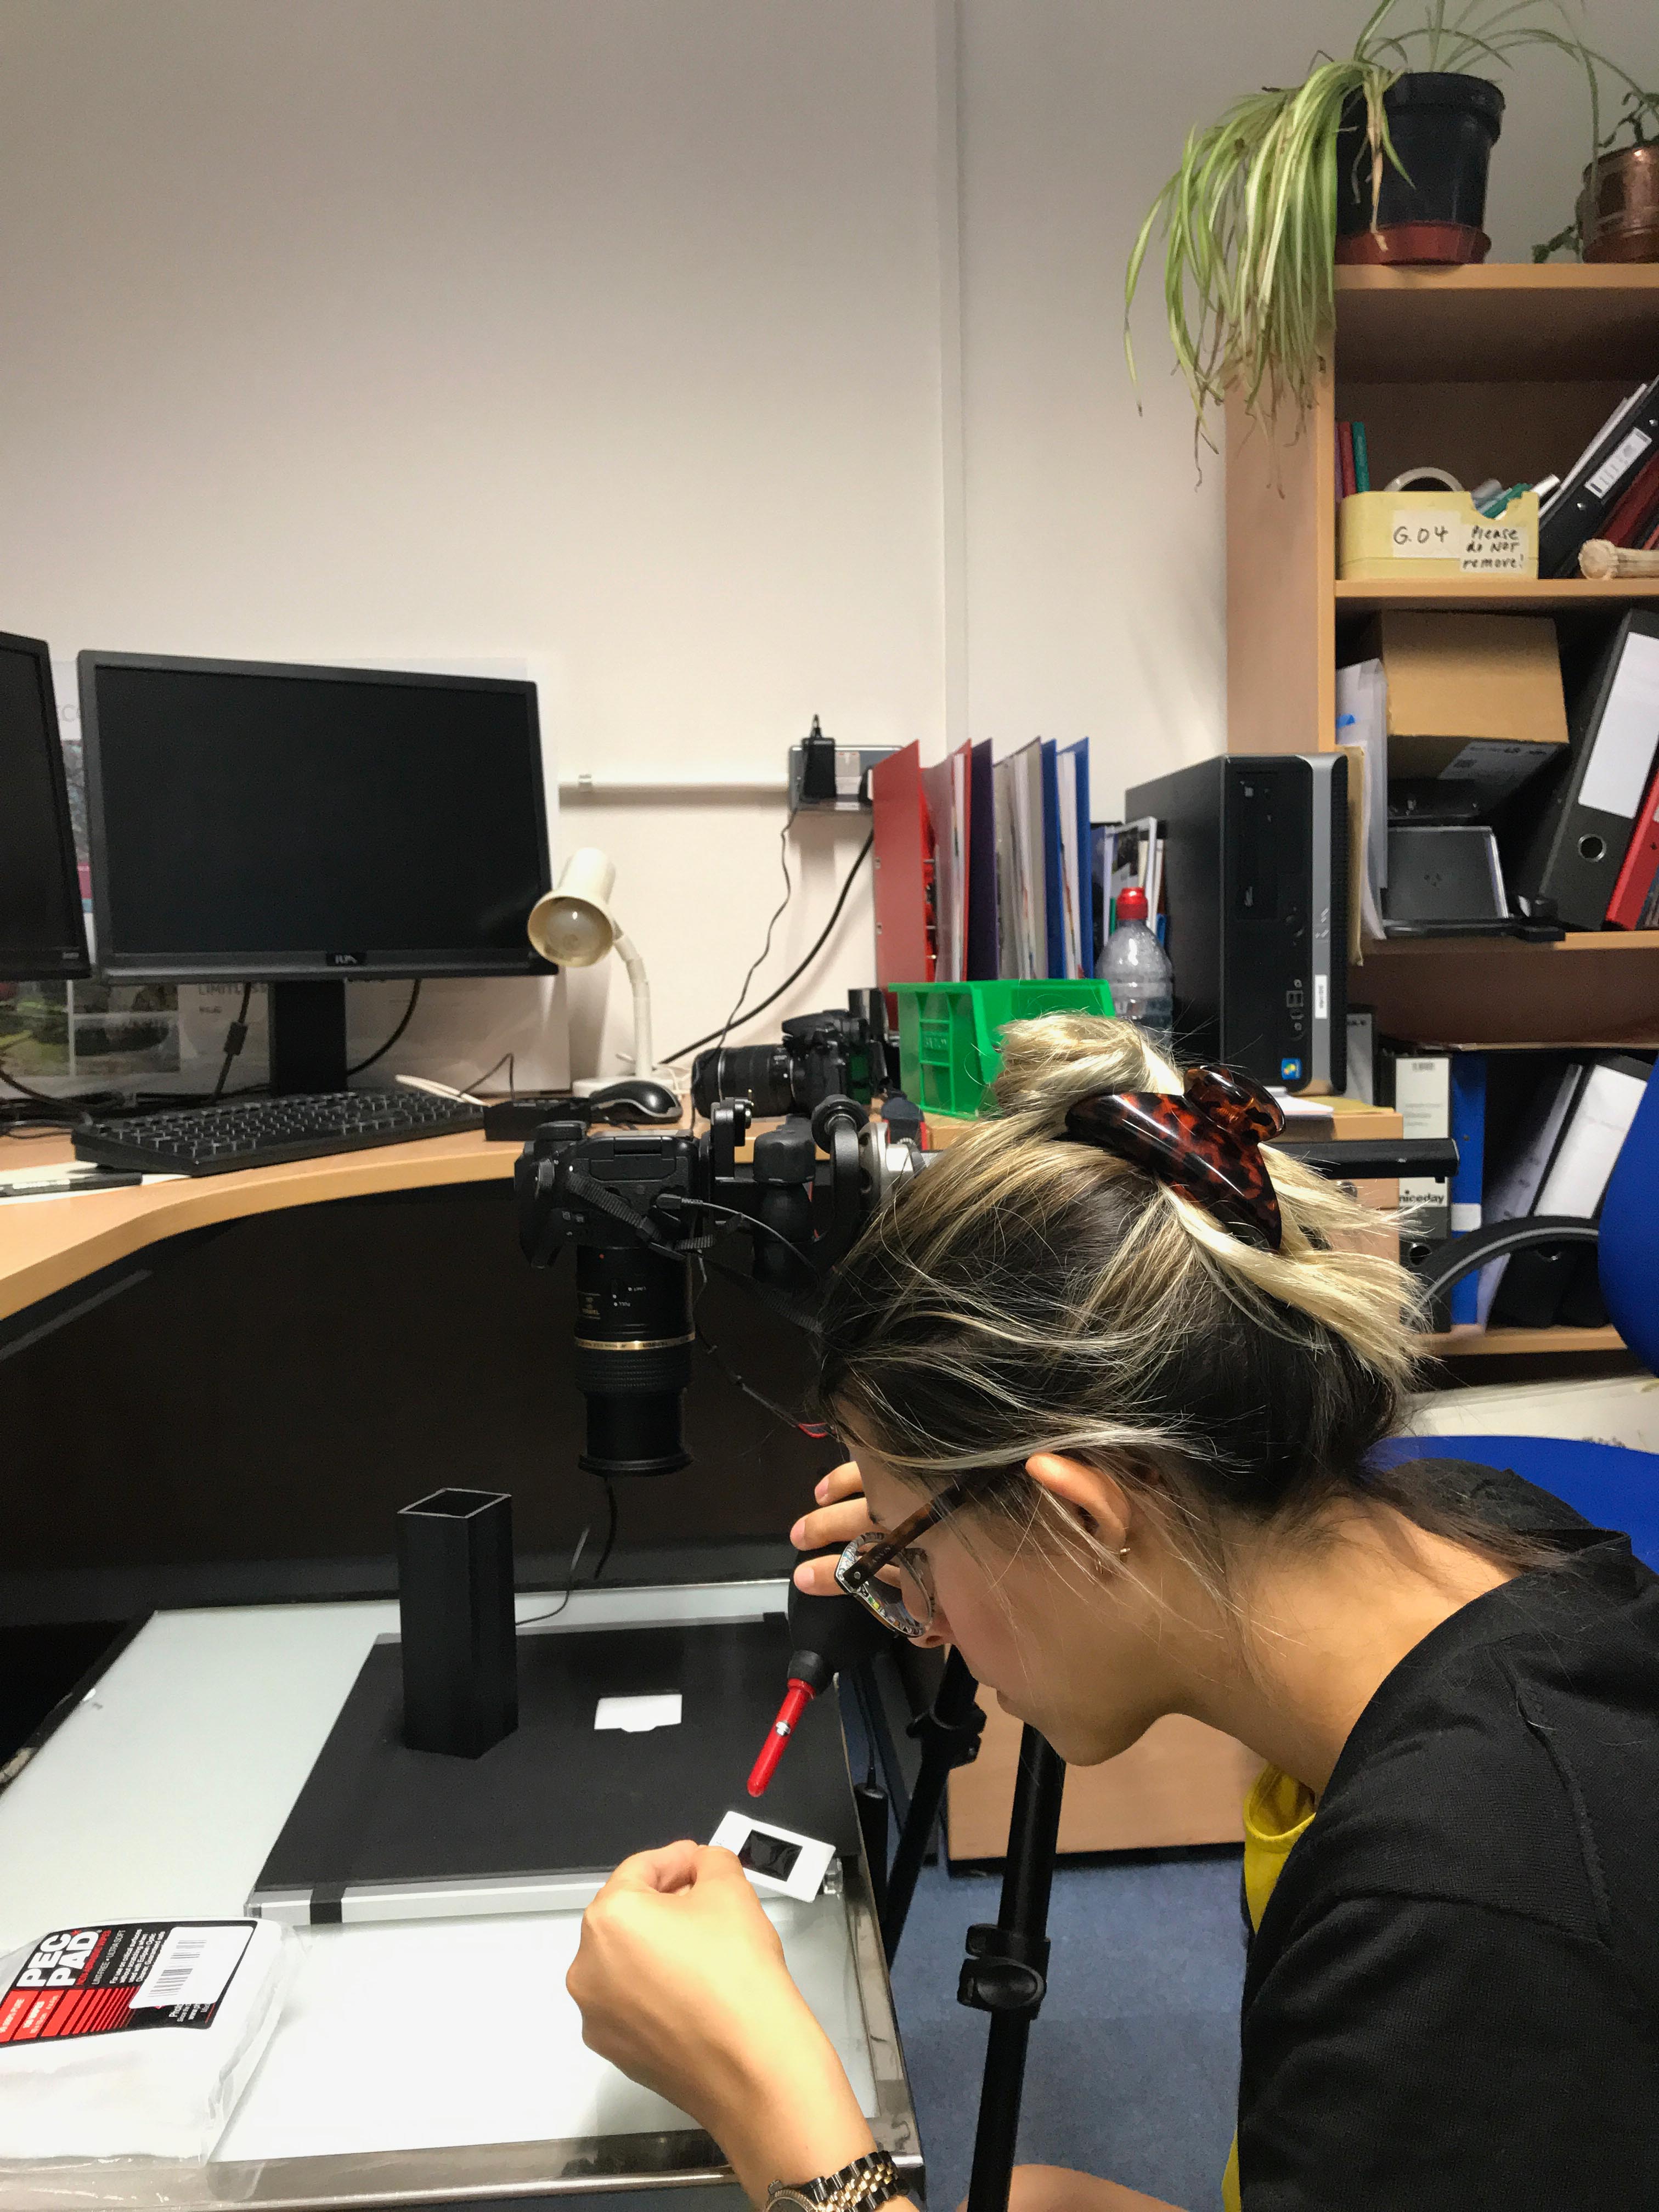
The results from the tests were mixed. Figure 3 shows the set up while testing VueScan. The Nikon scanner was tested using an iMac computer with macOS High Sierra 10.13.4. Although scanners come with scratch and dust removal features, it was decided after initial trials that while this technology can be useful for everyday use, it contravenes the principles of digital preservation for archival purposes, as discussed previously. Therefore, any enhancement techniques should be carried out separately and without altering the original, archival quality scans or digital files.
Figure 13 and Figure 14 show the results obtained from several tests carried out on two sample slides (JN25_06 and JN25_09) using a variety of methods. Table 1 provides full details of the settings and resolution of each test image from Figures 13 and 14. These slides were chosen as they did not contain more sensitive excavation data and therefore could be handled more freely to test the various methods. The slides were challenging as they presented complex landscape and portrait scenes in low lighting and high contrast conditions (sunrise), which challenged the scanners to a higher degree than photographs taken in more balanced lighting conditions but served the purpose of highlighting the strengths and weaknesses of each method assessed.
| Figure | Processed by | Hardware | Processed? | Processing Software | Processing/Camera Settings Details | Camera Resolution | Scanner dpi | Photo Quality | File Type | File Size |
|---|---|---|---|---|---|---|---|---|---|---|
| 13a | MPF | Nikon Coolscan IV ED | Y | SilverFast Ai Studio 8.8 | Type of Original>Kodachrome; SilverFast Scan Type>48 Bit Color; Auto Color; Scratch and Dust removal (light) | (eq. 10.4 MP) | 2900 | 300 ppi | TIFF | 68.22 MB |
| 13b | MPF | Nikon Coolscan IV ED | Y | SilverFast HDR Studio 8 | Type of Original>Kodachrome; SilverFast Scan Type>48 Bit HDR Color; Auto Color with Black point adjustment and colour correction in histogram | (eq. 10.4 MP) | 2900 | 300 ppi | TIFF | 68.65 MB |
| 13c | MPF | Nikon Coolscan IV ED | Y | Adobe Photoshop Lightroom Classic 8.3.1. | Processed from 14b; Auto Tone (Exposure +0.35; Contrast +5; Highlights -76; Shadows +39; Whites -1; Blacks -8; Vibrance +18; Saturation +3) | (eq. 10.4 MP) | 2900 | 300 ppi | TIFF | 68.65 MB |
| 13d | MPF | HP Scanjet 8300 | Y | HP Proprietary software | Not documented. | – | 4800 | 600 ppi | TIFF | 42.17 MB |
| 13e | Digitize Media | Canon EOS Kiss X3 with 105 mm lens | N | – | ISO 3200, 1/2500 sec at f/5.0 | 15 MP | – | – | CR2 | 21.03 MB |
| 13f | MPF | Canon EOS Kiss X3 with 105 mm lens | Y | Adobe Camera Raw 11.3 | Processed from 14e White Balance and Auto Exposure | 15 MP | – | 300 ppi | TIFF | 43.10 MB |
| 13g | MPF | Canon EOS 80D with TAMROM SP 90 mm F/2.8 Di MACRO 1:1 272EE | N | – | ISO 125, AV Mode, 1/125 sec at f/8; manual WB 6500 Kelvin; centre-weighted average metering | 24 MP | – | – | CR2 | 27.28 MB |
| 13h | MPF | Canon EOS 80D with TAMROM SP 90 mm F/2.8 Di MACRO 1:1 272EE | Y | Adobe Photoshop Lightroom Classic 8.3.1. | Processed from 14f; WB: Temp 8500; Tint 0 Tone: Exposure +0.80; Contrast +4; Highlights -80; Shadows +70; Whites 0; Blacks -22 Calibration: Green Primary Hue +20; Blue Primary Hue -10; Blue Primary Saturation -20 | 24 MP | – | – | CR2+xmp | 27.28 MB |
| 14a | MPF | Nikon Coolscan IV ED | Y | VueScan 9 x64 (9.6.38) Professional Edition | Auto Levels; Restore Fading; Scratch and Dust removal | (eq. 10.4 MP) | 2900 | TIFF | 61.18 MB | |
| 14b | MPF | Nikon Coolscan IV ED | Y | SilverFast Ai Studio 8.8 | Auto Color | (eq. 10.4 MP) | 2900 | TIFF | 68.22 MB | |
| 14c | MPF | Nikon Coolscan IV ED | Y | SilverFast HDR Studio 8 | Auto Color | (eq. 10.4 MP) | 300 ppi | TIFF | 68.29 MB | |
| 14d | MPF | HP Scanjet 8300 | Y | HP Proprietary software | Not documented. | 4800 600 ppi | TIFF | 168.46 MB | ||
| 14e | Digitize Media | Canon EOS Kiss X3 with 105 mm lens | N | – | ISO 3200, 1/2500 sec at f/5.0 | 15 MP | – | – | CR2 | 22.27 MB |
| 14f | MPF | Canon EOS Kiss X3 with 105 mm lens | Y | Adobe Camera Raw 11.3 | Processed from 15e White Balance and Auto Exposure | 15 MP | 300 ppi | TIFF | 43.10 MB | |
| 14g | MPF | Canon EOS 80D with TAMROM SP 90 mm F/2.8 Di MACRO 1:1 272EE | N | – | ISO 125, AV Mode, 1/8 sec at f/8; manual WB 6500 Kelvin; centre-weighted average metering | 24 MP | – | – | CR2 | 28.38 MB |
| 14h | MPF | Canon EOS 80D with TAMROM SP 90 mm F/2.8 Di MACRO 1:1 272EE | Y | Adobe Photoshop Lightroom Classic 8.3.1. | Processed from 15g; WB: Temp 8000; Tint 0 Tone: Exposure -0.59; Contrast +7; Highlights -81; Shadows +54; Whites 0; Blacks -10 Calibration: Green Primary Hue +20; Blue Primary Hue -10; Blue Primary Saturation -20 | 24 MP | – | – | CR2+xmp | 28.38 MB |
It will appear immediately clear that the results obtained with VueScan were significantly poorer than the results obtained with SilverFast (cf. Figure 14a and Figure 14b to Figure 14c for example). On average, each scan took about 3 to 5 minutes to complete, which was multiplied by three when using the HDR option offered by SilverFast. This time did not include the cleaning and handling time required for each slide, which means each slide required at least 5 minutes to process from start to finish and before any post-processing.
Figure 13d (HP Scanjet 8300) and Figure 14a (Nikon Coolscan IV ED + VueScan) clearly demonstrate the blue tint typical of Kodachrome scans, which the SilverFast software (Figure 13a, Figure 13b, Figure 13c, Figure 14b, Figure 14c) seems to correct using its Kodrachrome presets but without an IT8 calibrating target. However, after processing of the scans, even SilverFast could not render details of the original that were visible to the naked eye when examining the slides. The facial features of the man in JN25_06 remained largely obscured (Figure 13a) even with the HDR feature that offers lossless, improved scanning of Kodachrome's dynamic range (Figure 13b). It was impossible to define the features further in post-processing of the images using Lightroom to adjust the exposure and contrast (Figure 13c).
The HP Scanjet 83000 (Figure 2) rendered largely unusable and strange scans of the Kodachrome slides (Figure 13d and Figure 14d). Working with Lambert-Gates, the best results achieved by her with this scanner are shown in Figure 15a and Figure 16a. This option was discarded early on due to these poor results.
One option considered was outsourcing the scanning process to an external company, given the long processing times known for film scanners such as the Nikon Coolscan IV ED, at over 5 min per slide if not higher. A local reproduction company was contacted, Hobs Group. The company used a professional flatbed slide/film scanner which according to email correspondence had not been used in years. The company offered a price of £500 + VAT for 600 slides.
A professional photographic lab based in London was also contacted, METRO Imaging, who returned a quote of £5 + VAT per scan, thus a total of £3,935 + VAT. This option was beyond the means of this project, but it demonstrates the cost of producing high quality archival scans of slides and highlights the need to develop an economical, cost-effective method that may be applied internally to large archaeological collections without the means to commission professional scanning.
In recent years, the option of scanning analogue photographic material using a digital DSLR camera has received increasing attention from both amateurs and professionals. The exponential development of high-quality digital photography has opened the door to a new approach that could offer a more economical solution for scanning large photographic archives. To test this option, ten slides were sent to a local company specializing in slide digitisation for the general public, Digitize Media. The results appeared reasonably good for a price of around £200 for the whole dataset. However, upon closer inspection, the scans showed white noise after processing, which after investigation seemed to be caused by the high film speed employed, ISO 3200. This effect is clearly visible in Figure 13f and Figure 14f.
In light of the results obtained using the various methods and considering the time and funding constraints of the project, the possibility of reproducing and improving on the results obtained through DSLR scanning of the test slides was explored. The method developed through testing adapted aspects of Johnson's (2016) 'DSLR film scanning' guide and Day's (2019) DSLR "scanning" setup.
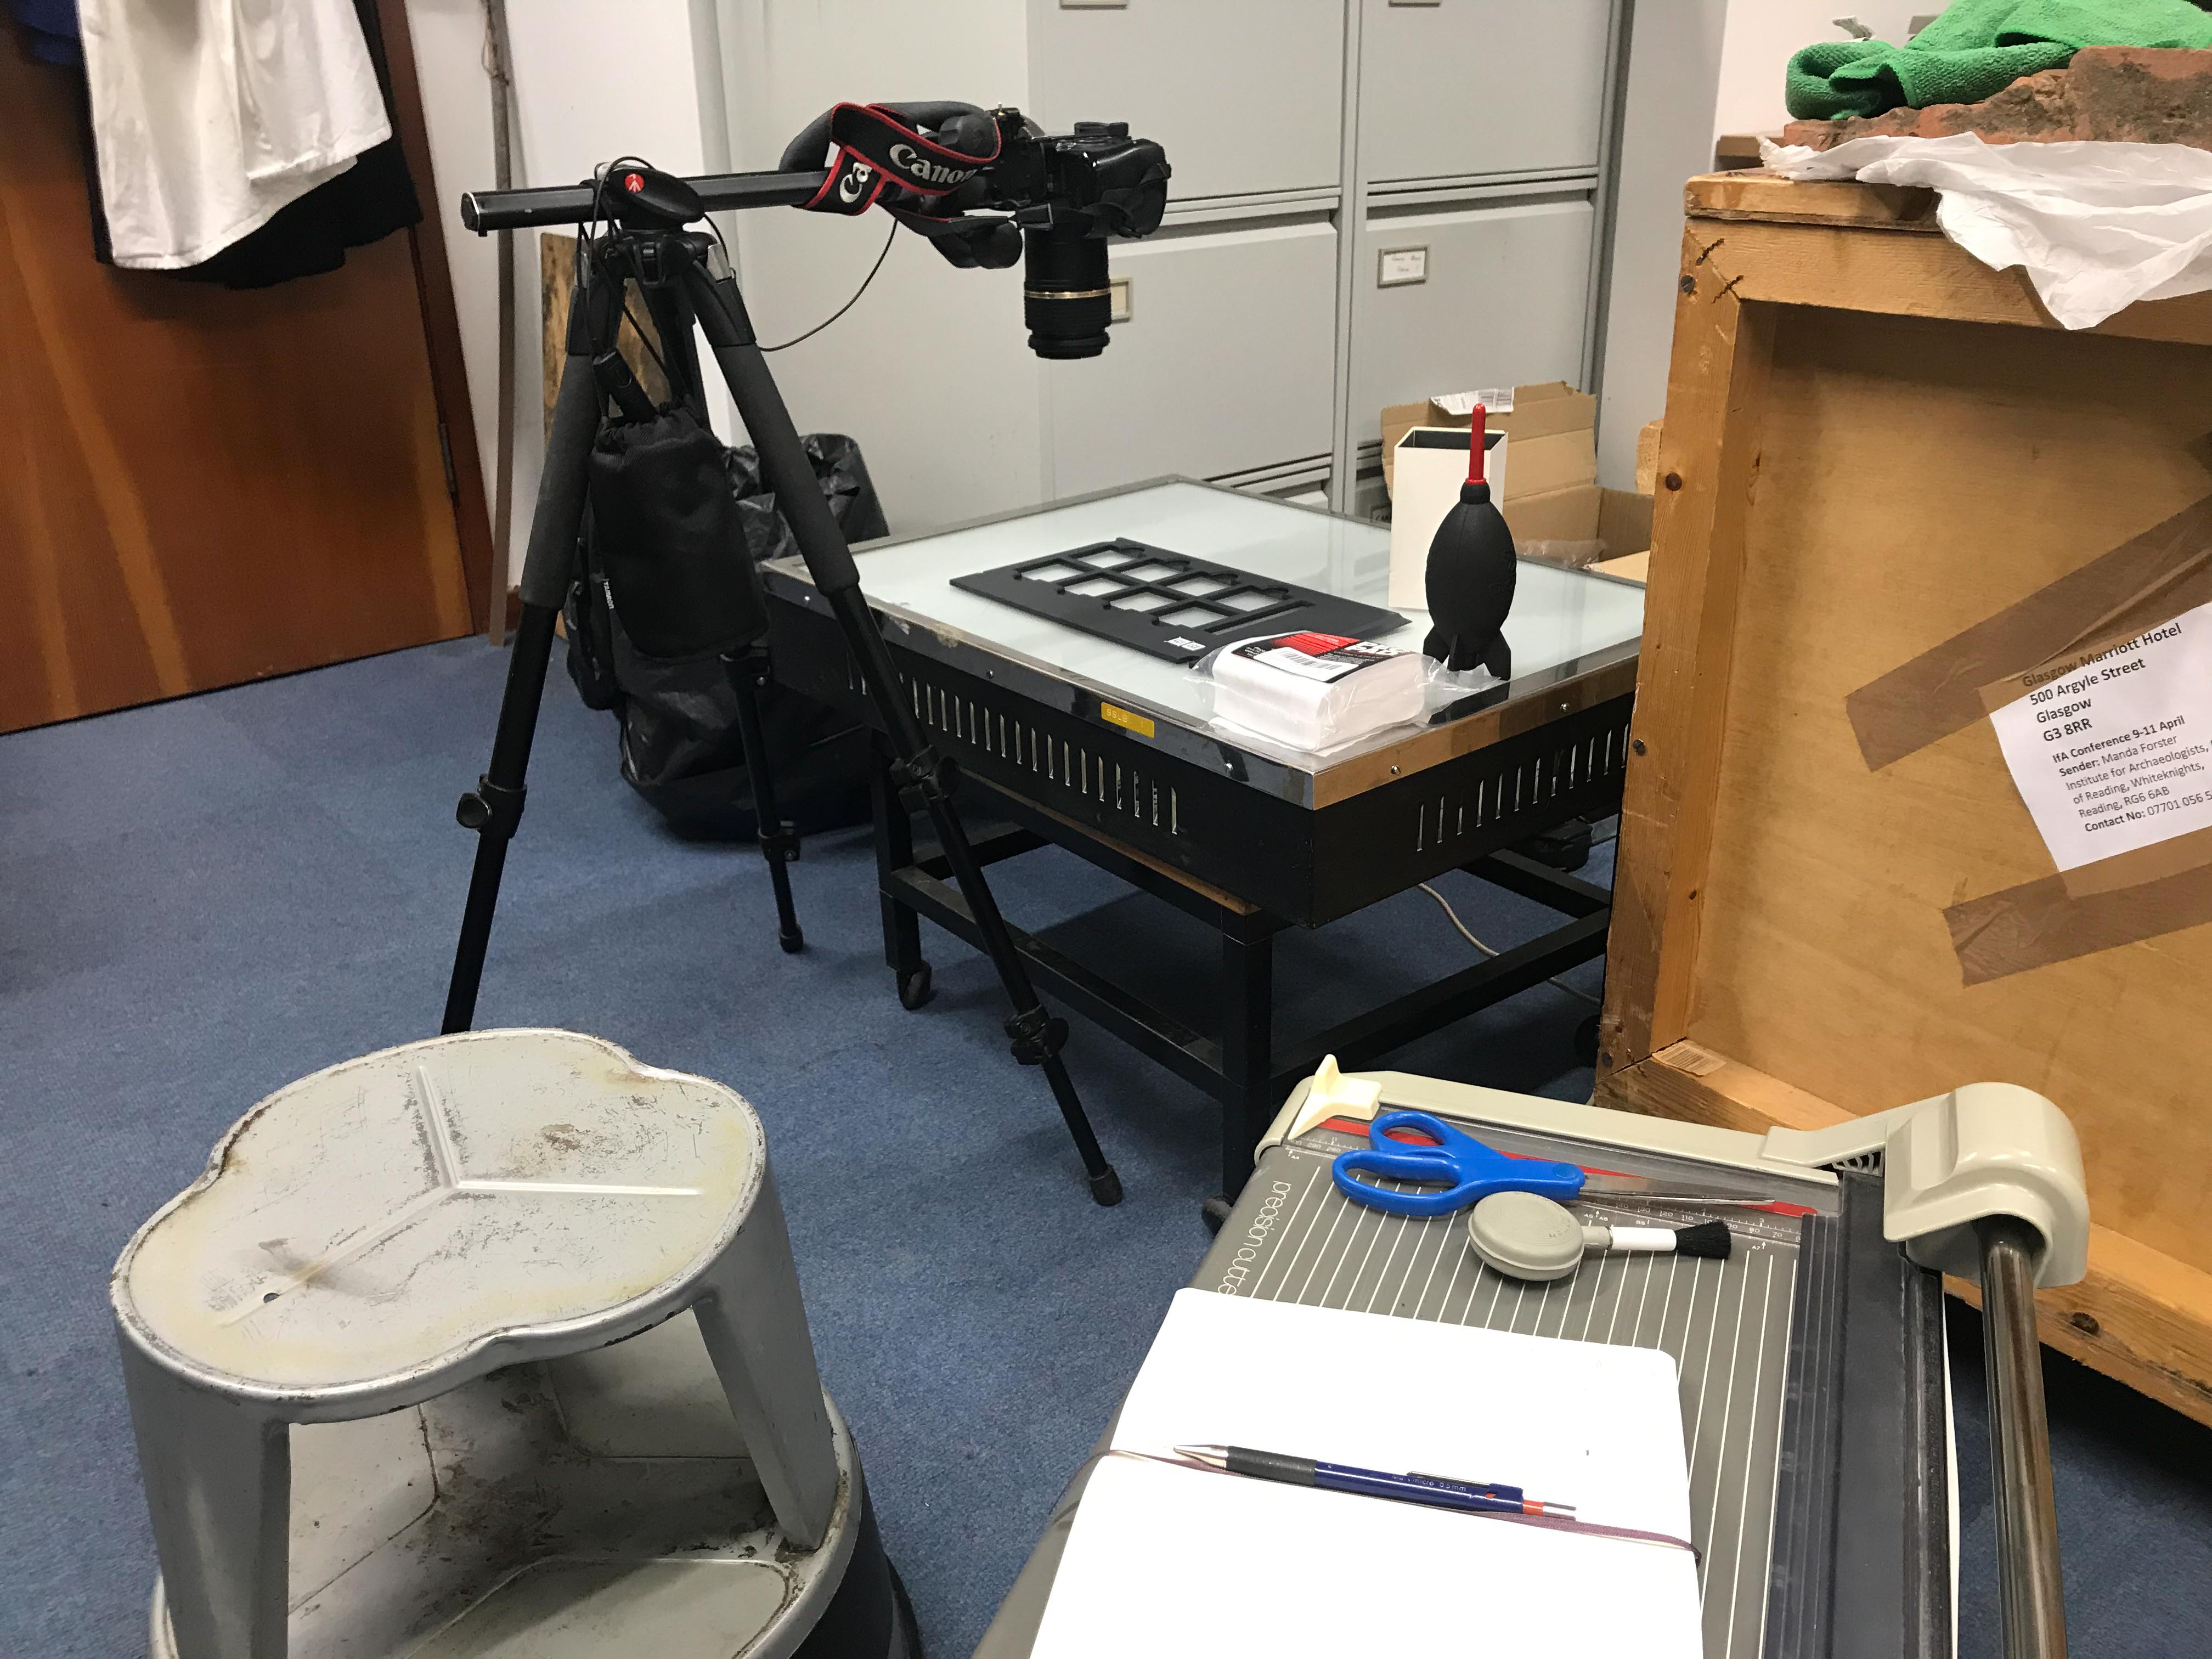
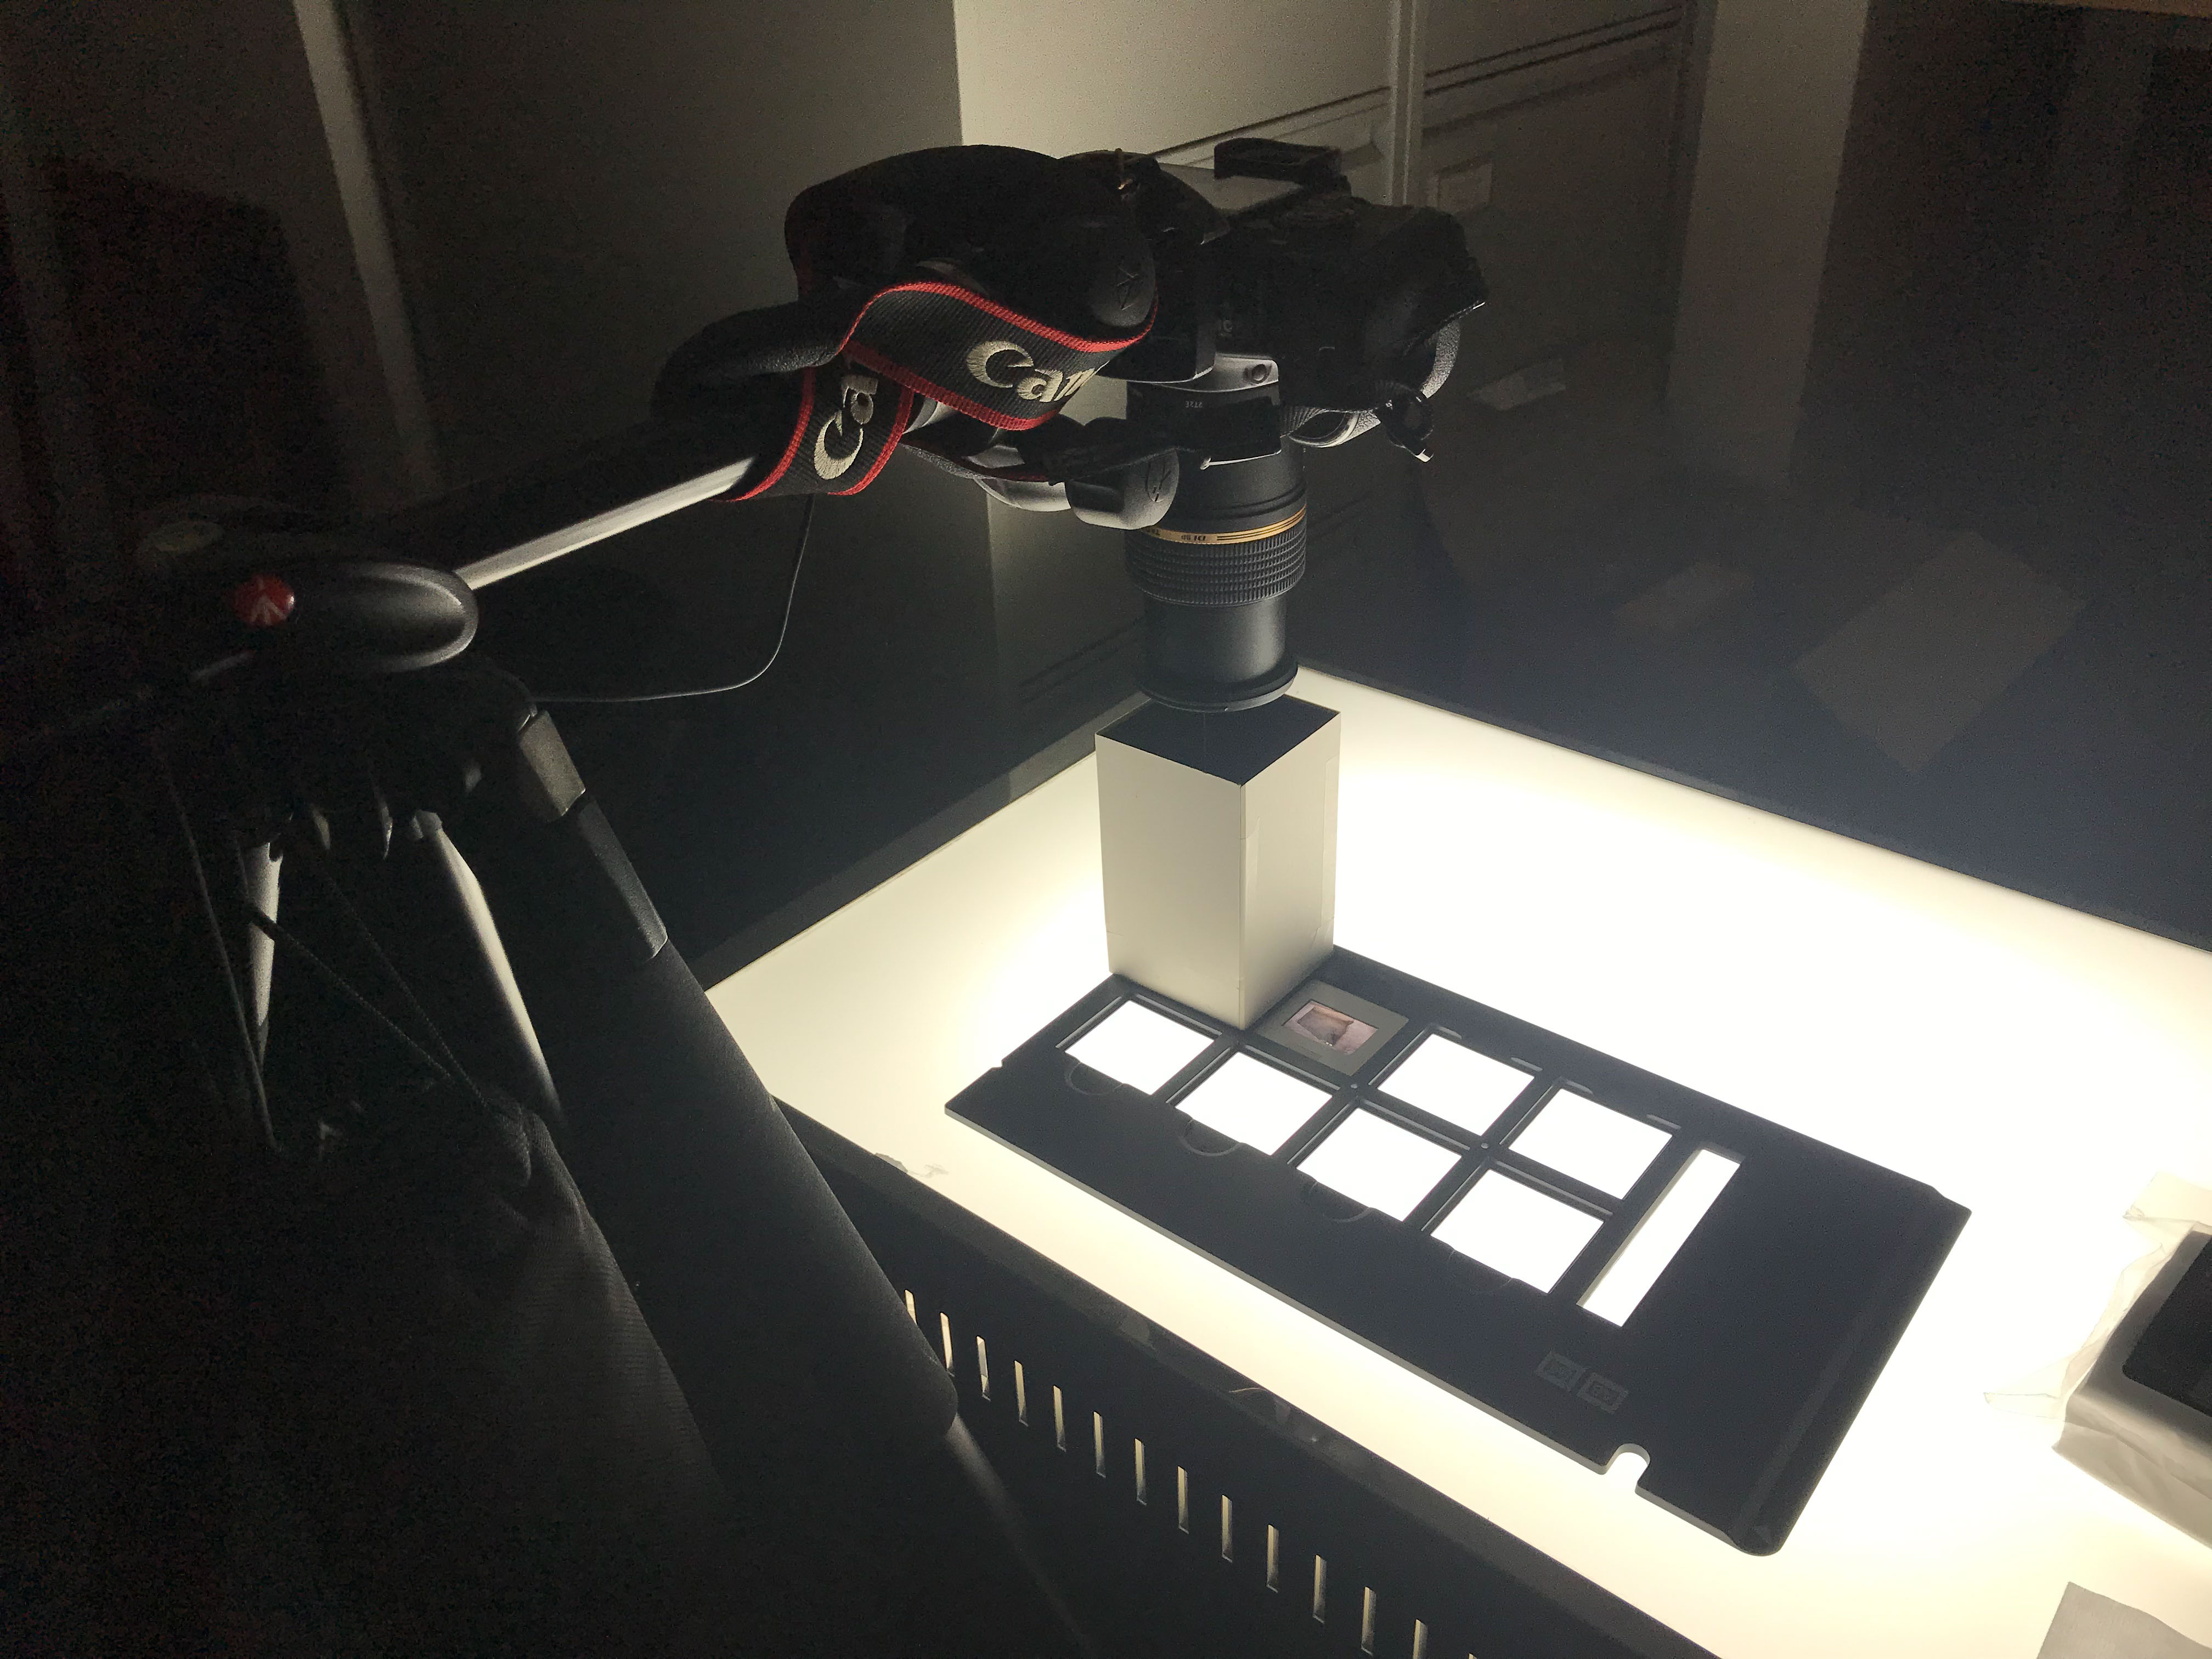
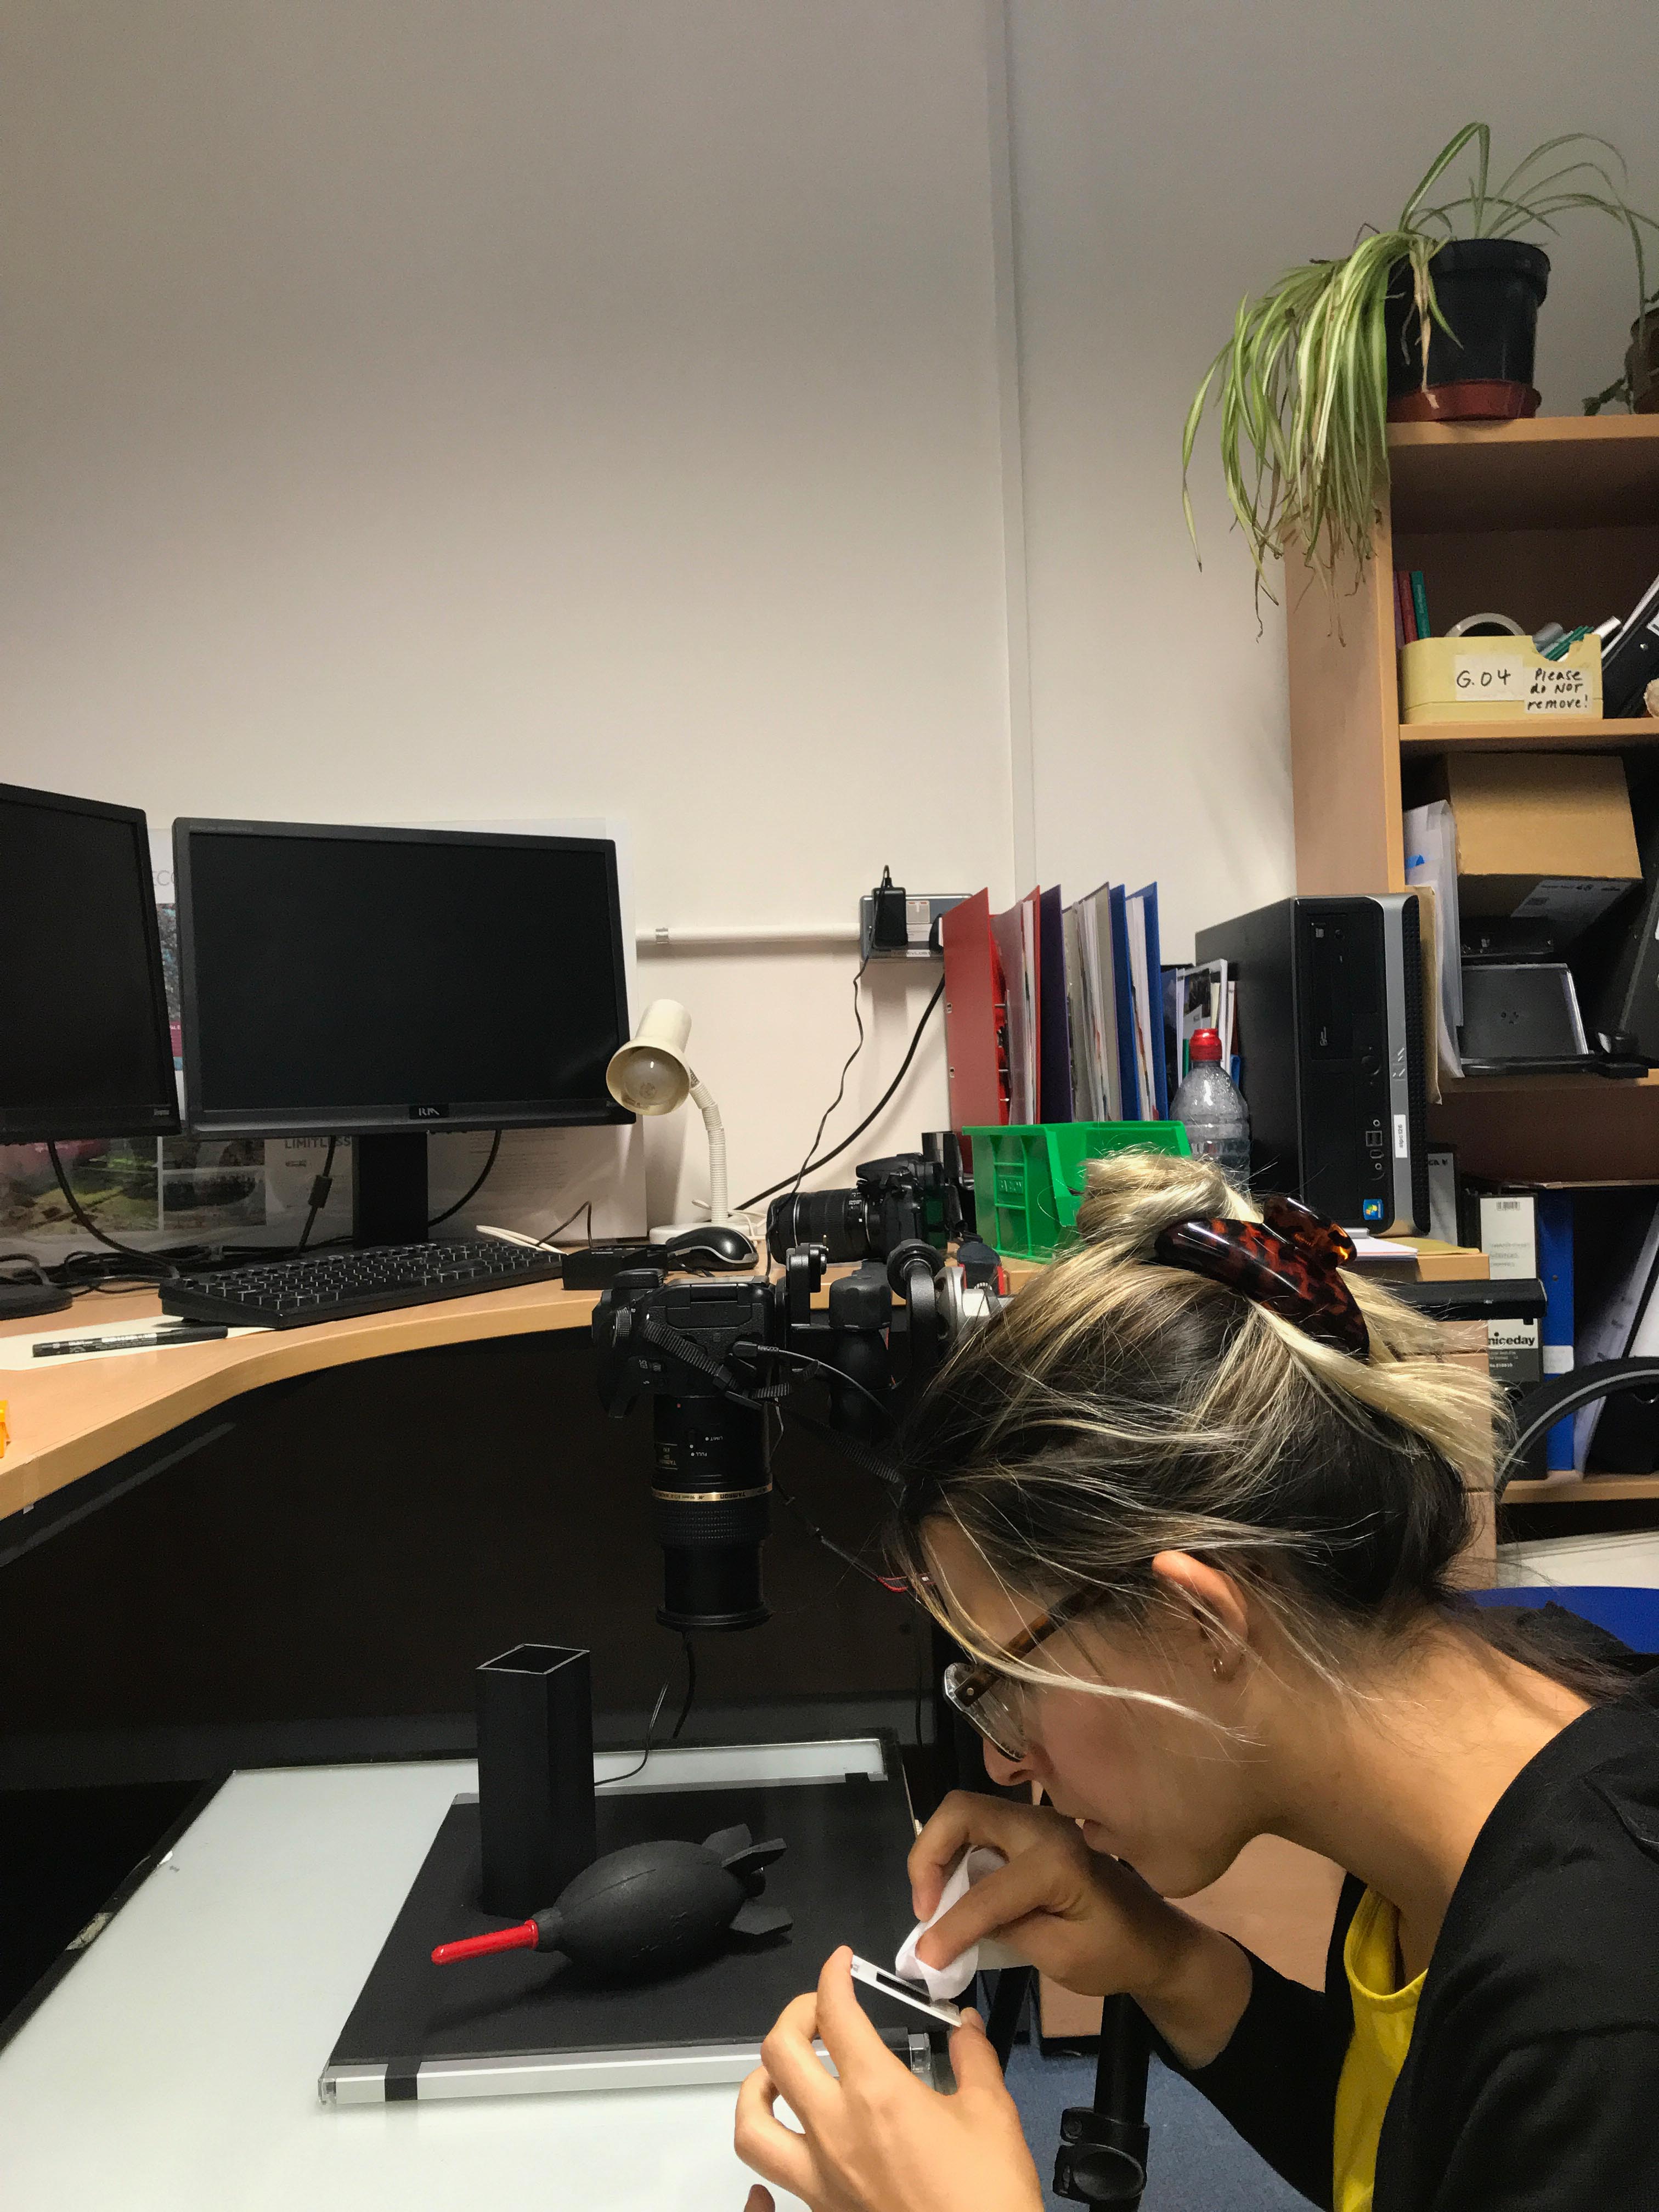
The initial set-up for testing is illustrated in Figure 4. Since the guidance consulted focused on scanning negative film instead of reverse colour film (Kodachrome), it was important to test the settings advised against the results obtained through empirical observation. The first step was to set up the workstation for scanning. I set up a light table owned by the department together with a tripod that already had a multi-angle boom extension attached for vertical macro shots. As can be seen in Figure 4, the light table is much larger than the slide holder initially used to carry out tests. Both of these items were eventually substituted. On the one hand, it soon became clear that scratches on the light table were visible in the scanned images and therefore added unwanted noise to the scans. Furthermore, the size of the light table caused a large amount of light flooding that could affect the colour balance of the image. These issues are illustrated in Figure 5. This issue was mitigated using a custom-made rectangular prism to block out excessive light from the lens range, as illustrated in Figure 4. If the scanner slide mount was unbalanced, it could cause distortion and force parts of the frame out of focus. Although a tripod was employed in the project – simply because it was what was available – a copy stand would be a more stable option (Dave Webb, pers. comm.).
To improve the workstation set-up, a new Light Box was purchased, the Artograph LightPad 930 XL which offers 6,500 Kelvin led light with a dimmable switch. The LightPad does not heat up and its reduced size and portability improved the ease of set up and control of the light source. Furthermore, a custom-made slide holder was made using black foam-backed cardboard, which was attached to the light pad with black masking tape. A rectangular prism made of the same material was built to help reduce ambient light in the room and the light reflections observed in the test scans (since it was impossible to carry out the work in a completely dark room). The final set up is illustrated in Figure 6.

Despite these initial hardware issues, the results of the tests offered substantive evidence that the proposed method could provide a faster and cheaper alternative to purchasing the SilverFast scanning software and trying the IT8 calibration that was unavailable in the demo version of the software, which would also require a target to be purchased. It also produced improved on results obtained by Digitized Media by lowering the ISO employed 3.
Since the slides have been in storage since the 1980s, they have accumulated dust and particles on the surface, as well as the occasional fingerprint, which become noise when scanned. An important element therefore in ensuring the best possible scanning results must include a slide preparation method to clean the slides without causing additional damage to the film surface. There are specialist tools to ensure the correct cleaning of film, which include a good-quality air blower and the use of lint-free wipes. In this case, Giottos rocket blower and Pec-Pad non-abrasive wipes were used, as illustrated in Figure 4. Figure 7 illustrates a diapositive before and after cleaning. The film of dust is clearly visible in the 'before' image, which is completely gone in the 'after' image. The technique used first required the use of the air blower to reduce contact with the film (Figure 8). For any stubborn particles, a non-abrasive wipe was used to gently lift them and then once again using the blower remove them. The blower was used on both sides of the film, but the wipes were not used on the emulsion side of the film, to prevent any damage. Gloves were not used because of the reduction of dexterity they impose. Negative film, glass plates and photographs are all more susceptible to damage from fingerprints. However, slides are easier to handle and the gloves would have increased handling time and potentially cause rippling of the film if touched excessively or clumsily while cleaning the slides wearing them. In fact, there were no recorded fingerprint accidents throughout the handling process. If necessary, nitrile gloves are preferred to cotton ones when handling photographic material since cotton fibres can be abrasive and film tends to attract small particles.

To achieve a well-balanced and faithful digitised copy of negative film or transparency using the DSLR method, it is important to understand several sets of relationships between the main elements in photography. First, there is the relationship between the camera's aperture and depth of field (DoF) to ensure the full image remains in focus while achieving as close to 1:1 magnification. Figure 9 illustrates DoF as the 'slice' of the image that is effectively brought into focus. This is determined by the focal length, the distance to the object, and the camera's aperture (f value). A wide aperture (low f value) gives a narrow DoF, which means only a thin 'slice' of the image is in focus. A narrow aperture (high f value) gives a wider DoF, which means a thicker 'slice' of the image is in focus. This relationship is even more critical in macro photography because distances are small. In this case, we are working with what appears to be a flat surface (film), but the film may not sit completely flat in the mount (for various reasons), or the camera and film may not be one hundred percent parallel to a millimetre. The Tamron 90 mm lens used in this project at its minimum focusing distance of 380 mm gives a DoF of just 0.45 mm at f/2.8 4. For the specific combination of camera and lens employed in this project, the minimum size of an object which can fill the frame (on its shortest size) is approximately 24mm; a Kodachrome slide is approximately 35 mm x 23 mm in size, so nearly 1:1 magnification was achieved. To show the impact of aperture on DoF, increasing it from f/2.8 to f/8.0 increases DoF to 1.26 mm. At f/16, DoF increases to 2.52 mm.
The other factor to take into account is film speed (ISO), which also controls exposure as it determines the 'light gathering' ability of film, or signal gain of a digital camera's sensor. A fast film (high ISO index) requires less exposure to light to produce an image than a slow film (low ISO index), with the caveat that an image taken with an ISO 800 film, for example, will display a coarser grain than the same image taken with an ISO 125 film. The 'grain' in film results from the size of silver particles in the film emulsion that react to the light when exposed. In digital photography, a high ISO will produce more noise in the image. When digitising film, this is an important factor to consider, as introducing noise will add to the grain of the original film, thus affecting the quality and faithfulness of the resulting image. This is clearly visible in the case of the Digitize Media samples (Figure 13f and Figure 14e), where the high ISO employed to reduce shutter speed caused significant noise (the white dots that appear on the images) that obscured the original Kodachrome fine grain. Better definition with lower noise can be observed in the results obtained using the film scanner, but also using a low ISO for the DSLR method (Figure 13i). An ISO of at most 125 will yield good results.
For this project, an ISO 125 and f/8.0 aperture was chosen. Although a f/2.8 aperture would offer faster shutter speed to ensure stability, f/8.0 offered a safer DoF with which to work in our conditions. A more stable set-up, such as with a copy stand and employing a camera with enabled remote control from a laptop, may allow a reduction in aperture without compromising image stability and definition.
The combination of ISO and aperture will affect the shutter speed to obtain the best exposure depending on the lighting conditions, which when digitising film depends on the original exposure of the film. If a slide shows a very bright scene, then the shutter speed will be faster as a lot of light passes through the slide and a shorter exposure is required. By contrast, if a slide shows a very dim or underexposed scene, then the shutter speed will be slower as less light passes through the slide to the camera sensor. After trying different shutter speed combinations for f/8.0, the results varied significantly because of the variation in light conditions of the slides. Therefore, Aperture Priority (AV) mode was used and allowed the camera to determine the best shutter speed for each image. This option seemed to yield good results, with the flexibility of taking extra shots of particularly difficult scenes to ensure correct recording of the slide's dynamic range without having to manually control every exposure. In particular, images of seal impressions taken at the museum in Baghdad required manually setting the shutter speed or forcing the Exposure Bias towards underexposure in order to avoid an overexposed scan of images which were originally underexposed. Overexposure during digitisation of originally underexposed slides has the effect of washing blacks and adding an unwanted tint to the original without revealing any detail in the image that was not visible in the original. Figure 17 illustrates the different results obtained for underexposed originals.
With macro lenses, the effective aperture declines as you focus near to minimum focusing distance, so the effective aperture employed was closer to f/13. It should be noted that while Canon (and most camera brands) do not reflect effective aperture when using macro lenses (they will still display f/8.0), macro lenses made for Nikon uniquely report the effective aperture. Optimum settings may vary if using a camera body with independent manufacturers' lens attached. These are informative aspects that should be considered when determining the correct settings to be used during the scanning process depending on the camera brand employed. The best way to determine these settings is to run a series of tests changing only one parameter at a time to find the best settings for your camera and lens combination, and unique film characteristics.
In our case, a particularly difficult aspect was the fact that light conditions at an archaeological site in southern Iraq such as Jemdet Nasr can be quite extreme in daylight and often produce high contrast images or, in technical terms, have a high dynamic range e.g. photographs of trenches in sunny conditions. The dynamic range of original Kodachrome slides or, in other words, its ability to capture the details in both bright and dark parts of a high contrast scene, is superior to the dynamic range currently achieved by DSLR cameras. This shortcoming can be overcome using high dynamic range modes either in-camera or in post-processing. Some digital cameras offer a 'High Dynamic Range' or HDR shooting mode which automatically takes several (usually three) shots of the same scene at bracketed speeds to capture both darker (overexposed) and brighter (underexposed) parts of the scene. HDR modes effectively automates exposure bracketing, but the in-camera mode might limit control of the settings or produce only a JPEG file. Therefore, exposure bracketing was used rather than the in-built camera HDR mode to capture as much detail as possible contained in the 35 mm frame of slides showing high dynamic range. This was considered the most effective way to document the details in the originals for future post-processing. Figure 18 demonstrates the results of this technique for a high contrast shot of a vertical profile of mudbrick layers. Using Adobe Lightroom Classic, the three shots were combined automatically to produce a more balanced image that captures the details of the brickwork without washing away the bright zones around the trench. However, shooting HDR or using exposure bracketing will dramatically increase file size threefold, so it is important to ration use of this technique and ensure optimal exposure settings are defined prior to batch digitisation, which will also speed up the process and minimise post-processing.
To minimise potential disassociation between the original physical objects (the slides) and the digital files produced, a simple labelling system was designed. Each physical slide and its corresponding digital copy were labelled following the schema 'JNXX_YY', where JN stands for Jemdet Nasr, XX stands for the slide box number (from 01 to 27), and YY stands for the slide number within that box. Only two digits were required as the number of boxes and the number of slides per box did not exceed 100.
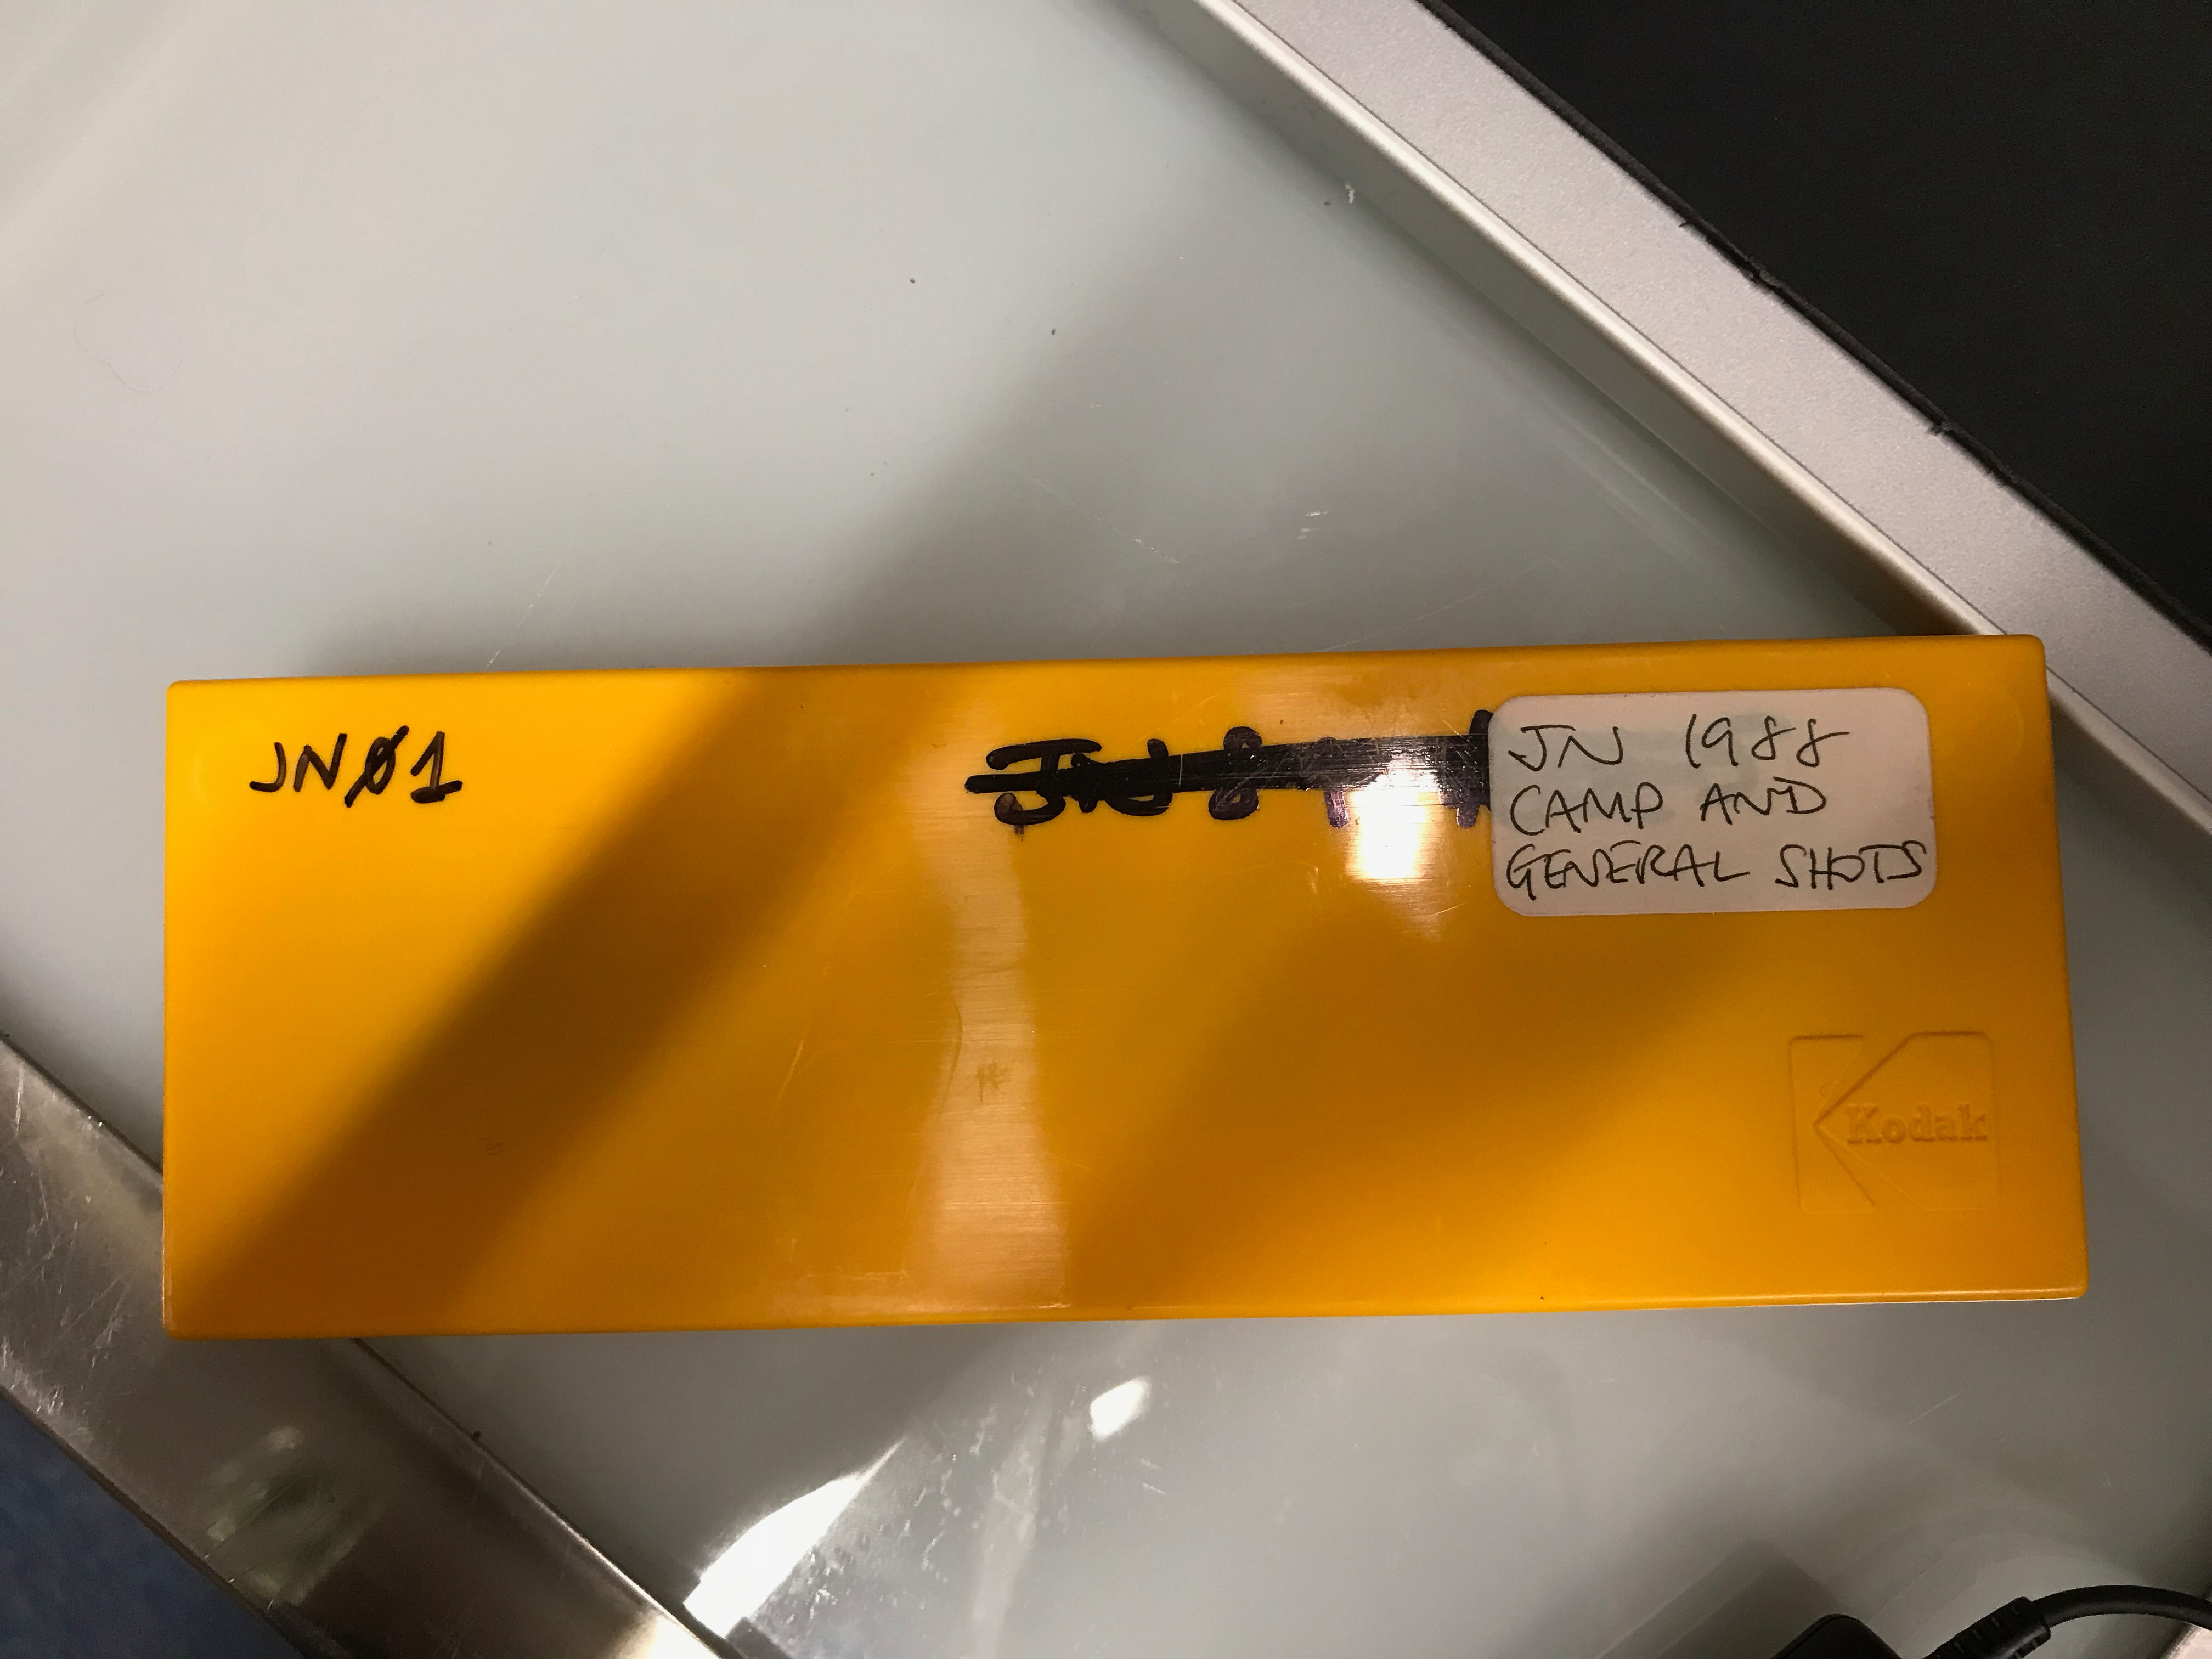
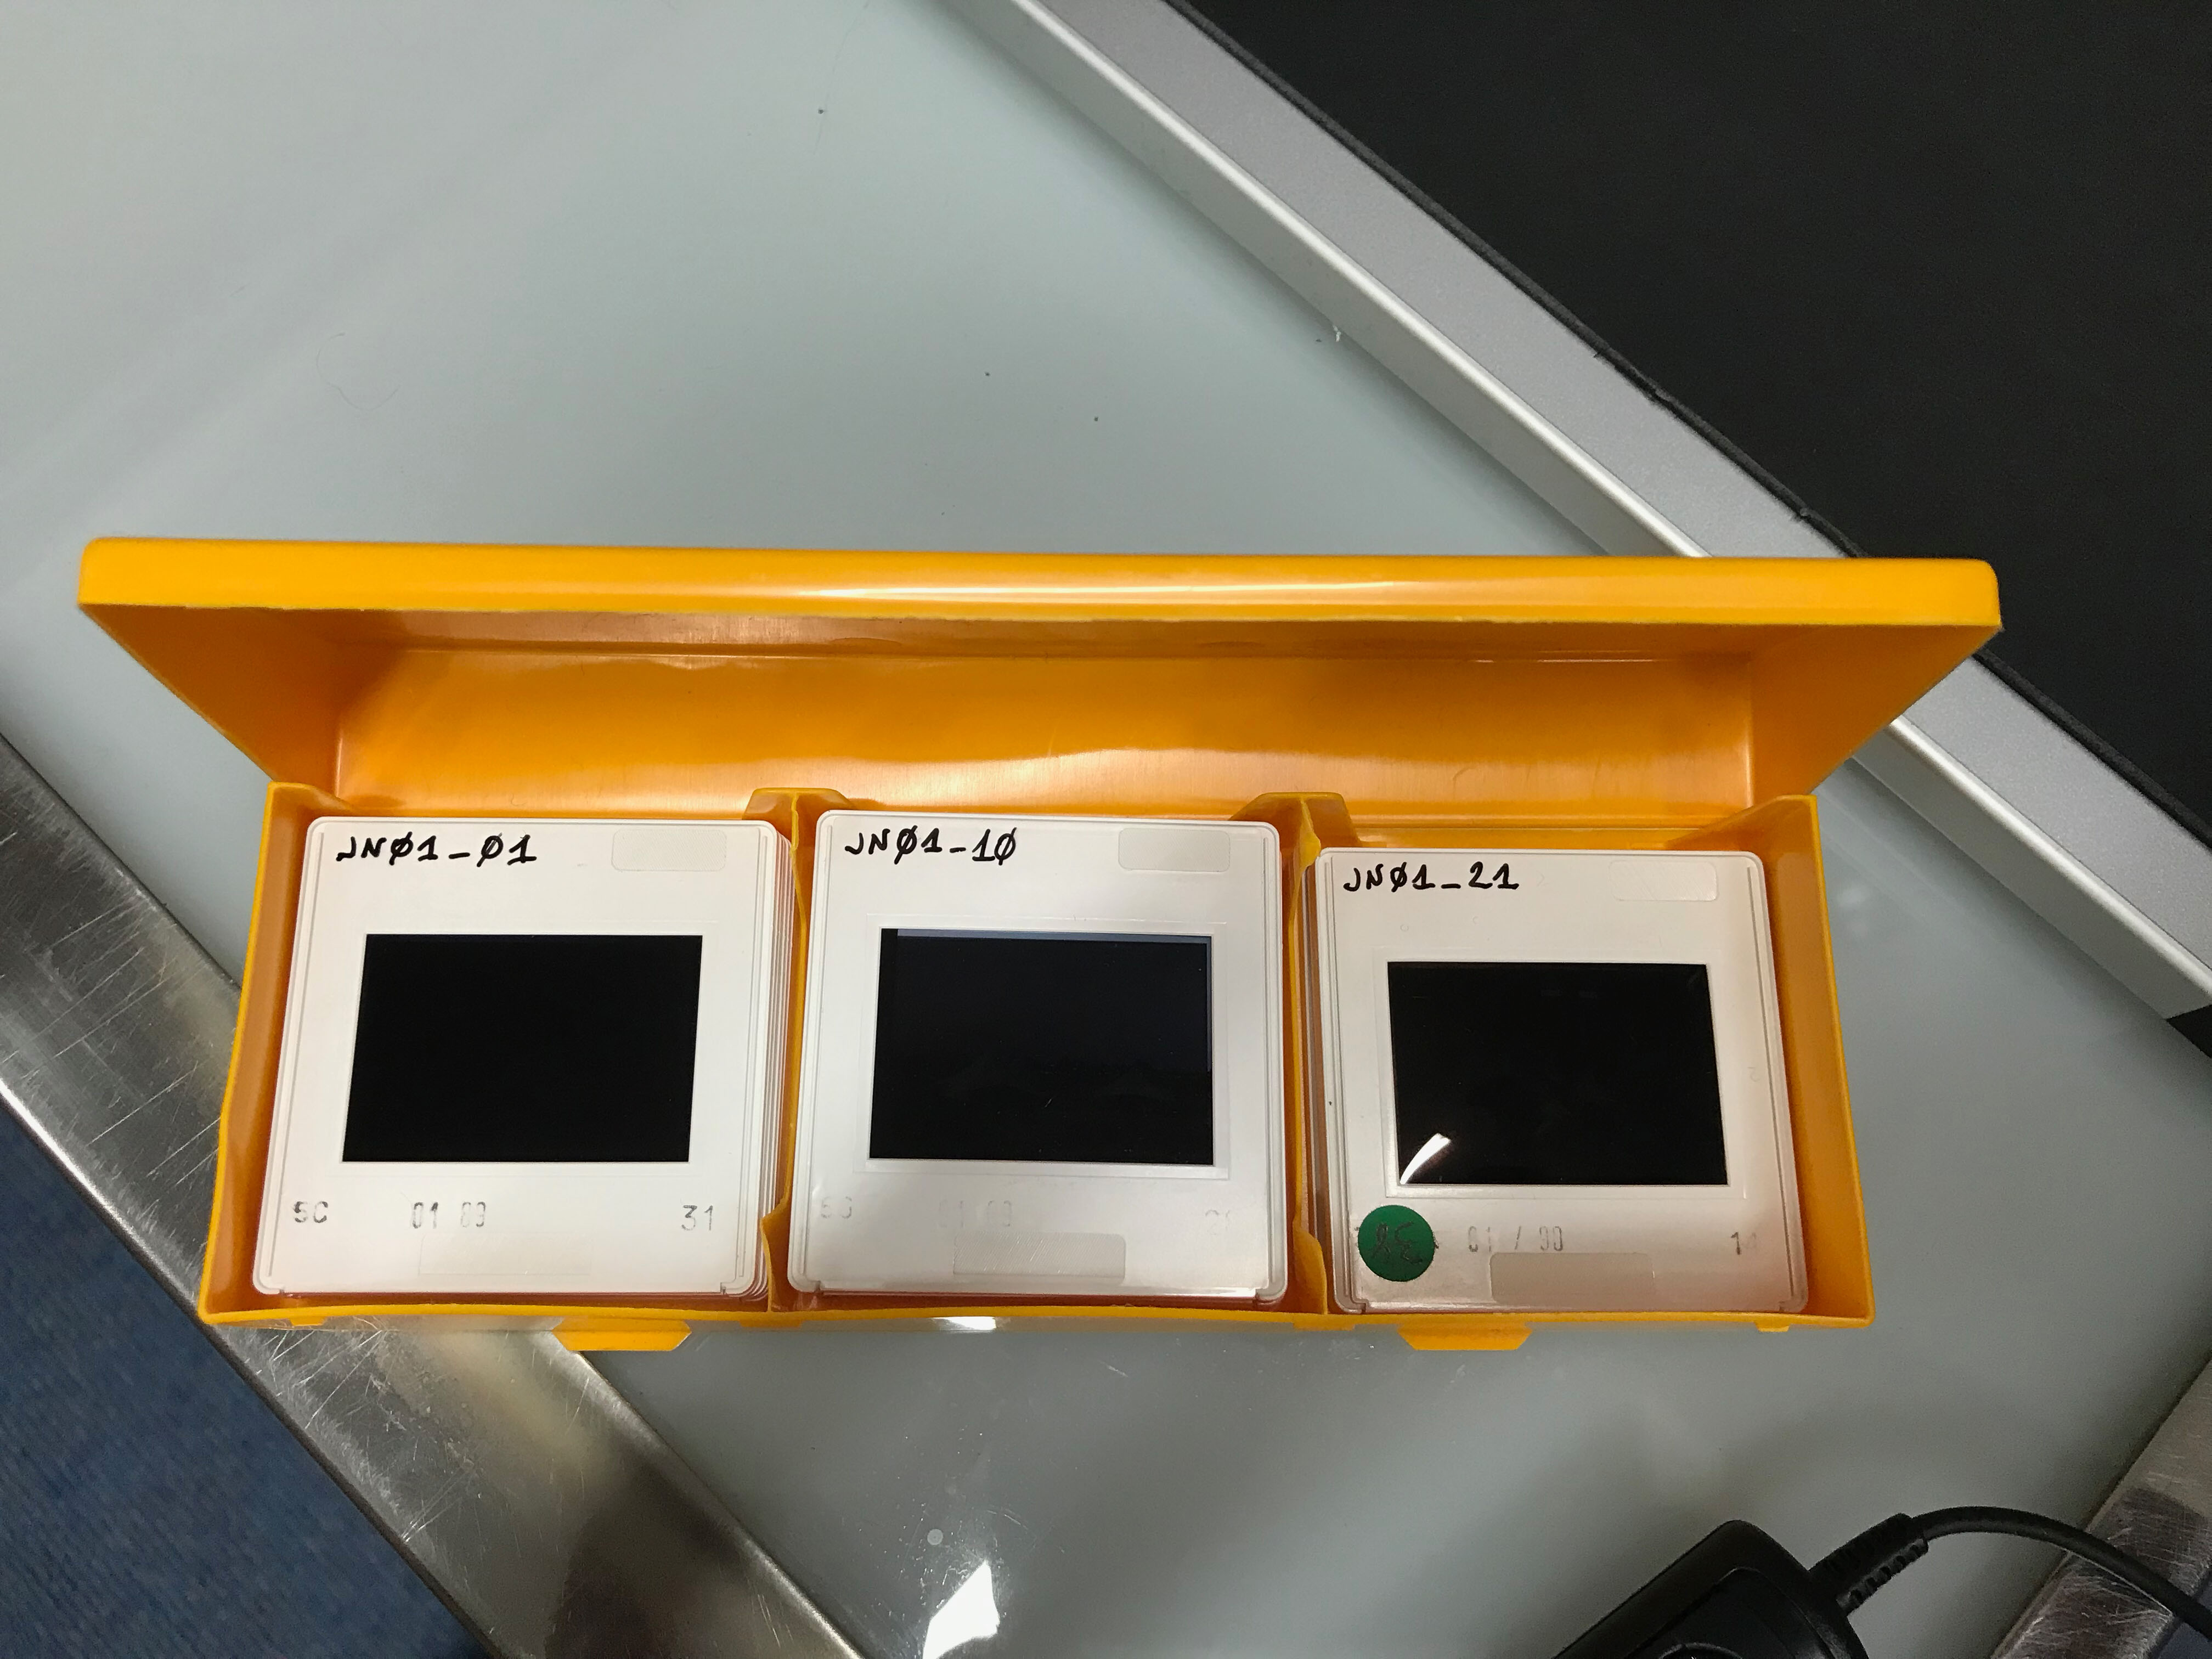
The slides had been organised into boxes and were previously labelled by Matthews with details of their content. The original slide distribution per box was maintained. For archival purposes, boxes were organised roughly chronologically and by theme. Boxes and slides were labelled using a permanent marker and any mistakes were corrected using a cotton bud slightly dabbed in rubbing alcohol. To minimize potential damage to the film, the label was applied to the top left-hand corner of each slide. Figure 10 illustrates the method employed for labelling of boxes and slides.
How the archive will be preserved and maintained over time? Limitations to physical archiving of photographic material have been discussed in a previous section. With regard to the digital archive, there are detailed guidelines available on how to manage and preserve digital collections (Digital Preservation Coalition 2020). The strategy employed will depend on the context of the project and resources available. In this case, since the project was based at the University of Reading, we employed their Research Data Archive, which offered research data deposition at no cost for smaller-sized archives ca. 20–30GB; this project generated c.28GB of data. The University of Reading Research Data Archive's policy ensures an initial preservation of 10 years with review thereafter, as well as endeavouring to ensure continued readability and accessibility (University of Reading 2020). As the data are non-repeatable, we were assured that the data would be preserved indefinitely. The option of using an institutional repository is highly beneficial although size restrictions limited the approach to file format, as shall be explained.
Obsolescence is a key risk in the preservation of digital data. Therefore, it is important to produce data using file formats that are recognised and approved by archives for long term storage and ongoing maintenance. In archiving, the industry standard is to preserve image data in a lossless format, usually uncompressed TIFF (Niven 2020, Section 3.2; Rieger 2016, 40). Uncompressed TIFF files contain image data and image information, whereby images may be edited and re-saved without losing image quality. For that same reason, they are usually large files. By contrast, formats such as JPEG or PNG may be acceptable for dissemination purposes, but they are 'lossy', where loss of data occurs at the point of shooting and with any subsequent editing of the image. However, they are significantly smaller in size.
Reproducing the original quality of the Kodachrome slides is nearly impossible, since they can be enlarged with a projector without losing quality. Kodak even made enlargements from Kodachrome 25 film that measured 60 feet long and 20 feet in height (Manning 1979). 'Noise' in analogue film depends on grain (ISO), while noise in digital images depends on its pixel resolution. Furthermore, while film grain appears irregular, pixels are laid out regularly, producing a 'checkerboard' effect when enlarged beyond its established limits. However, the objective of the scanning process in this project was simply to produce an image that captured the same level of detail of archaeological features as the original, not to produce a digital image that could be enlarged the same way that a Kodachrome slide can.
For archival purposes, balancing detail and file size was a key variable to consider, especially given the digital repository file size limitations. Table 1 collates information of the tests carried out on JN25_06 (Figure 13) and JN25_09 (Figure 14), including details of the size of the files generated. However, comparing quality across different scanning methods is not straightforward. The uncompressed TIFF files produced with the Nikon Coolscan averaged 70 Mb per file at 2900 dpi (dots per inch; this is the print resolution, roughly equivalent to 10 MP (megapixels) and 12.5 in x 8.4 in print) and 300 ppi (pixels per inch, 300 ppi is the industry standard for digital images). Meanwhile, the HP Scanjet 8300 has a higher resolution of 4800 dpi, which when matched with 600 ppi (to improve screen resolution) produced a 176 Mb file, though the scans obtained with this scanner were unusable (see Figure 13d, Figure 14d, Figure 15a and Figure 16a). Given these file sizes, one should think carefully before producing such large digital archives and whether it is feasible to store them safely and over time. Considering the purpose of the digital archive should help to strike this balance. In this case, the purpose was to achieve accurate and reliable reproduction of the archaeological features and objects for research and dissemination purposes. Therefore, scanning at 600 ppi was not deemed necessary to achieve this objective.
By contrast, the raw camera images produced using the Canon 80D, which has 24 MP resolution, were much more manageable at roughly 20–30Mb each. A 24 MP image makes a true photo quality 20 in x 13.4 in print, which is enough to cover any future print publications without loss of quality. However, Canon cameras use the proprietary lossless compression raw file CR2. Although CR2 is not a standard file format for archiving, in this case it constitutes the original file. In ideal circumstances, the CR2 files would be archived alongside the archival-standard processed uncompressed TIFFs. However, this was not a possibility for deposition in our institutional repository. After careful consultation with the university's research data manager, since CR2 files are the original files, and given that it is an easily opened format in various free programs, it was felt that depositing this file type would not compromise the data as long as the archive is actively managed by the repository (which it will be in this case). We therefore decided to deposit the CR2 files alongside the XMP metadata files created during the processing of the images for web-optimisation using Adobe Photoshop Lightroom, for reproducibility. This approach was supplemented through the additional creation of uncompressed TIFFs, which will be stored in the researcher's personal digital archive following the 3-2-1 strategy (three copies on at least two different media types and at least one copy stored offsite). In this case, this meant institutional cloud storage, a personal computer hard drive, and an external hard drive, with projected annual check-ups (Digital Preservation Coalition 2020, 'Storage').
The final digitisation set-up employed in this project included the following equipment:
| Film Speed | ISO 125 |
| Mode | AV (Aperture Priority) |
| Aperture | f/8.00 |
| White Balance | Custom Colour Temperature: 6,500 Kelvin (to match the LightPad's Colour Temperature) |
| Metering Mode | Centre-weighted average |
| Focus Mode | MF (Manual Focus) |
| File Type | RAW |
| Picture Style (Canon setting) | Fine Detail |
| Auto Lighting Optimizer | Standard |
| Colour Space | sRGB |
| *For images with strong contrast where the camera struggled to achieve the correct dynamic range, exposure bracketing was used, between -/+1 and -/+2. | |
| **For underexposed images and other difficult images, the camera forced exposure compensation, the Manual mode was used with ISO 125, f/8.0 and a manual shutter speed to correct the camera's bias towards correcting the original exposure of the slide. In some cases, this affected the white balance (in the case of the very underexposed seal impression shots). This can be corrected in post-processing. | |
The corrections done during data collection were not aimed at achieving the most accurate digital copy but at minimising error and producing standardised digital copies with as much detail as possible to enable lossless post-processing and analysis of recorded archaeological features in future. Particular emphasis was placed on the correct rendering of changes in soil colour and texture in shots of archaeological features and vertical profiles.
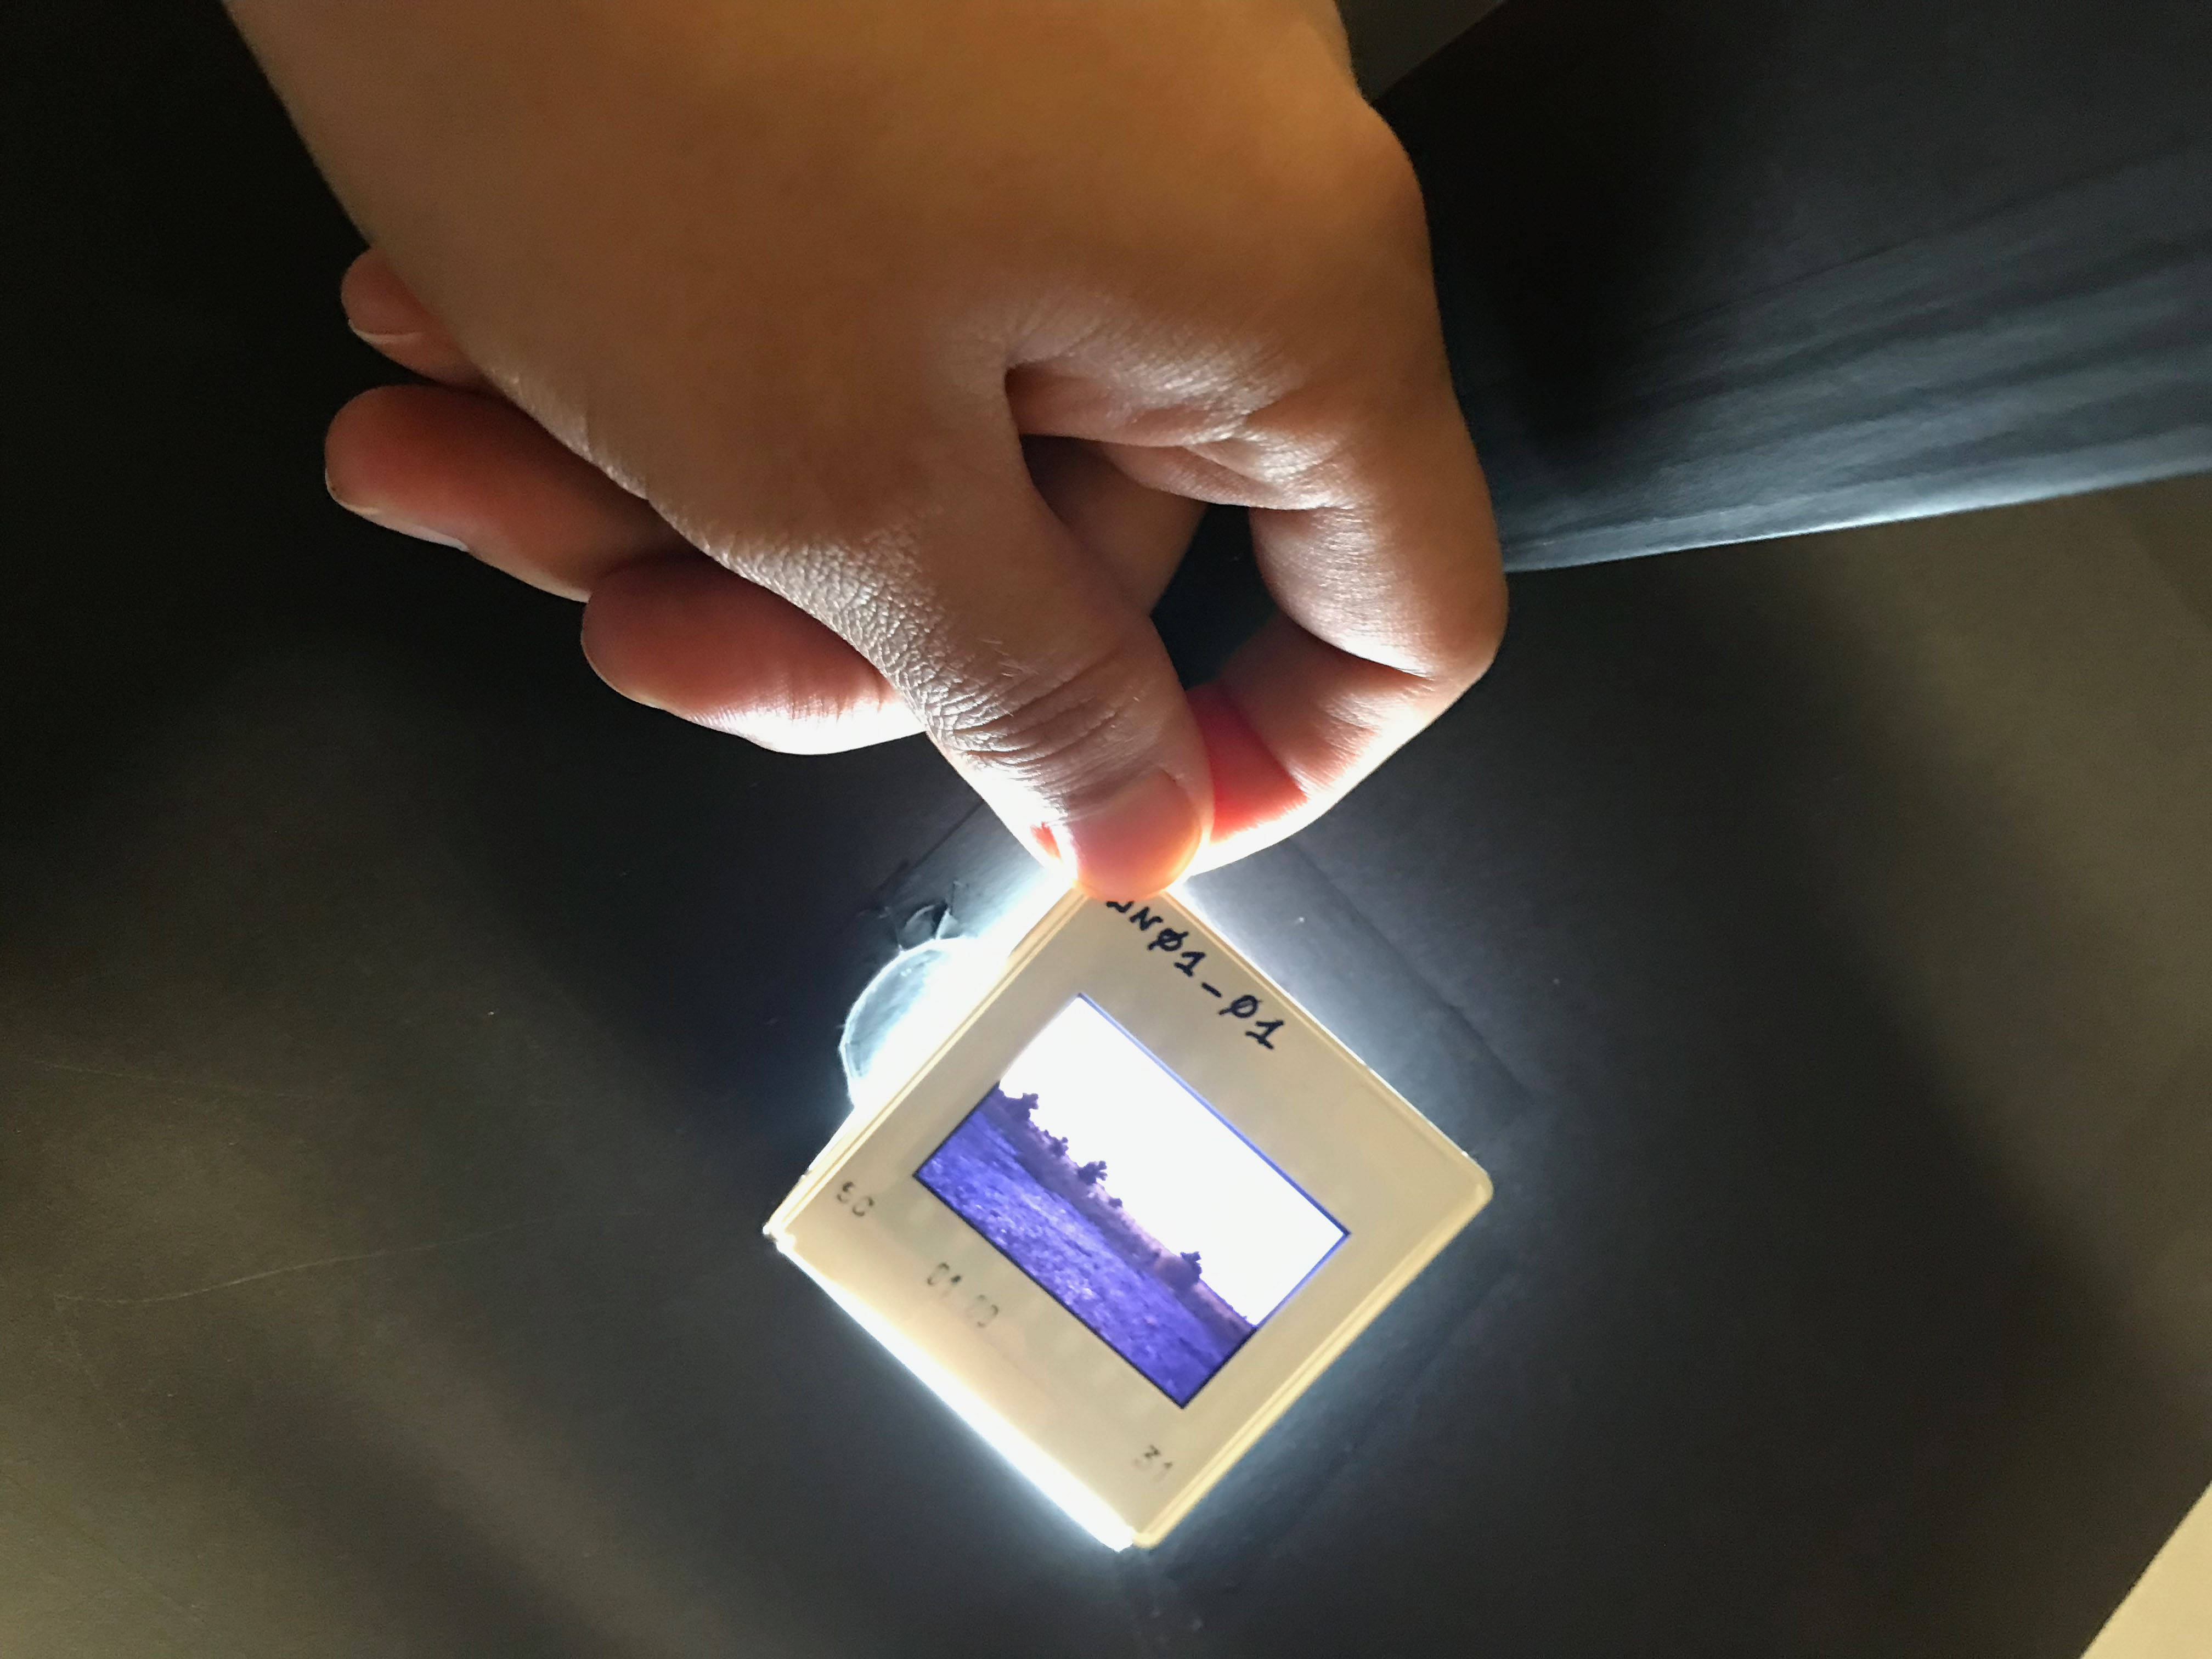
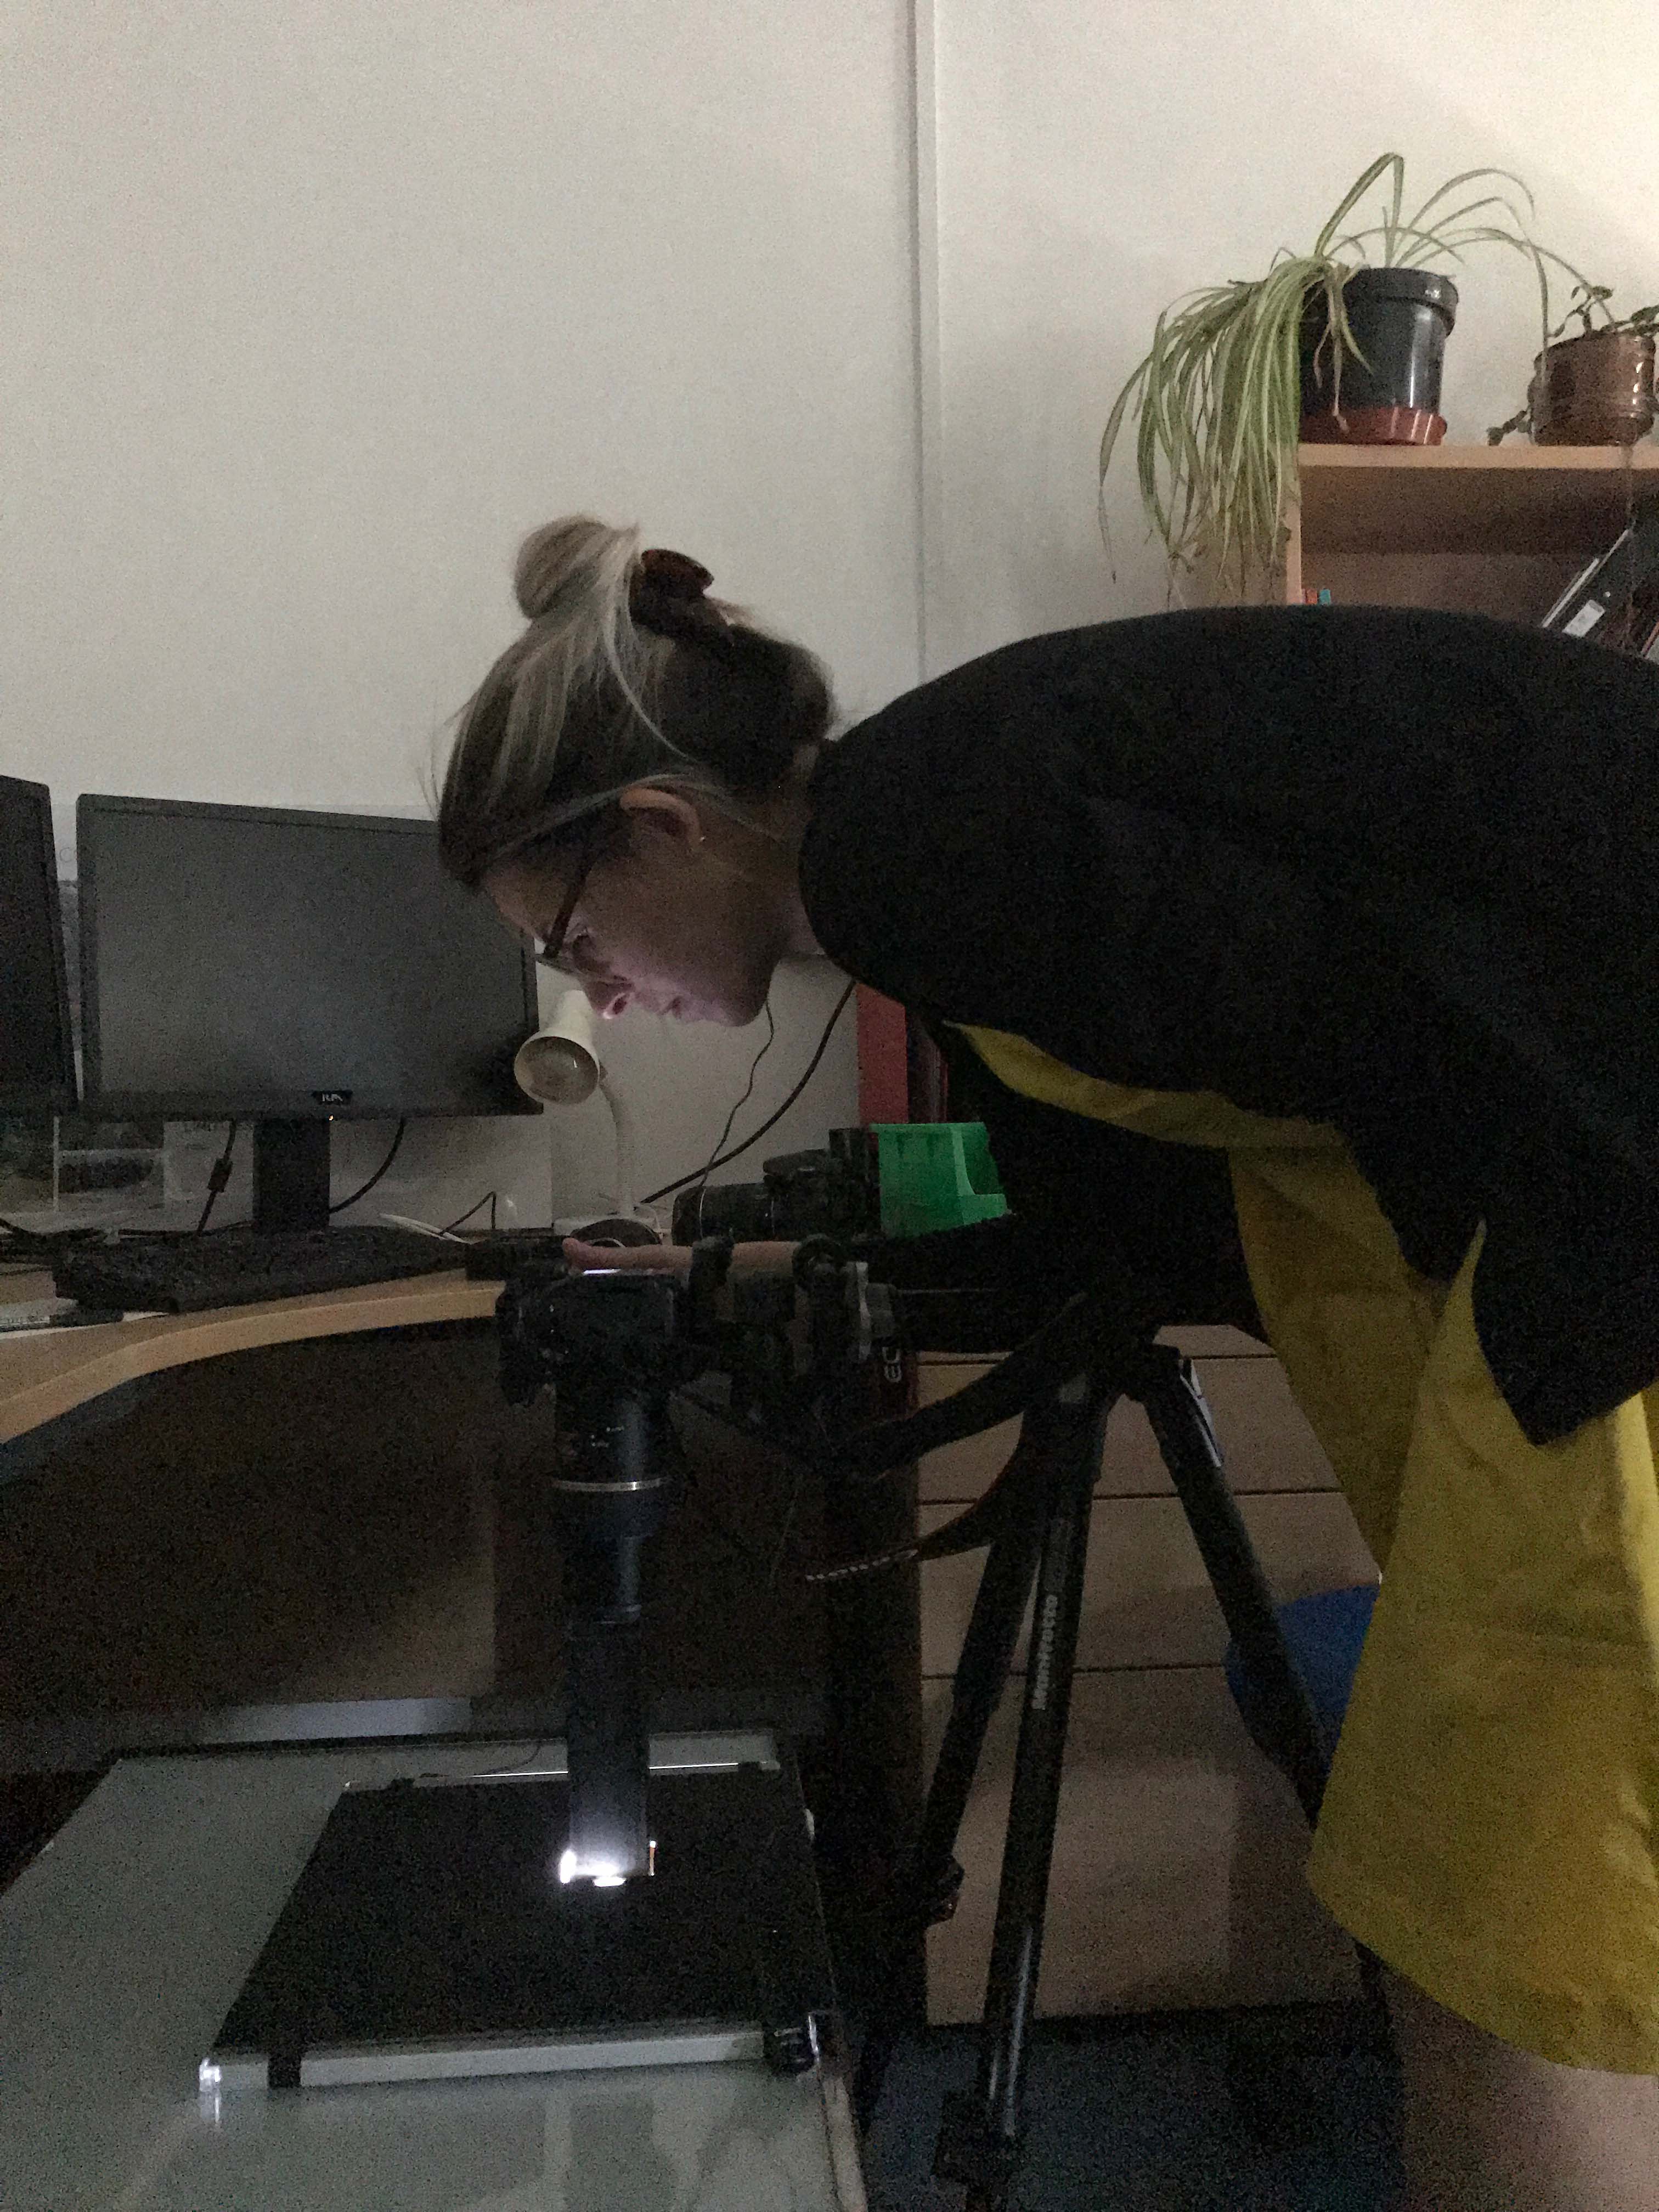
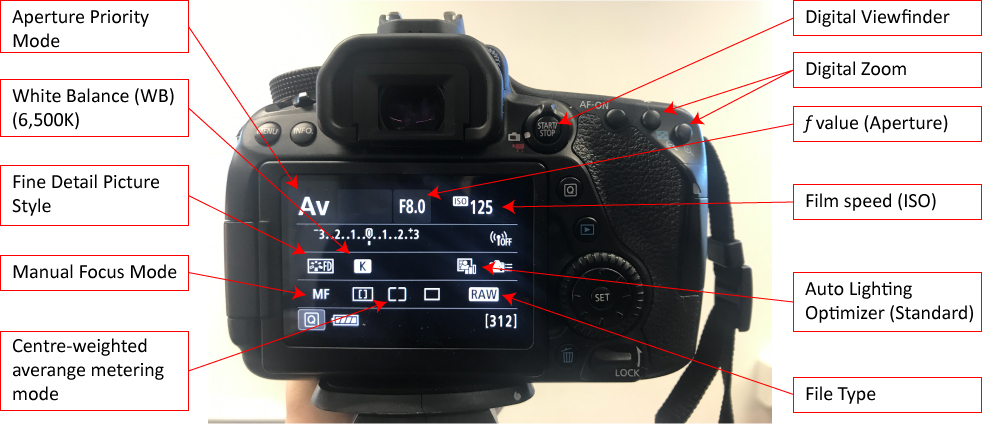
Figure 13: Results of scanning the sample diapositive JN25_06 using a variety of methods with detail of grain and definition of facial features in backlit photography. This slide was not tested using VueScan. Some images have a logo across them. This is because they were created using the trial versions of the software tested. Scroll through images or click to expand and zoom into detail.


 using Adobe Photoshop Lightroom Classic 8.3.1 Release; Auto Tone function. Note the white light cast in vertical lines, which hinder the correct adjustment of the image to retain both deep blacks and lift the shadow to reveal the facial features of the man. ©Roger J. Matthews; scanned by Mónica Palmero Fernández.")

 digital copy of JN25_06 using a Canon EOS Kiss X3 (15MP) and 105mm lens. ISO 3200, 1/2500 sec at f/5.0. ©Roger J. Matthews; scanned by Digitize Media.")
 digital copy of 13e (JN25_06) using Camera Raw 11.3, Auto Settings. Despite the apparent good balance of the image, note the 'white spots' in the close-up of the image. These are caused by the high ISO 32000 employed, which is likely the result of not using backlighting to illuminate the transparency. The Kodachrome used is ISO 64. ©Roger J. Matthews; scanned by Digitize Media; processed by Mónica Palmero Fernández.")
 digital copy of JN25_06 with Canon EOS 80D (24MP) camera and TAMRON SP 90mm F/2.8 Di MACRO 1:1 272EE macro lens. ISO 125, AV Mode, 1/125 sec at f/8; manual WB 6,500 Kelvin; centre-weighted average metering. Note the blue tint typical of Kodachrome scans. ©Roger J. Matthews; scanned by Mónica Palmero Fernández.")
 digital copy of 13g (JN25_06) using Adobe Photoshop Lightroom Classic 8.3.1. ©Roger J. Matthews; scanned and processed by Mónica Palmero Fernández.")


Figure 14: Results of scanning the sample diapositive JN25_09 using a variety of methods with detail of grain and definition of in backlit photography. Some images have a logo across them. This is because they were created using the trial versions of the software tested. Scroll through images or click to expand and zoom into detail.
. Note the blue tint of the Kodachrome scan. ©Roger J. Matthews; scanned by Mónica Palmero Fernández.")


 digital copy of JN25_09 using a Canon EOS Kiss X3 (15MP) and 105mm lens. ISO 32000, 1/2500 sec at <em>f</em>/5.0. ©Roger J. Matthews; scanned by Digitize Media.")
 digital copy of 14f (JN25_06) using Camera Raw 11.3. In this case, the blue tint has been probably overcorrected to red, but note also the 'white spots' in the close-up of the image. These are caused by the high ISO 3200 employed, which is likely the result of not using backlighting to illuminate the transparency. The Kodachrome used is ISO 64. ©Roger J. Matthews; scanned by Digitize Media; processed by Mónica Palmero Fernández.")
 digital copy of JN25_09 with Canon EOS 80D (24MP) camera and TAMRON SP 90mm F/2.8 Di MACRO 1:1 272EE macro lens. ISO 125, AV Mode, 1/8 sec at <em>f</em>/8; manual WB 6,500 Kelvin; centre-weighted average metering. Note the blue tint typical of Kodachrome scans. ©Roger J. Matthews; scanned by Mónica Palmero Fernández.")
 digital copy of 14g (JN25_09) using Adobe Photoshop Lightroom Classic 8.3.1. RAW (.CR2) file retained with sidecar xmp file. ©Roger J. Matthews; scanned and processed by Mónica Palmero Fernández.")
Files were transferred from the camera to a computer each time a box of slides was completed. The files were organised into folders labelled using the same schema employed for the labelling of the slide boxes and each digital copy was labelled using the same schema employed for the labelling of the individual slides (see Section 4.3.4). Where HDR copies were created, the 'best' natural exposure image was given the usual label while the under- and over-exposed copies were distinguished by adding a lowercase 'b' and 'c' letters to the file name, respectively. This system ensured a clear and user-friendly identification scheme between the original slides and the digitised copies.
Preliminary trials had identified the best settings for batch slide digitisation, with small adjustments made during the process for particularly difficult slides in order to maximise the level of detail retained in the digital copies. Moreover, raw image files act as 'undeveloped' film, but allowing multiple, non-destructive, reversible steps to be taken to achieve a desired image. Thus, the unprocessed digital copies of the original slides provide a systematically produced record of the original slides that allows for their future reuse and enhancement. For example, the characteristic blue tinge of scanned Kodachrome slides appears in the digitised copies, although this is not highly noticeable; compare slides JN25_06 and JN25_09 before (Figure 13g and Figure 14g) and after processing (Figure 13h and Figure 14h). As discussed in Section 2.3, the approach taken in this project was to produce faithful digital copies of the originals whilst enhancing, wherever possible, their informational quality. For example, originally high contrast and underexposed slides were enhanced at the point of digitisation, as well as in post-processing (Figure 16 and Figure 17).
The raw digital images were subsequently minimally processed using Adobe Photoshop Lightroom to produce the desired images for dissemination through a dedicated website in more manageable JPEG copies. The original raw (CR2) files and processing metadata (XMP caddy files) were deposited in the institutional repository, and uncompressed processed TIFFs were also produced for further archive. Both the digital archive and any information contained in the website are released under a Creative Commons license, thus achieving the objectives of preservation, transparency, dissemination, and accessibility.
The University of Reading's data deposit guidelines were followed to comply with their requirements. Enquiring with your institutional repository or checking some of the available guides on best practices should help to define the structure and documentation of your archive. In this case, the documentation submitted included a simple README.txt file giving basic details of the project, dataset, terms of use, contents, and method and processing. A spreadsheet with descriptions of each slide, as well as a draft of this article was included as detailed documentation of the process.
The results obtained through this digitising method are illustrated against the test results discussed above to demonstrate the significantly superior results obtained. Figure 13g and Figure 13h show the RAW and post-processed image of JN25_06 that was employed for many of the tests carried out in this project. The facial features of the man are better defined, while the grain is more subtle than the results obtained by Digitize Media (Figure 13f). When comparing the results obtained using SilverFast's HDR function (Figure 13c) with the non-HDR image obtained with the DSLR camera (Figure 13h), the method here described offers rich colour preservation, better capture of Kodachrome's original dynamic range, and grain does not appear to cause significant noise.
The final scan of JN25_09 (Figure 14g and Figure 14h) also demonstrates how this method achieves better results in capturing the high dynamic range of a sunrise/sunset scene without washing out either the sky or the darker foreground. The scan shows a slight blue tint in the foreground, but this could be fixed by a more skilled image processing technician if required. SilverFast's HDR function (Figure 14c) appears to offer good quality results, removing some of the blue tint typical when scanning Kodachrome slides. However, some loss of detail as discussed for the facial features of the individual photographed in JN25_06 (Figure 13) can be expected. The texture appears soft, but the blacks appear washed out compared to this method (Figure 14h).

Figure 17: Working with underexposed images of objects. While the camera tries to balance what it perceives as low light conditions, it is important to achieve a realistic effect, maximising detail without adding unwanted noise from overexposure. Shooting RAW further allows for later post-processing to force details out of images for archaeological analysis in a loss-less manner. ©Roger J. Matthews; scanned by Mónica Palmero Fernández. Scroll through images or click to expand and zoom into detail.

. ©Roger J. Matthews; scanned by Mónica Palmero Fernández.")

. ©Roger J. Matthews; scanned by Mónica Palmero Fernández.")
Figure 17 demonstrates the flexibility of the method employed when dealing with varying light conditions and underexposed shots. The Exposure Simulation mode incorporated into most digital cameras allow quick assessment of light conditions and adjustment of exposure settings. The same process using a scanner requires using the preview mode, which takes longer than the live preview offered by digital cameras. While shooting in AV Mode, it is useful to have the same settings already entered in the (M) manual mode, so that a quick shooting mode change and exposure adjustment can overcome any limitations imposed by the camera's integrated light metre.
Figure 18 demonstrates the potential of HDR shots (or Exposure bracketing) for enhancing scans and achieve the desired effect of film's high dynamic range.
Figure 18: Using exposure bracketing for a high contrast shot of a vertical profile of mudbrick layers. Scroll through images or click to expand and zoom into detail.


 using Lightroom Classic. The resulting HDR image balances the dark zone of the trench against the bright ground in the foreground, revealing details of the brickwork illustrated. ©Roger J. Matthews; scanned by Mónica Palmero Fernández.")
The pace of modern technological advancement in photography has radically transformed the ways in which we record and visualise archaeological remains. As the discipline of archaeology continues to develop digitally based methods, the incorporation of analogue visual archives into the pool of digital data will streamline the integration of archival and contemporary or future records to enhance their analysis and interpretation. Large archives incorporating original film in various formats such as glass plates, medium format and 35mm, as well as positive film slides and photographic prints pose human, technological, and economic challenges for archaeological projects, archaeological units, or archaeological departments with legacy data.
This article has sought to evaluate these challenges, review a variety of available hardware and software combinations, and describe a new method of digitisation for slides – though also applicable to negative film in various formats – that can offer an affordable option without sacrificing quality of results. Overall, the results obtained through the tests suggest that a semi-professional film and slide scanner, such as the Nikon Coolscan IV ED, continue to offer a good quality image output when combined with updated, specialised software, of which SilverFast offers the best results for archival purposes. However, they require a considerable economic and time investment that may not warrant the results.
As an alternative to the expensive and relatively slow process of using a film and slide scanner, the proposed method makes use of hardware and software widely used by archaeologists in the field and in the lab, thus reducing the economic investment, as well as the time required to scan photographic materials. Using a DSLR camera with a macro lens offers high quality, lossless scans that can be quickly filed and later processed using widely available image processing software such as Adobe Photoshop Lightroom. The grain, tonality, and dynamic range achieved during the scanning of Kodachrome slides – one of the most difficult film types to scan faithfully – underscore the strengths of DSLR scanning, while employing a RAW lossless format with instant live preview of the results adds flexibility and agility to the scanning process. Overall, from an archaeological perspective, the DSLR scanning method offers substantial advantages over few limitations for the digitisation of Kodachrome slides, and may be easily applied to scan a wider variety of photographic materials.
The Digitising Jemdet Nasr: 1988-1989 project was funded by the British Institute for the Study of Iraq under one of their Research Grants awarded in April 2019 to Professor Roger John Matthews.
I thank the University of Reading for hosting the associated website for the project, as well as covering the costs of data deposition on the University of Reading Research Data Archive.
1. Although the term 'DSLR scanning' has increasingly gained traction among non-archivists, 'digitisation' is the more accurate term to describe the process of taking photographs of film negatives and transparencies to produce digital copies of the analogue originals. This contribution will employ the term 'DSLR digitisation' but readers should be aware that this can often be referred informally as 'DSLR scanning', including in some of the resources here cited. ←
2. Professional photographer Nate Johnson has developed a unique expertise in this technique and offers a detailed workflow tutorial (Johnson 2016) as well as Negative Lab Pro, an Adobe Lightroom plug-in he developed for converting negative images inside the Lightroom workflow to maintain an All-RAW workflow (https://www.negativelabpro.com/). See Section 4.3 for details of how this guide was used in this project.←
3. Another option for a digitising set-up is to use a film digitising lens adapter, which attaches the slide directly to the camera lens through its filter thread thus ensuring lens and slide remain parallel. There are several options in the market with mixed reviews, and most only cater to 35mm film. When researching DSLR digitisation, this option was considered, but the mixed reviews and costly price of higher end models discouraged us from opting for this set-up. At the higher price end, there is Nikon's ES-2 adapter, which comes with a 35mm negative and slide mount (thanks to Dave Webb for this suggestion). However, these adapters might not work with all macro lenses and an extension tube might be required to achieve as close to 1:1 focus as possible; however, these affect the quality of the results (Langford and Bilissi 2011: 70). For example, the Nikon ES-2 works with a 60mm/f2.8 lens, but our macro lens was 90mm/f2.8, thus an extension tube would have been required to be able to focus on the image. Furthermore, a controlled light source and camera set-up are still required to obtain adequate results. In this case, the budget was too limited and the 'do it yourself' option here described offered good results.←
4. The DoF was calculated using the Photo Pills Macro Depth of Field Calculator, inputting a focusing distance of 380 mm (= 290 mm minimum focus distance + 90 mm focal length) (https://www.photopills.com/calculators/dof-macro).←
Internet Archaeology is an open access journal based in the Department of Archaeology, University of York. Except where otherwise noted, content from this work may be used under the terms of the Creative Commons Attribution 3.0 (CC BY) Unported licence, which permits unrestricted use, distribution, and reproduction in any medium, provided that attribution to the author(s), the title of the work, the Internet Archaeology journal and the relevant URL/DOI are given.
Terms and Conditions | Legal Statements | Privacy Policy | Cookies Policy | Citing Internet Archaeology
Internet Archaeology content is preserved for the long term with the Archaeology Data Service (ROR). Help sustain and support open access publication by donating to our Open Access Archaeology Fund.
 Home
Home