PREVIOUS   NEXT   CONTENTS   ISSUE   HOME 

3.5 The rendering workflow

The workflow for lighting, rendering and compositing borrowed conventions from the fields of computer-generated graphics and visual effects. Each scene was broken down into layers and passes for rendering. Render layers were used to separate the reconstructed elements from the environment while texture, lighting and other information was output in separate render passes (Figs 17 to 19). In the example shown here, computer-generated lighting was used to simulate the animated low light at sunrise. Other scenes used simulated lighting more subtly or not at all, remaining closer to the original kite aerial photographs.

Figure 17 Figure 18 Figure 19 Figure 20
Figure 17: The underlying mesh as it appears in the ambient occlusion pass. Image © Kieran Baxter (CC BY-NC-ND 3.0)
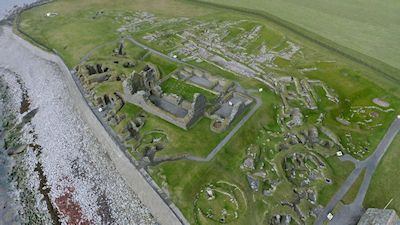
Figure 18: The raw colour photo-texture derived from kite aerial photography. Image © Kieran Baxter (CC BY-NC-ND 3.0)
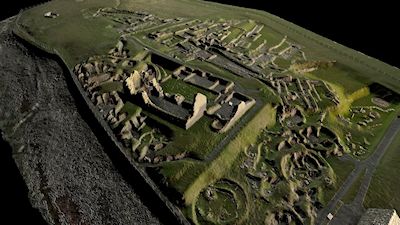
Figure 19: Additional computer-generated lighting was added to this scene. Image © Kieran Baxter (CC BY-NC-ND 3.0)
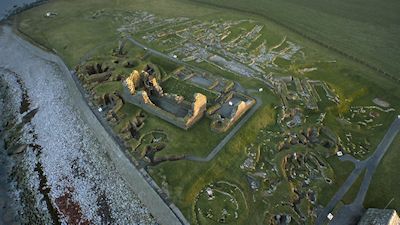
Figure 20: The render passes composited together in Nuke for the final effect. Image © Kieran Baxter (CC BY-NC-ND 3.0)

These render passes were composited together using The Foundry's Nuke, at which stage the different elements were balanced and colour graded. A final phase of editing and compositing was conducted in Adobe After Effects, where the reconstructed elements were blended and text captions added. This allowed adjustments to be made to the pacing of these elements during the final edit.