Sequences of kite aerial photographs were projected onto the master mesh to create photo-textures. There were a number of reasons for gathering the colour information separately from the three-dimensional data. Firstly, the pole-mounted camera sequences used for SFM were taken over a long period of time and contained changes in lighting conditions as well as different grass colour between the two phases of fieldwork. In addition, generating a texture that evenly covered the entire site would not have suited the demands of the animated outcome. Such a texture would have to be lit artificially for each stage of the narrative and would not allow the texture detail to be specific to the position of the camera.
Instead, a number of different photo-textures were generated by projecting distinct sequences of kite aerial photographs onto the mesh. These sequences did not cover the entire site evenly but rather emulated the camera angles that were planned for the animated outcome. This approach meant that detail could be contained in each photo-texture which was specific to the angle and proximity of the camera. While each texture was only viewable from an area close to where the kite aerial photographs were originally taken, a number of these textures covered all of the shots required in the film.
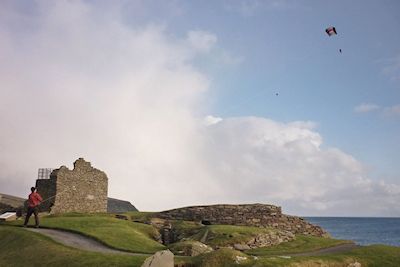
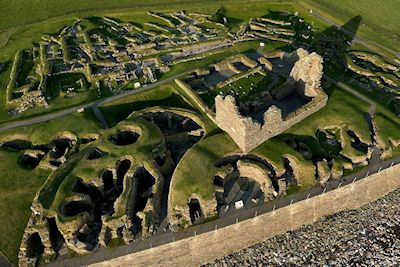
Another advantage of this method was that using kite aerial photography meant that these textures could be gathered over a very short period of time (Figure 13). This meant that specific lighting conditions such as the late afternoon light could be included in the photo-textures (Figure 14). It was felt that gathering (as opposed to simulating) the way in which the detail and surfaces of the site were illuminated added a fidelity to the end aesthetic that would be difficult to recreate otherwise. Figure 14 shows a kite aerial photograph that was later projected onto the master mesh to create a photo-texture. In this case no computer-generated lighting effects were used and the colour information seen in the animated sequence is very close to the original photographs. Other parts of the animated outcome include a combination of gathered lighting conditions and simulated lighting effects.
To prepare the kite aerial photographs for projection onto the mesh the images were first corrected for lens distortion using a batch process in Adobe Photoshop. The mesh was divided into seven sections for the purpose of texturing and the UV co-ordinates unwrapped using Autodesk Maya's automatic tool. In order to reduce unnecessary processing and rendering time, the texture resolution of these sections could be varied depending on the proximity of the animated camera in each sequence. The textures were then generated using the Projection Painting tool in Autodesk Mudbox. This allowed the photographs to be overlaid on top of the mesh from the calculated camera positions. The photographs were than be painted onto the mesh, allowing manual control over which camera was used to determine the texture of which surface.